
Backing up your data
Before embarking on the process of uninstalling apps from your OnePlus Nord, it's crucial to safeguard your data. Backing up your data ensures that you don't lose any important information during the app uninstallation process. Here's a comprehensive guide on how to back up your data effectively:
-
Google Account Backup: OnePlus Nord provides a seamless way to back up your data using your Google account. To do this, navigate to the "Settings" menu on your device. From there, select "System" and then "Backup." Ensure that the "Back up to Google Drive" option is enabled. This will automatically back up your app data, call history, device settings, and more to your Google account.
-
Syncing Data: Another effective method to back up your data is by syncing it with your Google account. This includes contacts, calendar events, app data, and more. To sync your data, go to "Settings," then "Accounts," and select your Google account. Ensure that the relevant data categories are set to sync.
-
Third-Party Backup Apps: There are numerous third-party apps available on the Google Play Store that offer comprehensive data backup solutions. These apps allow you to back up your photos, videos, documents, and other files to the cloud or an external storage device. Popular options include Google Photos, Dropbox, and Microsoft OneDrive.
-
Transfer to External Storage: If you prefer to have physical copies of your data, consider transferring important files to an external storage device, such as a microSD card or a USB drive. This method is particularly useful for backing up large media files like photos, videos, and music.
By following these steps to back up your data, you can proceed with the app uninstallation process on your OnePlus Nord with peace of mind, knowing that your important information is securely stored.
Uninstalling apps from the home screen
Uninstalling apps from the home screen of your OnePlus Nord is a straightforward process that allows you to efficiently manage your device's storage and optimize its performance. Here's a detailed guide on how to uninstall apps directly from the home screen:
-
Locate the App: Begin by navigating to the home screen of your OnePlus Nord. Take a moment to identify the app that you wish to uninstall. You can do this by scrolling through the various app icons or using the search function to quickly locate the app.
-
Long-press the App Icon: Once you've located the app you want to uninstall, press and hold its icon. This action will initiate the app management interface, providing you with several options for interacting with the app.
-
Select Uninstall: After long-pressing the app icon, a menu or pop-up window will appear, displaying various options related to the app. Look for the "Uninstall" option and tap on it to proceed with the uninstallation process.
-
Confirm Uninstallation: Upon selecting the "Uninstall" option, a confirmation prompt will appear, asking if you're sure you want to uninstall the app. This is a crucial step to prevent accidental deletions. Confirm your decision by tapping "OK" or "Uninstall," depending on the specific prompt displayed.
-
App Uninstallation: Once you've confirmed the uninstallation, the app will begin to uninstall from your OnePlus Nord. The system will remove the app and its associated data from the device, freeing up storage space and potentially improving the device's performance.
-
App Removal Completion: After the app has been successfully uninstalled, you will receive a notification or on-screen confirmation indicating that the process is complete. At this point, the app will no longer be accessible on your device, and its icon will be removed from the home screen.
By following these steps, you can efficiently uninstall apps directly from the home screen of your OnePlus Nord, decluttering your device and ensuring that only the essential apps remain installed. This process allows you to tailor your device to your specific needs, optimizing its functionality and enhancing your overall user experience.
Uninstalling apps from the settings menu
Uninstalling apps from the settings menu of your OnePlus Nord provides a systematic approach to managing your installed applications. This method offers a centralized location for app management, allowing you to efficiently uninstall unwanted apps and free up valuable storage space on your device. Here's a comprehensive guide on how to uninstall apps from the settings menu:
-
Access the Settings Menu: Begin by unlocking your OnePlus Nord and navigating to the home screen. Locate and tap the "Settings" app, which is typically represented by a gear icon. The settings menu serves as a control center for various device configurations and app management options.
-
Navigate to the Apps Section: Within the settings menu, scroll through the available options and look for the section labeled "Apps" or "Apps & Notifications." This section houses all the installed apps on your device and provides detailed controls for managing their behavior and configurations.
-
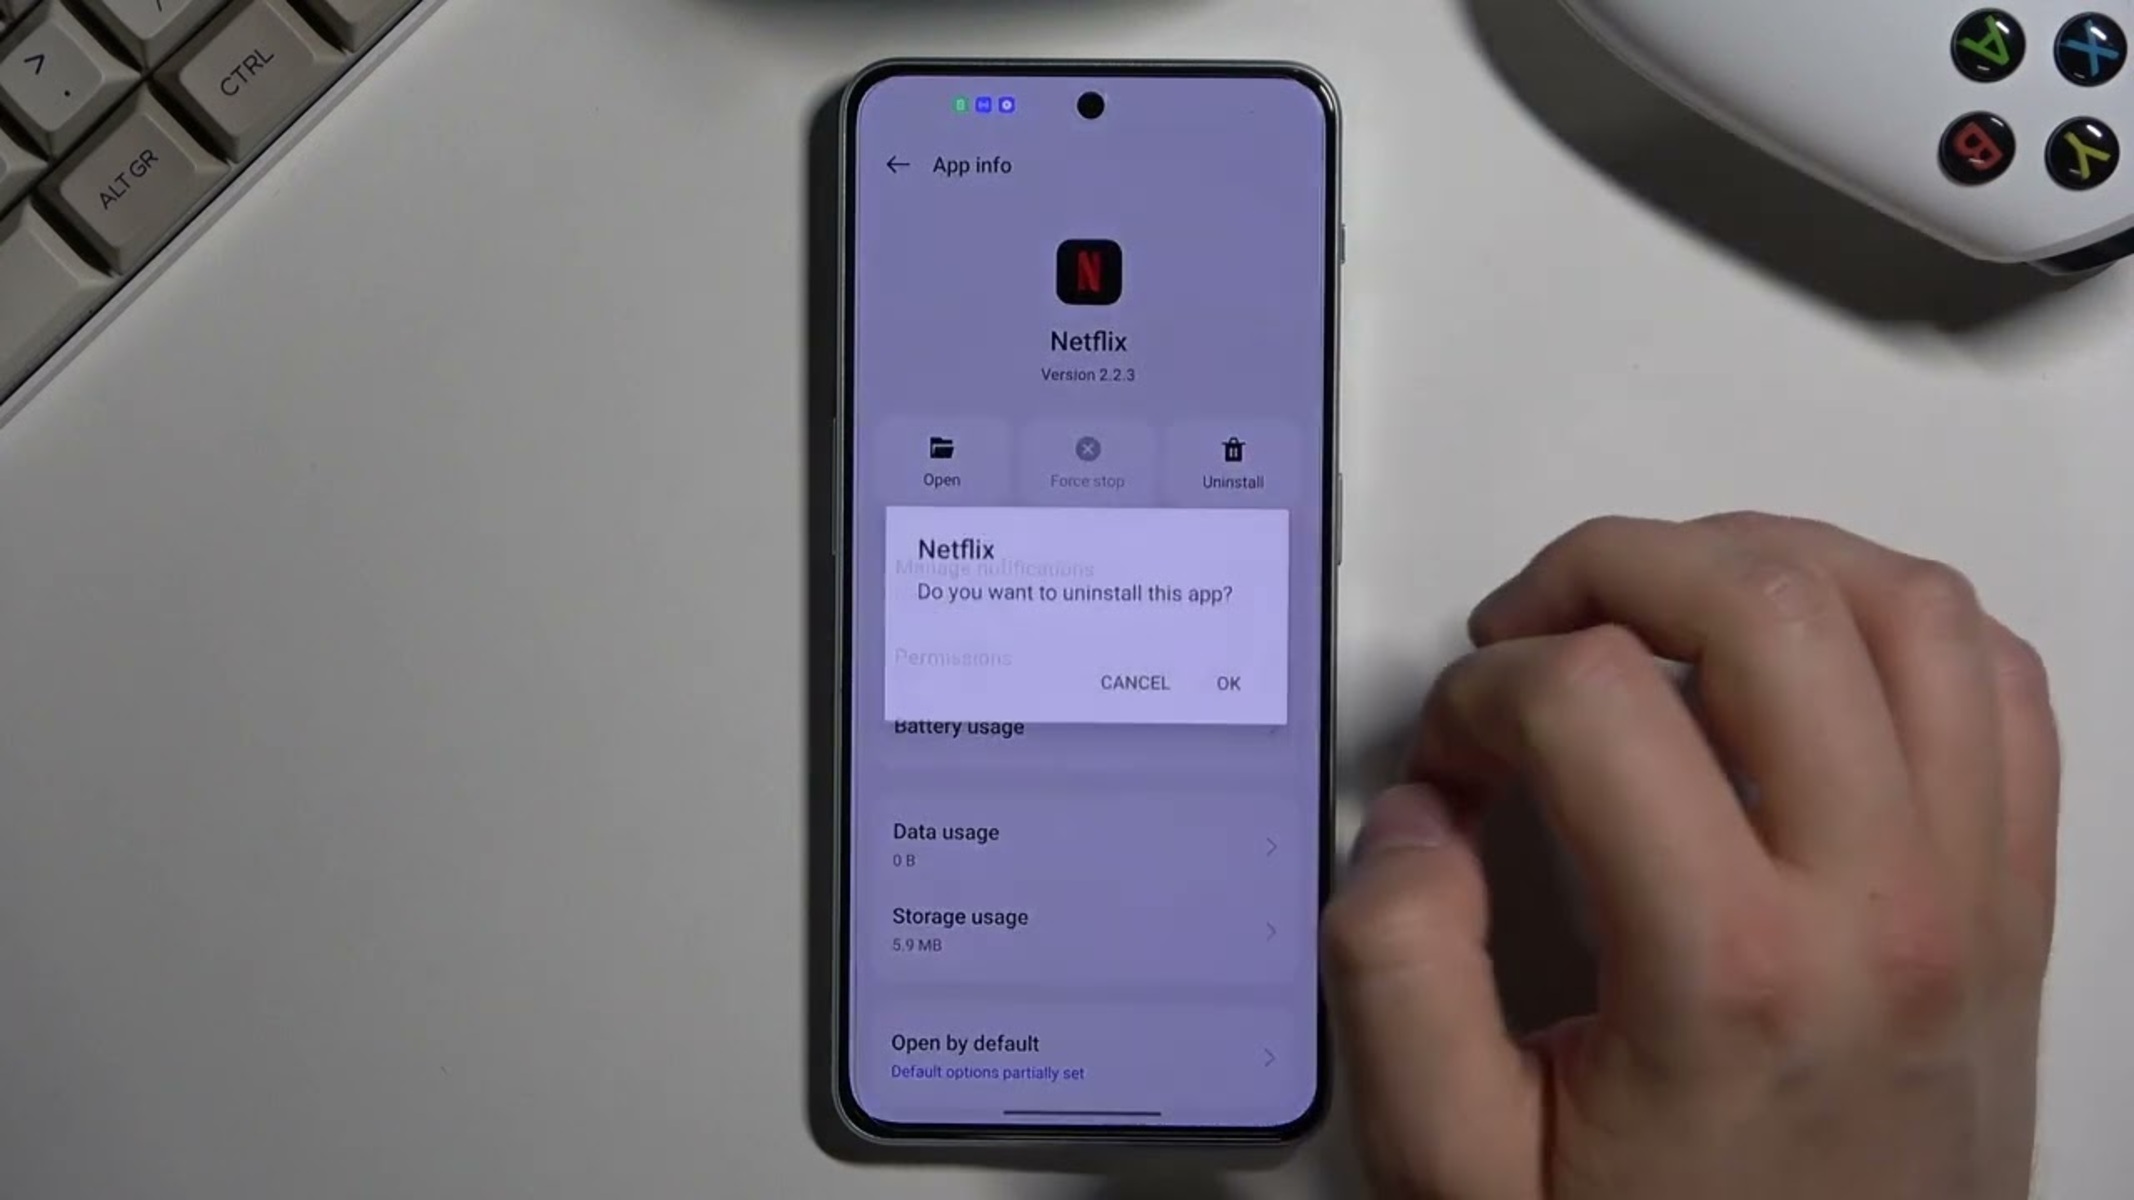
Select the App to Uninstall: Once you've accessed the "Apps" section, you will be presented with a list of all the apps installed on your OnePlus Nord. Scroll through the list or use the search function to locate the app that you wish to uninstall. Tap on the app to access its specific settings and management options.
-
Initiate the Uninstallation Process: Upon selecting the app, you will be directed to its individual settings page, where you can view detailed information about the app's storage usage, permissions, and more. Look for the "Uninstall" button or option within this page and tap on it to initiate the uninstallation process.
-
Confirm Uninstallation: After tapping the "Uninstall" button, a confirmation prompt will appear, asking if you're sure you want to uninstall the app. This step is crucial in preventing accidental deletions. Confirm your decision by tapping "OK" or "Uninstall," depending on the specific prompt displayed.
-
App Uninstallation: Once you've confirmed the uninstallation, the system will proceed to remove the app and its associated data from your OnePlus Nord. This process may take a few moments, depending on the size of the app and its data.
-
Uninstallation Completion: After the app has been successfully uninstalled, you will receive a notification or on-screen confirmation indicating that the process is complete. The app will no longer be present on your device, and its storage space will be reclaimed.
By following these steps to uninstall apps from the settings menu of your OnePlus Nord, you can efficiently manage your installed applications and optimize your device's performance. This method provides a structured approach to app management, allowing you to declutter your device and ensure that only the essential apps remain installed.
Uninstalling system apps
Uninstalling system apps from your OnePlus Nord requires a different approach compared to regular user-installed apps. System apps are pre-installed on the device by the manufacturer or carrier and are integral to the functioning of the operating system. While some system apps may not be essential for every user, it's important to exercise caution when uninstalling them, as removing certain system apps can potentially impact the stability and functionality of the device.
Here's a detailed guide on how to approach the uninstallation of system apps on your OnePlus Nord:
-
Identify the System App: Before proceeding with the uninstallation, it's crucial to identify the specific system app that you intend to remove. System apps are often denoted by their integration into the core functionalities of the device, such as the dialer, messaging app, or system settings. Additionally, some carrier-specific apps may also be categorized as system apps.
-
Assess the App's Importance: Once you've identified the system app, take a moment to assess its importance to your usage patterns. While some system apps may not be frequently used, others play a critical role in the device's functionality. It's advisable to research the potential implications of uninstalling a specific system app to ensure that it won't disrupt essential features or services.
-
Check for Disable Option: In many cases, system apps that cannot be uninstalled may have the option to be disabled. Disabling a system app effectively removes it from the app drawer and prevents it from running in the background, providing a way to declutter the device without fully uninstalling the app. To disable a system app, navigate to the app's settings within the system settings menu and look for the "Disable" option.
-
Utilize ADB Commands: For advanced users, the Android Debug Bridge (ADB) can be utilized to uninstall system apps from the OnePlus Nord. ADB commands allow for deeper access to the device's system, enabling the removal of certain system apps that may not have a straightforward uninstallation option through the user interface. It's important to exercise caution and research the specific ADB commands required for the targeted system app to avoid unintended consequences.
-
Backup and Research: Before attempting to uninstall any system app, it's highly recommended to back up your device and research the potential implications of removing the app. This proactive approach ensures that you can revert any changes if unexpected issues arise after uninstalling a system app.
By following these guidelines, you can approach the uninstallation of system apps on your OnePlus Nord with a clear understanding of the potential impact and the necessary precautions to safeguard the device's stability and functionality.
Resetting app preferences
Resetting app preferences on your OnePlus Nord can be a helpful troubleshooting step to resolve various app-related issues and restore default settings for app permissions, notifications, and defaults. This process does not delete any app data but resets app settings to their original state. Here's a detailed guide on how to reset app preferences on your OnePlus Nord:
-
Access the Settings Menu: Begin by unlocking your device and navigating to the home screen. Locate and tap the "Settings" app, represented by a gear icon. The settings menu provides access to various device configurations and management options.
-
Navigate to the Apps Section: Within the settings menu, scroll through the available options and look for the section labeled "Apps" or "Apps & Notifications." This section houses all the installed apps on your device and offers detailed controls for managing their behavior and configurations.
-
Access App Settings: Once in the "Apps" section, you will be presented with a list of all installed apps on your OnePlus Nord. Tap the three-dot menu icon or the specific option that allows you to access the app settings. This will vary depending on the device's specific interface.
-
Reset App Preferences: Within the app settings, look for the option to reset app preferences. This option is typically located in the advanced settings or additional options section. Tap on "Reset App Preferences" to initiate the process.
-
Confirmation Prompt: After selecting the "Reset App Preferences" option, a confirmation prompt may appear, informing you about the implications of resetting app preferences. Confirm your decision to proceed with the reset.
-
App Preference Reset: Once confirmed, the system will reset all app preferences to their default state. This includes settings related to app permissions, notifications, default apps, and any background restrictions that may have been modified.
-
Completion Confirmation: After the app preferences have been successfully reset, you may receive a notification or on-screen confirmation indicating that the process is complete. The app settings will now be restored to their original configurations.
By following these steps to reset app preferences on your OnePlus Nord, you can effectively troubleshoot app-related issues and ensure that app settings are aligned with their default configurations. This process can help resolve issues such as app crashes, permission conflicts, and unexpected behaviors, providing a streamlined and optimized app experience on your device.