Different Factors to Consider When Planting Pansy Seeds
Planting pansy seeds can be an exciting endeavor, but it’s important to consider several factors to ensure successful growth and beautiful blooms. From climate conditions to seed preparation, each aspect plays a crucial role in nurturing pansy seeds into healthy plants. In this article, we will explore the key factors to consider when planting pansy seeds.
1. Climate and Temperature Requirements: Pansies prefer cool temperatures, typically between 45-65°F (7-18°C). Before planting, ensure that the climate in your region is suitable for pansy growth. If you live in a warmer climate, consider planting them during cooler seasons, such as spring and fall.
2. Soil Conditions: Pansies thrive in well-draining soil rich in organic matter. Prepare the soil by mixing compost or aged manure to enhance its fertility and moisture retention capabilities. Avoid heavy clay or waterlogged soil, as it can lead to root rot.
3. Planting in Different Seasons: The ideal time to plant pansy seeds may vary depending on your local climate. In colder regions, it is best to sow seeds in late summer or early fall to allow the plants to establish before winter. In milder climates, pansies can be planted in early spring for a longer blooming period.
4. Starting Seeds Indoors: To get a head start on the growing season, consider starting pansy seeds indoors. Begin sowing the seeds 8-10 weeks before the last frost date. Use a seed tray filled with a seed-starting mix, lightly press the seeds into the soil, and keep them in a warm, well-lit area until they germinate.
5. Direct Sowing Outdoors: Pansy seeds can also be sowed directly into the garden bed. Prepare the soil as mentioned earlier and gently press the seeds into the soil surface. Keep the soil consistently moist until the seedlings emerge, which usually takes around 7-14 days.
6. Seed Preparation: Soaking pansy seeds in water for a few hours before planting can help expedite germination. Additionally, stratifying the seeds (exposing them to cold temperatures) for a week or two can break their dormancy and improve germination rates.
7. Transplanting Seedlings: Once the seedlings have developed their second set of true leaves, they are ready to be transplanted into the garden bed. Ensure the soil is prepared and dig holes at the same depth as the seedling’s container. Gently remove each seedling from the container and place it in the hole, then cover with soil and firm it gently.
8. Caring for Pansy Seedlings: Water the transplanted seedlings thoroughly and provide consistent moisture until they establish. Mulching around the seedlings can help retain moisture and suppress weed growth. Fertilize the plants every 3-4 weeks with a balanced, water-soluble fertilizer to promote healthy growth.
9. Protection from Frost and Extreme Weather: During cold snaps or frost warnings, cover the pansy plants with a breathable fabric or straw mulch to protect them from freezing temperatures. Similarly, during heatwaves, provide shade or mist the plants to prevent heat stress.
10. Signs of Success: In about 6-8 weeks, your pansy seeds should start sprouting and producing colorful blooms. Look for vibrant foliage and healthy growth as signs of successful cultivation. Keep up with regular maintenance like deadheading spent flowers to encourage continuous blooming.
By considering these important factors, you can maximize the chances of successful pansy seed planting and enjoy the beauty of these delightful flowers in your garden. Plan ahead, provide the right conditions, and soon you’ll witness the rewarding sight of pansies in full bloom.
Climate and Temperature Requirements for Pansy Seeds
Pansies, known for their vibrant and delicate blooms, have specific climate and temperature preferences that are crucial for successful seed planting and growth. Understanding these requirements will help you create the optimal environment for your pansy seeds. Let’s delve into the climate and temperature considerations for planting pansy seeds.
Pansies thrive in cool temperatures, typically ranging from 45-65°F (7-18°C). These flowers prefer mild climates that provide them with the perfect balance between warmth and coolness. Therefore, it’s essential to ensure that your local climate is compatible with pansy growth before planting the seeds.
If you reside in a region with hot summers, it’s best to plant pansy seeds during the cooler seasons, such as spring and fall. These times of the year provide the ideal temperature range for pansy growth. In warmer climates, pansies struggle to tolerate high temperatures, which can lead to wilting and poor blooming. By timing your seed planting correctly, you can ensure optimal growing conditions for your pansies.
On the other hand, if you live in a cooler climate, pansy seeds can tolerate colder temperatures and even some frost. In fact, some gardeners in colder regions sow pansy seeds in late summer or early fall. This allows the plants to establish well before the frosty winter arrives, ensuring robust growth when the weather warms up again in spring.
It’s important to note that while pansies can tolerate cool temperatures, they may not thrive in extreme cold. If your area experiences harsh winter conditions with freezing temperatures, it’s advisable to protect your pansy plants with a layer of mulch, straw, or a frost cover during these periods. This will safeguard the plants from frost damage and ensure their survival.
In addition to the temperature range, pansies also require adequate sunlight for their growth and development. Generally, they prefer full sun to light shade. However, in regions with scorching summers, providing some afternoon shade can prevent the plants from overheating and drying out.
When considering the microclimates within your garden, take note of areas that receive ample sunlight without being exposed to harsh, direct afternoon sun or strong winds. This will help you select the best spots to sow or transplant your pansy seedlings.
So, before planting pansy seeds, assess your climate’s suitability and temperature range. Ensure that you align the planting time with the seasons that offer the optimal conditions for pansy growth. By providing the right climate and temperature environment, you set your pansies up for success and can enjoy a stunning display of colorful blooms.
Soil Conditions for Successful Pansy Seed Planting
The quality of the soil plays a critical role in the successful growth and development of pansy seeds. By understanding the soil conditions required for pansies, you can ensure optimal planting conditions and foster healthy, vibrant plants. Let’s explore the essential soil considerations for successful pansy seed planting.
Pansies thrive in well-draining soil that is rich in organic matter. Before planting, prepare the soil by removing any weeds, rocks, or debris. Loosen the soil to a depth of at least 6 inches (15 cm) to promote good root growth and ensure proper drainage.
Adding organic matter, such as compost or aged manure, is essential for enriching the soil and enhancing its fertility. Mix in a generous amount of organic matter, ensuring that it is evenly distributed throughout the planting area. This organic matter improves the soil’s structure by increasing its water-holding capacity and nutrient content.
Furthermore, pansies prefer a slightly acidic to neutral soil pH, preferably in the range of 6.0-7.0. If your soil is too acidic, you can raise the pH by adding dolomitic limestone or wood ash. Conversely, if your soil is too alkaline, you can lower the pH by incorporating elemental sulfur or organic matter such as peat moss.
Adequate moisture is crucial for pansy seed germination and plant growth. However, waterlogged soil can lead to root rot and other fungal diseases. Therefore, it’s essential to ensure that the soil drains well and doesn’t retain excessive moisture. Sandy loam soil, which contains a mixture of sand, silt, and clay, provides the right balance of drainage and moisture retention for pansies.
Prior to planting pansy seeds, it’s a good practice to perform a soil test to assess the nutrient levels and pH of your soil. This will help you identify any deficiencies or imbalances that need to be addressed. You can obtain a soil test kit from a local garden center or send a soil sample to a laboratory for analysis. Based on the test results, you can adjust the soil’s nutrient levels and pH by adding the appropriate fertilizers or amendments.
When planting pansy seeds, space them apart according to the recommended spacing guidelines, typically around 6-8 inches (15-20 cm) apart. This provides adequate room for the plants to grow and prevents overcrowding, which can lead to poor airflow and increased disease risk.
Proper soil preparation is crucial for successful pansy seed planting. By ensuring well-draining soil that is enriched with organic matter and maintaining the appropriate soil pH, you create an ideal environment for your pansy seeds to thrive. With the right soil conditions, your pansies will develop strong roots, healthy foliage, and abundant blooms, creating a stunning display in your garden.
Pansy Seed Planting in Different Seasons
Pansies are a versatile flower that can be planted in various seasons, depending on your local climate and gardening goals. Understanding the ideal planting times for pansy seeds in different seasons will help you make the most of their blooming potential. Let’s explore when to plant pansy seeds in different seasons.
Spring: Spring is a popular season for planting pansy seeds, as it provides optimal growing conditions. It’s best to sow the seeds in early spring, a few weeks before the last expected frost. This gives the seeds time to germinate and establish themselves before the warmer months arrive. By starting pansy seeds indoors and transplanting them outdoors in early spring, you can enjoy their colorful blooms throughout the season.
Summer: Planting pansy seeds during the hot summer months can be challenging, especially in regions with high temperatures. Pansies prefer cool temperatures and may struggle to germinate and thrive in the heat. However, if you live in a milder climate or a location with cooler summers, you can still attempt to sow pansy seeds in early summer. Be sure to provide adequate shade and moisture to protect the seeds and seedlings from the scorching sun.
Fall: Fall is an excellent time for planting pansy seeds, as the weather begins to cool down after the hot summer months. In many regions, pansies are often grown as fall-blooming plants. Sow the seeds in late summer or early fall, allowing the plants to establish strong roots and develop before winter arrives. The cooler temperatures of fall provide a favorable environment for pansies to flourish, resulting in beautiful blooms throughout the autumn season.
Winter: Planting pansy seeds during winter is uncommon, especially in regions with frosty or snowy conditions. However, in mild winter climates, pansies can be sown during this season. It’s essential to ensure that the seeds are protected from freezing temperatures. Consider using cold frames or other protective measures to shield the seeds from extreme weather conditions. Planting pansy seeds in winter allows for early springtime blooms, giving your garden a splash of color as other plants start to emerge from dormancy.
When deciding on the season for planting pansy seeds, it’s important to consider your local climate and the specific requirements of pansies. Keep in mind that pansies prefer cooler temperatures and may struggle in extreme heat or freezing conditions. By selecting the appropriate season and providing the necessary care, you can enjoy vibrant pansy blooms throughout the year.
Ideal Time to Start Pansy Seeds Indoors
Starting pansy seeds indoors is a great way to get a head start on the growing season and ensure strong, healthy plants. By providing the optimal conditions for seed germination and early growth, you can enjoy earlier blooms and extend the flowering period. Let’s explore the ideal time to start pansy seeds indoors.
The ideal time to start pansy seeds indoors is typically 8-10 weeks before the last expected frost date in your area. This timeframe allows the seeds to germinate and develop into sturdy seedlings before they are transplanted outdoors.
Before starting the seeds indoors, gather the necessary supplies, including seed trays or pots, a seed-starting mix, and a clear plastic cover or plastic wrap to create a mini greenhouse effect. Fill the trays or pots with the seed-starting mix, which should be well-draining and sterile for optimal seed germination.
Lightly press the pansy seeds into the soil surface, ensuring they are evenly spaced apart. It’s recommended to sow multiple seeds in each tray or pot to account for any potential variations in germination rates.
Once the seeds are planted, water the soil gently to ensure it’s evenly moist. Cover the trays or pots with a clear plastic cover or plastic wrap to create a humid environment that promotes seed germination. Place the trays or pots in a warm location, ideally around 65-75°F (18-24°C).
During the germination period, it’s important to keep the soil consistently moist but not overly saturated. Avoid overwatering, as this can lead to damping-off, a fungal disease that affects seedlings.
As the seeds germinate, remove the plastic cover or wrap to allow air circulation and prevent mold or fungal growth. Place the trays or pots in a well-lit area, preferably near a south-facing window or under grow lights. Pansy seedlings require at least 12-16 hours of bright, indirect light daily to develop strong and healthy foliage.
After the pansy seedlings have developed their second set of true leaves, it’s time to transplant them into individual pots or containers. Use a well-draining potting mix and gently remove each seedling from the tray or pot, taking care not to damage the delicate roots. Transplant the seedlings at the same depth as they were in the tray or pot, and water them thoroughly after transplanting.
By starting pansy seeds indoors, you give them a head start on the growing season and increase their chances of success. With careful attention to timing, proper care, and optimal growing conditions, you’ll have healthy pansy seedlings ready for transplanting outdoors and a beautiful display of blooms to enjoy.
Direct Sowing Pansy Seeds Outdoors
Direct sowing pansy seeds outdoors is a convenient and straightforward method of planting that eliminates the need for transplanting seedlings. With the right timing and prepared soil, you can achieve successful pansy seed germination and enjoy the beauty of these charming flowers. Let’s explore the process of direct sowing pansy seeds outdoors.
The timing for direct sowing pansy seeds outdoors depends on your local climate and the specific requirements of pansies. In general, you should sow the seeds directly into the garden bed after the last expected frost date in your area. This ensures that the soil has warmed up sufficiently and provides favorable conditions for germination.
Prior to sowing the seeds, prepare the soil to create an optimal environment for seed germination and growth. Remove any weeds, rocks, or debris from the planting area, and loosen the soil to a depth of about 6 inches (15 cm). This helps to promote good root development and allows for proper drainage.
Evenly distribute the pansy seeds over the prepared soil surface, following the recommended spacing guidelines of around 6-8 inches (15-20 cm) between the seeds. Lightly press the seeds into the soil so that they make good contact with the earth.
Next, cover the seeds with a thin layer of soil or vermiculite, about 1/8 to 1/4 inch (3-6 mm) deep. This provides some protection and helps maintain moisture around the seeds during germination.
Once the seeds are sown, water the area gently but thoroughly. It’s important to keep the soil consistently moist during the germination period, as adequate moisture is crucial for seed germination and development.
As the seedlings emerge and grow, thin them out to provide enough space for each plant to develop fully. Remove any weak or overcrowded seedlings, allowing the strongest ones to flourish. Thinning the seedlings helps prevent overcrowding and competition for resources, ensuring healthier plants overall.
Continuously monitor the moisture levels of the soil, especially during dry periods. Regular watering is important to prevent the soil from drying out, which can hinder the growth and development of the pansy seedlings.
Once the pansy seedlings have grown a few inches in height and developed their second set of true leaves, you can provide them with a light application of a balanced, water-soluble fertilizer. Follow the package instructions for proper application rates to avoid overfertilization.
By direct sowing pansy seeds outdoors, you can simplify the planting process and witness the natural growth and development of the plants. With careful soil preparation, proper watering, and appropriate thinning, you’ll soon have a beautiful bed of pansies adding color and charm to your garden.
Tips for Seed Preparation Before Planting Pansy Seeds
Proper seed preparation is essential for maximizing the germination and growth potential of pansy seeds. By taking a few extra steps before planting, you can increase the chances of successful seed germination and ensure strong, healthy pansy plants. Here are some helpful tips for seed preparation before planting pansy seeds.
1. Soaking the Seeds: Consider soaking pansy seeds in water for a few hours or overnight before planting. This can help soften the seed coat and expedite the germination process. Simply place the seeds in a small container with water and allow them to soak for the recommended period, typically 4-8 hours.
2. Stratification: Some pansy seeds might benefit from stratification, a process that exposes the seeds to a period of cold temperatures to break dormancy. To stratify pansy seeds, moisten a paper towel or coffee filter and place the seeds inside. Fold the towel or filter, seal it in a plastic bag, and refrigerate it for about a week or two. The cool temperatures simulate winter conditions and encourage more consistent germination rates.
3. Scarification: Scarifying the seeds can help improve germination rates, especially for pansy varieties with tough seed coats. Gently rubbing the seed coat with a fine sandpaper or nail file can create small scratches or abrasions, allowing moisture to penetrate the seed more easily and promote germination. Take care not to damage the seed itself while scarifying.
4. Pre-Germination Test: If you have older or saved pansy seeds, it’s a good idea to perform a pre-germination test. Moisten a paper towel, place a few seeds on it, fold the towel, and keep it in a warm location for several days. Check regularly for seed germination. This test helps you assess the viability of the seeds and determine if they require any additional treatments or if it’s best to obtain fresh seeds.
5. Labeling and Organizing: Before planting, properly label your pansy seed packets or containers with the variety and date of collection or purchase. Organize them in a cool, dry place to maintain their viability. This ensures that you can easily access and identify your pansy seeds when it’s time to plant and avoids any confusion with other seed varieties.
6. Using Fresh Seeds: Pansy seeds have a limited shelf life, and their germination rates decrease over time. Whenever possible, use fresh seeds from reputable sources to ensure the highest germination success. Purchasing or collecting new seeds annually helps ensure that you start with viable and healthy pansy seeds.
By following these tips for seed preparation, you can enhance the germination process and set your pansy seeds up for success. Each step contributes to creating optimal conditions for germination, allowing you to enjoy a bountiful display of vibrant pansy blooms in your garden.
Transplanting Pansy Seedlings to the Garden Bed
Transplanting pansy seedlings from their initial containers to the garden bed is a critical step in their growth journey. Proper handling and preparation are necessary to ensure successful establishment and vibrant blooms. Here are some tips for transplanting pansy seedlings to the garden bed.
1. Timing: The optimal time to transplant pansy seedlings to the garden bed is when they have developed their second set of true leaves. At this stage, the seedlings are strong enough to handle the transplanting process and can adapt well to their new environment.
2. Soil Preparation: Before transplanting, ensure that the garden bed is prepared. Clear the area of weeds, rocks, or debris, and amend the soil with organic matter for improved fertility and moisture retention. Work compost or aged manure into the soil to provide essential nutrients that will support the growth of the transplanted seedlings.
3. Digging Holes: Dig holes in the garden bed that are slightly larger than the size of the seedling’s root ball. Ensure that the holes are spaced according to the recommended spacing guidelines for the specific pansy variety. This allows each plant to have enough space to grow and develop without overcrowding.
4. Transplanting Process: Gently remove the pansy seedling from its container, being careful not to disturb the roots. If the root ball is compacted, loosen it slightly with your fingers or a small garden tool. Place the seedling into the prepared hole, making sure it is planted at the same depth it was growing in the container. Backfill the hole with soil, gently pressing the soil around the stem to secure the seedling in place. Repeat this process for each seedling.
5. Watering: After transplanting, water the newly planted pansy seedlings thoroughly. This helps settle the soil and ensures good root-to-soil contact. Keep the soil consistently moist during the first few weeks after transplanting to support root establishment. Avoid overwatering, as overly wet soil can lead to root rot and other problems.
6. Mulching: Applying a layer of mulch around the transplanted seedlings can help retain moisture, suppress weed growth, and regulate soil temperature. Use organic mulch, such as straw or wood chips, and spread a thin layer around the base of the plants, being cautious not to pile it up against the stems.
7. Transitioning: If the seedlings were started indoors, it’s essential to gradually acclimate them to outdoor conditions before transplanting to prevent shock. This process, known as hardening off, involves exposing the seedlings to a few hours of outdoor sunlight and gradually increasing the duration over several days. Once the seedlings have been hardened off, they are ready to be transplanted into the garden bed.
By following these transplanting tips, you can ensure a smooth and successful transition for your pansy seedlings. With proper care and attention, they will establish well in the garden bed and reward you with a profusion of colorful blooms throughout the growing season.
How to Care for Pansy Seedlings After Planting
After transplanting your pansy seedlings into the garden bed, it’s important to provide them with the necessary care to ensure their healthy growth and abundant blooms. Here are some essential tips on how to care for pansy seedlings after planting.
1. Watering: Proper watering is crucial for the establishment of pansy seedlings. Keep the soil consistently moist, but not waterlogged, during the initial weeks after planting. Water at the base of the plants to avoid wetting the foliage, as this can promote disease development. Monitor the moisture levels of the soil and water as needed, adjusting based on the weather conditions in your area.
2. Fertilizing: Pansy seedlings can benefit from periodic fertilization to provide them with essential nutrients. About 3-4 weeks after planting, start applying a balanced, water-soluble fertilizer according to the package instructions. This will help bolster their growth and promote healthy foliage and blooms. Avoid overfertilization, as it can lead to excessive foliage growth at the expense of flower production.
3. Mulching: Apply a layer of organic mulch around the base of the pansy seedlings to conserve moisture, suppress weed growth, and regulate soil temperature. Mulching also helps protect the roots from drastic temperature changes and prevents soil erosion. Keep the mulch a few inches away from the stem to avoid excess moisture accumulation, which can lead to stem rot.
4. Deadheading: Regularly remove spent flowers, a process known as deadheading, to encourage continuous blooming. Use clean garden shears or your fingers to snip off the faded flowers, cutting them back to a node or leaf junction. Removing the spent blooms redirects the plant’s energy towards producing new buds and prolongs the flowering period.
5. Pest and Disease Control: Monitor your pansy seedlings for any signs of pests or diseases, such as aphids, slugs, or powdery mildew. If detected, take appropriate measures to control the infestation. This could involve handpicking pests, using organic insecticidal soaps or sprays, or applying suitable fungicides. Regularly inspecting your pansy plants allows for early intervention and helps maintain their health and vigor.
6. Light and Airflow: Pansies thrive in cool conditions and benefit from ample sunlight. Ensure that the seedlings are provided with at least 6 hours of direct sunlight each day. If your garden receives intense afternoon sun, consider providing some shade during the hottest part of the day to protect the plants from heat stress. Good airflow around the plants also helps prevent the development of fungal diseases.
7. Regular Inspections and Maintenance: Regularly inspect your pansy seedlings for any signs of stress or nutrient deficiencies. Look for faded or discolored leaves, stunted growth, or signs of pests. Address any issues promptly to ensure the overall health and vitality of your plants. Additionally, remove any weeds that may compete with the pansies for nutrients and water.
By providing proper care to your pansy seedlings after planting, you will encourage robust growth and abundant blooms. Consistent watering, appropriate fertilization, attention to pests and diseases, and regular maintenance will go a long way in ensuring the success of your pansy plants and the enjoyment of their beautiful flowers.
Protecting Pansy Seeds from Frost and Extreme Weather Conditions
Pansies are known for their ability to tolerate cooler temperatures, but they can still be susceptible to frost and extreme weather conditions. It’s important to take measures to protect pansy seeds from these harsh conditions to ensure their survival and optimal growth. Here are some tips for safeguarding your pansy seeds from frost and extreme weather conditions.
1. Frost Protection: Pansy seeds can be sensitive to frost, especially when they are in the early stages of germination or growth. Covering the seedbed or planting area with a frost cloth or row cover can provide protection from sudden temperature drops and frost. These covers act as a physical barrier and create a microclimate around the plants, trapping heat and preventing frost damage.
2. Mulching: Apply a layer of organic mulch, such as straw or wood chips, around the pansy seedlings. Mulch acts as an insulating layer, helping to regulate soil temperature and protect the roots of the plants. During colder periods, increase the thickness of the mulch to provide additional protection from frost.
3. Watering: Water the pansy seedlings thoroughly before a frost event. Moist soil retains heat better than dry soil, helping to protect the roots from freezing. Avoid overwatering, as excess moisture can lead to root rot. It’s important to strike a balance and ensure that the soil is consistently moist but not waterlogged.
4. Providing Shade: During heatwaves or periods of intense sunlight, providing shade can help protect pansy seedlings from scorching and drying out. Use shade cloth or plant taller plants nearby to create a shade canopy. This will help reduce the stress on the pansy plants and prevent wilting or sunburn.
5. Wind Protection: Strong winds can damage pansy seedlings and cause desiccation, particularly during dry or cold spells. Placing windbreaks, such as garden fencing or planting wind-resistant shrubs around the pansy seedlings, can help shield them from harsh winds and prevent damage.
6. Removing Snow: In regions with heavy snowfall, gently brush off excess snow from the pansy seedlings. The weight of snow can bend or break the delicate stems. However, be cautious not to damage the plants while removing the snow.
7. Covering Pots and Containers: If you are growing pansies in pots or containers, move them to a sheltered area, such as a covered porch or greenhouse, during periods of extreme weather. If moving is not possible, cover the containers with insulating materials like burlap or blankets during colder nights to protect the plants from freezing temperatures.
8. Monitoring and Reacting: Regularly monitor weather forecasts to stay informed about upcoming frost or extreme weather conditions. This allows you to take appropriate measures in advance to protect your pansy seedlings. Be prepared to cover the plants or move them to a protected area when necessary.
By implementing these strategies, you can provide a layer of defense for your pansy seeds against frost and extreme weather conditions. Ensuring their protection allows the seeds to germinate and grow in a favorable environment, leading to healthy and vibrant pansy plants that will brighten your garden with their beautiful blooms.
Signs of Success: When Pansy Seeds Start to Sprout and Bloom
Witnessing the sprouting and blooming of pansy seeds is a rewarding experience for any gardener. After sowing and caring for your pansy seeds, it’s exciting to see signs of success as they emerge from the soil and burst into colorful blooms. Here are some indicators to look out for that signify the successful growth and development of your pansy seeds.
Sprouting Seeds: One of the first signs of success is the appearance of sprouts pushing through the soil surface. Pansy seeds typically germinate within 7-14 days, depending on the growing conditions and variety. Look for the emergence of small, green seedlings breaking free from the soil. This indicates that the seeds have successfully sprouted and are beginning their journey towards maturity.
Young Leaves: As the seedlings grow, they will develop their first set of true leaves. These leaves are different from the initial seed leaves and resemble the mature leaves of a pansy plant. The presence of these true leaves is an encouraging sign that the seedlings are healthy and thriving, absorbing nutrients and energy from the surrounding environment.
Robust Growth: Successful pansy seedlings will exhibit robust growth, with sturdy stems and lush foliage. The seedlings should continue to grow and develop, increasing in size and stature over time. Healthy seedlings will have vibrant green foliage and a compact, bushy shape. Look for signs of vigorous growth, such as new leaves appearing and the seedlings filling out their allotted space.
Budding: Once the pansy seedlings have established themselves, they will start forming flower buds. These buds will gradually develop, showcasing the distinctive colors and shapes associated with pansy blooms. The appearance of buds is an exciting milestone, indicating that the plants are progressing towards their flowering stage.
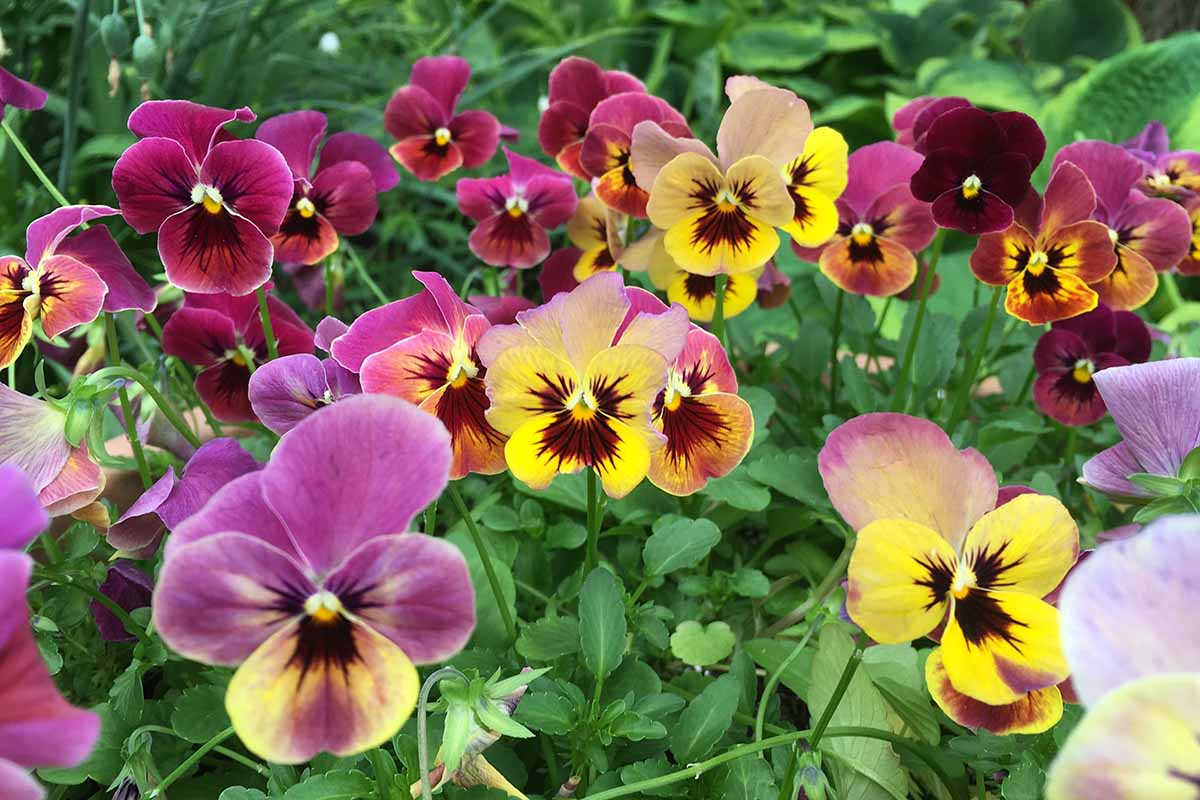
Colorful Blooms: The ultimate sign of success is when the pansy seedlings transform into full-fledged plants, adorned with an array of vibrant blooms. Depending on the pansy variety, you can expect a range of colors, including yellows, purples, blues, and whites. The sight of the colorful blooms is a testament to the successful growth and care provided to the pansy seeds. Enjoy the beauty and charm of these flowers as they enhance your garden or containers.
Continuous Blooming: Pansy plants are known for their long blooming season, often producing flowers for several months. After the initial blooms, continue to deadhead spent flowers regularly to encourage continuous blooming. With appropriate care and maintenance, your pansy plants will delight you with a profusion of blossoms, enhancing the visual appeal of your garden throughout the growing season.
Recognizing these signs of success when pansy seeds start to sprout and bloom is a delightful experience for any gardener. These indicators signify the successful germination and growth of your pansy seeds, reminding you of the fulfilling journey from seed to beautiful flowering plants.