
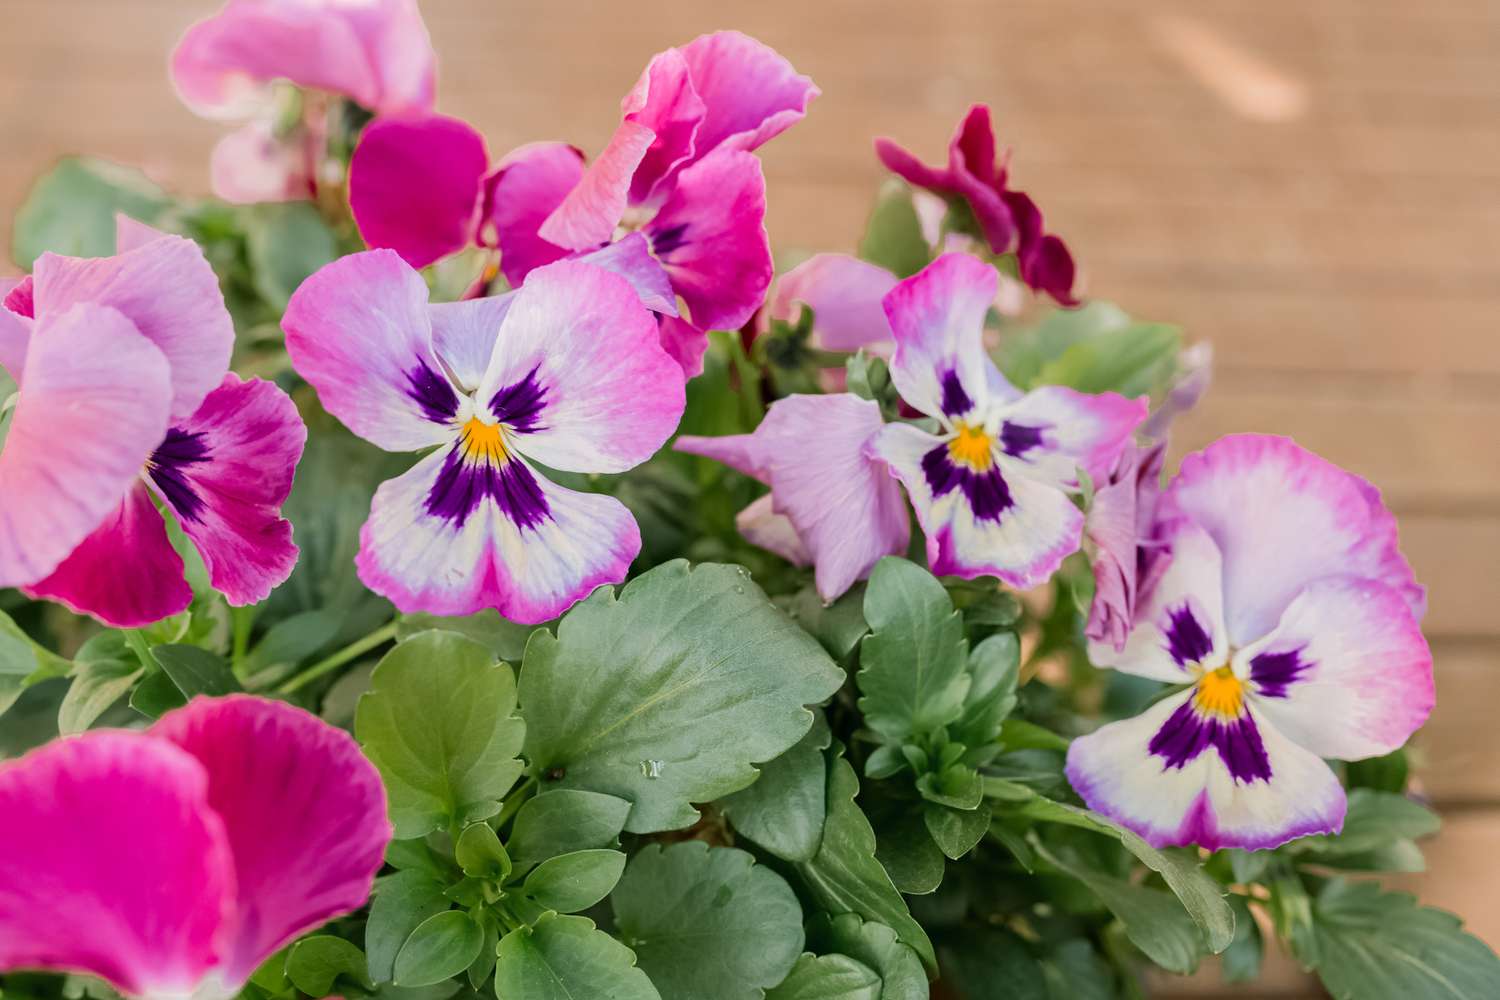
Choosing the Right Location
When it comes to planting pansies, selecting the right location is crucial for ensuring their growth and longevity. Pansies thrive in cool weather and require plenty of sunlight to flourish. Here are some important factors to consider when choosing the perfect spot for your pansy plants:
- Sunlight: Pansies love the sun, so it’s essential to find a location that receives at least 6 hours of direct sunlight each day. Choose an area that is not shaded by large trees or buildings to allow your pansies to soak up the rays.
- Temperature: Pansies prefer cooler temperatures, so avoid planting them in areas that experience intense heat or direct exposure to hot afternoon sun. They perform best in mild climates or during the cooler seasons.
- Soil Drainage: Pansies thrive in well-draining soil to prevent waterlogged roots. Avoid planting them in areas that retain excessive moisture, as this can lead to root rot. If your soil is heavy or clay-like, consider amending it with compost or peat moss to improve drainage.
- Protection from Harsh Winds: Pansies have delicate petals that can be easily damaged by strong winds. Plant them in an area that is sheltered from heavy gusts to preserve their beauty and prevent any damage.
- Garden Accessibility: Consider the location’s accessibility for maintenance and care. Make sure it is easy for you to water, fertilize, and inspect your pansies regularly.
By taking these factors into account and selecting a suitable location, you ensure that your pansies have the best possible chance of thriving.
Preparing the Soil
Preparing the soil is a crucial step in successfully planting pansies. By providing the right growing conditions, you can help your pansies establish strong roots and promote healthy growth. Here are some important steps to follow when preparing the soil:
- Clear the Area: Start by clearing the planting area of any weeds, rocks, or debris. This ensures that your pansies have ample space to grow without competition from other plants.
- Loosen the Soil: Pansies prefer loose, well-aerated soil. Use a garden fork or a tiller to loosen the soil to a depth of about 6 to 8 inches. This helps improve drainage and allows the pansy roots to spread easily.
- Amend the Soil: Pansies thrive in soil that is rich in organic matter. Add compost, well-rotted manure, or peat moss to the soil to improve its fertility and moisture-retaining capacity. Mix the amendments thoroughly with the native soil.
- Test the Soil pH: Pansies prefer slightly acidic to neutral soil with a pH level between 6 and 7. Use a soil testing kit to determine the pH of your soil. If the pH is too high (alkaline soil), you can lower it by adding elemental sulfur. If the pH is too low (acidic soil), you can raise it by adding lime.
- Level the Soil: After amending the soil, level the planting area using a rake. This ensures a smooth, even surface for planting your pansies.
By following these steps, you provide your pansies with a well-prepared and nutrient-rich environment to thrive. Remember to water the soil lightly after planting to settle it around the roots of the pansies. With proper soil preparation, your pansies will have the best possible start for healthy growth and abundant blooms.
Starting from Seeds or Transplants
When it comes to planting pansies, you have the option of starting from seeds or purchasing transplants from a nursery or garden center. Both methods have their pros and cons. Here’s what you need to know about starting pansies from seeds or transplants:
- Starting from Seeds: Starting pansies from seeds allows you to have a wider selection of varieties and colors. It also gives you the satisfaction of watching the plants grow from the very beginning. However, pansy seeds can be slow to germinate, and it may take several weeks before you see any seedlings. If you choose this method, start the seeds indoors 8 to 10 weeks before the last expected frost date in your area. Once the seedlings have grown a few inches tall, transplant them into the garden.
- Purchasing Transplants: Buying pansy transplants offers convenience and a head start in the growing process. Transplants are already established plants and can be directly planted in the garden. They are a good option if you want instant color in your garden, especially if you missed the optimal time for starting pansies from seeds. When selecting transplants, choose plants with healthy foliage and no signs of disease or pests.
Regardless of whether you start from seeds or transplants, the key to success is to provide the right growing conditions. Give your pansies well-draining soil, ample sunlight, and regular watering. Mulching around the plants can help conserve moisture and suppress weed growth.
Whether you choose to start from seeds or transplants, with proper care and attention, your pansies will reward you with vibrant and charming blooms that will brighten up your garden.
Planting Pansies in Containers
Planting pansies in containers is a versatile and convenient option that allows you to enjoy these colorful flowers even if you have limited space or a lack of suitable garden beds. Here are some important factors to consider when planting pansies in containers:
- Choose the Right Container: Select a container that is at least 6 to 8 inches deep to provide enough space for the pansy roots to grow. Ensure that the container has drainage holes to prevent waterlogging, as pansies dislike standing water.
- Use Well-draining Soil: Fill the container with a lightweight and well-draining potting mix. This type of soil allows for proper drainage while retaining sufficient moisture for the pansies’ roots.
- Positioning and Sunlight: Place the container in a location that receives at least 4 to 6 hours of sunlight daily. Pansies thrive in full sun or partial shade, so choose a spot that provides the appropriate amount of light for optimal growth.
- Planting Technique: Gently remove the pansy plants from their pots and loosen the roots. Dig holes in the potting mix where you want to place the pansies. Plant them at the same depth as they were in their original pots and firm the soil around the plants to ensure good contact between the roots and the soil.
- Watering and Fertilizing: Water the container thoroughly after planting to settle the soil and provide moisture to the pansy roots. Pansies in containers require more frequent watering compared to those in the ground, as containers tend to dry out faster. Fertilize the pansies regularly with a balanced liquid fertilizer to promote healthy growth and continuous blooming.
- Maintenance: Keep an eye on your container pansies for any signs of pests or diseases. Remove any faded flowers promptly to encourage more blooming and maintain a neat appearance. Deadheading also prevents the pansies from going to seed, which can hinder their flowering potential.
Planting pansies in containers allows you to create stunning displays on porches, balconies, or patios. With proper care, regular watering, and appropriate sunlight, your container pansies will provide a colorful and cheerful addition to your outdoor space.
Planting Pansies in Beds or Borders
Planting pansies in beds or borders is a beautiful way to add vibrant color and charm to your garden. Whether you want to create a stunning focal point or fill in gaps in existing flower beds, here are some essential tips for successfully planting pansies in beds or borders:
- Prepare the Soil: Before planting, prepare the soil by removing any weeds, rocks, or debris. Loosen the soil to a depth of 6 to 8 inches and amend it with organic matter, such as compost or well-rotted manure. This enriches the soil and provides a favorable environment for the pansies to grow.
- Spacing: Space your pansy plants according to their mature size, allowing enough room for them to spread and fill out. Follow the guidelines provided on the plant tags or nursery recommendations. Adequate spacing ensures good air circulation and minimizes competition for nutrients.
- Planting Depth: Dig holes slightly larger than the size of the root ball and place the pansy plants at the same depth they were in their nursery pots. Backfill the holes with soil and gently firm it around the plants to ensure stability.
- Watering: After planting, thoroughly water the soil around the pansy plants to settle them in and eliminate air pockets. Water regularly, especially during dry periods, to keep the soil evenly moist. Avoid overwatering, as pansies prefer well-drained soil and may suffer from root rot if the soil becomes waterlogged.
- Mulching: Apply a layer of organic mulch around the base of the pansy plants to conserve moisture, suppress weed growth, and regulate soil temperature. Maintain a mulch depth of 2 to 3 inches, ensuring that the mulch does not come into direct contact with the plant stems.
- Care and Maintenance: Monitor your pansies regularly for any signs of pests or diseases. Remove faded flowers promptly to encourage continuous blooming and deadhead regularly to prevent the plants from going to seed. Regularly fertilize your pansies with a balanced slow-release fertilizer to provide them with the necessary nutrients for healthy growth and vigorous blooming.
By following these tips, you can ensure successful planting of pansies in beds or borders, creating a visually stunning display of vibrant colors and exceptional beauty in your garden.
Watering and Fertilizing Pansies
Proper watering and fertilization are essential for the healthy growth and vibrant blooms of pansies. Here are some important guidelines to follow when watering and fertilizing your pansy plants:
- Watering: Pansies require regular watering to keep the soil moist, but not waterlogged. Water deeply and thoroughly, ensuring that the water reaches the root zone. Avoid overwatering, as this can lead to root rot and other fungal diseases. To determine when to water, check the soil moisture level by inserting your finger into the soil up to the second knuckle. If it feels dry, it’s time to water. During periods of hot weather, pansies may require more frequent watering to prevent wilting.
- Fertilizing: Pansies benefit from regular fertilization to promote healthy growth and continuous blooming. Use a balanced slow-release fertilizer or a liquid fertilizer formulated specifically for flowering plants. Follow the instructions on the fertilizer package for application rates and frequency. Generally, it is recommended to fertilize pansies every 4 to 6 weeks during the growing season. Avoid over-fertilization, as it can lead to excessive foliage growth at the expense of flowers. Always water your pansies after fertilizing to help the nutrients penetrate the soil.
- Fertilizer Selection: Choose a fertilizer with a balanced ratio of nitrogen (N), phosphorus (P), and potassium (K), such as a 10-10-10 or 14-14-14 formula. This ensures that pansies receive adequate amounts of each nutrient for overall health and vigorous blooming. Alternatively, you can use a fertilizer specifically formulated for flowering plants, which may have higher phosphorus levels to encourage flower production.
- Organic Options: If you prefer organic gardening methods, there are organic fertilizers available that are suitable for pansies. These fertilizers contain natural ingredients, such as compost, bone meal, or fish emulsion. Follow the instructions on the packaging for application rates and timing.
- Application Tips: When applying fertilizer, distribute it evenly around the base of the pansy plants, keeping it away from the stems. Avoid getting fertilizer on the foliage, as it can cause burning or damage. Water the plants thoroughly after fertilizing to ensure the nutrients are properly absorbed by the roots.
By providing proper watering and regular fertilization, you can ensure that your pansies flourish with healthy foliage and an abundance of stunning blooms throughout the growing season.
Mulching for Temperature Control
Mulching is a beneficial practice when it comes to planting pansies, as it helps regulate soil temperature, conserve moisture, and suppress weed growth. Here’s what you need to know about mulching for temperature control when growing pansies:
- Benefits of Mulching: Mulch acts as a protective layer on the soil surface, providing insulation against extreme temperatures. In colder climates, mulch helps to retain soil heat and reduce frost heaving, which can be harmful to pansy roots. During hot weather, mulch helps to keep the soil cool and prevent excessive water evaporation, ensuring that the pansies’ roots stay hydrated.
- Preferred Mulch Types: Organic mulches, such as straw, shredded bark, or compost, are excellent choices for mulching around pansies. They gradually break down over time, adding organic matter to the soil and improving its fertility. Additionally, organic mulches provide better insulation compared to inorganic mulches, such as rocks or plastic.
- Applying Mulch: Apply a layer of mulch around the base of the pansy plants, ensuring that the mulch is not in direct contact with the stems. Keep the mulch layer at a depth of 2 to 3 inches. This helps to conserve moisture, inhibit weed growth, and regulate soil temperature.
- Timing of Mulch Application: Mulch can be applied after planting the pansies and ensuring the soil is well-watered. Apply the mulch once the soil has warmed up in the spring for cold temperature control, or before the onset of hot weather in the summer to keep the soil cool. Avoid applying mulch too early in the spring when the soil is still cool, as it might delay the soil warming process and slow down plant growth.
- Mulching Considerations: When mulching, keep a small gap around the stems to prevent excess moisture buildup, which can lead to stem rot. Regularly check the mulch layer and replenish it as needed, as it may break down or get displaced over time. In the fall, you can leave the mulch in place to provide additional winter insulation for the pansy roots.
By applying mulch around your pansies, you create a favorable microclimate that helps regulate soil temperature, conserve moisture, and promote healthy growth and blooming. Mulching is a simple and effective technique to support the overall success of your pansy plants.
Managing Pests and Diseases
Like many plants, pansies are not immune to pests and diseases. However, with proper management and early intervention, you can keep your pansies healthy and thriving. Here are some tips for effectively managing common pests and diseases that may affect your pansies:
- Identify the Problem: Regularly inspect your pansies for any signs of pests or diseases. Common pests that may attack pansies include aphids, slugs, snails, and caterpillars. Look for symptoms of diseases such as powdery mildew, leaf spot, or root rot. Identifying the problem early on allows for prompt treatment, minimizing potential damage.
- Handpicking and Pruning: For larger pests like slugs and snails, handpicking them off your pansies can be effective. Regularly inspect the plants and remove any visible pests manually. If you notice any damaged or infected plant parts, promptly prune them and dispose of them to prevent the spread of diseases.
- Organic Pest Control: For smaller pests like aphids or caterpillars, consider using organic pest control methods. This can include applying insecticidal soap or neem oil, which are safe for both plants and beneficial insects. Follow the instructions on the product label for proper application and dosage.
- Preventive Measures: To reduce the risk of pest infestations and diseases, encourage good plant health through proper watering, adequate sunlight, and regular fertilization. Healthy plants are less susceptible to attacks. Additionally, practicing crop rotation and avoiding overcrowding can help prevent the buildup of pests and diseases in the soil.
- Fungicides: If your pansies are affected by fungal diseases like powdery mildew or leaf spot, fungicides might be necessary. Choose a fungicide labeled for use on pansies and follow the instructions carefully. Be sure to apply the fungicide as soon as you notice the symptoms and continue regular applications as recommended until the disease is under control.
- Consulting an Expert: If you are unsure about dealing with pests or diseases on your pansies, don’t hesitate to seek advice from a local garden center or extension service. They can provide guidance on the specific pests and diseases common in your area and recommend suitable treatment options.
Remember, early detection and timely intervention are key to effectively managing pests and diseases on your pansies. By staying vigilant and taking appropriate action, you can keep your pansies healthy and beautiful throughout the growing season.
Deadheading and Pruning Pansies
Proper deadheading and pruning of pansies are essential tasks to promote continuous blooming, maintain plant health, and ensure a neat and tidy appearance. Here are some guidelines for effectively deadheading and pruning your pansies:
- Deadheading: Deadheading is the process of removing faded or spent flowers from the pansy plants. This promotes more blooming by preventing the plant from diverting energy into seed production. To deadhead pansies, simply pinch or snip off the flower stalks just above a set of healthy leaves. Regular deadheading encourages the growth of new flower buds and extends the flowering period of your pansies.
- Pruning: Pruning pansies involves removing damaged, diseased, or overgrown plant parts. It helps maintain plant health, improves air circulation, and prevents the spread of diseases. When pruning, use clean and sharp pruners or scissors to make precise cuts. Trim back any leggy or straggly growth to maintain a compact and bushy shape. Additionally, remove any yellowing or discolored leaves to keep the plants looking healthy and attractive.
- Timing: Deadheading and pruning can be done throughout the growing season as needed. It’s best to deadhead pansy plants regularly, as soon as the flowers fade, to prevent seed production. For pruning, assess the plants regularly and prune as necessary to maintain their desired shape and health.
- Disposal: After deadheading and pruning, collect the debris and dispose of it properly. Do not compost diseased plant material, as it can spread pathogens to other plants. If you suspect disease, it is best to discard the plant material in a sealed bag to prevent further contamination.
- Beneficial Effects: Deadheading and pruning not only promote more blooms and healthier plants, but they also contribute to the overall aesthetic appeal of your pansy bed or container. Regular maintenance through deadheading and pruning helps create a neat and tidy appearance, showcasing the beauty of the remaining blossoms and foliage.
By incorporating regular deadheading and pruning into your pansy care routine, you can encourage continuous blooming, maintain plant health, and ensure attractive and well-maintained pansy plants throughout the growing season.