
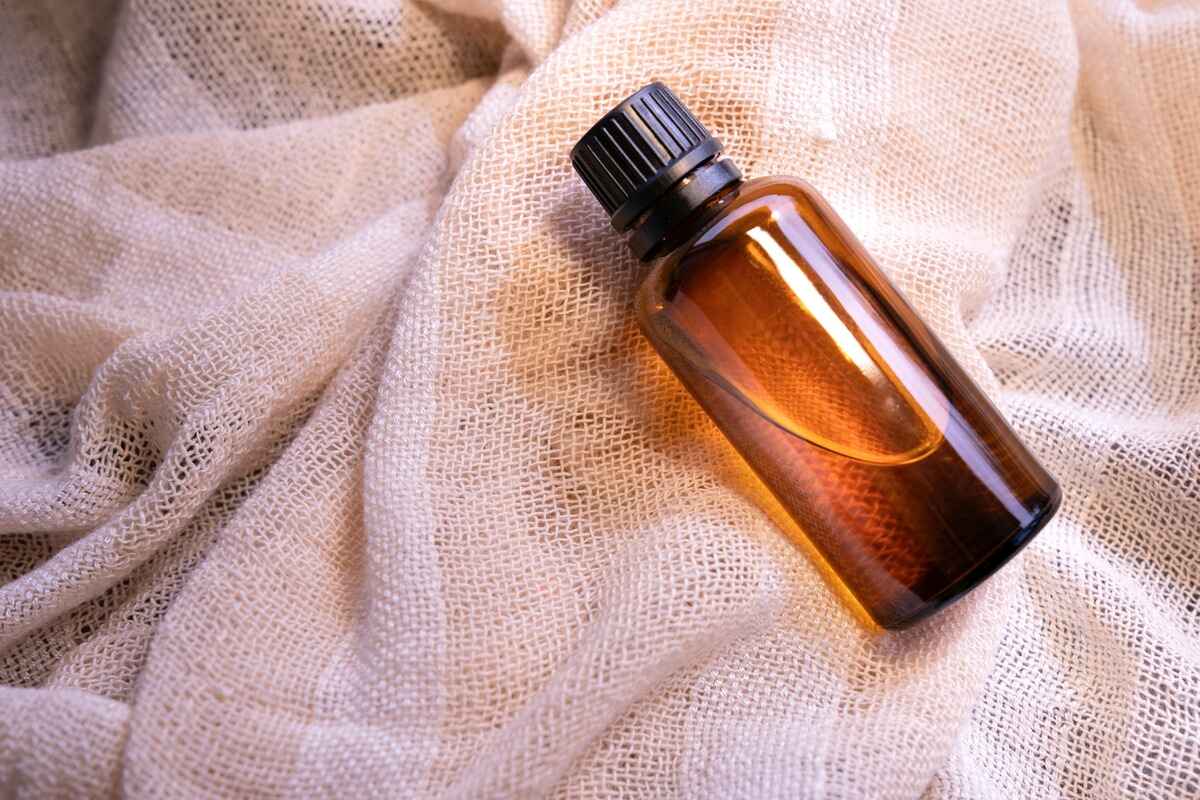
Clean and Reuse
Don’t let your old essential oil bottles go to waste! One of the easiest and most sustainable ways to make use of them is by cleaning and reusing them. Here’s how:
Step 1: Start by removing any residual oils from the bottle. You can do this by rinsing it with hot water and a mild soap. For stubborn oils, you can use a small brush or a cotton swab to gently scrub the inside of the bottle.
Step 2: After rinsing, fill a bowl with warm water and a few drops of vinegar or a tablespoon of baking soda. Place the bottle in the mixture and let it soak for about 10-15 minutes. The vinegar or baking soda will help remove any remaining residue and eliminate any odors.
Step 3: Use a bottle brush or a pipe cleaner to thoroughly clean the inside of the bottle. Make sure to reach all the corners and crevices. Rinse the bottle well with warm water to remove any remaining residue or cleaning solution.
Step 4: Allow the bottle to air dry completely. You can place it upside down on a clean towel or use a bottle drying rack to speed up the process.
Once your bottle is clean and dry, it’s ready to be reused! You can refill it with your favorite essential oil by using a pipette or dropper. Alternatively, you can create your own essential oil blends by combining different oils to suit your specific needs.
By cleaning and reusing your old essential oil bottles, you’re not only reducing waste but also saving money. Plus, you’ll have the satisfaction of knowing that you’re taking a small step towards a more sustainable lifestyle.
Create Essential Oil Blends
One of the great things about essential oils is that you can create your own unique blends by combining different oils. This allows you to tailor the scent and therapeutic properties to meet your specific needs. Here’s how you can create your own essential oil blends using your old bottles:
Step 1: Start by selecting the essential oils you want to blend. Consider the properties and aromas of each oil to ensure they complement each other well. For example, you could blend lavender, bergamot, and frankincense for a calming and relaxing blend.
Step 2: Clean your old essential oil bottles using the steps outlined in the previous section. This ensures that there are no residual oils that might affect the new blend.
Step 3: Using a pipette or dropper, add the desired amount of each essential oil to the empty bottle. The exact measurements will depend on your personal preference and the intensity of the scent you want to achieve. Start with a few drops of each oil and adjust as needed.
Step 4: Once all the oils are in the bottle, securely close the cap and gently roll the bottle between your palms to mix the oils together. This helps distribute the oils evenly throughout the bottle.
Step 5: Allow the blend to sit for a few hours or overnight to allow the scents to meld together. This will result in a more harmonious blend.
Now you have your very own custom essential oil blend! You can use it in a diffuser, dilute it with a carrier oil to use on your skin, add it to bath salts or lotions, or even use it to create homemade candles. The possibilities are endless!
Remember to label your blend with the name and date, as well as any safety precautions or dilution guidelines. This ensures that you can easily identify and use your blend in the future.
Creating your own essential oil blends not only allows you to have a more personalized experience but also helps you put your old bottles to good use. So unleash your creativity and start experimenting with different combinations to create unique and delightful aromas!
Make Room Sprays
If you’re looking to freshen up your home or workspace, making room sprays with your old essential oil bottles is a fantastic idea. Not only will these sprays add a pleasant scent to the air, but they can also help uplift your mood and create a calming atmosphere. Here’s how you can make your own room spray:
Step 1: Clean your empty essential oil bottle using the steps mentioned earlier. This will ensure that there are no residual oils that might affect the new spray.
Step 2: Fill the clean bottle with distilled water, leaving some space at the top for the other ingredients. Distilled water is preferable as it doesn’t contain impurities that could clog the spray nozzle.
Step 3: Add a few drops of your favorite essential oils to the bottle. The number of drops will depend on the desired strength of the fragrance. You can use single oils, such as lavender or citrus, or create custom blends to suit your preferences.
Step 4: If desired, you can add a small amount of alcohol or witch hazel to the bottle. This acts as a natural emulsifier, helping to disperse the essential oils in the water. Just a teaspoon or two will do.
Step 5: Securely close the bottle and gently shake it to mix all the ingredients together. This will ensure that the essential oils and water are well combined.
To use your room spray, simply give the bottle a gentle shake and spritz it around your space. You can spray it in the air, on linens, or even on fabric furniture (always do a patch test first). Enjoy the refreshing aroma and the instant transformation of your environment.
Room sprays made from essential oils are a healthier and more natural alternative to synthetic air fresheners. Plus, by making your own using recycled bottles, you’re contributing to a more sustainable lifestyle. So why not give it a try and create a signature scent for your living or working space?
Create Personalized Perfumes
Do you have a collection of old essential oil bottles gathering dust? Don’t let them go to waste! Instead, use them to create your very own personalized perfume. With a few simple steps, you can have a unique and captivating fragrance that is tailored to your preferences. Here’s how:
Step 1: Begin by thoroughly cleaning your empty essential oil bottles. This ensures that there are no residual oils that might alter the scent of your perfume.
Step 2: Decide on the base, middle, and top notes for your perfume. The base note provides the foundation and lasting power of the scent, the middle note adds balance and complexity, and the top note is the initial burst of aroma that fades away quickly.
Step 3: Select a carrier oil for your perfume. Jojoba oil, sweet almond oil, or fractionated coconut oil are all popular choices. Once you have chosen your carrier oil, fill one of your cleaned bottles about ¾ of the way full.
Step 4: Add the base note essential oils to the carrier oil, using a dropper or pipette. Start with a few drops and adjust to your preference. Common base notes include vanilla, sandalwood, or patchouli.
Step 5: Next, add the middle note essential oils to the bottle. These oils will give the perfume its character and complexity. Popular middle notes include floral scents like lavender, rose, or jasmine.
Step 6: Lastly, add a few drops of the top note essential oils. These oils will provide the initial burst of aroma. Common top notes include citrus, bergamot, or lemongrass.
Step 7: Give the bottle a gentle shake to mix the oils with the carrier oil. Allow the perfume to sit for at least 24 hours for the scents to blend and develop. You can also test the scent on your skin and make any adjustments if needed.
Creating your personalized perfume not only allows you to express your unique style, but it also gives your old essential oil bottles a new lease of life. Whether you prefer a floral, woody, or citrusy scent, the possibilities are endless!
So, why not embark on a fragrant journey and indulge in the art of creating your own customized perfume? It’s a delightful way to repurpose your old bottles and discover a scent that is truly one-of-a-kind.
DIY Household Cleaners
Did you know that you can use your old essential oil bottles to create your own natural and chemical-free household cleaners? By repurposing these bottles, you can reduce waste and create a safer environment for you and your family. Here’s how you can make your own DIY household cleaners:
Step 1: Thoroughly clean your empty essential oil bottles to remove any residue or remaining oils from previous use.
Step 2: Choose a natural cleaning agent as the base for your household cleaner. White vinegar and baking soda are excellent options that are effective at cleaning a variety of surfaces.
Step 3: Depending on the size of your bottle, mix equal parts of the cleaning agent and water. For example, if you have a 200ml bottle, fill it with 100ml of vinegar or baking soda, and top it up with 100ml of water.
Step 4: Add a few drops of essential oils to your cleaning mixture to enhance the scent and boost the cleaning power. Lemon, tea tree, lavender, or eucalyptus oils are popular choices for their antibacterial and freshening properties.
Step 5: Close the bottle tightly and give it a good shake to mix all the ingredients together.
Now you have a ready-to-use DIY household cleaner! You can use it to clean surfaces, windows, mirrors, and even floors. The vinegar or baking soda will help break down grease and grime, while the essential oils add a pleasant scent and extra cleaning power.
Remember to label your homemade cleaner appropriately, including the ingredients used and the date of creation.
Creating your DIY household cleaners not only provides a safe and eco-friendly alternative to conventional cleaning products, but it also gives your old essential oil bottles a purpose. Plus, you’ll enjoy the benefits of a fresh and chemical-free home.
Give it a try and see how your old bottles can help you keep your living space clean and sparkling!
Homemade Bath and Body Products
Your old essential oil bottles can be repurposed to create your very own homemade bath and body products. These DIY creations not only allow you to customize the scents but also ensure that you are using natural and nourishing ingredients on your skin. Here are some ideas for homemade bath and body products using your old bottles:
Body Scrubs: Fill your clean bottle with a mixture of sugar or salt, carrier oil (such as coconut oil or sweet almond oil), and a few drops of essential oils. Use this gentle scrub to exfoliate and moisturize your skin.
Bath Salts: Create your own luxurious bath salts by combining Epsom salt, sea salt, or Himalayan salt with a carrier oil and essential oils. Simply add a few tablespoons to your bath for a relaxing and aromatic soak.
Massage Oils: Fill a bottle with a carrier oil, such as jojoba or grapeseed oil, and add a blend of essential oils known for their calming or invigorating properties. Use this homemade massage oil to pamper yourself or give a loved one a soothing massage.
Body Oils: Mix a carrier oil with your favorite essential oils in a bottle to create a moisturizing body oil. Apply it right after a shower to lock in moisture and enjoy the benefits of the essential oils on your skin.
Roll-On Perfumes: Clean your bottle thoroughly and fill it with a carrier oil and your favorite essential oil blend. Add a rollerball top for easy and convenient application. Apply the perfume to your pulse points for a long-lasting fragrance.
These homemade bath and body products not only make wonderful self-care treats but also make fantastic gifts for friends and family. They allow you to customize the scents and ingredients to suit individual preferences and needs. Remember to properly label your creations with the ingredients used and date of creation.
By using your old essential oil bottles for homemade bath and body products, you are promoting sustainable living and reducing waste. Enjoy the benefits of natural ingredients and the pleasure of creating personalized products with a personal touch!
Essential Oil Jewelry
If you’re looking for a stylish and convenient way to enjoy the benefits of essential oils throughout the day, consider repurposing your old essential oil bottles into jewelry. Essential oil jewelry allows you to carry your favorite scents with you and experience aromatherapy on the go. Here are some ideas for turning your bottles into beautiful and functional accessories:
Necklaces: Clean the bottles thoroughly and remove the labels. Attach a small eye screw cap to the top of the bottle. String it onto a chain or cord, and voila! You have a unique necklace that can hold a drop or two of your desired essential oil.
Bracelets: Similar to necklaces, you can convert your bottles into bracelets. Clean the bottle, insert a small eye screw cap, and attach it to a bracelet chain or a leather strap. This way, you can have the scent of your favorite essential oil close to your wrist.
Earrings: Remove the dropper or cap from your essential oil bottle. Using a small drill bit, create a hole through the bottle cap. Attach earring hooks or hoops to the caps, and now you have one-of-a-kind essential oil earrings.
Keychains: Transform your essential oil bottles into functional keychains. Remove the dropper cap and replace it with a small eye screw cap. Add a keyring to the eye screw cap, and you’ll always have your favorite scent on hand.
When using essential oil jewelry, add a drop or two of your preferred essential oil onto an absorbent pad or cotton ball, and place it inside the bottle. The aroma will gradually diffuse throughout the day, providing you with the benefits of aromatherapy.
Not only does essential oil jewelry allow you to enjoy the therapeutic benefits of essential oils on the go, but it also gives your old bottles a beautiful new purpose. You can customize the jewelry to suit your personal style and create unique pieces that reflect your taste.
So, get creative and repurpose your old essential oil bottles into stunning jewelry that combines fashion and aromatherapy!
Travel-sized Toiletries
When it comes to traveling, carrying full-sized toiletries can be inconvenient and take up precious space in your luggage. However, you can repurpose your old essential oil bottles into travel-sized toiletries, making packing and organizing much easier. Here are some ideas for creating travel-sized essentials:
Shampoo and Conditioner: Clean your essential oil bottles thoroughly and fill them with your favorite shampoo and conditioner. You can even label them to avoid any confusion. These compact bottles are perfect for short trips or when you prefer using your preferred products.
Body Wash: Instead of purchasing travel-sized body wash, pour your preferred body wash into a clean essential oil bottle. It becomes a convenient and TSA-friendly option for keeping yourself fresh and clean while on the go.
Lotion or Moisturizer: Transfer your favorite lotion or moisturizer into a clean bottle. This way, you can have your preferred body or face moisturizer without the need to carry bulky containers.
Mouthwash or Toner: Clean out your essential oil bottles and use them to store a small amount of a refreshing mouthwash or toner. This ensures that you have your preferred oral or skincare product handy during your travels.
Using your old essential oil bottles as travel-sized toiletries not only saves space and reduces waste but also allows you to bring along familiar and trusted products. Plus, you get to enjoy the benefits of your preferred scents even when you’re away from home.
Remember to label your travel-sized toiletries to easily identify each product. You can also personalize the bottles by adding decorative labels or ribbons to make them visually appealing.
So, repurpose your old essential oil bottles and create practical and compact travel-sized toiletries that make your journeys more convenient and enjoyable!
Essential Oil Sachets
If you’re looking for a simple and effective way to add fragrance to your drawers, closets, or small spaces, repurposing your old essential oil bottles into sachets is a wonderful idea. Essential oil sachets not only provide a pleasant scent but also have the potential to offer aromatherapy benefits. Here’s how to create your own:
Step 1: Clean your emptied essential oil bottles thoroughly to remove any residual oils or odors. This ensures that the scent of the sachet will be purely from the essential oils you add.
Step 2: Choose a filler material for your sachet. Options include dried flowers, herbs, rice, or even small cotton balls. These materials will help hold the essential oils and provide a pleasing texture.
Step 3: Add a few drops of your chosen essential oils to the filler material. Lavender, rose, or chamomile oils are calming choices, while citrus oils like lemon or grapefruit add a refreshing scent.
Step 4: Once the filler material is scented with the essential oils, carefully fill the clean essential oil bottle with the mixture. Cap the bottle tightly to ensure that the scent remains trapped inside.
Step 5: To release the fragrance, simply shake or squeeze the sachet gently to allow the essential oils to permeate the filler material. Place the sachet in drawers, closets, or any small space that could benefit from a pleasant scent.
Essential oil sachets not only freshen up your surroundings but can also serve as mood enhancers or stress relievers, depending on the oils used. They make wonderful additions to gifts or favors and can even be placed under pillows for a soothing aroma at bedtime.
Remember to refresh the sachets periodically by adding a few more drops of essential oils to maintain their fragrance. This way, you can enjoy their benefits for an extended period.
Repurposing your old essential oil bottles into sachets is a great way to reduce waste and create delightful scents for various spaces in your home. So, get creative and bring a touch of aromatic charm to every corner!
Create a Relaxing Pillow Spray
Have trouble falling asleep or want to enhance your relaxation routine? Transform your old essential oil bottles into a soothing pillow spray. A gentle spritz of a relaxing blend can create a calming ambiance and promote a restful night’s sleep. Here’s how you can make your own:
Step 1: Begin by thoroughly cleaning your empty essential oil bottles. This ensures that there are no residual oils that might affect the new blend.
Step 2: Choose essential oils known for their calming properties, such as lavender, chamomile, or vetiver. These oils can help ease stress, anxiety, and promote relaxation. You can use a single oil or create a custom blend.
Step 3: Fill one of the cleaned bottles with distilled water, leaving some space at the top for the essential oils and other ingredients.
Step 4: Add a few drops of your selected essential oils to the bottle. The number of drops will depend on your preferred strength of the scent. Start with a few drops and adjust as needed.
Step 5: Optional: Add a small amount of alcohol or witch hazel to the mixture. This helps disperse the essential oils evenly in the water, allowing for a more integrated scent experience.
Step 6: Securely close the bottle and gently shake it to blend all the ingredients together.
Before bed, give your pillow spray bottle a gentle shake, and lightly mist your pillow and bedding. The relaxing aroma will create a tranquil atmosphere, helping you unwind and prepare for a better night’s sleep.
It’s important to note that some individuals may have sensitivities to essential oils or specific scents. Always test a small amount of the spray on a corner of your pillow or fabric before use to ensure there is no adverse reaction.
Creating a relaxing pillow spray from your old essential oil bottles is not only a sustainable way to repurpose them but also a perfect addition to your nighttime routine. Enjoy the serenity and tranquility brought by the comforting scent as you drift off to dreamland.
Repurpose as a Reed Diffuser
If you’re looking for a stylish and long-lasting way to enjoy the pleasant fragrance of essential oils in your home or office, consider repurposing your old essential oil bottles into reed diffusers. This simple DIY project allows you to create a beautiful and effective home fragrance solution. Here’s how:
Step 1: Clean your empty essential oil bottle thoroughly to remove any residue or remaining oils.
Step 2: Fill the clean bottle about three-quarters full with a carrier oil of your choice. Popular options for carrier oils include sweet almond oil, fractionated coconut oil, or safflower oil.
Step 3: Add a few drops of your preferred essential oils to the carrier oil. Choose scents that you enjoy and that complement each other. For example, you could combine lavender and bergamot for a calming effect or lemongrass and eucalyptus for an invigorating aroma.
Step 4: Insert reed diffuser sticks or bamboo skewers into the bottle. Make sure to flip the sticks occasionally to refresh the scent. The sticks will absorb the oil mixture and diffuse the fragrance into the air.
Step 5: Place the reed diffuser on a stable surface in a room of your choice. The fragrance will gradually fill the air, creating a welcoming and inviting ambiance in your home.
Reed diffusers are not only an effective way to disperse the scent of your favorite essential oils but also serve as beautiful decorative pieces. You can customize the look of your diffuser by adding decorative elements, such as ribbons or beads, to the bottle.
Remember to keep an eye on the oil level and refill as needed. Depending on the size of the bottle and the number of reed sticks used, the diffuser can last up to a few weeks before needing a refresh.
Transforming your old essential oil bottles into reed diffusers allows you to enjoy the benefits of aromatherapy and adds a touch of elegance to your living or working space. So repurpose those bottles and let the enchanting scents fill your surroundings!