
Choosing the Right Wine Bottle
When it comes to creating a wine bottle oil lamp, the first step is to choose the right wine bottle. While you can use any wine bottle for this project, certain bottles may work better than others. Here are a few factors to consider when selecting the perfect wine bottle:
- Size: Wine bottles come in various sizes, so choose one that suits your preference and the space where you plan to display the lamp. Keep in mind that larger bottles will hold more oil and burn for a longer time.
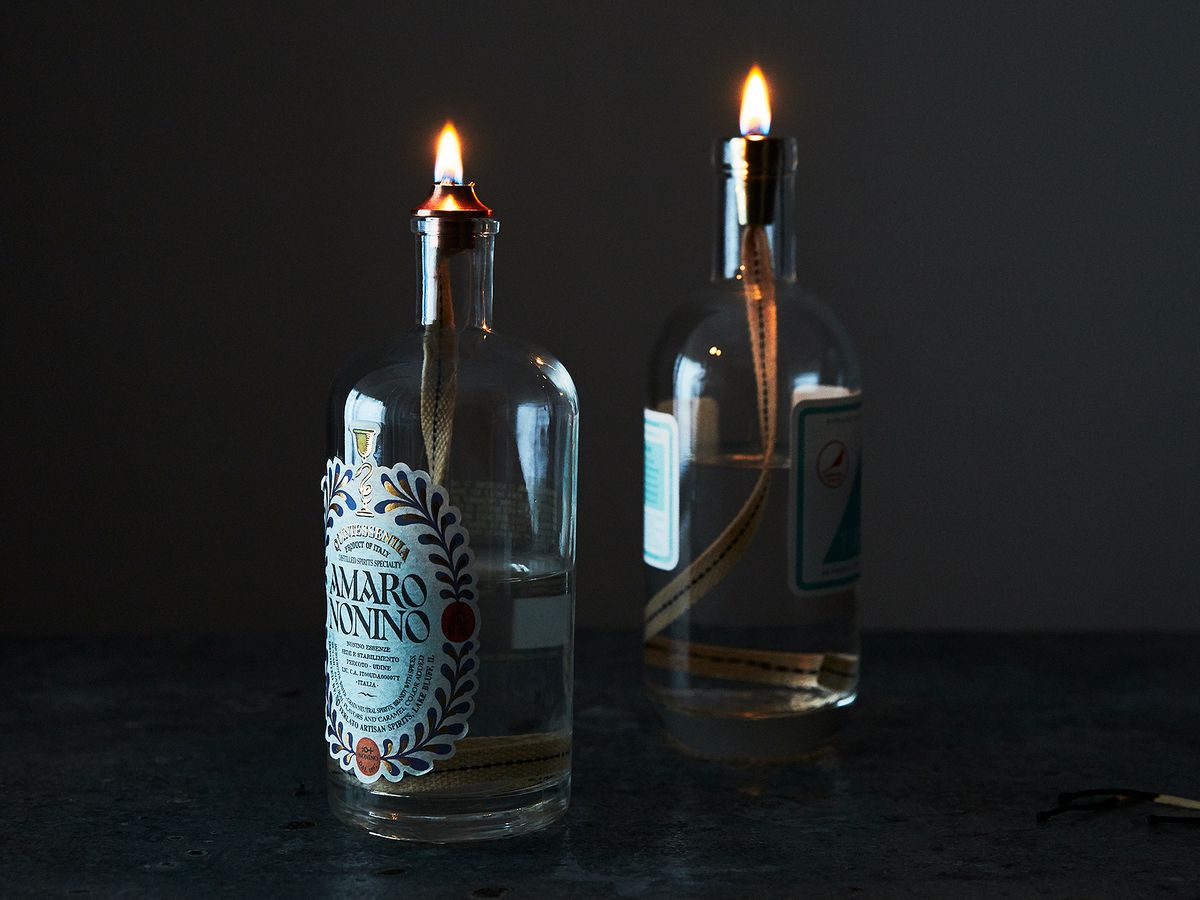
- Color: The color of the wine bottle can affect the ambiance of the lamp. Clear bottles create a classic and elegant look, while green or amber bottles can add a touch of warmth and vintage charm.
- Shape: Wine bottles come in different shapes, from slender and tall to squat and round. Consider the aesthetic appeal and stability of the bottle when choosing one for your oil lamp.
- Label and Residue: If you prefer a clean and polished appearance, choose a bottle with a label that can be easily removed or has minimal residue. Gently soak the bottle in warm, soapy water to loosen the label or use a label remover for stubborn adhesive.
Remember, the wine bottle you choose will determine the overall look and feel of your oil lamp. So take your time to find a bottle that aligns with your style and preferences. Once you have selected the perfect wine bottle, you can move on to the next steps of creating your one-of-a-kind oil lamp.
Preparing the Wine Bottle
After selecting the ideal wine bottle for your oil lamp, the next step is to properly prepare it. This involves cleaning the bottle and ensuring it is free from any residue or impurities. Follow these steps to prepare your wine bottle:
- Remove the label: If your wine bottle still has a label, soak it in warm, soapy water for a few minutes. This will help to loosen the adhesive. Gently peel off the label, making sure to remove any remaining adhesive. For stubborn residue, you can use a label remover or rubbing alcohol.
- Clean the bottle: Thoroughly clean the wine bottle with warm water and mild dish soap. Use a bottle brush or sponge to reach all areas, including the neck and bottom of the bottle. Rinse it well to ensure no soap residue remains.
- Dry the bottle: Once the bottle is clean, let it air dry completely. You can also use a clean towel to dry the bottle manually. Make sure there is no moisture left inside the bottle to prevent any issues when using the oil lamp.
By properly preparing your wine bottle, you are ensuring a clean and polished appearance for your oil lamp. The removal of labels and thorough cleaning will allow the beauty of the bottle to shine through while also providing a safe and efficient foundation for your oil lamp creation.
Creating the Wick Holder
Once you have prepared your wine bottle, the next step in making a wine bottle oil lamp is to create a wick holder. The wick holder serves as the mechanism that holds the wick in place and allows it to draw up the oil for combustion. Follow these steps to create your wick holder:
- Select a suitable material: Choose a heat-resistant material to create your wick holder. Metal washers, nuts, bolts, or even a small metal cap from a spray can are commonly used options. Ensure that the chosen material can withstand the heat produced by the flame.
Creating a wick holder is a crucial step in ensuring that your wine bottle oil lamp functions properly. The right wick holder will securely hold the wick in place and allow for steady oil absorption, resulting in a consistent and long-lasting flame.
Making the Wick
Creating a wick for your wine bottle oil lamp is a simple yet essential step in the process. The wick serves as the channel through which the oil is drawn up to fuel the flame. Follow these steps to make your own wick:
- Select the wick material: Cotton is a commonly used material for wicks due to its absorbent nature. You can use cotton string, candle wick, or even repurpose an old cotton fabric, like a t-shirt or a piece of cloth. Ensure that the material is clean and free from any synthetic fibers or coatings.
Making your own wick allows you to customize the size and material according to your preferences. The use of a clean and absorbent material, such as cotton, ensures efficient fuel absorption and helps to maintain a consistent flame in your wine bottle oil lamp.
Filling the Wine Bottle with Oil
Now that you have prepared the wick and wick holder, the next step is to fill the wine bottle with oil. The oil serves as the fuel source for your oil lamp, allowing it to produce a steady and radiant flame. Follow these steps to fill the wine bottle with oil:
- Choose the right oil: Select a high-quality lamp oil or liquid paraffin that is specifically designed for oil lamps. Avoid using vegetable oil or flammable liquids, as they may produce excessive smoke or an unpleasant odor.
- Prepare a funnel: To ensure a mess-free and efficient process, place a small funnel into the mouth of the wine bottle. This will help to guide the oil into the bottle without spillage.
- Pour the oil slowly: Begin pouring the oil into the funnel. Make sure to pour it slowly and steadily to avoid overflow. Pause occasionally to allow the oil to settle and ensure there is enough space for the wick to absorb the oil.
- Fill to the appropriate level: Fill the wine bottle with oil, leaving about 1/4 inch of space at the top. This empty space allows for the expansion of the oil when heated and helps prevent any overflow or leakage.
- Remove the funnel and clean any spills: Carefully remove the funnel from the bottle, taking care not to spill any oil. If there are any spills or drips, wipe them clean with a cloth or tissue.
Filling the wine bottle with oil is a crucial step in creating a functional oil lamp. By choosing the right oil and carefully pouring it into the bottle, you ensure a safe and efficient fuel source for your lamp, allowing it to burn brightly for hours of enjoyment.
Assembling the Oil Lamp
Now that you have prepared the wine bottle, wick holder, wick, and filled the bottle with oil, it’s time to assemble the components into a fully functional oil lamp. Follow these steps to assemble your oil lamp:
- Place the wick holder: Insert the wick holder with the attached wick into the mouth of the wine bottle. Make sure it is positioned securely and centered.
- Adjust the wick: Gently pull the wick up through the wick holder, leaving approximately half an inch of the wick exposed above the wick holder. This will allow for easy lighting and adjustment of the flame height.
- Secure the wick holder: If necessary, use a pair of pliers to tighten the wick holder and ensure it is firmly in place. This will prevent it from moving or coming loose during use.
- Trim the wick: If the wick is too long, use scissors to trim it to the desired length. Leaving a slightly longer wick may result in a larger flame, while a shorter wick will produce a smaller flame.
- Clean any oil spills: Remove any oil spills or drips on the outside of the wine bottle using a cloth or tissue. This will help maintain a clean and visually appealing oil lamp.
Once you have assembled the components and trimmed the wick, your oil lamp is ready to be lit and enjoyed. The careful positioning and adjustment of the wick holder and wick ensure a steady and controlled flame, providing both illumination and ambiance to your space.
Lighting and Enjoying the Lamp
With your oil lamp fully assembled, it’s time to bring the warm glow and ambiance to life by lighting the lamp. Follow these steps to safely light and enjoy your wine bottle oil lamp:
- Find a safe and stable location: Choose a secure and level surface to place your oil lamp. Ensure there are no flammable objects nearby and keep it away from any drafts or areas with high foot traffic.
- Ignite the wick: Using a long-reach lighter or a matchstick, carefully light the exposed end of the wick. Hold the flame near the wick until it catches fire. Take care to avoid contact with the flames.
- Adjust the flame height: Observe the initial flame and adjust the height by gently pulling or pushing the wick. A higher wick will produce a larger flame, while a lower wick will create a smaller, more controlled flame.
- Enjoy the warm glow: Once the flame is stable and adjusted to your liking, sit back and enjoy the soothing and gentle illumination provided by your wine bottle oil lamp. It creates a cozy and relaxing atmosphere for any occasion.
- Monitor the lamp: While enjoying the lamp, make sure to keep an eye on it for the duration of its use. Ensure the flame remains steady and doesn’t get too high or too close to the bottle. Avoid leaving the lamp unattended for long periods.
As you enjoy the flickering light and ambient glow of your oil lamp, take the time to relax and appreciate the cozy atmosphere it creates. Whether for a quiet evening at home or for creating a warm ambiance during social gatherings, your wine bottle oil lamp adds a touch of elegance and charm to any space.
Safety Precautions
While wine bottle oil lamps can create a beautiful and cozy atmosphere, it’s essential to prioritize safety when using them. Follow these safety precautions to ensure the safe operation of your oil lamp:
- Keep the lamp attended: Never leave the oil lamp unattended while it is lit. Accidents can happen quickly, so always stay near the lamp and monitor it closely.
- Place it on a stable surface: Ensure that the oil lamp is placed on a stable and non-flammable surface. This will prevent accidental tipping over and reduce the risk of fire hazards.
- Keep away from flammable objects: Make sure to position the oil lamp away from any flammable materials, such as curtains, paper, or furniture. Leave a safe distance to prevent accidental contact with flames.
- Avoid using near flammable liquids: Never use your oil lamp near or on surfaces that have flammable liquids, such as alcohol or cleaning agents. This can lead to a dangerous combustion if the flame happens to reach these substances.
- Use a flame-resistant container: Ensure that the wine bottle or any other container used for the lamp is made of flame-resistant materials. This reduces the risk of the container getting damaged or exploding due to heat.
- Keep away from children and pets: Oil lamps involve an open flame and hot surfaces, so it’s important to keep them out of reach of children and pets to prevent accidents or burns.
- Extinguish properly: When you are done enjoying your oil lamp, extinguish the flame by gently blowing it out or using a snuffer. Make sure the wick is entirely extinguished before leaving the lamp unattended.
- Store oil away from heat sources: Store your lamp oil in a cool and dry place, away from direct sunlight and heat sources. Keep it in a properly labeled, tightly sealed container to prevent accidental spills or leaks.
- Practice proper ventilation: Ensure that the room in which you use the oil lamp is properly ventilated to prevent the buildup of smoke or fumes that may be emitted by the burning oil.
By following these safety precautions, you can enjoy the warm glow and ambiance of your wine bottle oil lamp while ensuring the well-being of yourself, your loved ones, and your home.
Maintenance and Tips
To ensure the longevity and optimal performance of your wine bottle oil lamp, it is important to perform regular maintenance and follow these helpful tips:
- Clean the wick regularly: Over time, the wick may accumulate residue or become discolored. Clean the wick periodically by gently wiping it with a cloth or trimming the discolored portion. This improves fuel absorption and helps maintain a clean flame.
- Trim the wick as needed: If you notice the flame becoming too large or flickering excessively, trim the wick to a shorter length. This helps maintain a stable and controlled flame while prolonging the life of the wick.
- Refill the oil as necessary: Keep an eye on the oil level in the wine bottle. When it starts to run low, carefully refill it to ensure uninterrupted use of your oil lamp. Avoid overfilling to prevent spills or leakage.
- Avoid touching the wick while lit: The wick and surrounding components can become hot when the lamp is in use. Never touch the wick or any part of the lamp while it is lit or shortly after extinguishing the flame. Allow sufficient cool-down time.
- Store the lamp safely: When not in use, store the oil lamp in a safe location, away from reach of children or pets. Keep it protected from dust and dirt by covering it with a cloth or placing it in a storage box.
- Experiment with scented oils: Consider using scented lamp oils to add pleasant fragrances to your space while enjoying the warm glow of your oil lamp. Choose oils specifically designed for oil lamps and follow the manufacturer’s instructions for use.
- Position the lamp strategically: Place your oil lamp in areas where it can be appreciated and create the desired ambiance. Consider dining tables, outdoor patios, or cozy corners of your home. Experiment with different placements to find the perfect spot.
- Regularly inspect for damages: Check the wick holder, wick, and wine bottle for any signs of damage, such as cracks, loose components, or frayed wicks. Replace any damaged parts before using the oil lamp again.
- Enjoy the beauty and warmth: Lastly, take the time to enjoy the enchanting glow and cozy ambiance created by your wine bottle oil lamp. Whether for relaxation, romance, or gatherings, let the warm light create an inviting atmosphere in your space.
By following regular maintenance routines and implementing these helpful tips, you can ensure the longevity and optimal performance of your oil lamp while maximizing your enjoyment of its inviting and soothing glow.