
Choosing the Right Loom
When it comes to weaving a rag rug, selecting the right loom is crucial. The loom you choose will determine the size and complexity of your rug, as well as the overall weaving experience. There are a few factors to consider when deciding on the best loom for your project:
- Size: Consider the dimensions of the rug you want to create. If you’re planning to weave a large rug, you’ll need a loom that can accommodate the desired size. On the other hand, smaller looms are suitable for creating small rugs or practicing weaving techniques.
- Type of Loom: There are different types of looms available, each with its own advantages. The most common types include frame looms, rigid heddle looms, and floor looms. Frame looms are portable and easy to use, making them ideal for beginners. Rigid heddle looms are versatile and can handle a range of weaving projects. Floor looms are larger and more complex, allowing for intricate designs and larger rugs.
- Material: Looms can be made from various materials, such as wood, metal, or plastic. Wood looms offer durability and stability, while metal or plastic looms provide portability and flexibility. Choose a material that suits your weaving needs and preferences.
- Budget: Set a budget for your loom purchase. Looms come in a wide price range, so consider how much you’re willing to invest in your weaving hobby. Keep in mind that quality looms tend to be more expensive but can offer superior weaving results and longevity.
Once you’ve considered these factors, it’s time to start researching and comparing different loom options. Read reviews, seek recommendations from experienced weavers, and even attend local weaving guilds or workshops to get hands-on experience with different loom types. This will help you make an informed decision and choose the loom that best fits your weaving goals.
Gathering Materials
Gathering the right materials is essential for weaving a rag rug on a loom. Here are the main materials you’ll need:
- Fabric Strips: Start by collecting fabric strips for your rug. These can be old t-shirts, bed sheets, or any other fabric you have on hand. Cut the fabric into strips approximately 1-2 inches wide and several inches long.
- Loom: As mentioned in the previous section, choose a loom that suits your weaving needs. Make sure it’s set up and ready to use. If you’re using a frame loom or rigid heddle loom, ensure it’s secured firmly before starting.
- Shuttle or Stick: A shuttle or stick is used to pass the weft (horizontal) threads through the warp (vertical) threads. You can purchase a weaving shuttle or make one by using a long, narrow stick or dowel.
- Yarn or Warp Thread: Yarn or warp thread is used for setting up the loom and creating the warp threads. Choose a strong, durable material that can withstand the tension of the weaving process.
- Scissors: Have a pair of sharp scissors on hand to cut fabric strips and trim any excess threads.
- Weaving Comb: A weaving comb is used to press down the weft threads after each row of weaving. It helps to create a tight and even weave. You can use a specially designed weaving comb or a wide-toothed comb from your everyday tools.
- Pattern or Design Inspiration: If you plan to incorporate patterns or designs into your rug, gather any reference material or inspiration you might need. This could be a pattern book, online resources, or your own creative ideas.
Ensure you have all the necessary materials at your workspace before you begin weaving. This will help you stay organized and make the weaving process smoother. Take some time to gather everything you need and set up your work area in a comfortable and well-lit space.
Preparing Fabric Strips
Before you can begin weaving your rag rug, it’s important to properly prepare your fabric strips. Here’s how to get them ready:
- Cut the Fabric: Gather the fabric you have chosen for your rug and cut it into strips. Aim for strips that are approximately 1-2 inches wide and several inches long. You can use scissors or a rotary cutter and cutting mat for precision.
- Remove Hem and Seams: If you’re using old t-shirts or clothing, remove any hems, seams, or buttons from the fabric. These can create bumps and uneven sections in your rug. Cut along the fabric to avoid these areas.
- Joining Fabric Strips: Depending on the length of your fabric strips, you may need to join them together to create longer lengths. To do this, take one strip and fold about an inch of one end. Place another strip on top, aligning the edges. Sew a diagonal stitch across the folded section to securely join the two pieces. Trim any excess fabric.
- Sorting and Organizing: If you plan to use multiple colors or patterns in your rug, sort and organize your fabric strips accordingly. This will make it easier to find the strips you need as you weave. You can use separate containers or dividers to keep everything organized.
- Rolling or Folding: Consider how you want to store and access your fabric strips during the weaving process. You can roll them into neat balls, fold them and stack them, or use other methods that work best for you. Experiment and find a storage system that keeps your fabric strips easily accessible.
Once you have prepared your fabric strips, take a moment to inspect them for any loose threads or irregularities. Trim any loose threads to ensure a clean and smooth weaving process. With your fabric strips ready, you can move on to the next step of setting up the loom and starting your weaving journey.
Warp Preparation
Before you can start weaving your rag rug, you’ll need to prepare the warp threads on your loom. Follow these steps to get the warp ready:
- Measure the Warp: Determine the desired length of your rug and add a few extra inches for loom waste and fringe. Measure and cut the warp threads according to this length. Yarn or strong warp thread is commonly used for this step.
- Secure the Warp: Tie one end of the warp threads to the front of your loom, securing them tightly. Then, pass the other end of the warp threads through the loom’s tension bars, keeping them taut. This creates the structure for your rug.
- Evenly Space the Warp Threads: Use a weaving comb or your fingers to evenly space the warp threads across the loom. This will ensure that your rug has a consistent width and even tension throughout the weaving process.
- Tie Off the Warp: Once the warp threads are evenly spaced, tie them off securely at the back of the loom. This will prevent them from shifting or coming loose during weaving.
- Create a Shed: A shed is the space between the warp threads where you insert the weft threads. Depending on your loom type, you can create a shed by either using a shuttle or stick, or by using the heddle to raise and lower alternate warp threads to form a gap. Follow your loom’s instructions to create the appropriate shed.
- Check for Even Tension: Make sure that the tension of your warp threads is even across the loom. Adjust any loose or tight areas to ensure a consistent tension, as this will affect the overall quality of your rug.
Take your time with the warp preparation process to ensure that everything is properly set up. A well-prepared warp will make the weaving process smoother and result in a more professional-looking rug. Once your warp is ready, you can move on to setting up the loom and start weaving your rag rug.
Setting Up the Loom
Now that you have prepared the warp threads, it’s time to set up your loom for weaving. Follow these steps to get your loom ready:
- Position the Loom: Find a sturdy and comfortable place for your loom. Make sure it’s placed at a height that allows you to weave comfortably without straining your back or shoulders. You can use a table, stand, or even prop it against a wall, depending on the type of loom you have.
- Secure the Loom: Once you have found the perfect spot, secure the loom to prevent it from moving or shifting during weaving. Use clamps, weights, or straps to keep it in place.
- Thread the Warp: To thread the warp threads through the shed, start at one end of the loom and pass the warp thread through the shed in an over-and-under motion. Use a shuttle or stick to help guide the warp across the loom. Repeat this process until all the warp threads are threaded through the shed.
- Even Out the Warp: As you thread the warp, check for any unevenness or tension issues. Adjust the warp threads as needed to ensure they are evenly spread and have consistent tension across the loom.
- Tie Off the Weft: Once all the warp threads are threaded, tie off the weft thread to one side of the loom. This will serve as the starting point for your weaving.
- Adjust the Shed: Take a moment to adjust the shed of your loom. Make sure it’s open and wide enough to easily pass the shuttle or stick through during weaving. You may need to adjust the tension or raise/lower the heddle if you have a different loom type.
Setting up the loom may require some practice and adjustments, especially if you’re new to weaving. Take your time to familiarize yourself with the process and make any necessary tweaks to ensure a smooth and enjoyable weaving experience. Once the loom is set up, you’re ready to start weaving your rag rug!
Basic Weaving Techniques
With your loom properly set up, it’s time to delve into the basic weaving techniques to create your rag rug. Here are the fundamental steps to get you started:
- Pass the Shuttle: Take the shuttle or stick with the weft thread and pass it through the shed of the loom, starting from one edge. This creates the first row of weaving. Leave a small tail of weft thread on the edge to secure it later.
- Beat the Weft: Use a weaving comb or your fingers to press down on the weft thread after each row. This action is called “beating the weft,” and it helps to tightly pack the rows together, creating a sturdy and even weave.
- Create Even Tension: As you weave, ensure that the tension on the weft thread is consistent. Avoid pulling too tightly or leaving it too loose, as it can distort the shape and alignment of the fabric strips. This may require adjusting the tension of the warp threads as you progress.
- Add Fabric Strips: As you reach the end of a fabric strip, overlap it with a new strip to create a continuous weave. Secure the ends together by overlapping and tucking them under the surrounding fabric strips to seamlessly continue weaving.
- Create a Selvedge: To create a neat edge on your rug, weave a few rows using a technique called selvedge. This involves weaving a few warp threads without adding fabric strips, creating a clean and straight edge.
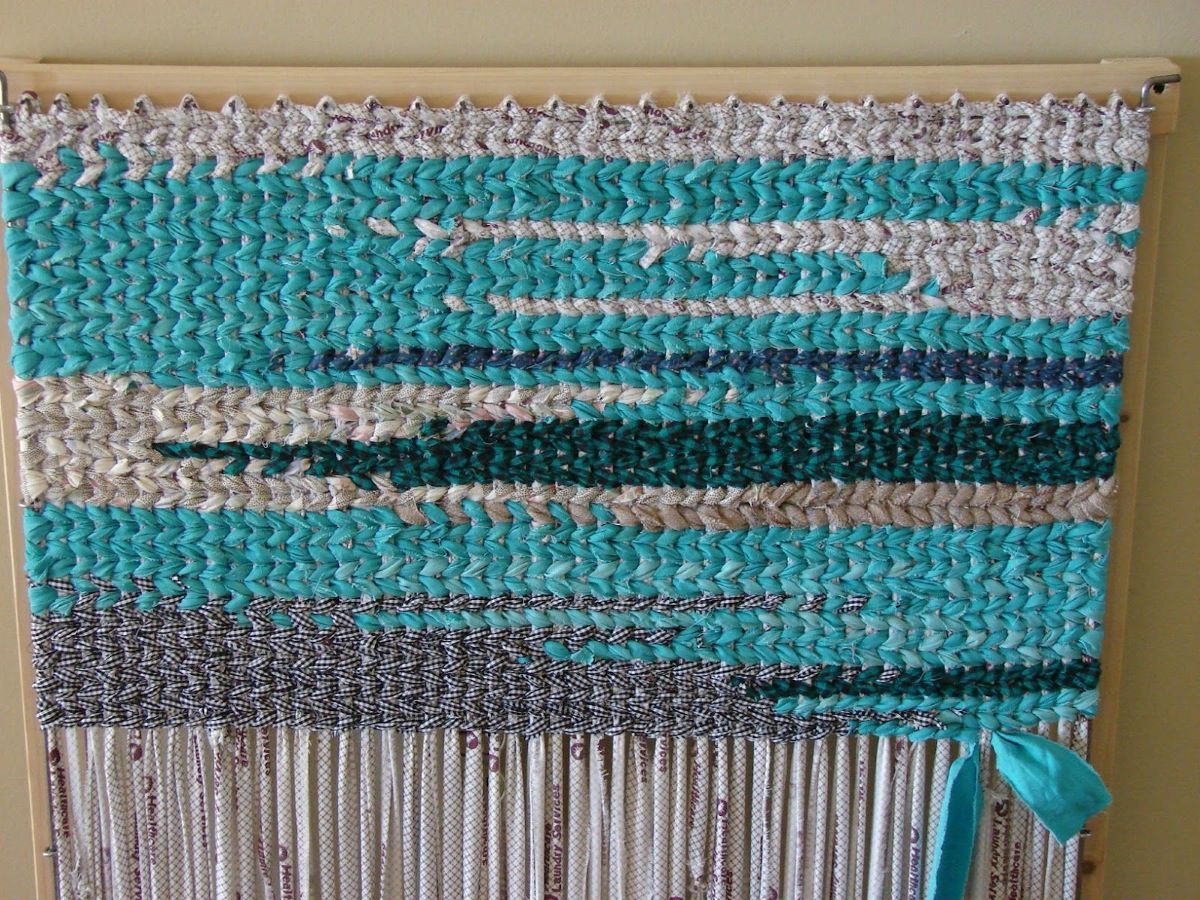
- Weave in Patterns: To add interest and variety to your rag rug, experiment with different weaving patterns and techniques. You can alternate colors, create stripes, or even incorporate simple designs through a combination of fabric strip placement and weaving techniques.
- Continue Weaving: Keep weaving row by row, following the pattern or design you have in mind. Stop periodically to check the tension, beat the weft, and adjust as needed to maintain an even and well-aligned weave.
Practice these basic weaving techniques to get comfortable with the rhythm and process. As you gain more experience, you can explore advanced weaving techniques to further enhance the visual appeal of your rag rug.
Adding New Fabric Strips
As you weave your rag rug, you’ll eventually run out of fabric on your current strip. Adding new fabric strips is a simple process that allows you to seamlessly continue weaving. Here’s how to add new fabric strips:
- Prepare the New Strip: Cut a new fabric strip and ensure it’s ready to be added to your rug. If necessary, join the new strip to the previous strip using a diagonal stitch to securely connect them.
- Overlap the Ends: Take the end of the new fabric strip and overlap it with the end of the previous strip. Make sure to align the edges of the fabric strips evenly.
- Tuck and Secure: To seamlessly integrate the new strip, tuck both ends under the surrounding fabric strips. This will hide the ends and prevent them from unraveling. Continue weaving over the tucked ends to secure them in place.
- Adjust Tension: After adding the new fabric strip, check the tension of the weft thread. Ensure that it’s consistent with the rest of the weave to ensure an even surface. Adjust the tension as needed by gently pulling or beating the weft thread.
- Weave Continuously: Once the new fabric strip is securely in place, continue weaving row by row using the same techniques you’ve been using. Be mindful of the pattern or design you’re following and maintain an even tension as you progress.
- Repeat as Needed: As you continue weaving, you may need to add new fabric strips multiple times, depending on the size of your rug and the length of your fabric strips. Repeat the process of preparing, overlapping, tucking, and securing until you achieve your desired rug length.
Adding new fabric strips is a regular part of the weaving process, and with practice, it will become second nature. Take your time to ensure the ends are securely tucked and the tension remains consistent to maintain a professional-looking rug. With each new strip, your rag rug will take shape, and you’ll see the progress of your creative efforts.
Creating Patterns and Designs
One of the joys of weaving a rag rug is the opportunity to incorporate patterns and designs into your creation. Whether you want to add visual interest or showcase your creativity, here are some techniques to consider:
- Alternating Colors: Use different colored fabric strips to create stripes or checkered patterns in your rug. Alternate between two or more colors to achieve a visually striking effect.
- Gradient Transition: If you have fabric strips in different shades of the same color, you can create a gradient transition in your rug. Gradually shift from light to dark or vice versa to add depth and dimension.
- Random Placement: For a more eclectic or artistic look, randomly place different fabric strips throughout your rug. This creates a vibrant and dynamic design that feels unique and spontaneous.
- Geometric Patterns: Incorporate geometric shapes like triangles, chevrons, or diamonds into your rug. You can achieve this by strategically placing fabric strips or using different weaving techniques to create the desired shapes.
- Textured Elements: Experiment with adding texture by using fabric strips with different textures or weaving techniques. Combine smooth and textured strips to create a visually interesting and tactile rug.
- Introduce Appliqués: Take your design a step further by incorporating appliqués. You can cut fabric shapes and sew or glue them onto your rug during the weaving process to create intricate patterns or motifs.
- Experiment with Weft Techniques: Try different weft techniques like loops, twists, or even braids to add texture and dimension to your rug. These techniques can create eye-catching patterns and designs that stand out.
Remember, the possibilities are endless when it comes to creating patterns and designs in your rag rug. Let your imagination guide you and don’t be afraid to experiment. Take inspiration from existing patterns or designs, or create your own unique combinations.
As you weave, step back periodically to assess your progress and make adjustments as needed. Creating patterns and designs adds a personal touch to your rug and elevates it from a simple woven item to a work of art.
Finishing the Rug
Once you’ve completed weaving your rag rug, it’s time to give it the finishing touches. Here are the important steps for finishing your rug:
- Check for Loose Ends: Take a close look at your rug and check for any loose fabric strips or loose threads. Trim any excess or stray ends to ensure a clean and polished look.
- Tidy Up the Edges: If you want a neat and finished edge on your rug, you can consider adding a border. This can be achieved by weaving a few rows using the selvedge technique or by adding additional fabric strips in a contrasting color to frame the edges.
- Securing the Warp: Depending on your loom type and personal preference, you can finish the ends of the warp threads in different ways. One common method is to knot the ends and create a fringe. Another option is to hemstitch the ends, which involves weaving the warp threads together in small groups to create a finished and secure edge.
- Steam or Press: If your rug needs some smoothing out or if you want to enhance its overall appearance, you can steam or press it. Use a steam iron or garment steamer to gently steam the rug, or place a damp cloth over it and press with a hot iron. This will help to even out the weave and remove any wrinkles or creases.
- Document and Celebrate: Once your rug is finished, take a moment to document your accomplishment. Capture photos of your completed masterpiece to commemorate your hard work and creativity. Share your journey with others and celebrate the beautiful rug you’ve woven.
- Display or Use: Decide how you want to showcase your rug. You can use it as a functional floor covering, hang it on the wall as a decorative tapestry, or even gift it to someone special. Display your rug with pride, knowing that it is a unique and handmade work of art.
Finishing your rug is the final step in the weaving process, and it adds the perfect final touch to your creation. Take your time to ensure that all loose ends are trimmed, the edges are tidy, and the overall appearance is flawless. A well-finished rug not only enhances its aesthetics but also ensures its durability and longevity for years to come.
Cleaning and Care for Your Rag Rug
Proper cleaning and care are essential to maintain the beauty and longevity of your rag rug. Follow these guidelines to keep your rug looking its best:
- Vacuum Regularly: Depending on where your rug is placed, vacuum it regularly to remove dirt and debris. Use a vacuum cleaner with a brush attachment or a handheld vacuum to gently clean the surface of the rug. Avoid using excessive force or suction to prevent damaging the fabric strips.
- Shake Out: If your rug is small enough, you can take it outside and shake it vigorously to remove any embedded dirt or dust particles. This can help maintain the freshness and cleanliness of the rug.
- Spot Clean: Treat any spills or stains as soon as possible to prevent them from setting. Blot the affected area with a clean cloth or paper towel to absorb the liquid. Avoid rubbing, as it may spread the stain. Use a mild detergent solution or a carpet cleaner specifically formulated for delicate fabrics to clean the area gently. Always test the cleaning solution on a small, inconspicuous area of the rug first to ensure it doesn’t cause any discoloration or damage.
- Avoid Excessive Moisture: While spot cleaning is necessary, avoid saturating the rug with excessive moisture. Over-wetting can weaken the fabric and lead to mold or mildew growth. Use a minimal amount of cleaning solution and blot the area dry with a clean towel afterward.
- Air Dry: If your rug is damp after cleaning or has gotten wet, hang it to air dry in a well-ventilated area. Avoid placing it in direct sunlight, as it can fade the colors. Ensure both sides of the rug are completely dry before using or storing it.
- Rotate the Rug: To ensure even wear, regularly rotate your rug. This helps distribute the foot traffic and minimizes the chances of certain areas becoming more worn out than others.
- Store Properly: If you need to store your rug for an extended period, clean it thoroughly, ensure it is completely dry, and roll it up carefully. Store it in a cool, dry, and well-ventilated area to prevent moisture and pests from affecting the rug.
- Professional Cleaning: If your rug requires a deep clean or if you’re unsure how to effectively remove a stain, consider seeking professional cleaning services. Professional cleaners have the expertise and equipment to handle delicate fabrics and ensure the best cleaning results for your rag rug.
By following these cleaning and care tips, you can preserve the beauty and lifespan of your rag rug. Regular maintenance will help maintain its vibrant colors, texture, and overall appearance, allowing you to enjoy your woven masterpiece for years to come.