
Assess the Plant’s Condition
When trying to revive a dying plant, it is crucial to start by assessing its overall condition. This step will help you understand the underlying issues and determine the best course of action. Here are some factors to consider:
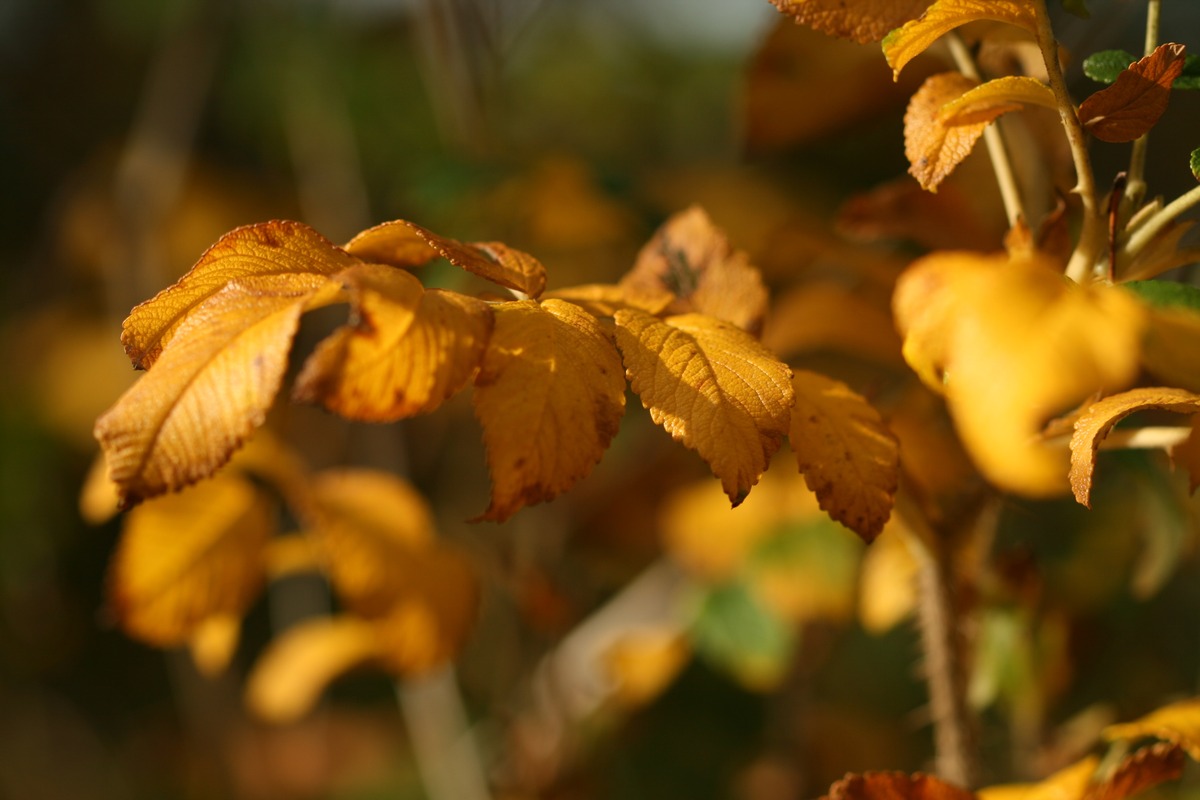
- Appearance: Examine the plant closely and note any visible signs of distress. Look out for wilting leaves, discolored foliage, or drooping stems.
- Root Health: Gently remove the plant from its pot and check the root system. Healthy roots are firm, white, and spread evenly across the soil. If you notice a foul odor or mushy roots, it could indicate root rot.
- Pest Infestation: Check for any signs of pests such as aphids, mites, or mealybugs. Look for eggs, webs, or tiny insects on the leaves and stems.
- Disease: Some diseases can cause plant decline. Look for spots, lesions, or unusual growth patterns on the foliage.
- Environmental Factors: Consider if the plant has been exposed to extreme temperatures, drafts, or excessive humidity. These factors can impact the plant’s health.
By thoroughly assessing the plant’s condition, you will have a clearer understanding of what might be causing its decline. This information will guide you in taking the necessary steps to revive it.
Check the Soil Moisture
One of the key factors to consider when reviving a dying plant is the moisture level of the soil. Plants need a proper balance of water to thrive. Here’s how you can check and adjust the soil moisture:
- Visual Inspection: Examine the soil surface to see if it appears dry or waterlogged. Dry soil may be cracked and pulling away from the edges of the pot, while waterlogged soil will appear excessively wet, with a foul odor.
- Finger Test: Insert your finger about an inch deep into the soil. If it feels dry at that depth, it’s likely time to water the plant. If it feels wet or moist, it’s a sign that the soil is adequately hydrated.
- Weight Test: Lift the pot to assess its weight. A lightweight pot indicates that the soil is dry and needs watering, while a heavy pot suggests the soil is saturated and needs time to dry out.
- Moisture Meter: Alternatively, you can use a moisture meter to accurately measure the moisture level. These devices have a probe that you can insert into the soil to get an instant reading.
Once you have determined the moisture level, take appropriate action to adjust it:
- Watering: If the soil is dry, water the plant thoroughly until the water flows out of the drainage holes. Allow the excess water to drain away, and then empty the saucer to avoid waterlogged conditions. Remember to follow the plant’s specific watering requirements.
- Drainage Improvement: If the soil is consistently waterlogged, you may need to improve the drainage by adding materials like perlite or vermiculite to the soil mix. This helps to create air pockets and prevent excess water accumulation.
- Misting: In some cases, increasing the humidity around the plant can improve its moisture levels. You can mist the leaves with water or place a tray of water near the plant to enhance the humidity.
By regularly checking and adjusting the soil moisture, you can ensure that your dying plant receives the right amount of water to recover and thrive.
Adjust Watering Routine
Proper watering is essential to revive a dying plant. Sometimes, the issue lies in an improper watering routine. Here are some crucial considerations to help you adjust your watering routine:
- Frequency: Evaluate how often you are watering the plant. Overwatering can suffocate the roots and lead to root rot, while underwatering can cause wilting and dehydration. Aim for a balance by allowing the top inch of the soil to dry out before watering again.
- Watering Method: Consider the method you use to water your plant. Pouring water directly onto the soil avoids wetting the leaves, reducing the risk of fungal diseases. Use a watering can or a gentle spray nozzle to ensure a controlled and even distribution of water.
- Deep Watering: When you water the plant, make sure the water penetrates deeply into the root zone. This encourages the roots to grow deeper and strengthens the plant’s overall health. Water until you see it coming out of the drainage holes.
- Drainage: Check the drainage holes of the pot to ensure that excess water can escape. If the holes are blocked, the water may accumulate and lead to overwatering. Clear any obstructions to encourage proper drainage.
- Seasonal Adjustments: Understand that different seasons may require adjustments in your watering routine. Plants may need less water during cooler months and more during hot summer months. Monitor your plant’s water needs accordingly.
Observe your plant closely when adjusting the watering routine. Look for indications of over or underwatering, such as yellowing leaves, wilting, or a moldy smell. Adjust the frequency and amount of water as needed to provide optimal moisture for the plant.
Remember, each plant has specific water requirements, so it’s essential to research and understand the needs of your particular plant species. Adapting your watering routine based on these considerations will contribute significantly to the revival of your dying plant.
Provide Adequate Sunlight
Sunlight is a vital component for the survival and growth of plants. Insufficient or excessive sunlight can contribute to the decline of a plant’s health. Here are some key points to consider when providing adequate sunlight:
- Know Your Plant’s Sunlight Requirements: Different plants have varying sunlight needs. Some plants thrive in direct sunlight, while others prefer indirect or partial shade. Research the specific sunlight requirements for your plant species and provide the appropriate conditions.
- Observe Natural Lighting Conditions: Take note of the lighting conditions in the area where the plant is located. Is it in a sunny spot by a window, or is it in a dimly lit corner of the room? Assess if the current location is providing the necessary amount of light.
- Optimize Positioning: Adjust the position of the plant to ensure it is receiving the optimum amount of light. Rotate the plant occasionally to ensure all sides receive adequate sunlight and promote even growth.
- Consider Artificial Lighting: If natural sunlight is limited or inadequate, consider supplementing with artificial lighting. Place grow lights or fluorescent bulbs near the plant to provide the necessary light spectrum for photosynthesis.
- Avoid Sunburn: While plants need sunlight, too much exposure can lead to sunburn. Some plants are more sensitive and can develop brown, withered patches on their leaves when exposed to intense sunlight. Provide shade or use sheer curtains to filter direct sunlight if necessary.
Regularly monitor your plant’s response to the light it receives. Signs of inadequate sunlight include leggy growth, pale foliage, and a lack of flowering or fruit production. If you notice these signs, adjust the lighting conditions accordingly.
Remember, striking a balance between providing adequate sunlight and avoiding excessive exposure is key to the health and revival of your dying plant. By understanding your plant’s sunlight requirements and making necessary adjustments, you can help stimulate growth and improve its overall condition.
Remove Dead or Diseased Parts
When attempting to revive a dying plant, it is essential to eliminate any dead or diseased parts. These parts can hinder the plant’s recovery and potentially spread further damage. Here’s what you need to do:
- Inspect the Plant: Carefully examine the plant for any visible signs of dead or diseased parts. Look for wilting, discoloration, mold, or fungal growth on the leaves, stems, or branches.
- Prune Dead or Diseased Leaves: Use clean pruning shears or scissors to remove any dead or diseased leaves. Make clean cuts just above the stem or node, ensuring that no stubs remain.
- Trim Dead or Diseased Branches: If you notice dead or diseased branches, trim them back to healthy tissue. Cut at an angle just above a healthy bud or side shoot. This promotes new growth and prevents further disease spread.
- Remove Infected Soil: If root rot or any other disease is present, carefully remove the plant from its pot and gently shake off the soil. Trim away any black, mushy, or slimy roots, as they are signs of decay.
- Sanitize Pruning Tools: After each cut, it is crucial to sanitize your pruning tools to prevent the spread of infection. Wipe the blades with rubbing alcohol or a solution of one part bleach to nine parts water.
- Dispose of Debris: Properly dispose of all removed plant parts and infected soil. This will minimize the risk of recontamination and ensure a clean environment for the plant to recover.
Removing dead or diseased parts helps redirect the plant’s resources to healthy areas and stimulates new growth. It also stops the spread of diseases and improves the plant’s overall health.
Remember to treat any open wounds or cut areas on the plant appropriately with a fungicide or an organic antiseptic to prevent infection. With proper pruning and removal of dead or diseased parts, you give your dying plant a better chance of revival and rejuvenation.
Add Nutrients to the Soil
Providing adequate nutrients to the soil is crucial for the revival of a dying plant. Nutrient deficiencies can weaken the plant’s immune system and hinder its ability to recover. Here are some key points to consider when adding nutrients to the soil:
- Identify Nutrient Deficiencies: Look for signs of nutrient deficiencies in your plant, such as yellowing leaves, stunted growth, or poor flowering. Common deficiencies include nitrogen, phosphorus, and potassium.
- Choose the Right Fertilizer: Select a fertilizer that is appropriate for your plant’s specific needs. Consider a balanced fertilizer or one formulated to address the specific nutrient deficiency. Follow the instructions on the fertilizer package for proper application.
- Apply Organic Matter: Organic matter, such as compost or well-rotted manure, can enrich the soil with essential nutrients and improve its structure. Apply a layer of organic matter to the soil surface and gently work it into the top layer of soil.
- Use Slow-Release Fertilizers: Slow-release fertilizers provide a steady supply of nutrients over an extended period. This can prevent nutrient overload and excessive growth while promoting balanced nourishment for the plant.
- Consider Foliar Feeding: Foliar feeding involves spraying a diluted nutrient solution directly onto the plant’s leaves. This method allows the plant to absorb essential nutrients through its foliage, bypassing any root uptake issues.
- Monitor Nutrient Levels: Regularly assess the plant’s response to the applied nutrients. Adjust the fertilization schedule as needed to prevent over or underfeeding. Monitoring nutrient levels helps ensure the plant receives optimal nourishment for its recovery.
Remember to water the plant thoroughly after applying nutrients to help facilitate nutrient absorption. It’s also essential to follow the recommended application rates and avoid overfertilization, as this can lead to burning or damaging the plant’s roots.
By providing the right balance of nutrients, you can help nourish your dying plant and support its revival and growth. Regularly assessing and addressing nutrient deficiencies will contribute to the overall health and vibrancy of your plant.
Consider Repotting the Plant
Repotting a dying plant can provide numerous benefits and give it a fresh start. When considering repotting, keep these factors in mind:
- Assess Root Bound Plants: Check if the plant appears root-bound, meaning its roots are tightly packed and circling the bottom of the pot. This condition can restrict growth and nutrient absorption.
- Select the Right Pot: Choose a pot that is slightly larger than the current one. Ensure it has proper drainage holes to prevent waterlogging. Using a well-draining potting mix specific to your plant’s needs will contribute to its overall health.
- Prepare the Plant: Gently remove the plant from the current pot, being careful not to damage the roots. Loosen the soil and trim any unhealthy or tangled roots. This encourages new root growth and prevents potential issues from carrying over.
- Provide Fresh Soil: Fill the new pot with fresh potting soil. This provides the plant with a nutritious medium for growth and ensures that it is free from any potential pathogens or diseases present in the old soil.
- Repot Carefully: Place the plant in the new pot, ensuring it is positioned at the same level as before. Fill the gaps with fresh soil, gently pressing it around the roots to provide stability. Avoid compacting the soil too tightly.
- Water and Adjust Care: Once repotted, water the plant thoroughly to help settle the soil and provide hydration. Adjust your care routine, considering factors such as watering frequency, sunlight exposure, and fertilization, to accommodate the transplant shock.
Repotting can also present an opportunity to address any underlying issues, such as root rot or pest infestations. By carefully inspecting and treating the roots, you can help revive the plant’s health.
Note that not all plants require immediate repotting. Some may benefit from a simple soil refresh or root pruning within the existing pot. Research the specific needs of your plant before deciding to repot.
Repotting can be a stressful process for plants. It’s important to observe your plant’s response and provide adequate care and attention during the recovery period. With the right conditions and care, repotting can breathe new life into your dying plant.
Maintain Consistent Care
Consistency in caring for a dying plant is crucial for its revival and long-term health. Here are some essential tips to maintain consistent care:
- Watering: Develop a regular watering routine based on the plant’s specific needs. Avoid over or underwatering, as it can stress the plant. Monitor soil moisture levels and adjust watering frequency accordingly.
- Lighting: Ensure the plant receives the proper amount of sunlight or artificial light. Place it in an area with suitable lighting conditions and adjust as needed based on the plant’s requirements.
- Temperature and Humidity: Keep the plant in an environment with consistent temperature and humidity levels. Extremes in either can negatively impact the plant’s health. Avoid placing it near drafts or heating/cooling vents.
- Fertilization: Feed the plant with appropriate fertilizers at regular intervals according to its specific needs. This helps replenish essential nutrients and promotes healthy growth.
- Pruning and Trimming: Regularly remove dead or yellowing leaves and trim overgrown or damaged branches. Pruning encourages new growth and helps maintain the plant’s shape and health.
- Pest Control: Monitor the plant for any signs of pests, such as nymphs, webs, or chewed leaves. Implement appropriate measures to control and prevent infestations.
- Support and Staking: Provide support or stakes to help weak or drooping stems and promote proper growth and stability.
- Regular Inspections: Continuously assess the plant’s overall health and appearance. Look out for any signs of stress, disease, or nutrient deficiencies. Early detection allows for prompt action.
Consistency in care establishes a stable and nurturing environment for the plant to recover and thrive. Regularly observing and addressing the plant’s needs helps prevent future issues and ensures its continued well-being.
Remember that each plant may have unique care requirements, so it’s crucial to research and understand the needs of your specific plant species. Tailor your care routine accordingly to provide the best possible conditions for its revival and future growth.
Monitor the Plant’s Progress
Monitoring the progress of a dying plant as you implement various revival strategies is important to assess its response and make necessary adjustments. Here are some key points to consider when monitoring the plant’s progress:
- Observe New Growth: Look for signs of new growth, such as fresh leaves, buds, or shoots. These indicate that the plant is responding positively to the care you are providing.
- Check for Disease or Pest Recurrence: Regularly inspect the plant for any signs of recurring diseases or pest infestations. Catching these issues early allows for immediate intervention and prevention of further damage.
- Assess Overall Health: Evaluate the overall health of the plant. Note any improvements in color, texture, or overall vitality. A healthier plant will exhibit robust growth, stronger stems, and vibrant foliage.
- Monitor Watering and Fertilization: Keep track of your watering and fertilization routine to ensure consistency. Adjust as needed based on the plant’s requirements and response to avoid over or underwatering, as well as nutrient deficiencies or excesses.
- Track Environmental Conditions: Take note of any changes in the plant’s environment, such as temperature fluctuations, humidity levels, or lighting conditions. Adjust the plant’s placement or provide supplemental support if needed.
- Document Progress: Take photos or maintain a journal to document the plant’s progress over time. Record any notable changes, challenges encountered, and successful strategies implemented. This record can serve as a valuable reference for future plant care.
Regular monitoring allows you to fine-tune your approach and address any issues promptly. It provides valuable insights into the plant’s response and guides you in providing the best care possible for its revival.
Patience is crucial during this process. Reviving a dying plant takes time, and progress may be gradual. However, consistent monitoring and care will greatly increase the chances of successful recovery.
If, despite your best efforts, the plant does not show significant signs of improvement, it may be necessary to consider seeking professional help from a local plant nursery or horticulturist who can provide specialized guidance and expertise.
Seek Professional Help if Necessary
If your efforts to revive a dying plant have not yielded significant results or if you are uncertain about the best course of action, it may be wise to seek professional help. A horticulturist, plant specialist, or local plant nursery can provide valuable expertise and guidance in diagnosing and addressing the plant’s issues. Here are some reasons why seeking professional help can be beneficial:
- Specialized Knowledge: Professionals have a deep understanding of plants, including common issues, diseases, and solutions. They can accurately diagnose the problem and provide tailored advice.
- Experience and Expertise: Horticulturists and plant specialists have years of experience working with different plant species. They possess knowledge of effective techniques and strategies to revive and care for plants.
- Access to Resources: Professionals often have access to a wide range of resources, including specialized tools, fertilizers, and treatments that may be necessary to address specific plant ailments or conditions.
- Plant-Specific Insights: While general tips can be helpful, certain plants have unique care requirements. Professionals can provide detailed insights and recommendations specific to your particular plant species.
- Troubleshooting and Problem-Solving: If you have tried various methods without success, a professional can help identify any potential underlying issues that may not be readily apparent. They can offer alternative solutions and troubleshoot specific challenges you may be facing.
- Preserving the Plant: Seeking professional help can increase the chances of saving the plant from further decline. They can guide you through the necessary steps to restore its health and vitality.
Remember that seeking professional help does not indicate a lack of knowledge or capability on your part. It is an intelligent choice to ensure the best possible care for your plant. Consulting with an expert can provide peace of mind and significantly increase the chances of reviving your dying plant.
Be prepared to share relevant information about the plant’s history, previous care, and any noticeable changes or symptoms. This will help the professional assess the situation more accurately.
By collaborating with a plant specialist or horticulturist, you can gain valuable insights and guidance to revive your dying plant successfully and nurture it back to health.