
Safety Precautions
When it comes to replacing the lamp in your Panasonic device, it is essential to prioritize safety. Here are some important precautions to take before starting the replacement process:
- Ensure that your device is unplugged from the power source before attempting any lamp-related tasks. This will minimize the risk of electric shock.
- Allow the device to cool down completely before handling the lamp. High temperatures can cause severe burns.
- Wear protective gloves to prevent skin contact with the lamp. This will help avoid oil and dirt transfer, which can diminish the lamp’s performance.
- Avoid touching the lamp with bare hands, as the oils from your skin can reduce its lifespan and quality. If contact occurs, clean the lamp carefully with a lint-free cloth.
- Keep the replacement lamp away from excessive heat, moisture, and direct sunlight. Exposure to these elements can damage the lamp or reduce its longevity.
- Make sure to read the user manual provided by Panasonic for specific instructions and safety guidelines related to your device’s lamp replacement.
- Double-check that the replacement lamp you purchased is compatible with your Panasonic device. Using an incompatible lamp may result in malfunction or damage to your device.
- If you are unsure or uncomfortable with the replacement process, consider seeking assistance from a professional technician. They have the expertise to handle the task safely and efficiently.
By following these safety precautions, you can ensure a smooth and secure experience while replacing the lamp in your Panasonic device. Remember, your safety should always be the top priority when dealing with electrical components. Now that you are aware of the precautions, let’s move on to the next step: Gathering the Necessary Tools.
Gathering the Necessary Tools
Before you start replacing the lamp in your Panasonic device, make sure you have all the required tools ready. Having everything prepared in advance will help streamline the replacement process. Here are the essential tools you will need:
- Phillips head screwdriver: This tool will be used to loosen and remove screws securing the lamp cover.
- Lint-free cloth: A soft, lint-free cloth is necessary for handling the lamp without leaving any smudges or fingerprints.
- Protective gloves: Wear a pair of protective gloves to avoid direct contact with the lamp and protect it from oil and dirt transfer.
- Replacement lamp: Make sure you have a compatible replacement lamp specifically designed for your Panasonic device. Check the model number and specifications to ensure compatibility.
- User manual: Refer to the user manual provided by Panasonic for specific instructions and guidelines related to your device’s lamp replacement.
Having these tools ready will help facilitate a smooth and successful lamp replacement. Before proceeding, double-check that you have all the necessary items at hand. Now that you have gathered the tools, let’s move on to the next step: Checking the Indicator Lights.
Checking the Indicator Lights
Before you begin the lamp replacement process, it’s important to check the indicator lights on your Panasonic device. The indicator lights can provide valuable information about the status of the lamp and whether it needs to be replaced. Here are the steps to check the indicator lights:
- Locate the power button or indicator light on your device. This can usually be found on the front or side panel.
- Turn on the device and observe the indicator lights.
- Pay attention to any specific light sequences or colors that indicate lamp-related issues. Consult the user manual for a detailed explanation of the indicator light patterns for your specific Panasonic model.
- If the lamp indicator light is flashing or displaying a warning message, it is likely an indication that the lamp needs to be replaced. Proceed with the lamp replacement process.
- If the indicator lights are functioning normally and do not show any signs of lamp failure, it’s still a good idea to replace the lamp if it has been in use for an extended period of time. Regular lamp replacement can help maintain optimal performance.
It’s crucial to note that some Panasonic devices may have different indicator light systems or additional diagnostic features. Therefore, always consult the user manual specific to your device for accurate information about the indicator lights.
Now that you have checked the indicator lights and determined whether the lamp needs to be replaced, let’s move on to the next step: Removing the Lamp Cover.
Removing the Lamp Cover
To access the lamp unit for replacement, the first step is to remove the lamp cover on your Panasonic device. Follow these steps to remove the lamp cover:
- Ensure that your device is turned off and unplugged from the power source. This will minimize the risk of electrical shock during the process.
- Locate the lamp cover on your device. It is typically located on the back or side panel.
- Using a Phillips head screwdriver, carefully loosen and remove the screws securing the lamp cover. Place the screws in a safe place for later use.
- Gently slide off the lamp cover and set it aside.
Some Panasonic devices may have different mechanisms for removing the lamp cover. Refer to the user manual specific to your device for detailed instructions on how to remove the lamp cover correctly.
Once you have successfully removed the lamp cover, you will have clear access to the lamp unit. In the next step, we will identify the lamp unit and prepare it for replacement. Let’s continue with the next section: Identifying the Lamp Unit.
Identifying the Lamp Unit
Before replacing the lamp in your Panasonic device, it’s essential to correctly identify the lamp unit. This ensures that you purchase the right replacement and install it properly. Here’s a step-by-step guide to identifying the lamp unit:
- Refer to the user manual provided by Panasonic to locate the specific section that provides information about the lamp unit for your device. The manual will typically have detailed illustrations and instructions to help you identify the lamp unit.
- Take note of the lamp unit’s location within the device. It can vary depending on the model and design of your Panasonic device. Common locations include the rear, bottom, or side panels.
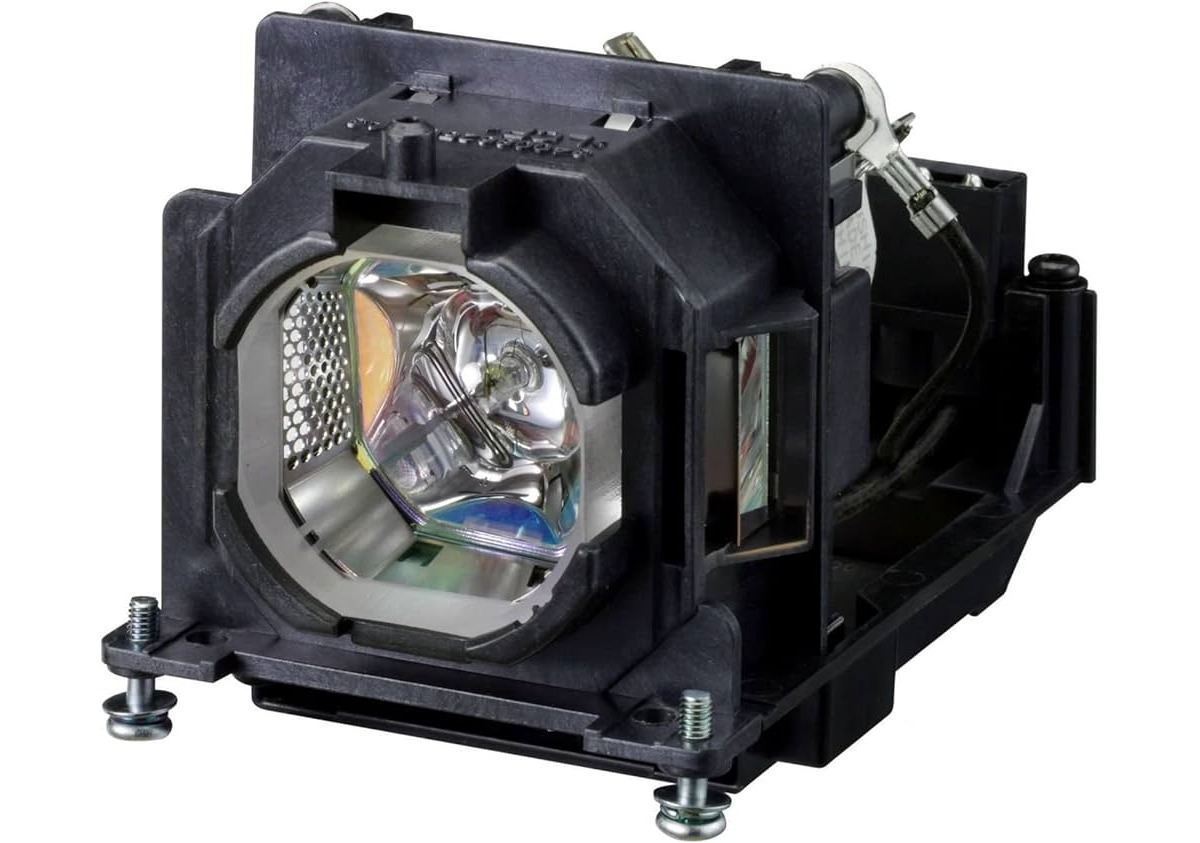
- Observe the physical appearance of the lamp unit. It is typically a small, rectangular or cylindrical module with a connector protruding from one end.
- Make a note of any labels or identification markings on the lamp unit. This can include the model number, wattage, or other specifications that are necessary to ensure compatibility with the replacement lamp.
- If you are uncertain about identifying the lamp unit, consider taking a picture of it and consulting with a Panasonic customer service representative or a professional technician for guidance.
Once you have successfully identified the lamp unit, you can proceed with the next step: Detaching the Lamp Unit. Proper identification of the lamp unit is crucial for a successful replacement process.
Detaching the Lamp Unit
After identifying the lamp unit in your Panasonic device, it’s time to detach it in preparation for replacing it with a new one. Follow these steps to safely detach the lamp unit:
- Ensure that your device is turned off and unplugged from the power source to prevent any electrical hazards.
- Locate the lamp unit, which you previously identified. It is usually held in place by screws or brackets.
- Using a Phillips head screwdriver, carefully loosen and remove the screws or brackets securing the lamp unit. Keep the screws in a safe place for later use.
- Inspect the lamp unit for any additional connectors or cables attached to it. Gently disconnect these cables, if present, by carefully pulling them away from the lamp unit.
- Once all screws and cables are disconnected, carefully slide the lamp unit out of its housing or slot. Be mindful not to use excessive force or apply pressure to the lamp unit.
- Set the detached lamp unit aside in a safe place. Take extra care to avoid touching the lamp itself as it may still be hot or prone to damage from oil and dirt transfer.
Remember to be cautious and gentle while detaching the lamp unit to avoid any damage to your Panasonic device or the lamp itself. In the next section, we will guide you through inserting the new lamp unit. Let’s move on to the next step: Inserting the New Lamp Unit.
Inserting the New Lamp Unit
After detaching the old lamp unit from your Panasonic device, it’s time to insert the new lamp unit. Follow these steps to ensure a successful replacement:
- Take the new lamp unit out of its packaging and handle it with care, avoiding any direct contact with the lamp itself.
- Align the new lamp unit with the slot or housing from which you removed the old lamp unit. Make sure it is facing the correct direction, as indicated by the alignment marks or connectors.
- Gently slide the new lamp unit into place, ensuring it fits securely and snugly. Do not force it or apply excessive pressure.
- If there are any connectors or cables, carefully reconnect them to the appropriate ports or connectors on the new lamp unit. Ensure a secure connection, double-checking that all cables are properly aligned and inserted.
- Once the new lamp unit is inserted and connected, use the screws or brackets you previously removed to secure it in place. Tighten the screws appropriately, but avoid over-tightening.
It’s important to follow the manufacturer’s instructions and guidelines provided in the user manual specific to your Panasonic device when inserting the new lamp unit. Proper installation is crucial for optimal performance and safety.
With the new lamp unit securely inserted, we are almost done with the replacement process. In the next section, we will guide you through reattaching the lamp cover. Let’s move on to the next step: Reattaching the Lamp Cover.
Reattaching the Lamp Cover
Now that you have successfully replaced the lamp unit in your Panasonic device, it’s time to reattach the lamp cover. Follow these steps to securely reattach the lamp cover:
- Take the lamp cover, which you removed earlier, and ensure it is clean and free from any debris or fingerprints. Use a lint-free cloth to wipe it if necessary.
- Align the lamp cover with the designated slots or guides on the device. Make sure it is positioned correctly and in line with the overall design.
- While holding the lamp cover in place, carefully insert and tighten the screws using a Phillips head screwdriver. Be careful not to overtighten the screws, as it could damage the cover or the device.
- Ensure that the lamp cover is securely fastened and flush with the device’s surface. This will prevent any potential gaps or loose connections.
- Double-check that all screws are tightened evenly and that the lamp cover is firmly attached to the device.
By reattaching the lamp cover properly, you can ensure the safety and integrity of the lamp replacement and the overall functionality of your Panasonic device. Now that the lamp cover is securely in place, the next step is to reset the lamp timer. Let’s continue to the next section: Resetting the Lamp Timer.
Resetting the Lamp Timer
After replacing the lamp unit in your Panasonic device, it is important to reset the lamp timer to ensure accurate tracking of the lamp’s usage. Resetting the lamp timer will help you keep track of the lamp’s lifespan and ensure timely replacement. Follow these steps to reset the lamp timer:
- Ensure that your device is plugged in and turned on.
- Access the device’s menu or settings by using the remote control or the buttons on the device itself. The exact method may vary depending on your specific Panasonic model.
- Navigate to the “Lamp” or “Lamp Timer” menu option. Consult the user manual for detailed instructions specific to your device.
- Select the option to reset the lamp timer. This may involve confirming the action or entering a specific code or password.
- Once the lamp timer has been successfully reset, exit the menu and return to normal operation mode.
By resetting the lamp timer, you can accurately monitor and track the usage of the new lamp unit. This will help you anticipate when it may be time for a replacement in the future. Remember to consult the user manual of your Panasonic device for precise instructions related to resetting the lamp timer.
With the lamp timer reset, we are nearing the end of the lamp replacement process. In the next section, we will guide you through testing the new lamp unit. Let’s move on to the next step: Testing the New Lamp Unit.
Testing the New Lamp Unit
After replacing the lamp unit in your Panasonic device and resetting the lamp timer, it’s important to test the new lamp unit to ensure proper functionality. Follow these steps to test the new lamp unit:
- Ensure that your device is plugged in and turned on.
- Allow the device a few moments to initialize and power up.
- Access the device’s menu or settings to navigate to the “Lamp” or “Lamp Status” option.
- Check the lamp status on the screen or menu. It should indicate that the new lamp unit is recognized and functioning properly.
- If the lamp status is not displayed or indicates an issue, double-check the lamp unit’s installation, connections, and compatibility.
- If the lamp status confirms the successful installation and operation of the new lamp unit, proceed to test the device’s overall performance, such as brightness, clarity, and color accuracy.
- Continue using the device and monitor its performance over the next few hours or days to ensure consistent, reliable operation.
If you encounter any issues or abnormalities during testing, consult the user manual or contact Panasonic customer support for further assistance. They can provide additional troubleshooting steps or recommend the next course of action.
With the new lamp unit successfully tested and the device performing as expected, you have completed the lamp replacement process. However, to maintain the longevity and performance of your lamp, it’s important to follow proper maintenance tips. In the next section, we will provide some valuable maintenance tips for prolonging the lamp’s life. Let’s move on to the next step: Maintenance Tips for Prolonging Lamp Life.
Maintenance Tips for Prolonging Lamp Life
To ensure the longevity and optimal performance of the lamp unit in your Panasonic device, it’s important to follow some maintenance tips. By implementing these practices, you can extend the life of your lamp and avoid premature failures. Here are some valuable maintenance tips to consider:
- Keep the device and its surroundings clean: Dust and debris can accumulate on the lamp and affect its performance. Regularly clean the device and the area around it to minimize dust buildup.
- Avoid blocking ventilation: Proper airflow is crucial for keeping the lamp cool. Ensure that the ventilation ports or fans are not obstructed by objects or dust.
- Avoid excessive heat and humidity: High temperatures and humidity levels can negatively impact the performance and lifespan of the lamp. Keep the device in a well-ventilated area and away from direct sunlight or sources of excessive heat.
- Do not turn off the device immediately after use: Allow the device to cool down before turning it off. This helps prevent thermal stress on the lamp.
- Avoid frequent power cycles: Frequent on/off cycles can cause excessive wear on the lamp. Whenever possible, try to minimize unnecessary power cycling.
- Use eco-friendly settings: Some devices offer eco-friendly modes that optimize lamp usage. Utilize these settings to extend the lamp’s lifespan.
- Follow recommended usage hours: Different lamps have specific recommended usage hours. Adhere to these guidelines to avoid overuse and premature failures.
- Handle the lamp with care: When handling the device or lamp, avoid touching the lamp itself. Oils from your skin can affect its performance. If accidental contact occurs, clean the lamp with a lint-free cloth.
By following these maintenance tips, you can ensure a longer life for your lamp unit and maintain the device’s overall performance. Regularly check the lamp’s status and performance to detect any issues early on. If you notice any abnormalities, refer to the user manual or consult with a professional technician for further guidance.
With these maintenance tips in mind, you are now equipped to maximize the lifespan of your lamp unit and enjoy optimal performance from your Panasonic device.