
Choosing the Right Location
When it comes to planting plants in the ground, choosing the right location is crucial for their growth and overall health. Here are some key factors to consider when selecting the perfect spot:
- Sunlight: Most plants thrive in sunlight, so it’s important to choose a location that receives adequate sunlight throughout the day. Take note of the direction the area faces and any potential obstructions that may shade the plants.
- Soil Drainage: Different plants have different soil drainage requirements. Ensure that the chosen location has proper drainage to prevent waterlogged soil, which can lead to root rot and other plant diseases.
- Soil pH: Check the pH level of the soil in the desired location. Different plants have varying pH preferences, and it’s important to match their requirements to promote optimal growth and nutrient uptake.
- Proximity to Structures: Consider the proximity of the area to any buildings, fences, or other structures. Some plants may require support, such as trellises or stakes, and you’ll need to ensure there’s enough space for them to grow without causing any damage.
- Proximity to Other Plants: Take into account the neighboring plants in the area. Some plants have specific requirements when it comes to spacing and compatibility. Make sure to provide enough space between plants to prevent competition for resources.
- Accessibility: Think about how easily accessible the location is for maintenance and care. Planting in an area that is convenient to reach will make it easier to water, fertilize, and prune the plants as necessary.
By considering these factors, you can choose the ideal location for your plants, ensuring they have the best possible conditions for growth. Take the time to assess the site and make any necessary preparations before moving on to the next step.
Preparing the Soil
Before planting plants in the ground, it’s essential to prepare the soil to provide a nurturing environment for their roots. Follow these steps to ensure your plants have the best possible start:
- Remove Weeds and Debris: Begin by clearing the area of any weeds, rocks, sticks, or other debris that may hinder the plant’s growth. This will prevent competition for nutrients and allow the roots to establish themselves more easily.
- Loosen the Soil: Use a garden fork or spade to loosen the soil in the planting area. This will help improve aeration and drainage, allowing the roots to grow deeper and access water and nutrients more efficiently.
- Amend the Soil: Test the soil to determine its composition and nutrient levels. Based on the results, add organic matter such as compost, well-rotted manure, or peat moss to improve fertility and structure. Mix these amendments into the soil thoroughly.
- Break Up Clumps: Break up any large clumps of soil to ensure a smoother and more even planting surface. This will help the roots establish themselves and allow for better water penetration.
- Level the Surface: Use a rake or garden hoe to level the soil surface to create a uniform planting bed. This will make it easier to place the plants at the proper depth and ensure even water distribution.
By preparing the soil adequately, you create an ideal foundation for your plants to thrive. Taking the time to remove debris, loosen and amend the soil, and level the surface will promote healthy root development and improve the overall growing conditions.
Digging the Hole
Digging the right hole is crucial for the successful establishment of your plants. Follow these steps to dig the perfect hole:
- Measure the Plant’s Rootball: Before you start digging, measure the rootball of the plant. The hole should be slightly wider and deeper than the rootball to allow the roots to spread and anchor properly.
- Start Digging: Use a spade or garden shovel to start digging the hole. Dig straight down to the desired depth, keeping the sides of the hole as vertical as possible. If the soil is compacted, break it up with the shovel as you dig.
- Check Depth and Width: As you dig, periodically check the depth and width of the hole using a measuring tape or the plant’s rootball as a guide. Make any necessary adjustments to ensure that the hole is the correct size.
- Loosen the Soil in the Hole: Use the shovel or a garden fork to loosen the soil at the bottom of the hole. This will help the roots penetrate the surrounding soil more easily and promote healthy growth.
- Remove Excess Soil: If you have dug the hole deeper than necessary, remove any excess soil from the bottom. The plant’s rootball should sit level with the surrounding ground to prevent water pooling around the roots.
Remember to take breaks and pace yourself while digging, especially if the soil is heavy or compacted. It’s better to take your time and dig a proper hole than to rush and risk damaging the plant’s roots.
Adding Fertilizer
Fertilizing your plants is an important step in promoting healthy growth and ensuring they receive the necessary nutrients. Here’s how to properly add fertilizer:
- Choose the Right Fertilizer: There are various types of fertilizers available, including organic and synthetic options. Consider the specific needs of your plants and choose a fertilizer that matches their requirements.
- Read the Instructions: Before applying any fertilizer, carefully read the instructions on the packaging. It will provide guidance on the correct amount to use and any specific application instructions.
- Apply at the Right Time: It’s best to apply fertilizer when planting or during the active growing season. This gives the plants an immediate boost of nutrients to support their initial growth or ongoing development.
- Distribute Evenly: Sprinkle or spread the fertilizer evenly around the base of the plant, avoiding direct contact with the stems or leaves. This ensures that the nutrients are distributed evenly and minimizes the risk of fertilizer burn.
- Water the Area: After applying the fertilizer, water the area thoroughly. This helps to activate the nutrients and allows them to penetrate the soil and reach the plant’s roots.
- Monitor and Repeat: Regularly monitor the condition of your plants and pay attention to any signs of nutrient deficiencies. If needed, follow the recommended fertilization schedule and apply additional fertilizer accordingly.
Remember, it’s important not to over-fertilize your plants, as this can lead to nutrient imbalances and environmental issues. Always follow the instructions and use fertilizer in moderation to provide your plants with the appropriate nutrition they need to thrive.
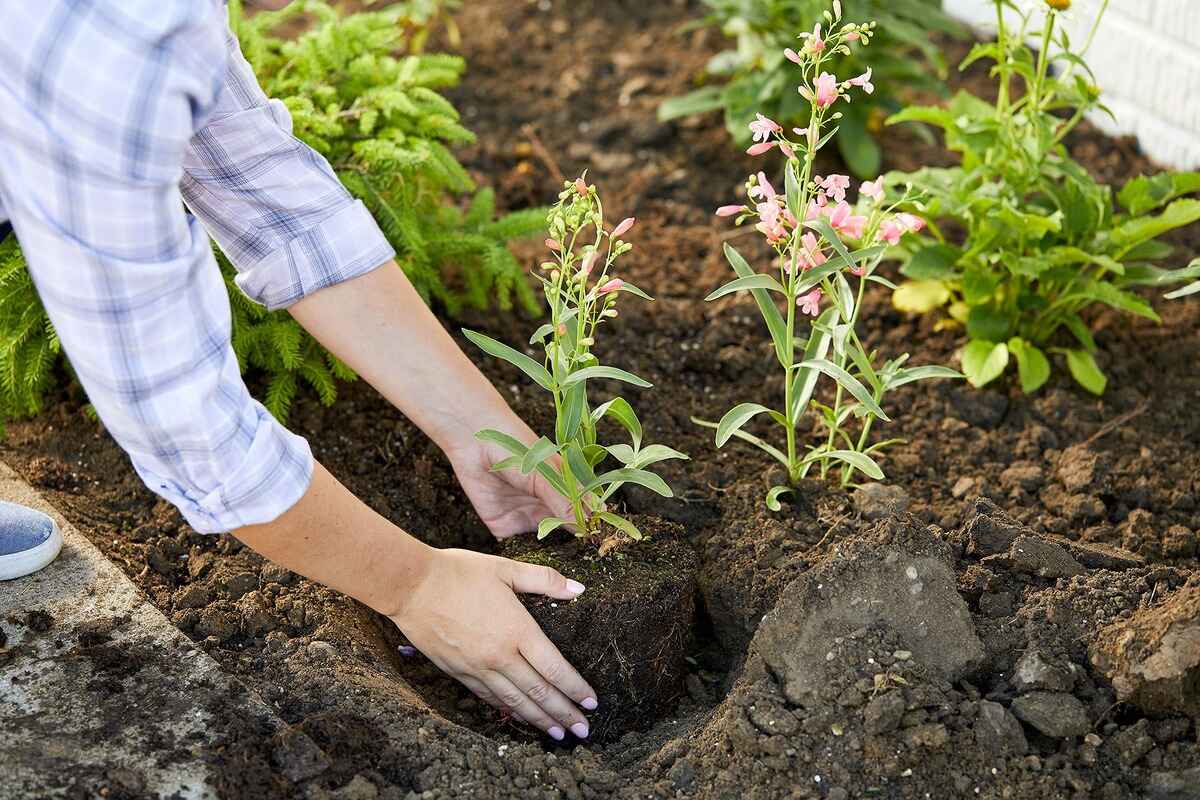
Transferring the Plant
Transferring a plant from its nursery container to the ground is a delicate process, and proper care must be taken to ensure the plant’s roots remain intact. Here’s a step-by-step guide on how to transfer a plant:
- Prepare the Plant: Thoroughly water the plant a day or two before transplanting. This helps to hydrate the roots and makes the extraction from the container easier.
- Choose the Right Time: It’s best to transfer plants in the early morning or late afternoon, when the weather is cooler. Avoid transplanting during hot, sunny periods, as this can stress the plant.
- Dig the Hole: Prepare the planting hole in advance, ensuring it’s wide and deep enough to accommodate the plant’s root system. Use the measurements of the rootball as a guide to determine the correct size.
- Remove the Plant: Carefully remove the plant from its container by gently tapping the sides or squeezing the container. Avoid pulling on the stem, as it may damage the plant. If the roots are tightly bound, gently loosen them to encourage outward growth.
- Place the Plant: Set the plant in the prepared hole, ensuring that it’s positioned at the same level as it was in the container. Avoid burying the stem too deeply, as this can cause rotting. The top of the rootball should be level with the surrounding soil.
- Backfill the Hole: Gently backfill the hole with the soil, patting it down lightly to ensure good contact with the roots. Avoid compacting the soil too tightly, as this can restrict root growth and water drainage.
Transferring a plant can be stressful for both the plant and the gardener, so it’s important to handle the process with care. By following these steps, you can help the plant establish itself in its new home and encourage healthy growth.
Backfilling and Tamping
After placing the plant in the hole, the next step is to backfill the hole with soil and properly tamp it down. Follow these steps for backfilling and tamping:
- Backfill the Hole: Begin by adding soil to the hole around the plant. Gradually fill the hole, ensuring that the soil is evenly distributed. Avoid piling soil directly against the stem of the plant as it can cause rotting.
- Tamp the Soil: Once the hole is filled with soil, use your hands or a gardening tool to gently tamp down the soil around the base of the plant. This helps to remove any air pockets and ensures good root-to-soil contact.
- Avoid Compacting Soil: While tamping, be careful not to compact the soil too tightly. Overly compacted soil can restrict root growth and hinder water and nutrient absorption. Aim for a firm but loose soil texture.
- Build a Small Soil Basin: Create a small basin or circular ridge around the plant to retain water during watering. This will help channel water directly to the root zone and prevent runoff.
- Check Soil Level: Verify that the soil level is even and matches the surrounding ground level. The top of the rootball should be at or slightly above the soil surface to avoid suffocating the plant’s roots.
Backfilling and tamping are important steps to ensure proper soil structure and root support for your newly planted plant. By following these guidelines, you will create favorable conditions for the plant to establish itself and thrive in its new environment.
Watering the Plant
Watering is a crucial element in the early stages of plant establishment and ongoing plant care. Follow these guidelines to ensure proper watering:
- Water Immediately: After planting, water the plant thoroughly to help settle the soil and ensure good root-to-soil contact. This helps prevent air pockets and allows the roots to access moisture.
- Monitor Soil Moisture: Regularly check the moisture level of the soil around the plant. Stick your finger or a moisture meter a few inches into the soil to determine if it’s dry or moist. Avoid overwatering or allowing the soil to dry out completely.
- Water Deeply: When watering, aim to moisten the soil to a depth that encourages deep root growth. Shallow watering may lead to surface roots that are more susceptible to drying out. Water slowly to allow for proper absorption.
- Watering Frequency: The frequency of watering depends on various factors, including plant type, weather conditions, and soil drainage. Generally, it’s better to water deeply and less frequently rather than shallowly and frequently.
- Water in the Morning: Watering in the morning is preferred as it allows the plant foliage to dry out during the day. This helps prevent fungal diseases and minimizes evaporation loss due to the cooler morning temperatures.
- Avoid Overwatering: Overwatering can lead to root rot or suffocation, depriving the plant of oxygen. Ensure proper drainage and avoid waterlogging the soil. Adjust watering accordingly based on the plant’s needs and environmental conditions.
- Adjust with the Seasons: Adjust your watering schedule to accommodate seasonal changes. Plants may require more frequent watering during hot, dry periods and less during cooler, rainy seasons.
Proper watering is essential for healthy plant growth. By monitoring soil moisture, watering deeply and appropriately, and adjusting with the seasons, you’ll help your plants establish and thrive in their new environment.
Mulching the Area
Mulching is a beneficial practice that involves applying a layer of material around the base of the plant. Here’s why mulching is important and how to properly mulch the area:
- Benefits of Mulching: Mulching offers several advantages, including controlling weed growth, conserving moisture, regulating soil temperature, and improving overall soil health. It acts as a protective barrier that enhances plant growth and reduces maintenance.
- Choose the Right Mulch: Select a suitable mulching material based on your plant’s needs and personal preferences. Common options include organic materials like wood chips, straw, shredded leaves, or compost, as well as inorganic materials like gravel or landscape fabric.
- Apply the Mulch: Begin by removing any weeds or grass in the area around the plant. Apply the mulch in a layer about 2-4 inches deep, making sure to extend it a few inches past the plant’s drip line. Avoid piling the mulch directly against the stem, as it can lead to moisture retention and rotting.
- Maintain Proper Thickness: Over time, the mulch may decompose or be displaced. Check the mulch layer periodically and replenish it as needed to maintain the desired thickness. This helps to maximize the benefits and appearance of the mulched area.
- Consider Aesthetics: Choose a mulch color and texture that complements your landscape and adds visual appeal. Consider the overall design and feel of the garden to create a cohesive and attractive look.
- Monitor Moisture Levels: While mulching helps conserve moisture, it’s important to monitor the soil’s moisture levels regularly. Adjust watering if necessary and ensure that the mulch layer is allowing proper water infiltration and drainage.
- Adjust Mulch Depth for Plant Type: Different plants have varying mulching requirements. Some plants prefer a thinner mulch layer, while others may benefit from a thicker layer. Research the specific needs of your plants to determine the optimal mulch depth.
Mulching provides numerous benefits to your garden and plants. By choosing the right mulch, applying it correctly, and maintaining its thickness, you can create a more sustainable and visually appealing landscape while improving the overall health and well-being of your plants.