
Selecting and Preparing a Planting Site
Choosing the right planting site is crucial for the successful growth of leeks. Here are some important factors to consider when selecting and preparing a planting site for your leeks.
Sunlight: Leeks thrive in full sun, so choose a location that receives at least six to eight hours of direct sunlight per day. Avoid areas with too much shade, as it can stunt the growth of the leeks.
Soil Conditions: Leeks prefer well-draining soil that is rich in organic matter. Before planting, test your soil’s pH level and make adjustments if needed. Ideally, the pH should be between 6.0 and 7.0. Incorporating compost or well-rotted manure into the soil will help improve its fertility and moisture retention.
Spacing: Leeks need ample space to grow and develop. Ensure that you have enough room between each plant. A spacing of 6-8 inches between plants and 12-18 inches between rows is recommended. This allows the leeks to grow to their full potential and makes it easier to harvest them later on.
Weed Control: Keep the planting area free from weeds, as they can compete with the leeks for nutrients and hinder their growth. Before planting, remove any existing weeds and create a barrier, such as a layer of mulch, to prevent weed growth throughout the season.
Watering: Leeks require consistent moisture for optimal growth. Ensure that the planting site has access to a water source or be prepared to water the leeks regularly. Avoid over-watering, as it can lead to waterlogged soil and rotting of the leeks’ roots.
Protection from Elements: Consider the exposure of the planting site to strong winds. Leeks can be damaged by strong gusts, so planting them in a sheltered area or providing support, such as stakes or a windbreak, can help protect them.
By carefully selecting and preparing a suitable planting site for your leeks, you are setting the foundation for healthy growth and a successful harvest. Remember to assess the specific needs of your leeks and make any necessary adjustments to provide the best growing conditions possible.
Buying Leek Seedlings or Starting from Seed
When it comes to growing leeks, you have two options: buying seedlings or starting from seed. Each method has its advantages and considerations. Let’s explore both:
Buying Seedlings:
If you’re new to gardening or want a head start, buying leek seedlings from a reputable nursery or garden center is a great option. Here are some benefits of buying seedlings:
- Time-saving: Buying seedlings allows you to skip the time-consuming process of starting from seed, especially if you’re short on time or have a limited growing season.
- Assured Variety: When you buy seedlings, you can choose from a selection of leek varieties. This ensures that you get the specific type of leeks you desire.
- Hardened Off: Seedlings purchased from nurseries are often “hardened off,” which means they are acclimated to outdoor conditions. This makes them more resilient and better prepared for transplanting into your garden.
Starting from Seed:
If you enjoy the process from start to finish or want a wider variety of leeks to choose from, starting from seed is a rewarding and cost-effective option. Consider the following advantages and considerations:
- Greater Variety: Starting from seed gives you access to a wider range of leek varieties, including heirlooms and specialty options that may not be readily available as seedlings.
- Cost-effective: While it requires more time and effort, starting from seed is generally more cost-effective, as a single seed packet can provide you with numerous plants.
- Timing Control: Starting from seed allows you to control the timing. You can sow the seeds indoors earlier in the season, giving your leeks a longer growing period.
Whether you decide to buy leek seedlings or start from seed, ensure that you choose healthy plants or quality seeds from reliable sources. Carefully follow the instructions provided with the seedlings or seeds to ensure successful growth and establishment in your garden.
Preparing the Soil for Planting
Proper soil preparation is essential for the success of your leek plants. By providing them with nutrient-rich and well-draining soil, you create a conducive environment for growth. Here are some steps to prepare the soil for planting your leeks:
Clear the Area: Begin by clearing the planting area of any weeds, rocks, or debris. This will ensure that the leeks have ample growing space and reduce competition for nutrients.
Loosen the Soil: Use a garden fork or a tiller to loosen the soil to a depth of at least 8 to 10 inches. This allows the leek roots to penetrate easily and promotes good drainage.
Amend the Soil: Leeks prefer soil that is rich in organic matter. Incorporate well-rotted compost, aged manure, or other organic amendments into the soil. These additions help improve its fertility, structure, and water-holding capacity.
Adjust pH Levels: Leeks prefer slightly acidic to neutral soil with a pH range of 6.0 to 7.0. You can easily test the pH level of your soil using a soil testing kit. If necessary, adjust the pH by adding lime to raise it or sulfur to lower it, based on test results.
Level and Rake: Once the amendments are added, level the soil surface with a rake. This ensures an even planting surface and facilitates uniform growth of your leek plants.
Consider Adding Fertilizer: If your soil is deficient in nutrients, applying a balanced organic fertilizer can provide additional nourishment for your leeks. Follow the product instructions for the appropriate amount and method of application.
Irrigation: Before planting, ensure that the soil is adequately moist, but not waterlogged. Proper soil moisture is crucial for the growth and development of leeks. If the soil is too dry, water it thoroughly a day or two before planting.
By giving attention to soil preparation, you set the stage for healthy and robust leek plants. Remember to perform these steps before planting to provide the best possible growing conditions for your leeks.
Digging Holes or Trenches for Transplanting
When it comes to transplanting leek seedlings into your garden, there are a few methods you can choose from. The most common methods are digging individual holes or creating trenches. Both methods have their benefits, so let’s explore how to dig holes or trenches for transplanting your leeks:
Digging Holes:
If you prefer a more precise and controlled approach, digging individual holes for transplanting is the way to go. Here’s how to do it:
- Measure and Space: Determine the desired spacing between your leek plants. Typically, a spacing of 6-8 inches between plants is recommended. Measure the distance between each hole and mark the spots where the holes should be dug.
- Dig the Holes: Use a garden trowel or a dibber to dig holes that are deep enough to accommodate the length of the leek seedlings’ roots. A depth of 6-8 inches should be sufficient. Space the holes according to your desired spacing.
- Planting: Gently place each leek seedling into a hole, ensuring that the roots are fully covered with soil. Press the soil around the base of the seedling to secure it in place. Repeat this process for each hole.
Creating Trenches:
The trench method is a great option when you have a large number of leek seedlings to transplant or if you prefer a more efficient approach. Here’s how to create trenches:
- Measure and Space: Measure the length of your planting area and determine the desired spacing between leek plants. With a garden rake or hoe, create a straight trench along the length of the planting area. The trench should be deep enough to accommodate the leek seedlings comfortably.
- Planting: Lay the leek seedlings in the trench, spacing them according to your desired spacing. Ensure that the roots are spread out and covered with soil. Gently press the soil around the base of the seedlings to secure them in place.
- Backfilling: Gradually backfill the trench with soil, covering the leek seedlings up to their desired planting depth. Avoid burying the green tops of the seedlings. As you backfill, gently firm the soil around the seedlings.
Remember to water the transplanted leeks immediately after planting to help them establish in their new home. With these methods, you can efficiently transplant your leek seedlings and ensure their proper placement and growth in your garden.
Transplanting Leek Seedlings into the Garden
Transplanting leek seedlings is an important step in the growth process, as it allows them to establish themselves in the garden and continue their development. Follow these guidelines to ensure the successful transplant of your leek seedlings:
Timing: Transplant leek seedlings outdoors when they are around 8-10 weeks old or have reached a pencil thickness. They should have at least 4-6 leaves. Aim to transplant them in early spring or fall when the weather is mild and the soil temperature is cooler.
Prepare the Seedlings: Before transplanting, water the seedlings thoroughly to ensure they are well-hydrated. If the soil is dry, it may be beneficial to water the planting area as well.
Prep the Planting Area: Clear any weeds or debris from the planting area, ensuring there is enough space for the leek seedlings. Loosen the soil gently and remove any large clumps or stones.
Spacing: Space the leek seedlings 6-8 inches apart in rows that are 12-18 inches apart. This allows the leeks to grow to their full size and makes it easier to manage and harvest them later on.
Transplanting Technique: Using a dibber or your finger, make a hole or trench that accommodates the length of the leek seedling’s roots. Gently place the seedling in the hole, ensuring the roots are fully covered with soil. Press the soil around the base of the seedling to secure it in place.
Watering: After transplanting, water the leek seedlings thoroughly to help settle the soil and provide moisture to their roots. This promotes successful establishment and helps prevent transplant shock.
Mulching: Apply a layer of mulch around the base of the leek seedlings to retain moisture, suppress weed growth, and provide insulation to the soil. Straw, shredded leaves, or grass clippings can all work well as mulch for leeks.
Care: Monitor the transplanted leek seedlings closely for the first few weeks. Keep the soil consistently moist but not soggy. Regularly weed the area around the leeks to prevent competition for nutrients and space.
By following these guidelines and providing proper care, your transplanted leek seedlings will have a strong start in the garden. With time and attention, they will develop into mature leeks that you can harvest and enjoy in your culinary endeavors.
Watering and Mulching the Leeks
Proper watering and mulching are crucial for the health and growth of your leeks. By providing adequate moisture and implementing mulching techniques, you can help your leeks thrive in the garden. Here’s how to effectively water and mulch your leeks:
Watering:
Consistent Moisture: Leeks require consistent moisture throughout the growing season. Keep the soil evenly moist but avoid overwatering, as this can lead to waterlogged soil and root rot. Regularly check the moisture level by inserting your finger into the soil. If it feels dry about an inch below the surface, it’s time to water.
Deep Watering: When watering, aim to provide deep, thorough soakings rather than light, frequent sprays. This encourages the leeks’ roots to grow deep into the soil in search of moisture and nutrients. Water at the base of the plants, avoiding wetting the foliage to prevent disease.
Watering Schedule: The frequency of watering will depend on various factors like weather, soil type, and stage of leek growth. In general, aim to water leeks about 1-2 inches per week, adjusting as needed based on weather conditions.
Mulching:
Benefits of Mulching: Mulching the soil around your leeks provides numerous benefits, including:
- Conservation of Moisture: Mulch acts as a barrier, reducing soil moisture evaporation and helping to maintain a consistently moist environment around the leeks.
- Weed Suppression: A layer of mulch helps to smother weed growth, minimizing competition for nutrients and reducing the need for manual weeding.
- Temperature Regulation: Mulch insulates the soil, preventing extreme temperature fluctuations that can stress the leeks.
- Erosion Prevention: Mulch helps to prevent soil erosion, especially during heavy rain or watering, by reducing runoff and keeping the soil in place.
Mulching Technique: To mulch your leeks:
- Mulch Material: Opt for organic materials such as straw, shredded leaves, grass clippings, or compost. These materials provide nutrient benefits as they break down.
- Application: Apply a 2-3 inch layer of mulch around the base of the leeks, taking care not to pile it against the stems. Leave a small gap around each plant to prevent moisture and disease issues.
- Replenish as Needed: Monitor the mulch layer throughout the season and add more if it becomes thin or decomposes. Maintaining an adequate mulch cover helps maximize its benefits.
By watering your leeks properly and implementing mulching techniques, you create an optimal growing environment for healthy, robust plants. Consistency is key, so remember to monitor moisture levels and make adjustments as necessary to ensure the success of your leeks.
Caring for Leeks During the Growing Season
Providing proper care for your leeks throughout the growing season is essential for their development and yield. By paying attention to their needs and implementing good cultivation practices, you can ensure healthy and thriving leek plants. Here are some important care tips to follow:
Weeding:
Regularly weed the area around your leeks to prevent competition for nutrients, water, and sunlight. Be cautious when weeding to avoid damaging the leek plants and their shallow root systems. Consider using mulch to suppress weed growth and minimize the need for frequent weeding.
Watering:
Continue to monitor the moisture levels of the soil and water your leeks as needed. Be consistent with your watering schedule, making sure to provide deep, thorough soakings rather than frequent light sprinklings. Adjust your watering frequency based on weather conditions, ensuring the soil remains consistently moist.
Fertilizing:
Leeks benefit from regular applications of fertilizer to ensure they receive an adequate supply of nutrients. Consider using a balanced organic fertilizer or a slow-release fertilizer specifically formulated for vegetables. Follow the instructions on the product label for the appropriate amount and frequency of application.
Supporting:
If your leeks grow tall and their stalks start to lean or become top-heavy, you may need to provide support. Use stakes or small garden trellises to gently tie the leek plants together, propping them up and preventing them from falling or bending under their weight. This support will help keep the plants upright and prevent damage.
Pest and Disease Control:
Monitor your leeks for any signs of pest infestation or disease. Common pests that may affect leeks include aphids, onion maggots, and leek moth. Employ pest control methods such as natural predators, insecticidal soaps, or organic insecticides, as necessary. Keep a watchful eye for any signs of disease like leaf spots or rot, and promptly take action by removing affected foliage or treating with appropriate organic fungicides.
Harvesting:
Regularly monitor the size of your leeks as they mature. Harvest them when they reach the desired size, usually around 1-2 inches in diameter. Carefully loosen the soil around the base of the leek with a fork or trowel and gently lift the leek from the ground. Trim the roots and foliage, leaving about an inch of green tops. Harvest only what you need and store the remaining leeks in the ground for continued freshness.
By practicing these care tips throughout the growing season, you can ensure the health and productivity of your leek plants. With dedication and proper attention, you will be rewarded with a bountiful harvest of delicious and flavorful leeks.
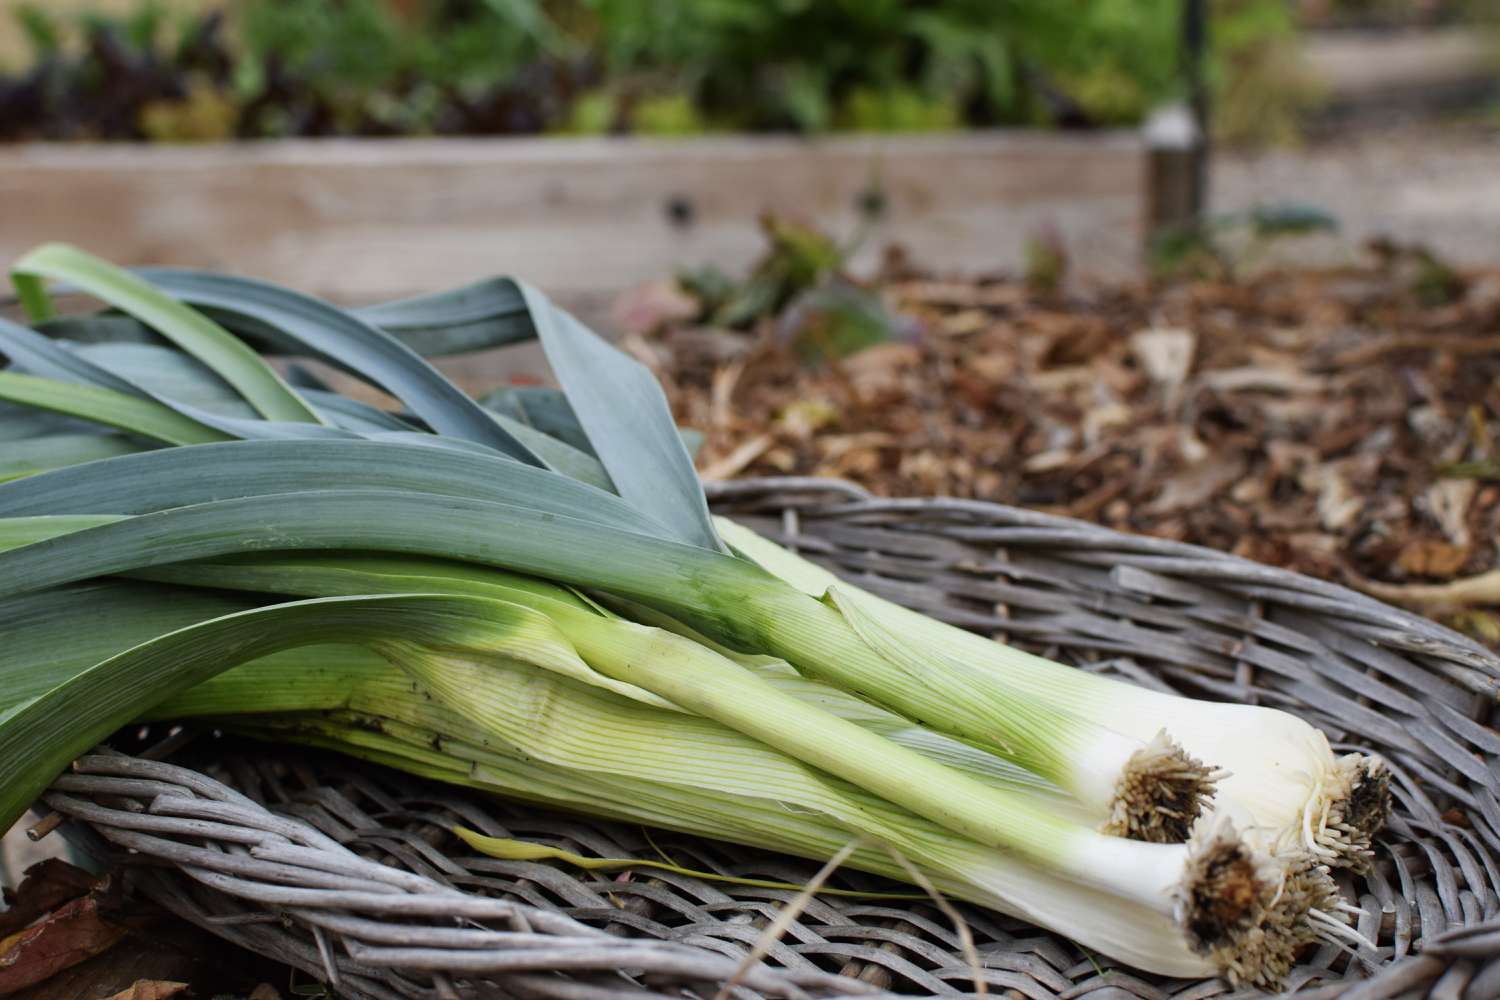
Harvesting Leeks
Harvesting leeks is an exciting moment in the gardening journey. Knowing when and how to harvest your leeks ensures that you enjoy these flavorful vegetables at their prime. Here are some guidelines to help you harvest your leeks:
Timing:
Leeks typically take around 90-120 days to reach maturity. However, you can start harvesting them when they have reached the desired size. Generally, leeks are ready for harvest when they are 1-2 inches in diameter and have a firm, solid feel. The exact timing will depend on the variety you are growing and your personal preferences.
Harvesting Technique:
Follow these steps to harvest your leeks:
- Loosen the Soil: Gently loosen the soil around the base of the leek plant using a garden fork or trowel. Be careful not to damage the leek or its neighboring plants.
- Lift the Leek: Insert the fork or trowel at an angle, slightly away from the plant, and lift the leek from the ground. Apply gentle pressure to overturn and remove the leek with the roots intact.
- Trim the Roots: Once the leek is out of the ground, trim the roots to remove any excess soil. Leave about an inch of the roots attached to the leek.
- Trim the Foliage: Trim the green tops of the leek to a length of about an inch. This helps to neaten the appearance and remove any damaged or discolored leaves.
Storing and Using Harvested Leeks:
After harvesting, you have several options for storing and using your leeks:
- Immediate Use: Freshly harvested leeks can add a delicious flavor to your dishes. Rinse them thoroughly to remove any remaining soil, and use them in your favorite recipes.
- Short-Term Storage: If you plan to use the leeks within a week or two, store them in the refrigerator. Wrap them loosely in damp paper towels or place them in a perforated plastic bag to maintain moisture while allowing airflow.
- Long-Term Storage: For longer storage, consider freezing or preserving the leeks. Blanch them in boiling water for a few minutes, cool in an ice bath, and then pack them in freezer-safe bags or containers. You can also preserve leeks by pickling or canning them.
Remember to label and date your stored leeks to keep track of their freshness. Properly stored leeks can last several months in the refrigerator or freezer.
Enjoy the fruits of your labor by savoring the delicate and savory flavor of freshly harvested leeks. With proper harvesting and storage, you can extend your enjoyment of leeks long after the growing season has ended.
Storing and Using Harvested Leeks
Once you have successfully harvested your leeks, it’s time to consider how to store and use them to maximize their flavor and freshness. By following proper storage techniques and exploring versatile culinary options, you can make the most of your harvested leeks. Here are some suggestions:
Short-Term Storage:
If you plan to use your leeks within a week or two, storing them in the refrigerator is the ideal option. Here’s how to store them:
- Rinse: Begin by rinsing the harvested leeks under cold water to remove any remaining dirt or debris. Pat them dry gently with a clean cloth or paper towel.
- Wrap: Wrap each leek loosely in a damp paper towel to maintain moisture. Alternatively, you can place them in a perforated plastic bag, allowing for some airflow.
- Refrigerate: Store the wrapped leeks in the crisper drawer of your refrigerator, which provides the optimal cool and slightly humid environment to keep them fresh.
Long-Term Storage:
If you have an abundance of leeks and want to store them for an extended period, consider freezing, pickling, or canning them:
- Freezing: Blanch the leeks in boiling water for a few minutes, then transfer them to an ice bath to cool quickly. Drain and pat them dry before packing them into airtight freezer bags or containers. Store them in the freezer for up to a year.
- Pickling: Create a flavorful pickling solution using vinegar, salt, sugar, and spices of your choice. Cut the harvested leeks into desired lengths, blanch them briefly, and pack them into sterilized jars. Pour the pickling solution over the leeks, seal the jars, and store them in a cool, dark place for several months.
- Canning: Similar to pickling, canning involves packing the leeks into sterilized jars and covering them with a brine or liquid of your choice. Process the jars using a water bath canner according to proper canning instructions, ensuring a secure seal. Canned leeks can be stored for up to a year or longer.
Using Harvested Leeks:
Harvested leeks can be used in a variety of delicious dishes. Here are some ideas for incorporating your leeks into your culinary creations:
- Soups and Stews: Leeks add a delicate and sweet flavor to soups, stews, and broths. From classic potato leek soup to hearty vegetable stews, the possibilities are endless.
- Sautéed and Stir-Fried: Slice your leeks and sauté them in butter or olive oil for a flavorful side dish or stir-fry ingredient. They pair well with other vegetables and protein sources.
- Baked and Roasted: Incorporate leeks into your favorite baked or roasted dishes. Toss them with olive oil, salt, and pepper, and roast them until tender and slightly caramelized for a delicious and versatile addition to your meals.
- Quiches and Frittatas: Add chopped or thinly sliced leeks to quiches, frittatas, or egg-based dishes for an extra layer of flavor and texture.
Remember to trim the root ends and remove any outer tough layers before using your harvested leeks. They can be used in place of onions in many recipes, adding a unique flavor profile to your dishes.
By properly storing your leeks and exploring various culinary applications, you can enjoy their fresh and distinctive taste long after the harvest season. Experiment with different recipes and savor the delicious flavors that leeks bring to your meals.