
Choosing the Right Variety of Kale
When it comes to planting kale, selecting the right variety is crucial for a successful harvest. Kale comes in different shapes, sizes, and colors, each with its own unique flavor and texture. Here are some factors to consider when choosing the right variety of kale for your garden.
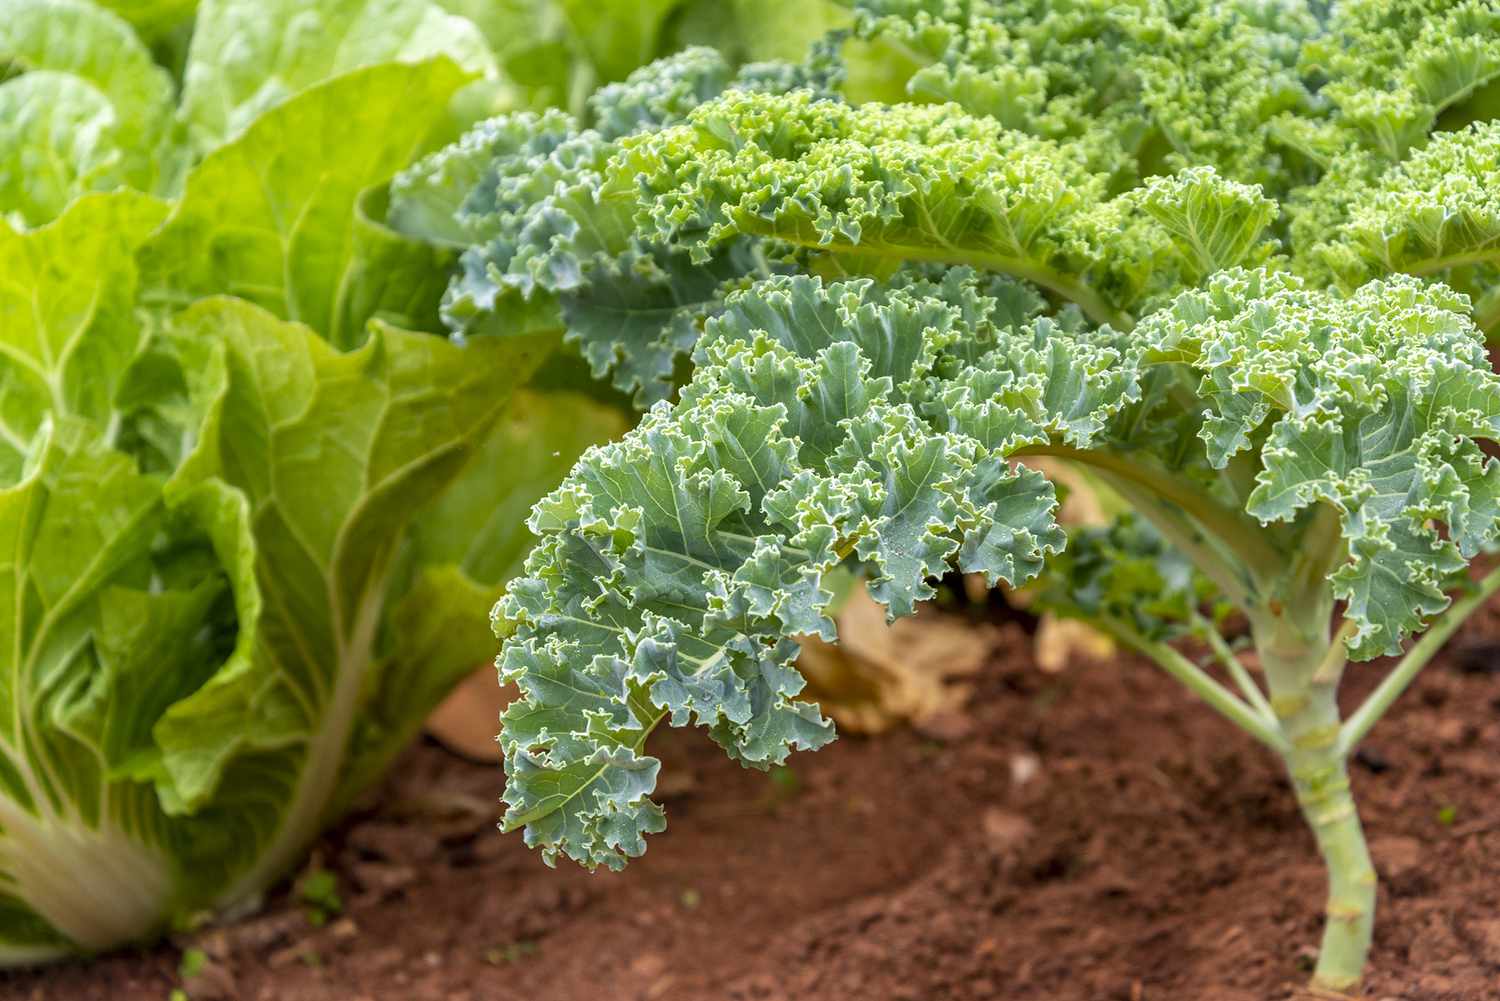
Growth Habit: Kale varieties can be classified into two main growth habits: curly leaf and flat leaf. Curly leaf kale, such as the popular ‘Winterbor’ variety, has tightly curled leaves that are perfect for adding texture to salads and stir-fries. Flat leaf kale, like ‘Lacinato’ or ‘Tuscan’ kale, has broader, smoother leaves that are great for steaming or using in soups.
Flavor Profile: Different kale varieties offer varying flavors. Some have a mild and slightly sweet taste, while others are more robust and peppery. If you prefer a milder flavor, consider varieties like ‘Red Russian’ or ‘Dwarf Blue Curled.’ For those who enjoy a stronger taste, ‘Siberian’ or ‘Redbor’ kale might be the perfect choice.
Color Variation: Aside from the traditional dark green leaves, kale also comes in vibrant colors like purple and red. Varieties such as ‘Redbor’ or ‘Scarlet’ kale offer a visually stunning addition to your garden and culinary creations. The colorful leaves can add an aesthetic appeal to your dishes.
Growing Season: Some kale varieties are better suited for specific growing seasons. For early spring or fall plantings, consider cold-hardy varieties like ‘Winter Red’ or ‘White Russian.’ If you’re looking for a variety that can withstand hot summer temperatures, ‘Dinosaur’ or ‘Toscano’ kale is a great choice.
Space and Yield: Different kale varieties have varying sizes. If you have limited space, opt for compact varieties like ‘Dwarf Blue Curled’ or ‘Red Russian,’ which can thrive in containers or small garden beds. On the other hand, if you have ample space and want larger yields, consider varieties like ‘Nero di Toscana’ or ‘Red Ursa.’
By considering these factors, you can find the perfect kale variety to suit your taste preferences, growing conditions, and space limitations. Experiment with different varieties to add diversity and color to your garden, and enjoy the nutritious and delicious benefits of growing your own kale.
Preparing the Soil for Planting
Before planting kale, it is important to prepare the soil properly to provide an optimal growing environment. By taking the time to prepare the soil, you can ensure that your kale plants will have the necessary nutrients and drainage for healthy growth. Here are some steps to follow for preparing the soil:
Clear the Area: Start by clearing the planting area of any weeds or debris. Remove any large rocks or roots that may hinder root growth.
Loosen the Soil: Use a garden fork or a tiller to loosen the soil to a depth of about 8-10 inches. This will help improve drainage and allow the roots to penetrate the soil more easily.
Amend the Soil: Kale prefers a slightly acidic soil with a pH between 6.0 and 7.5. Test the soil using a pH testing kit and adjust as necessary by adding organic matter or soil amendments. Incorporate well-rotted compost, aged manure, or peat moss into the soil to improve its structure and fertility.
Add Nutrients: Kale is a nutrient-hungry crop, so adding organic fertilizers like composted manure or a balanced organic fertilizer will provide the necessary nutrients for healthy plant growth. Follow the package instructions for application rates.
Level and Smooth: After amending the soil, rake the area to level and smooth it out. This will create an even surface for planting and prevent water from pooling in low spots.
Consider Raised Beds: If your soil has poor drainage or is of low quality, consider constructing raised beds for growing kale. This will allow you to control the soil quality more effectively and improve drainage.
Water the Soil: Before planting kale, thoroughly water the prepared soil to ensure that it is moist, but not waterlogged. Adequate moisture is essential for seed germination and root establishment.
By properly preparing the soil, you create a favorable growing environment for your kale plants. This preparation allows the roots to penetrate easily and access the necessary nutrients for healthy growth. Investing time in preparing the soil will pay off in the form of robust and productive kale plants.
Starting Kale From Seeds Indoors
Starting kale from seeds indoors is a great way to kick-start your growing season and ensure a bountiful harvest. By starting seeds indoors, you can get a jump on the growing season and have seedlings ready to transplant outside when the weather is favorable. Here’s a step-by-step guide on how to start kale from seeds indoors:
Selecting the Right Containers: Choose containers with drainage holes to prevent waterlogging. You can use biodegradable pots, peat pots, or seed trays. Ensure that the containers are clean and sterilized to prevent the spread of diseases.
Preparing the Seed Starting Mix: Use a well-draining seed starting mix or create your own by combining equal parts of compost, vermiculite, and perlite. Moisten the mix slightly, but make sure it is not overly saturated.
Sowing the Seeds: Sow the kale seeds on the surface of the moistened seed starting mix, spacing them about 1 inch apart. Gently press the seeds into the soil, but avoid burying them too deep. Cover the seeds with a thin layer of the seed starting mix or vermiculite.
Providing Optimal Environmental Conditions: Place the containers in a warm location with temperatures between 70-75°F (21-24°C). Ensure that the seeds receive plenty of light by placing them near a bright window or using fluorescent grow lights. Aim for 12 to 16 hours of light per day.
Maintaining Moisture: Keep the seed starting mix evenly moist by misting it with water or using a spray bottle. Avoid overwatering, as this can lead to dampening off or root rot. Use a plastic cover or a clear plastic dome to create a mini-greenhouse effect and retain moisture.
Transplanting Seedlings: Once the seedlings have developed their first true leaves and are about 3-4 inches tall, they are ready to be transplanted outdoors. Harden off the seedlings by gradually exposing them to outdoor conditions, starting with a few hours of morning sunlight and increasing the duration each day.
Starting kale from seeds indoors gives you control over the germination and early growth stages, setting your plants up for success once they are transplanted outdoors. By following these steps, you’ll enjoy a healthy and robust kale harvest in your garden.
Transplanting Kale Seedlings Outdoors
Transplanting kale seedlings outdoors is an exciting step in the growing process, as it allows the young plants to thrive in the natural environment. When the seedlings have reached a suitable size and the weather conditions are favorable, follow these steps to transplant them outdoors:
Choose the Right Timing: Transplant kale seedlings outdoors when the threat of frost has passed and the soil temperature has warmed to around 40-75°F (4-24°C). This is typically in early spring or late summer to early fall, depending on your location.
Prepare the Planting Area: Select a sunny location with well-drained soil to ensure optimal growth. Clear the area of weeds and cultivate the soil to a depth of about 6-8 inches. Incorporate compost or organic matter to improve soil fertility and structure.
Space the Seedlings: Provide enough room between seedlings for air circulation and proper growth. Space them about 12-18 inches apart in rows that are approximately 18-24 inches apart. This allows ample space for the kale plants to develop without crowding each other.
Water the Seedlings: Before transplanting, water the seedlings thoroughly to ensure that the roots are well-hydrated. This will help minimize transplant shock and aid in the establishment of the plants in their new location.
Transplant with Care: Dig a hole slightly larger than the root ball of each seedling. Gently remove the seedlings from their containers, being mindful of the delicate roots. Place the seedling in the hole and backfill with soil, ensuring that the plants are at the same depth as they were previously growing.
Water the Transplanted Seedlings: After transplanting, give the seedlings a thorough watering to settle the soil and eliminate any air pockets around the roots. Maintain adequate moisture throughout the growing season, providing approximately 1-1.5 inches of water per week, depending on the weather conditions.
Protect from Elements: Consider using row covers or netting to protect the young seedlings from pests, extreme weather conditions, and excessive sun. These covers also help in creating a microclimate that encourages growth and protects against pests.
Transplanting kale seedlings outdoors gives them the opportunity to acclimate to the natural environment and establish strong root systems. By following these steps, you can ensure a successful transition for your kale plants, setting them up for a productive and abundant harvest.
Direct Sowing Kale Seeds
Direct sowing kale seeds is an alternative method to starting seedlings indoors. This approach eliminates the need for transplanting and allows the seeds to germinate and grow directly in the garden. Here are some steps to follow when direct sowing kale seeds:
Selecting the Planting Location: Choose a sunny spot in your garden with well-draining soil. Kale thrives in cool weather, so select an area with partial shade for hotter regions, or full sun for cooler climates.
Preparing the Soil: Clear the planting area of any debris or weeds. Loosen the soil to a depth of 6-8 inches using a garden fork or a tiller. Remove any large rocks or roots that may interfere with root growth.
Sowing the Seeds: Follow the instructions on the seed packet for the recommended spacing and depth. Typically, kale seeds should be planted about ½ inch deep and spaced 12-18 inches apart.
Watering the Seeds: After sowing the seeds, water the area thoroughly to ensure adequate moisture for germination. Keep the soil consistently moist, but not waterlogged, throughout the germination process.
Thinning the Seedlings: Once the seedlings emerge and reach a height of a few inches, thin them out to provide enough space for each plant to grow. Space the seedlings about 12-18 inches apart to allow for proper air circulation and healthy development.
Weed and Mulch: Keep the planting area weed-free by regularly removing any weeds that might compete with the kale plants for nutrients and water. Apply a layer of organic mulch around the seedlings to help retain soil moisture and suppress weed growth.
Provide Adequate Watering: Water the kale plants deeply and evenly, providing approximately 1-1.5 inches of water per week. Adjust the frequency and amount of watering based on the weather conditions and moisture needs of the plants.
Protect from Pests: Monitor the kale plants for any signs of pest damage, such as chewed leaves or holes. Use organic pest control methods, like handpicking pests or using insecticidal soap, to deter pests and protect your kale plants.
Harvesting: Depending on the variety, kale takes around 60-90 days to mature. Begin harvesting the outer leaves when they are about 8-10 inches long, leaving the central leaves to continue growing. Regularly harvest the outer leaves to promote continuous growth and maximize your harvest.
Direct sowing kale seeds allows for a simple and straightforward approach to growing this nutritious leafy green. By following these steps, you can enjoy freshly grown kale straight from your garden without the need for transplanting.
Providing Adequate Watering and Drainage
Adequate watering and proper drainage are essential factors for the successful growth of kale plants. Kale requires consistent moisture but also requires good drainage to prevent waterlogged roots and potential diseases. Here are some guidelines for providing adequate watering and ensuring proper drainage for your kale:
Watering: Kale plants prefer consistently moist soil throughout their growth cycle. Regular watering is especially important during dry periods to prevent the leaves from wilting and becoming bitter. Water deeply, aiming to provide about 1-1.5 inches of water per week. Adjust watering frequency based on weather conditions, ensuring that the soil doesn’t dry out completely.
Watering Methods: Use a watering can, garden hose with a spray attachment, or drip irrigation to deliver water directly to the soil. Water at the base of the plant to avoid wetting the foliage, as this can encourage diseases like powdery mildew. Avoid overhead watering, especially in humid climates, to minimize fungal diseases.
Monitoring Moisture: Regularly check the moisture level of the soil by sticking your finger about an inch into the ground. If it feels dry at that depth, it’s a sign that the plants need watering. Avoid overwatering, as this can lead to root rot and other issues. Striking the right balance is crucial for optimal growth.
Drainage: Kale thrives in well-draining soil. If your soil retains excess moisture, it can lead to root rot and other fungal diseases. Improving drainage is key in such cases. Prioritize planting kale in raised beds or mounds if your soil tends to stay soggy. Alternatively, you can amend the soil with organic matter like compost or vermiculite to enhance drainage.
Mulching: Apply a layer of organic mulch around the base of kale plants. Mulching helps to retain soil moisture, slow down evaporation, and suppress weed growth. Use materials like straw, wood chips, or grass clippings. Keep the mulch a few inches away from the main stem to prevent rot and improve air circulation.
Observing Leaf Appearance: Monitor the leaves of the kale plants for signs of underwatering or overwatering. Wilting, yellowing, or dry leaves indicate a lack of water, while yellowing with brown spots or mushy leaves can indicate overwatering. Adjust your watering practices accordingly based on these visual cues.
Providing adequate watering and ensuring proper drainage are essential for healthy kale plants. By following these guidelines, you can maintain the right moisture level in the soil and prevent issues related to both under and overwatering. This will help your kale plants thrive and provide a bountiful harvest.
Applying Mulch to Retain Moisture
Applying mulch to your kale plants offers numerous benefits, including moisture retention, weed suppression, and temperature regulation. Mulching helps to create a favorable environment for kale by conserving soil moisture and promoting healthy growth. Here’s why and how to apply mulch to retain moisture for your kale plants:
Moisture Retention: Applying mulch around kale plants helps to retain soil moisture by reducing evaporation. The mulch acts as a protective layer, preventing water from quickly evaporating from the soil surface. This is especially beneficial during hot and dry periods, ensuring that the roots have consistent access to the moisture they need for growth.
Weed Suppression: Mulch acts as a natural barrier that suppresses weed growth. The layer of mulch prevents sunlight from reaching weed seeds, inhibiting their germination and growth. This reduces competition for water, nutrients, and sunlight between the kale plants and weeds, allowing the kale to thrive without the interference of invasive plants.
Temperature Regulation: Mulch acts as an insulating layer, helping to regulate soil temperatures around the kale plants. It keeps the soil cooler during hot summer months and warmer during colder periods, providing a more stable and favorable environment for root development.
Choosing the Right Mulch: Organic mulches, such as straw, wood chips, shredded leaves, or compost, are excellent choices for mulching around kale plants. These materials gradually break down over time, enriching the soil with organic matter and nutrients. They also improve soil structure, aeration, and water-holding capacity.
Applying Mulch: Start by clearing the ground around the kale plants of any weeds or debris. Water the soil thoroughly before applying mulch to ensure that it is moist. Apply a layer of mulch around the base of the plants, making sure to cover the root zone but leaving a small gap around the stem to prevent rot. The ideal thickness of mulch is around 2-3 inches to offer adequate weed suppression and moisture retention.
Maintaining Mulch: Regularly monitor the mulch layer and replenish it as needed. Over time, organic mulches decompose, so adding a fresh layer annually or as necessary will ensure continued weed suppression and moisture retention benefits.
Watering with Mulch: When watering the kale plants, direct the water towards the base of the plants rather than over the mulch. This allows the water to penetrate the soil directly, maximizing its effectiveness.
Mulching around kale plants is a simple but effective technique to retain moisture, suppress weeds, and regulate soil temperature. By applying mulch, you create a favorable growing environment that promotes healthy and productive kale plants in your garden.
Fertilizing Kale Plants
Fertilizing kale plants is essential to providing them with the necessary nutrients for healthy growth and optimal yields. While kale is a hardy vegetable, it benefits from a balanced fertilization regimen to ensure it has access to the nutrients it needs. Here are some guidelines for effectively fertilizing your kale plants:
Soil Preparation: Before planting kale, incorporate well-rotted compost or aged manure into the soil. This will enrich the soil with organic matter and provide a good foundation of nutrients. If your soil is lacking in fertility, you can also add a slow-release organic fertilizer during soil preparation.
Timing: Kale plants benefit from fertilizer applications at different stages of growth. Apply fertilizer at planting, when plants are established, and during active growth to provide a steady supply of nutrients. Follow the manufacturer’s instructions for specific timings and application rates.
Choose the Right Fertilizer: Select a balanced, all-purpose fertilizer with equal ratios of nitrogen (N), phosphorus (P), and potassium (K). Look for a fertilizer with an NPK ratio of around 10-10-10 or similar. This will provide the necessary macronutrients for overall plant development.
Application Methods: There are two primary methods for fertilizing kale plants: top-dressing and side-dressing. For top-dressing, sprinkle the fertilizer evenly around the base of the plants, avoiding direct contact with the leaves. For side-dressing, create a shallow trench a few inches away from the plant’s base, apply the fertilizer into the trench, and cover it with soil.
Organic Fertilizers: If you prefer organic alternatives, use well-composted materials like fish emulsion, seaweed extracts, or compost tea. These organic fertilizers provide a slow release of nutrients and improve soil health by promoting beneficial microbial activity.
Watering After Fertilizing: After applying fertilizer, water the kale plants deeply. This helps to incorporate the nutrients into the soil and prevents the risk of fertilizer burn. Adequate water also aids in the transportation of nutrients to the root zone, where they can be taken up by the plants.
Observing Plant Response: Monitor the kale plants for signs of nutrient deficiencies or excesses. Symptoms such as yellowing leaves, stunted growth, or unusual leaf coloring can indicate imbalances in nutrient availability. Adjust your fertilization program accordingly by using specific fertilizers or supplements to address the deficiencies.
Organic Matter for Continuous Feeding: Regularly adding compost or well-rotted organic matter around the base of the kale plants provides a continuous supply of nutrients. This organic matter improves soil structure, fertility, and overall plant health, reducing the need for additional fertilizer applications.
By following these guidelines, you can provide the necessary nutrients for your kale plants, promoting vigorous growth, lush foliage, and a successful harvest. Regular fertilization ensures that your kale plants are well-nourished throughout their growth cycle.
Managing Pests and Diseases
Managing pests and diseases is an important aspect of growing healthy kale plants. While kale is relatively resistant to many common garden pests and diseases, it is still susceptible to certain issues. Implementing preventive measures and early detection can help ensure the well-being of your kale plants. Here are some tips for effectively managing pests and diseases:
Pest Identification: Learn to identify common pests that can affect kale plants, such as aphids, cabbage worms, flea beetles, and slugs. Regularly inspect your plants for any signs of pest activity, including holes in leaves, chewed foliage, or visible insects.
Encourage Beneficial Insects: Attract beneficial insects to your garden, such as ladybugs, lacewings, and parasitic wasps. These insects feed on harmful pests and help control their populations naturally. Planting companion plants like dill, cilantro, or marigold can attract beneficial insects and deter pests.
Natural Remedies: If you notice pests on your kale plants, consider using organic pest control methods. Physically remove pests by handpicking them off the plants. You can also use insecticidal soap, neem oil, or a homemade garlic spray to deter pests. These natural remedies help protect your kale plants without the use of harmful chemicals.
Crop Rotation: Rotate kale plants to different areas of your garden each year. This prevents the buildup of pests and diseases specific to kale. Avoid planting kale or related crops in the same spot for consecutive years, as it can increase the risk of infestations and diseases.
Maintain Good Air Circulation: Proper air circulation is crucial for preventing fungal diseases, such as powdery mildew or black rot. Avoid overcrowding kale plants by giving them ample space. Prune or remove any nearby vegetation that could obstruct airflow around the plants.
Healthy Soil and Plant Nutrition: Maintain healthy soil by adding organic matter, such as compost, to improve nutrient availability and plant immunity. Well-nourished plants are less susceptible to diseases and pests. Avoid over-fertilizing, as it can attract pest infestations.
Monitor and Treat Early: Regularly inspect your kale plants for any signs of diseases or pests. Early detection is key for effective management. If you notice any issues, act promptly by applying appropriate organic treatments or consulting with a local garden center for advice.
Protective Barriers: Use row covers or nets to physically protect plants from insect pests like cabbage worms or flea beetles. These barriers create a physical barrier between the pests and plants, preventing feeding damage.
By implementing these pest and disease management techniques, you can ensure the health of your kale plants and promote a productive harvest. Regular vigilance and proactive measures will help minimize the impact of pests and diseases on your kale crop.
Harvesting Kale Leaves
Harvesting kale leaves is an exciting part of growing this nutritious green vegetable. Kale is a cut-and-come-again crop, meaning you can continually harvest leaves as needed while the plant continues to grow. Here are some guidelines for successfully harvesting kale leaves:
Wait for Mature Leaves: Kale leaves can be harvested once they reach a size that is suitable for consumption. Allow the plant to grow and develop for approximately 60-90 days before beginning to harvest. Young leaves are more tender and flavorful, while older leaves can be slightly tougher.
Harvesting Method: Rather than removing the entire plant, opt for the selective harvesting method. This involves picking individual mature leaves from the outer portion of the plant while allowing the younger, inner leaves to continue growing. Harvesting this way encourages continuous leaf production throughout the growing season.
Leaf Selection: Choose leaves that are healthy, vibrant, and free from any signs of diseases or pests. Select leaves that are about 8-10 inches in length, depending on your preference. Smooth leaves are usually more tender, while curly leaves offer more texture.
Harvesting Technique: To harvest kale leaves, use a sharp pair of garden scissors or pruning shears. Cut the individual mature leaf at the base, close to where it meets the main stem. You can also gently pull the leaf downward to snap it off if it feels tender and breaks away easily.
Leave Central Leaves: Avoid harvesting all of the leaves from the center of the plant. Leave the central leaves, also known as the “growing point,” to promote continuous growth. This allows the plant to continue producing new leaves for future harvests.
Regular Harvesting: Regularly harvest the outer leaves as needed, typically about once a week or every 10-14 days. This helps to maintain the plant’s vitality and encourages the growth of fresh leaves. Kale leaves can be stored for several days in the refrigerator.
Trick for Tenderizing Tough Leaves: If you find that the older kale leaves are tough or fibrous, you can try gently massaging them or briefly blanching them in boiling water for a few seconds. This can help soften the texture and make them more enjoyable to eat.
Post-Harvest Care: After harvesting, remove any damaged or wilted leaves and discard them. Rinse the harvested leaves under cool running water to remove any dirt or debris. Once cleaned, pat them dry with a clean towel or use a salad spinner before storing or using them.
By harvesting kale leaves selectively and regularly, you can enjoy a steady supply of fresh and nutritious greens throughout the growing season. Remember to handle the leaves gently to avoid bruising or damaging them, and savor the abundance of homegrown kale in your meals.
Storing and Using Fresh Kale
After harvesting kale from your garden, proper storage and utilization techniques will help you enjoy its freshness and nutritional benefits for an extended period. Here are some tips on storing and using fresh kale:
Storing Fresh Kale:
– Rinse: Gently wash the kale leaves under cool running water to remove any dirt or debris.
– Drying: Pat the leaves dry with a clean towel or use a salad spinner to remove excess moisture. Dry leaves will last longer and remain fresh.
– Wrapping: Wrap the kale leaves loosely in a paper towel or store them in a breathable plastic bag. Inserting a paper towel will help absorb any excess moisture and prevent wilting.
– Refrigeration: Place the wrapped kale leaves in the crisper drawer of your refrigerator. The optimal storage temperature for kale is around 32-36°F (0-2°C), with a humidity level of around 95%.
– Shelf Life: Fresh kale can be stored in the refrigerator for up to 7-10 days. However, it is best to consume it as soon as possible for maximum freshness and nutritional value.
Using Fresh Kale:
– Salads: Kale leaves are a great addition to salads. Tear or chop the leaves into bite-sized pieces and toss them with other salad ingredients like tomatoes, cucumbers, and dressings. For a tender texture, massage the kale leaves with a bit of olive oil and lemon juice before adding the other ingredients.
– Smoothies: Add kale leaves to your favorite smoothie recipe for a nutritious boost. Blend them with fruits, yogurt, and a liquid of your choice for a refreshing and healthy drink.
– Stir-fries and Sautes: Sauté kale leaves with garlic, onions, and olive oil for a quick and healthy side dish. Add them to stir-fries with other vegetables and protein sources like tofu or chicken for a nutritious and flavorful meal.
– Soups and Stews: Kale is a hearty addition to soups and stews. Add chopped kale leaves to simmering broths or vegetable-based soups for added texture and a boost of nutrients.
– Kale Chips: Transform kale leaves into crispy and savory kale chips. Toss the leaves with olive oil, seasonings of your choice, and bake them in the oven until crisp. Enjoy them as a nutritious snack.
– Blanched and Frozen: If you have excess kale, blanch the leaves in boiling water for a minute, then transfer them to an ice bath to stop the cooking process. Drain and freeze them in airtight containers or freezer bags. Frozen kale can be used in smoothies, soups, or stews.
By properly storing and utilizing fresh kale, you can maximize its flavors, textures, and nutritional benefits. Experiment with different cooking methods and recipes to enjoy the versatility of this nutrient-rich leafy green.
Saving Seeds for Next Year’s Crop
Saving seeds from your kale plants is a cost-effective and rewarding way to ensure a continuous supply of this nutritious vegetable. By saving seeds, you can maintain the desirable characteristics of your favored kale varieties and even experiment with cross-pollination to develop unique varieties suited to your specific garden conditions. Here are some steps to successfully save seeds for next year’s kale crop:
Choose Open-Pollinated Varieties: Select open-pollinated kale varieties for seed saving. Open-pollinated plants will produce offspring with similar traits, allowing you to maintain consistency in your future crops. Avoid planting hybrid varieties as they may not produce true-to-type offspring.
Leave Some Plants to Bolt: Allow some of your kale plants to mature fully and begin bolting, which is the natural process of flowering and seed formation. Let the plants develop seed pods instead of harvesting them for leaves.
Monitor Seed Development: As the plant’s flowers fade, seed pods will begin to form. Monitor the seed pods regularly and observe them as they change color and dry out. Harvest the seeds when the pods turn brown and become dry and brittle.
Collecting Seeds: Harvest the dry seed pods by gently pulling or cutting them from the plants. Place the pods in a clean, dry container such as a paper bag or envelope. Label the container with the variety name and the date of seed collection.
Threshing the Seeds: To separate the seeds from the seed pods, gently crush or rub the dried pods between your hands. This will release the seeds from the protective pods. Alternatively, you can use a sieve or strainer to separate the seeds from the debris.
Cleaning and Drying: After threshing, remove any remaining plant matter or debris from the seeds. Use a fine mesh screen or sieve to clean the seeds further if necessary. Allow the seeds to dry completely in a cool, well-ventilated area for about a week before storing them.
Storage: Once the seeds are completely dry, store them in airtight containers such as glass jars or seed envelopes. Store them in a cool, dark, and dry place to maintain their viability. Consider including a desiccant packet to control moisture levels and prevent the seeds from becoming damp and losing their potency.
Labeling: Proper labeling is essential for future reference. Make sure to label each seed container with the kale variety, the date of collection, and any additional notes or observations you may want to remember for next year’s planting.
Germination Test: Before planting saved seeds, perform a germination test. Place a small number of seeds on a damp paper towel and keep them in a warm location. Check for sprouting after a week. If the germination rate is low, you may need to consider alternative seed sources for a higher success rate.
Saving seeds from your kale plants is a fulfilling and sustainable practice that allows you to maintain the genetic diversity of your favorite varieties. By following these steps, you can confidently save seeds and ensure a successful kale crop year after year.