
Choosing the Right Variety of Chive Seeds
When it comes to selecting chive seeds for planting, there are several factors to consider. With a wide range of chive varieties available, each offering unique flavors and appearances, choosing the right one can enhance your culinary experience and make your garden flourish. Here are some key points to keep in mind:
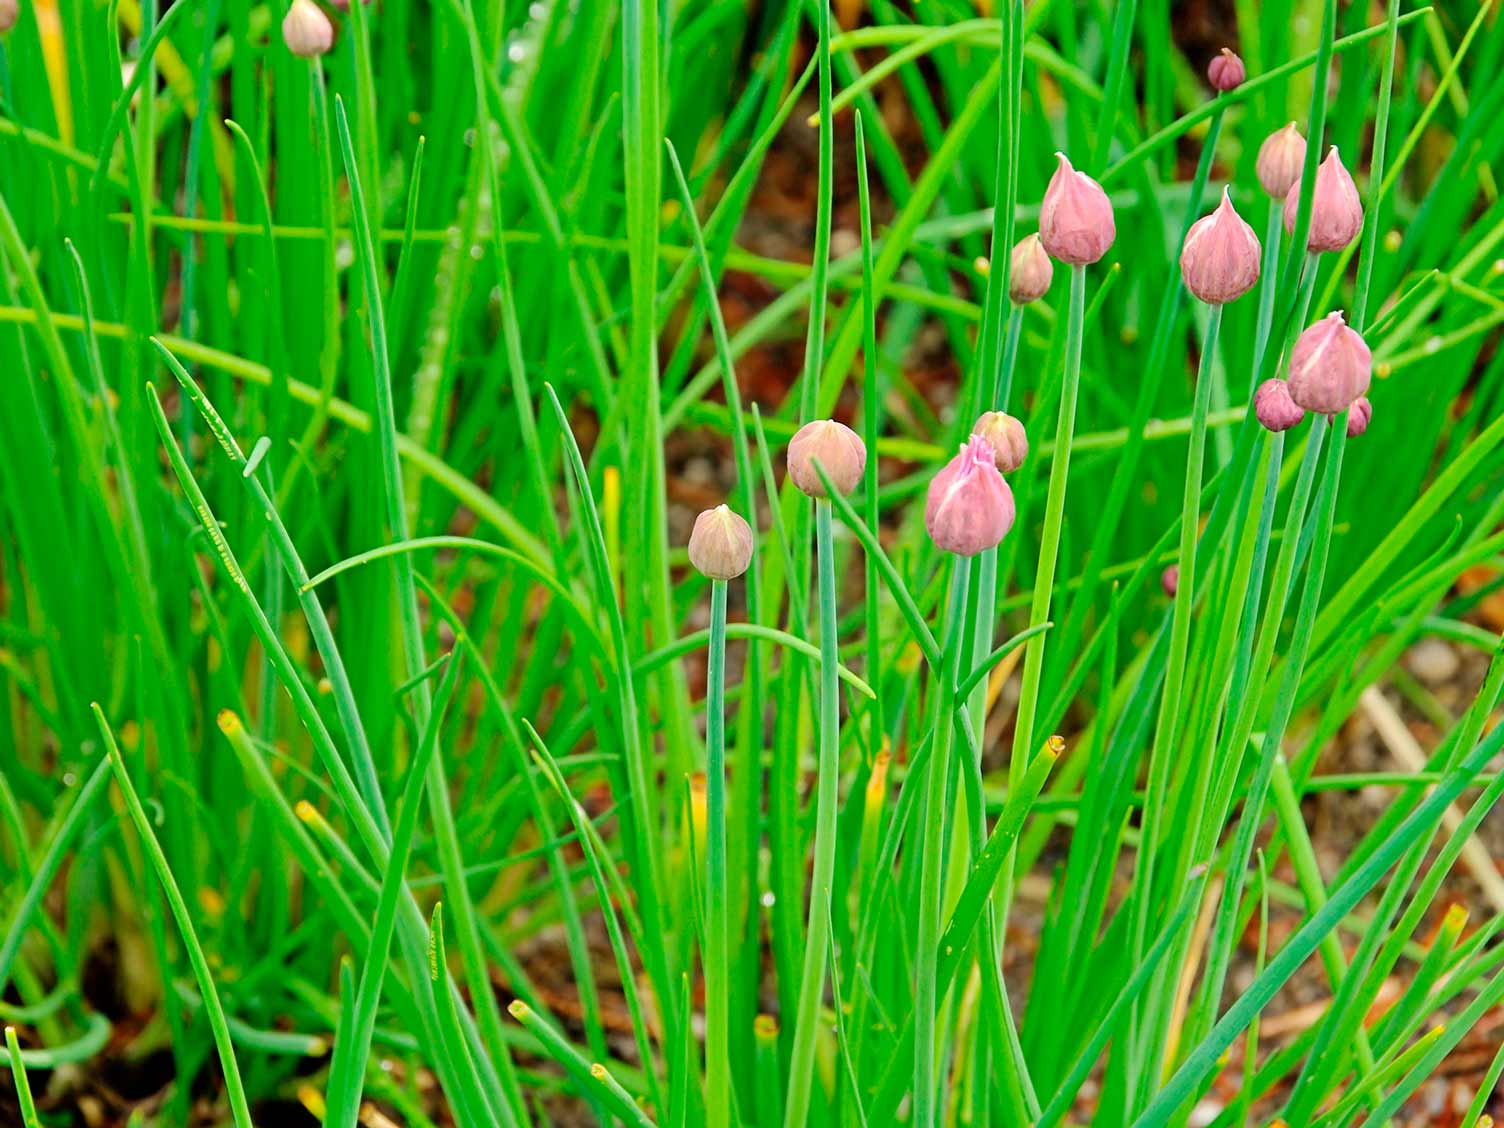
- Common Chives (Allium schoenoprasum): These are the most popular chive variety, recognized for their mild onion flavor. Common chives have thin, green leaves and delicate purple flowers. They are versatile and can be used in a variety of dishes, from soups and salads to sauces and garnishes.
- Garlic Chives (Allium tuberosum): As the name suggests, garlic chives have a distinct garlicky taste. They feature flat, broad leaves and white flowers. Garlic chives add a strong flavor to stir-fries, dumplings, and herb butters.
- Curly Chives (Allium crispum): If you’re after a visually striking addition to your herb garden, consider planting curly chive seeds. As the name implies, their leaves have curly edges, adding texture and aesthetic appeal to your dishes. They have a milder taste compared to common and garlic chives.
- Wild Chives (Allium schoenoprasum var. sibiricum): These chives are native to Siberia and have a stronger onion flavor compared to common chives. They produce small white flowers and can be a hardier option for colder climates.
Consider your culinary preferences and the dishes you plan to prepare when choosing the variety of chive seeds. It’s also worth noting that chives are known for their ability to repel pests, making them a useful addition to any garden.
Whether you opt for common chives, garlic chives, curly chives, or wild chives, each variety offers a unique flavor profile and aesthetic appeal. Experiment with different chive varieties to find the ones that best complement your cooking style and garden environment.
Preparing the Soil for Planting
The success of your chive plants largely depends on the quality of the soil they are planted in. By preparing the soil correctly, you can create a nutrient-rich and well-draining environment for your chive seeds to thrive. Here are some steps to follow when preparing the soil:
- Clear the area: Start by clearing the area where you plan to plant your chives. Remove any weeds, rocks, or debris that may hinder the growth of your plants.
- Loosen the soil: Chives prefer loose, well-draining soil. Use a garden fork or a tiller to break up compacted soil and improve its structure. This will allow the roots to penetrate deeply and access essential nutrients and water.
- Add organic matter: Enrich the soil with organic matter, such as compost or well-rotted manure. This helps to improve soil fertility, drainage, and moisture retention. Spread a layer of organic matter over the soil and mix it well using a garden fork or a tiller.
- Test the soil pH: Chives thrive in slightly alkaline soil with a pH between 6.0 and 7.0. Test the soil pH using a soil testing kit available at your local garden center. If the pH is too acidic, you can add agricultural lime to raise it to the desired level.
- Ensure proper drainage: Chives dislike standing water, so it’s important to ensure proper drainage. If your soil is heavy and clayey, consider amending it with sand or perlite to improve drainage. Avoid planting chives in low-lying areas that are prone to waterlogging.
Once you have prepared the soil, it’s crucial to give it time to settle before planting your chive seeds. This allows the organic matter to integrate with the soil and for any pH adjustments to take effect. Water the soil lightly after preparation to help it settle and provide a moist environment for your chives to establish their roots.
By taking the time to properly prepare the soil, you are setting a strong foundation for your chive plants to grow and flourish. The well-drained, nutrient-rich soil will support healthy root development, leading to abundant foliage and flavorful harvests.
Sowing Chive Seeds Indoors
Sowing chive seeds indoors allows you to get a head start on the growing season and ensures a higher rate of germination. Here’s a step-by-step guide on how to sow chive seeds indoors:
- Select containers: Choose deep containers or seed trays with drainage holes to prevent waterlogging. Clean the containers thoroughly before use to reduce the risk of diseases.
- Fill with seed starting mix: Fill the containers with a high-quality seed starting mix. This lightweight, sterile medium provides the ideal conditions for chive seed germination.
- Sow the seeds: Sprinkle the chive seeds evenly on the surface of the seed starting mix. Press them lightly into the soil, but avoid burying them too deeply, as chive seeds require light to germinate.
- Mist the soil: Use a spray bottle to mist the soil gently, ensuring that it is evenly moist but not waterlogged. Chive seeds need consistent moisture for successful germination.
- Provide warmth and light: Place the containers in a warm location with temperatures between 60-70°F (15-21°C). Chives also require ample light, so provide 12-16 hours of bright, indirect sunlight or use grow lights.
- Keep the soil moist: Monitor the moisture levels and mist the soil as needed to keep it consistently moist. Avoid overwatering, as this can lead to fungal diseases and rot. A spray bottle can help maintain proper moisture levels.
- Germination and thinning: Chive seeds typically germinate within 7-14 days. Once the seedlings emerge, thin them if necessary to provide enough space for growth. Space them about 4-6 inches apart.
As the chive seedlings grow, continue to provide them with adequate light and moisture. Regularly check for any signs of pests or diseases and take appropriate action if needed. When the outdoor temperatures warm up and the seedlings have developed 4-5 leaves, they will be ready for transplanting outdoors.
Sowing chive seeds indoors gives you a head start on the growing season and ensures healthy and vigorous seedlings. With proper care and attention, you’ll soon have bountiful chive plants ready to be enjoyed in your garden or culinary creations.
Transplanting Chive Seedlings Outdoors
Once your chive seedlings have grown to a suitable size indoors and the threat of frost has passed, it’s time to transplant them into your outdoor garden. Transplanting chive seedlings requires careful handling to ensure their successful adaptation to the outdoor environment. Follow these steps to transplant your chive seedlings outdoors:
- Choose the right location: Select a sunny spot in your garden with well-draining soil. Chives thrive in full sun but can tolerate partial shade.
- Prepare the soil: Just like when preparing the soil for planting, ensure that the soil is loose, fertile, and well-draining. Incorporate organic matter, such as compost or well-rotted manure, into the soil to improve its texture and nutrient content.
- Make holes: Dig holes in the prepared soil that are large enough to accommodate the root ball of each chive seedling. Space the holes about 8-10 inches apart to allow for the plant’s growth.
- Water the seedlings: Before transplanting, water the chive seedlings thoroughly to ensure that the root ball is moist. This will help reduce transplant shock and assist with their establishment in the new location.
- Transplant the seedlings: Gently remove the chive seedlings from their containers, making sure to keep the soil around the roots intact. Place each seedling into a prepared hole, ensuring the top of the root ball is level with the soil surface. Fill the hole with soil, gently firming it around the seedling.
- Water again: After transplanting, give the chive seedlings a thorough watering to help settle the soil and provide moisture to the roots. Keep the soil consistently moist but not overly saturated as the plants establish themselves.
- Mulch the plants: Apply a layer of organic mulch around the base of the chive plants to help retain moisture, suppress weed growth, and regulate soil temperature. Use materials such as straw, grass clippings, or wood chips.
As your chive seedlings adjust to their new outdoor environment, continue to provide them with appropriate care. Regularly water the plants during dry periods and monitor for any signs of pests or diseases. With time, the chive plants will establish themselves and begin to flourish in their new home.
Transplanting chive seedlings outdoors is a critical step in their growth journey. By following these steps and providing the necessary care, you’ll ensure that your chive plants have a strong start and can thrive in your garden.
Caring for Chive Seedlings
Once your chive seedlings are transplanted outdoors, they require proper care to ensure their healthy growth and productivity. By providing the right conditions and attending to their needs, you’ll help your chive seedlings flourish into robust and flavorful plants. Here are some essential care tips for your chive seedlings:
- Watering: Chives prefer consistently moist soil, so water them regularly, especially during dry periods. Aim to keep the soil evenly moist but avoid overwatering, which can lead to root rot.
- Fertilizing: Chives are not heavy feeders, but a light feeding of a balanced organic fertilizer or compost in early spring can promote healthier growth. Avoid over-fertilizing, as this can result in excessive foliage with reduced flavor.
- Weeding: Regularly weed the area around your chive seedlings to prevent competition for nutrients and water. Be careful when removing weeds to avoid damaging the shallow chive roots.
- Pruning: To encourage bushier growth, snip or pinch off the outermost leaves of the chive plants periodically. Regular harvesting also helps prevent the plants from becoming too leggy.
- Pest control: Chives are generally resistant to pests and diseases. However, it’s important to keep an eye out for aphids, onion flies, and thrips. If infestations occur, you can use natural pest control methods or organic insecticides to manage them.
- Division: Chives tend to clump together over time. To maintain their vitality, divide the clumps every 3-4 years in early spring or fall. Dig up the clump and gently separate the individual plants, then replant them with adequate spacing.
- Winter care: Chives are perennial plants and can survive winter freezes. However, if you live in a region with extremely cold winters, provide some winter protection by mulching the plants with straw or leaves.
By following these care guidelines, you’ll ensure that your chive seedlings receive the necessary attention and create an optimal environment for their growth. Healthy chive plants will reward you with abundant and flavorful harvests, making them a valuable addition to your garden and culinary creations.
Harvesting Chives
Harvesting chives is an exciting part of growing these versatile herbs. With their delicate onion-like flavor, chives can add a fresh burst of taste to a wide range of dishes. Proper harvesting techniques ensure that you get the most out of your chive plants while promoting ongoing growth. Here’s how to harvest chives:
- Wait for growth: Chives usually reach a harvestable size within 60-90 days after planting. Allow the plants to establish themselves and develop a sufficient amount of foliage before you start harvesting.
- Choose the right time of day: Harvest chives in the morning after any dew has evaporated. This is when the essential oils in the leaves are at their peak, providing the best flavor. Avoid harvesting in the heat of midday when the leaves may wilt easily.
- Snip or cut: Use sharp, clean scissors or herb clippers to cut the chive leaves. Start by cutting the outer leaves about 2 inches above the soil level. Alternatively, you can snip individual leaves close to the base. This allows the inner leaves to continue growth.
- Leave some growth: To maintain the vitality of your chive plants, never harvest more than one-third of the foliage at a time. Leaving enough leaves ensures that the plants can continue producing food through photosynthesis.
- Trim flowers: Chive plants produce lovely purple flowers that are edible and have a milder flavor. However, if you want to focus on leaf production, it’s recommended to trim the flower spikes as soon as they appear. This encourages more leaf growth.
- Regular harvesting: Chives grow vigorously, especially during the warm months. Harvest them every 2-3 weeks to ensure continuous growth and prevent the leaves from becoming tough or yellow.
Freshly harvested chives can be used immediately or stored for later use. If you won’t be using the chives right away, follow the proper storage techniques to maintain their flavor and freshness.
By harvesting chives correctly, you’ll encourage healthy growth and ensure a steady supply of these flavorful herbs throughout the growing season. Enjoy the bounty of your chive plants in a variety of culinary delights.
Storing and Using Chives
Once you have harvested a bountiful supply of chives, it’s important to store them properly to maintain their flavor and freshness. Additionally, understanding how to use chives in your culinary creations will help bring out their delicate onion-like taste and vibrant green color. Here are some tips for storing and using chives:
- Storage: After harvesting, gently wash the chives and pat them dry with paper towels. You can store them in a few different ways:
- Refrigerator: Wrap the chives loosely in a damp paper towel and store them in a breathable container or bag in the refrigerator. They should stay fresh for up to a week.
- Freezing: Chop the chives into small pieces and freeze them in an airtight container or freezer bag. Frozen chives retain most of their flavor and are ideal for use in cooked dishes.
- Drying: If you prefer dried chives, hang the clean, whole chive stalks upside down in a warm, well-ventilated area. Once fully dried, crumble the leaves and store them in an airtight container.
- Utilizing fresh chives: Fresh chives can be used in various dishes to add a subtle onion flavor and a pop of color. Here are some common ways to incorporate fresh chives into your cooking:
- Garnish: Sprinkle chopped chives over soups, salads, scrambled eggs, or baked potatoes to add a burst of flavor and visual appeal.
- Sauces and dressings: Mix finely chopped chives into creamy sauces, herb-infused butters, or homemade salad dressings for added freshness.
- Herb-infused oils and vinegars: Combine chives with other herbs and infuse them into olive oil or vinegar for a flavorful base in your culinary creations.
- Using dried chives: Dried chives are a convenient alternative when fresh chives are not readily available. Here are some ways to use dried chives:
- Seasoning: Sprinkle dried chives into dips, marinades, or meat rubs for a subtle onion flavor.
- Soups and stews: Add a pinch of dried chives to enhance the flavors of homemade soups, stews, and broths.
- Pasta and rice dishes: Mix dried chives with cooked pasta, rice, or quinoa to lend a delicate onion-like taste to the dish.
Experiment with using chives in your favorite recipes and get creative with their versatility. Whether you choose to use fresh or dried chives, they will add a delightful touch to your culinary creations.