
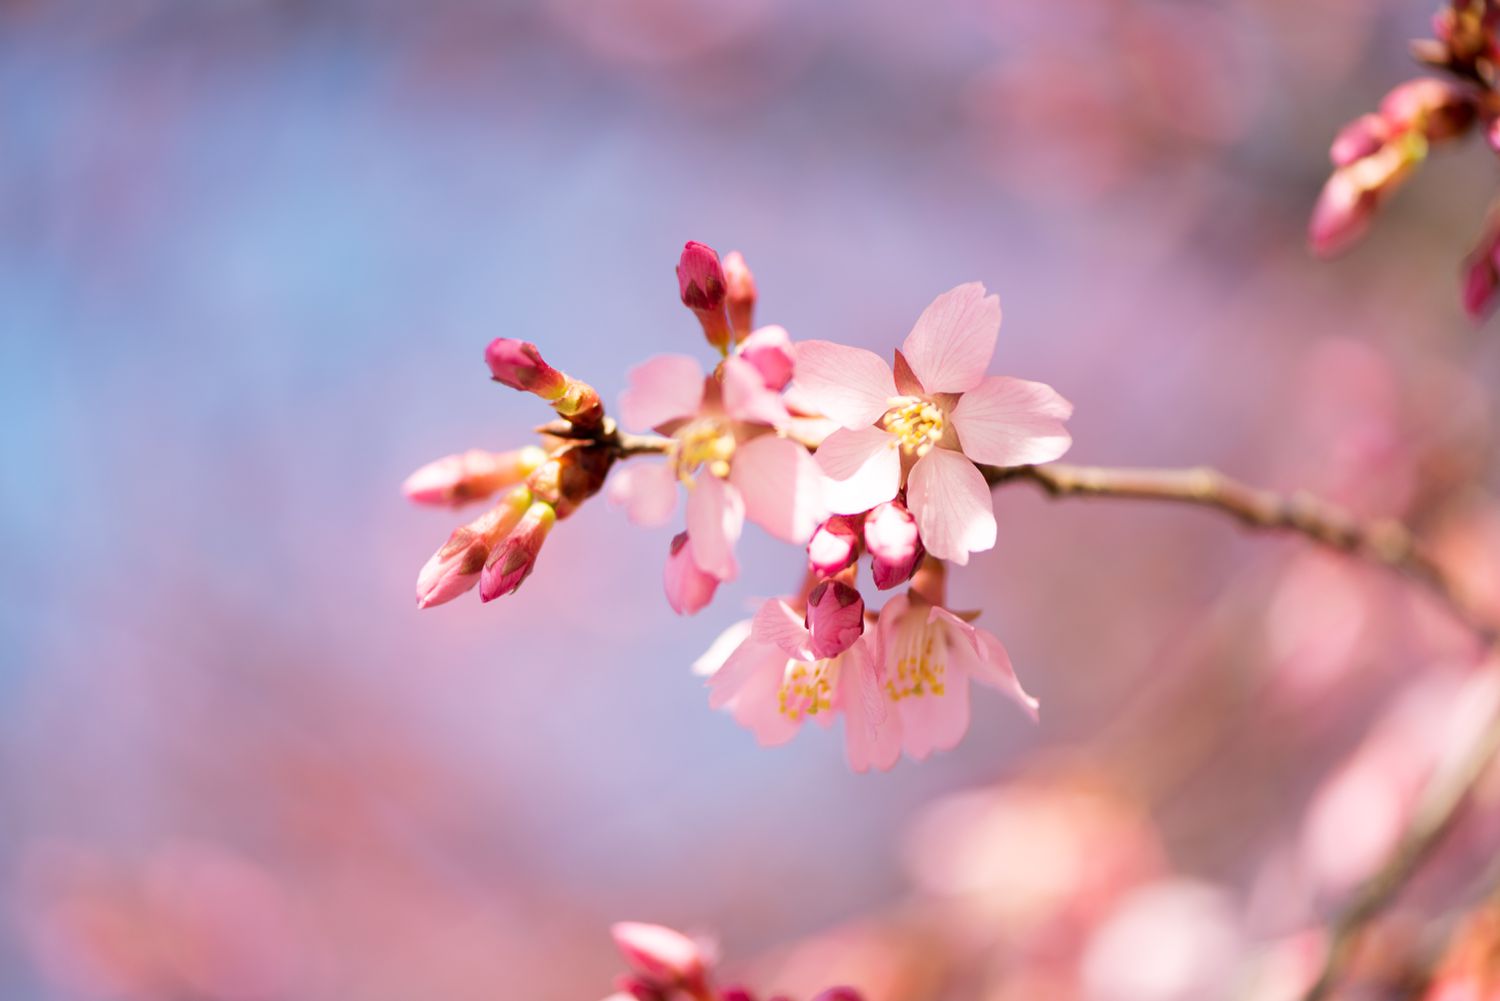
Choosing the Right Variety
When it comes to planting cherry trees, one of the most crucial decisions you’ll need to make is choosing the right variety. With so many different cherry tree varieties available, selecting the one that suits your climate, soil conditions, and personal preferences is essential for a successful harvest.
Before you make a decision, consider the following factors:
- Climate: Different cherry tree varieties have different climate requirements. Some thrive in cool climates, while others prefer warmer regions. Make sure to choose a variety that is well-suited to your local climate to ensure healthy growth and abundant fruiting.
- Chilling Hours: Some cherry tree varieties require a certain number of chilling hours during winter to ensure proper bud development. Check the chilling hour requirements of the variety you’re interested in and ensure it aligns with the average winter temperatures in your area.
- Pollination: Cherry trees can be self-pollinating or require cross-pollination with another compatible variety. If you have limited space or only want one tree, opt for a self-pollinating variety. If you have room for multiple trees, consider the benefits of cross-pollination for increased fruit production.
- Taste and Use: Consider the flavor profile and intended use of the cherries. Some varieties are best for eating fresh, while others are more suitable for cooking, canning, or making jams and preserves. Choose a variety that aligns with your taste preferences and intended culinary uses.
Take the time to research different cherry tree varieties and consult with local gardening experts or nurseries. They can provide valuable insights into which varieties perform well in your area and offer guidance on selecting the ideal cherry tree for your specific needs.
Selecting the Right Location
Choosing the appropriate location for your cherry tree is vital for its growth and productivity. Here are some key considerations to help you select the right location:
Sunlight: Cherry trees thrive in full sun, requiring at least six to eight hours of direct sunlight per day. Choose a location in your garden that receives ample sunlight throughout the day, preferably without any major obstructions like buildings or tall trees that may cast shadows on the tree.
Soil Conditions: Cherry trees prefer well-draining soil with a pH between 6.0 and 7.0. Conduct a soil test to determine the pH level and fertility of your soil. If your soil is heavy or clay-like, consider amending it with organic matter such as compost or well-rotted manure to improve drainage.
Air Circulation: Good air circulation is essential to prevent the development of fungal diseases in cherry trees. Avoid planting your tree in a location that is prone to heavy wind tunnels or stagnant air. A gentle breeze can help dry the leaves and reduce the risk of various fungal infections.
Proximity to Other Trees: Avoid planting your cherry tree too close to other trees or structures. Cherry trees require adequate space for their roots to expand and access water and nutrients. Planting them too close to other trees can result in competition for resources and potentially affect growth.
Accessibility and Drainage: Consider the accessibility of the location for watering, pruning, and harvesting. Additionally, ensure the area has proper drainage to prevent waterlogging, as excessive moisture can lead to root rot and other issues.
Take the time to carefully evaluate the different locations in your garden and choose the one that best meets these criteria. This will provide your cherry tree with the ideal growing conditions, setting the stage for a healthy and fruitful tree for years to come.
Preparing the Soil
Before planting your cherry tree, it’s essential to prepare the soil to create a favorable environment for healthy root development and growth. Follow these steps to properly prepare the soil:
1. Clear the area: Remove any weeds or grass from the planting site. Clearing the area will eliminate competition for nutrients and help prevent weed growth around the tree.
2. Test the soil: Conduct a soil test to determine the pH level and nutrient content of the soil. Cherry trees thrive in well-draining soil with a pH range of 6.0 to 7.0. If necessary, amend the soil to achieve the optimal pH level. Adding organic matter, such as compost or well-rotted manure, can help improve the soil structure and fertility.
3. Loosen the soil: Use a garden fork or tiller to loosen the soil to a depth of at least 12 to 18 inches. Breaking up compacted soil will allow for better root penetration and growth.
4. Remove debris: Remove any rocks, roots, or debris from the soil. These may hinder root development and can cause uneven soil moisture levels.
5. Add amendments: If the soil lacks essential nutrients, incorporate organic amendments, such as bone meal or blood meal, according to the recommendations from the soil test. These amendments will provide the necessary nutrients for the cherry tree’s healthy growth.
6. Level the soil: Smooth out the soil surface with a rake to create a level planting area. This will ensure proper water distribution and prevent pooling around the tree.
By properly preparing the soil before planting, you set a solid foundation for your cherry tree to establish strong roots and thrive in its new environment.
Digging the Hole
Properly digging the hole for your cherry tree is crucial to ensure proper root growth and establishment. Follow these steps to dig the hole:
1. Determine the hole size: The size of the hole depends on the size of the root ball of your cherry tree. The width of the hole should be two to three times wider than the root ball, while the depth should be just deep enough to accommodate the roots without burying the trunk.
2. Mark the perimeter: Use stakes or a garden hose to mark the perimeter of the hole. This will help guide you as you dig and ensure the hole is the correct size.
3. Begin digging: Use a shovel or garden spade to start digging the hole. Start by removing the topsoil and set it aside. Dig straight down, removing the underlying soil as you go.
4. Check the hole depth: Periodically check the depth of the hole as you dig. Measure from the bottom of the hole to the base of the trunk flare, which is where the trunk widens at the base. Adjust the hole depth as necessary to ensure it is just deep enough to accommodate the roots.
5. Create a saucer-shaped hole: As you dig, shape the hole into a saucer shape. The saucer shape will help collect water and allow it to gradually seep into the root zone.
6. Remove rocks and debris: While digging, remove any rocks, roots, or debris that you encounter. These can hinder root growth and cause uneven water distribution.
7. Save topsoil: Set aside the topsoil that you removed earlier. Once the hole is dug, you can use this topsoil to backfill around the roots when planting.
By taking the time to dig the hole properly, you create an optimal environment for your cherry tree’s roots to spread and establish, setting the stage for healthy growth and development.
Planting the Cherry Tree
Now that you have prepared the soil and dug the hole, it’s time to plant your cherry tree. Follow these steps to ensure successful planting:
1. Position the tree: Carefully place the cherry tree in the center of the hole, ensuring that the base of the trunk is level with or slightly above the surrounding soil. Position the tree so that the graft union (if visible) is above the soil line.
2. Backfill the hole: Use the saved topsoil or a mixture of topsoil and compost to backfill the hole around the roots. Gently tamp the soil to eliminate any air pockets. Avoid compacting the soil too tightly, as this can hinder root growth and drainage.
3. Water thoroughly: After planting, thoroughly water the tree to settle the soil around the roots. This will help minimize air pockets and provide moisture for the newly planted tree.
4. Create a watering basin: Build a small berm or mound of soil around the circumference of the hole. This will help create a watering basin to direct water to the root zone and prevent runoff.
5. Add mulch: Apply a layer of organic mulch, such as wood chips or straw, around the base of the tree. The mulch will help retain soil moisture, suppress weed growth, and regulate soil temperatures. Keep the mulch a few inches away from the trunk to prevent moisture buildup and potential rot.
6. Stake if necessary: If your tree is tall or in a windy location, you may need to stake it for support. Use soft tree ties or flexible material to attach the tree to the stakes, ensuring they are not too tight to allow for natural movement.
7. Prune if needed: Trim any damaged or broken branches and remove any crossing or crowded branches. Pruning will help shape the tree and promote healthy growth.
Remember to regularly water your cherry tree, especially during the first year of growth, and monitor its progress. With proper planting techniques, your cherry tree will have a strong start and the potential for abundant harvests in the future.
Watering and Mulching
Proper watering and mulching are essential for the health and growth of your cherry tree. Follow these guidelines to ensure your tree receives the right amount of water and benefits from mulch:
Watering:
Cherry trees require consistent moisture to flourish, particularly during dry periods. Here are some watering tips to keep in mind:
- Water deeply: Provide enough water to saturate the root zone, which is typically located within the top 12 to 18 inches of soil. This encourages the roots to grow deeply and reduces the tree’s dependence on frequent watering.
- Drip irrigation or soaker hoses: Use a drip irrigation system or soaker hoses to deliver water directly to the root zone. This helps minimize water loss through evaporation and ensures that the water reaches the roots efficiently.
- Avoid overwatering: While consistent moisture is important, avoid overwatering, as excessive moisture can lead to root rot and other diseases. Monitor the soil moisture regularly and adjust your watering accordingly.
- Consider weather conditions: Adjust the frequency and duration of watering based on weather conditions, such as rainfall and temperature. During hot and dry periods, you may need to water more frequently.
Mulching:
Mulching is beneficial for cherry trees in several ways. Here’s how to properly mulch your tree:
- Apply a layer of mulch: Spread a 2 to 4-inch layer of organic mulch, such as wood chips, straw, or compost, around the base of the tree. Ensure that the mulch extends outward to the dripline but remains a few inches away from the trunk.
- Retain soil moisture: Mulch helps retain soil moisture by reducing evaporation. This reduces the frequency of watering and helps keep the soil consistently moist.
- Suppress weed growth: Mulch acts as a barrier, suppressing weed growth around the tree. This minimizes competition for nutrients and water and reduces the need for manual weed control.
- Regulate soil temperature: Mulch insulates the soil, protecting the tree’s roots from extreme temperature fluctuations. This is particularly important during hot summers and cold winters.
- Prevent soil erosion: Mulch helps prevent soil erosion by reducing the impact of heavy rainfall or irrigation on the soil surface.
Remember to periodically replenish the mulch layer as it decomposes over time. By providing adequate water and applying mulch, you create optimal conditions for the growth and productivity of your cherry tree.
Pruning and Training
Pruning and training your cherry tree is essential for maintaining its shape, promoting healthy growth, and maximizing fruit production. Follow these guidelines to properly prune and train your cherry tree:
1. Prune during dormancy: The best time to prune cherry trees is during the dormant season, typically in late winter or early spring before new growth begins. Pruning during this time minimizes the risk of disease and allows the tree to heal more quickly.
2. Remove dead or diseased wood: Start by removing any dead, damaged, or diseased branches. These can be identified by their lack of foliage, discoloration, or signs of infection. Cutting them back to healthy wood will help prevent the spread of diseases and encourage new growth.
3. Thin out crowded branches: Look for branches that are crossing, rubbing, or competing with each other. Selectively remove some of them to improve airflow, reduce shading, and promote better light penetration into the canopy.
4. Shape the tree: Consider the desired shape or form for your tree. Cherry trees can be trained using various methods, such as central leader pruning or open-center pruning, depending on your preference and space available. Remove branches that deviate from the desired shape to encourage an even and balanced structure.
5. Prune for fruiting: Encourage fruit production by thinning out excess fruiting spurs or buds. This helps prevent overcrowding and allows the remaining fruit to mature properly. Consult specific pruning guides for your cherry tree variety to determine the recommended fruit thinning practices.
6. Use proper pruning tools: Use sharp, clean pruning tools appropriate for the size of branches you are cutting. Hand pruners are suitable for smaller branches, while loppers or pruning saws may be needed for larger cuts. Ensure your tools are sanitized to minimize the risk of disease transmission.
7. Train young trees: For newly planted cherry trees, consider training them to a desired shape. This can be achieved by selecting a central leader or main scaffold branches and removing competing branches. Use ties and stakes if necessary to support and guide the young tree’s growth.
Remember that each pruning cut has the potential to impact the tree’s growth and development. Take your time, make deliberate cuts, and regularly assess the tree’s structure to ensure it remains healthy and well-maintained throughout its lifespan.
Fertilizing
Fertilizing your cherry tree is crucial for providing it with essential nutrients for growth, fruit production, and overall health. Here are some guidelines to effectively fertilize your cherry tree:
1. Soil Test: Before applying any fertilizer, conduct a soil test to identify any nutrient deficiencies or imbalances. The soil test results will guide you in selecting the appropriate fertilizer and determining the correct application rate.
2. Timing: Fertilize your cherry tree in early spring, preferably before new growth begins. This allows the tree to benefit from the nutrients as it enters the growing season.
3. Balanced Fertilizer: Choose a balanced, slow-release fertilizer specifically formulated for fruit trees. Look for a fertilizer with an NPK ratio (nitrogen, phosphorus, potassium) of 10-10-10 or similar. This balanced ratio ensures the tree receives the necessary macronutrients for healthy growth.
4. Application Rate: Follow the instructions provided on the fertilizer packaging regarding the application rate. Generally, for mature cherry trees, apply approximately 1 to 2 pounds of fertilizer per inch of trunk diameter.
5. Application Method: Spread the fertilizer evenly around the drip line of the tree, which is where the canopy extends. Avoid placing the fertilizer directly against the trunk to prevent burning or damaging the tree.
6. Watering after Fertilization: After applying the fertilizer, water the area thoroughly. This helps activate the fertilizer and ensures it reaches the root zone for uptake by the tree.
7. Organic Alternatives: If you prefer organic fertilizers, options such as compost, well-rotted manure, or organic fruit tree fertilizers can be used. Follow the recommended application rates for organic fertilizers and adjust as necessary based on your soil test results.
8. Regularity: Fertilize your cherry tree annually to maintain its nutrient levels and support continuous growth and fruit production. However, be cautious not to over-fertilize, as it can lead to excessive vegetative growth and reduced fruit quality.
Remember that the specific fertilization requirements may vary depending on factors such as soil type, tree age, and local growing conditions. Regular soil testing, observation of tree health, and consultation with local gardening experts can provide valuable guidance for proper fertilization practices.
Pest and Disease Control
Maintaining proper pest and disease control measures is crucial for the health and productivity of your cherry tree. Here are some guidelines to help you effectively manage pests and diseases:
1. Monitoring: Regularly inspect your cherry tree for signs of pests or diseases. Look for visible damage, discolored leaves, abnormal growth, or the presence of pests such as aphids, caterpillars, or mites.
2. Cultural Practices: Implement good cultural practices to promote tree health and minimize pest and disease problems. This includes proper pruning, regular irrigation, and maintaining a clean garden area free from weeds and debris that can harbor pests.
3. Pest Identification: Identify the specific pests or diseases affecting your cherry tree. Proper identification allows you to implement targeted control measures. Consult local agricultural extensions or gardening resources to identify and learn about common cherry tree pests and diseases in your area.
4. Integrated Pest Management: Utilize integrated pest management strategies that combine multiple approaches for pest control. This includes cultural practices, biological control (introducing beneficial insects or organisms), and targeted insecticide or fungicide use if necessary. Minimize the use of chemicals and focus on environmentally friendly options whenever possible.
5. Insect Control: For insect pests, utilize insecticidal soaps, neem oil, or other approved insecticides to target and control specific pests. Be sure to follow instructions on the product label for proper application and safety precautions.
6. Disease Prevention: To prevent diseases, ensure proper air circulation by pruning to improve airflow and reduce humidity. Avoid overwatering and overhead watering, as excess moisture can create a favorable environment for fungal infections. Use fungicides if necessary, following recommended application timing for specific diseases.
7. Regular Inspections: Routinely monitor your cherry tree throughout the growing season. Early detection and intervention can help prevent pests and diseases from spreading and causing extensive damage.
Remember that prevention and proactive management are key in maintaining a healthy cherry tree. By implementing these pest and disease control practices, you can enjoy a thriving tree with minimal pest and disease issues.
Harvesting
Harvesting your cherry tree is an exciting and rewarding experience. To ensure you pick the cherries at their peak of ripeness, follow these guidelines:
1. Timing: Monitor the color and firmness of the cherries to determine their readiness for harvest. Cherries should have a deep, rich color and a slight give when gently squeezed. Harvest cherries when they are fully colored, but before they become overly soft or mushy.
2. Harvesting Method: Carefully pluck the cherries from the tree, using a gentle twisting motion to detach them from the stem. Alternatively, use sharp pruning shears or scissors to avoid damaging the tree and neighboring fruit.
3. Harvesting Frequency: Depending on the variety, cherries can ripen over a period of weeks. Check the tree daily during the ripening season and harvest ripe cherries as soon as they reach their desired stage of maturity.
4. Optimal Time of Day: Harvest cherries early in the morning when temperatures are cooler. This helps to maintain the fruit’s quality and freshness.
5. Handling: Handle cherries with care to prevent bruising or damage. Place them into shallow containers or baskets to avoid piling them on top of one another, which can cause cherries to become crushed or bruised.
6. Post-Harvest Care: After harvesting, promptly refrigerate the cherries to extend their shelf life. Store them in a cool, dry place and use them within a few days for the best flavor and quality.
7. Enjoying Fresh or Preserving: Cherries can be enjoyed fresh, added to desserts, or used in jams, jellies, and preserves. Explore various culinary options to make the most of your harvest.
Harvesting cherries from your tree is a delightful experience. Enjoy the sweet and juicy fruits while they are at their prime, knowing that your hard work and care have resulted in a bountiful harvest.