
Choosing the Right Bulbs for Fall Planting
When it comes to planting bulbs in the fall, selecting the right bulbs is crucial for a successful and vibrant garden. With a wide variety of bulbs available, it can be overwhelming to choose the perfect ones. Here are some key factors to consider when selecting bulbs for fall planting.
Climate and Hardiness: Consider the climate in your region and choose bulbs that are suitable for your area. Look for bulbs that are labeled as “hardy” or appropriate for your USDA hardiness zone.
Bloom Time: Think about when you want your bulbs to bloom. Different bulbs have different bloom times, so make sure to choose a combination that will provide a continuous display of flowers throughout the season.
Size and Height: Take into account the mature size and height of the bulbs you are considering. This will ensure that your garden has a visually appealing design with varied heights and proportions.
Color and Variety: Consider the color palette and variety of flowers you want in your garden. Whether you prefer bold and vibrant hues or soft and pastel tones, selecting a diverse range of colors will add depth and visual interest to your garden.
Special Considerations: Some bulbs require specific growing conditions or have unique care needs. Read the bulb’s instructions or do some research to ensure you can provide the necessary conditions for the specific bulbs you choose.
Quality and Source: Purchase bulbs from reputable sources to ensure quality and healthy plants. Avoid bulbs that are soft, moldy, or damaged, as they may not produce the desired results.
By carefully considering these factors, you can choose the right bulbs for fall planting that will thrive in your garden and bring beauty and joy for years to come.
Preparing the Soil for Bulb Planting
Before planting bulbs in the fall, it’s essential to prepare the soil to create an optimal environment for their growth. Here are some steps to follow for preparing the soil:
Clear the Area: Begin by clearing the planting area of any weeds, rocks, or debris. This will create a clean space for the bulbs to grow without competition from other plants.
Loosen the Soil: Use a garden fork or a tiller to loosen the soil to a depth of at least 10-12 inches. This will help improve drainage and allows the bulbs’ roots to penetrate easily into the soil.
Improve Drainage: If you have heavy clay soil, consider adding organic matter such as compost to improve drainage. This will prevent water from pooling around the bulbs, reducing the risk of rot and disease.
Test Soil pH: Bulbs generally prefer a slightly acidic to neutral soil pH. Test the soil pH using a soil testing kit, and if necessary, adjust it by adding sulfur or lime according to the test results.
Add Fertilizer: Bulbs benefit from the addition of a slow-release fertilizer rich in phosphorus. Incorporate the fertilizer into the soil following the package instructions to provide the bulbs with the necessary nutrients for healthy growth.
Amend Heavy or Sandy Soil: If your soil is heavy clay or sandy, it’s helpful to amend it with organic matter to improve its texture and water-holding capacity. Adding compost, well-rotted manure, or peat moss will enhance the soil’s fertility and moisture retention.
Level the Soil Surface: After incorporating amendments and fertilizer, carefully level the soil surface using a rake. This ensures an even planting surface and provides a good base for the bulbs.
Preparing the soil appropriately will create an optimal environment for the bulbs, allowing them to establish strong roots and thrive during the growing season.
Deciding on the Best Planting Location
Choosing the right planting location is crucial for the success and overall appearance of your fall-planted bulbs. Here are some factors to consider when deciding on the best location:
Sun Exposure: Most flowering bulbs require ample sunlight to thrive. Select a location that receives at least six hours of direct sunlight each day. Areas with partial shade are suitable for bulbs that tolerate or prefer less sunlight.
Soil Drainage: Bulbs prefer well-drained soil to prevent waterlogged conditions that can lead to root rot. Avoid low-lying or poorly drained areas and opt for raised beds or amend heavy clay soil to improve drainage.
Proximity to Trees and Shrubs: When planting bulbs, consider the proximity to trees and shrubs. Avoid locations where the bulbs may have to compete with the roots of larger plants for nutrients and water.
Visibility and Aesthetics: Plant bulbs in areas where they will be visible and appreciated. Consider focal points in the garden, such as entrances, pathways, or areas where you spend a lot of time, to enhance the overall aesthetics and enjoy the beauty of the blooms.
Complementing Existing Landscaping: Take into account the existing landscape and choose bulb varieties that complement the surrounding plants in terms of color, height, and bloom time. This will create a cohesive and visually appealing garden design.
Protection from Wildlife: If you have issues with wildlife, such as deer or squirrels, choose a planting location that is protected or consider using deterrents to safeguard your bulbs from being eaten or disturbed.
Accessibility for Maintenance: Ensure that the planting location is easily accessible for maintenance activities such as watering, weeding, and deadheading. This will make it easier to care for your bulbs and ensures their long-term health.
By carefully considering these factors, you can select the best planting location for your fall-planted bulbs and set the stage for a stunning and thriving garden display.
Proper Timing for Fall Bulb Planting
Timing is crucial when it comes to planting bulbs in the fall. By planting at the right time, you give your bulbs the best chance to establish roots before the winter and bloom beautifully in the spring. Here are some guidelines for proper timing:
Early Fall: In regions with mild climates and winters, early fall is the ideal time to plant bulbs. The soil is typically still warm, allowing the bulbs to establish roots before the colder temperatures arrive.
Mid-Fall: For most regions, mid-fall is the optimal time to plant bulbs. By this time, the soil has cooled down, but it is not frozen yet. Planting at this time ensures that the bulbs have enough time to establish roots before the ground freezes.
Late Fall: In colder regions with early and harsh winters, you can plant bulbs until the ground freezes. However, late fall planting leaves less time for the bulbs to establish roots, increasing the risk of the bulbs not surviving the winter.
Consider the First Frost Date: Check the first frost date in your region and plant bulbs at least 2-4 weeks before that date. This gives the bulbs enough time to settle in and develop strong roots before winter arrives.
Follow Package Instructions: Different bulb varieties have specific optimal planting times. Follow the instructions on the bulb packages for the recommended planting time. This will ensure that you plant each type of bulb at the right time for best results.
Stagger Planting Times: If you have a large number of bulbs to plant, consider staggering the planting times. This means planting a portion of the bulbs early in the fall and the rest a few weeks later. Staggered planting results in a longer blooming period and a more extended display of flowers in spring.
Avoid Planting Too Early: Planting bulbs too early in the fall, when the soil is still warm, may trigger premature growth. This can lead to weak plants and fewer flowers in the spring. Wait until the soil has cooled down to the appropriate temperature for bulb planting.
By planting bulbs at the proper time, you set them up for success, giving them the best opportunity to establish roots, survive the winter, and reward you with a vibrant and colorful display in the following spring.
How to Plant Bulbs Correctly
Planting bulbs correctly is essential to ensure their successful growth and stunning blooms. Here is a step-by-step guide on how to plant bulbs correctly:
Step 1: Choose the Right Tools: Gather the necessary tools, including a trowel or bulb planter, gardening gloves, and a watering can or hose.
Step 2: Prepare the Planting Hole: Dig a hole in the prepared soil that is approximately two to three times deeper than the bulb’s height. For example, if a bulb is two inches tall, dig a hole that is six inches deep.
Step 3: Loosen the Soil at the Bottom: Loosen the soil at the bottom of the planting hole with a gardening fork or by gently disturbing the soil with the tip of your trowel. This will facilitate root penetration and encourage healthy growth.
Step 4: Add Organic Matter: If the soil is poor or lacks organic matter, mix in some compost, peat moss, or well-rotted manure into the bottom of the planting hole. This will provide essential nutrients for the bulb’s growth.
Step 5: Place and Orient the Bulb: Place the bulb carefully in the hole with the pointed side facing up. Most bulbs don’t have a pointed side, but if unsure, place the bulb on its side.
Step 6: Backfill the Hole: Gently backfill the hole with the soil, ensuring that the bulb is covered to the appropriate depth recommended for that particular bulb. Avoid compacting the soil; allow it to settle naturally.
Step 7: Water Thoroughly: After planting, give the area a good watering to settle the soil around the bulb and ensure adequate moisture. This will encourage root growth.
Step 8: Mark the Planting Location: If desired, place a garden marker or stake near the planted bulb to mark its location. This will prevent accidentally digging it up or damaging it during future gardening activities.
Step 9: Mulch (Optional): Consider applying a layer of organic mulch over the planted area. Mulch helps retain moisture, regulates soil temperature, and suppresses weeds. This step is especially beneficial in regions with cold winters.
By following these steps, you can ensure that your bulbs are planted correctly, providing them with an excellent start for healthy growth, strong roots, and beautiful blooms in the upcoming season.
Caring for Bulbs After Planting
Proper care is essential to ensure the long-term health and vitality of your planted bulbs. Here are some important care tips to follow after planting:
Watering: Provide adequate water to newly planted bulbs to help them establish their roots. Keep the soil consistently moist, but avoid overwatering, as excessive moisture can lead to rot. After the bulbs have sprouted and started growing, continue to water them regularly, especially during dry spells.
Mulching: Consider applying a layer of mulch around the planted area. Mulch helps retain moisture, suppresses weeds, and regulates soil temperature. Use organic materials such as straw, bark chips, or compost. Just make sure the mulch is not directly touching the bulbs to prevent rotting.
Protection from Extreme Weather: If your area experiences extreme weather conditions like heavy rain, strong winds, or frost, it may be necessary to provide protection for the bulbs. Use protective coverings like row covers, cloches, or straw to shield the bulbs from harsh weather elements.
Deadheading and Pruning: After the flowers have bloomed and wilted, remove the faded blooms by deadheading. This prevents the plant from expending energy on seed production, allowing it to focus on bulb development. Once the foliage turns yellow and dies back naturally, you can prune it back to ground level.
Fertilizing: Bulbs benefit from a balanced fertilizer application after flowering. Apply a slow-release bulb fertilizer or a phosphorus-rich fertilizer according to package instructions. This provides the necessary nutrients for bulb development and strengthens the plant for the following year’s growth.
Pest and Disease Control: Monitor the bulbs for any signs of pests or diseases. Common pests include squirrels, rabbits, and aphids. If pests are an issue, use appropriate deterrents or protective measures. For diseases such as fungal infections, improve ventilation and avoid overhead watering to reduce the risk of infection.
Allow Foliage to Wither: After flowering, it’s important to allow the foliage to wither naturally. The green leaves provide nutrients to the bulb for next year’s growth. Resist the temptation to trim or remove the foliage prematurely as this can weaken the bulbs and result in poor future blooms.
Dividing and Transplanting: Some bulbs may require dividing after a few years to maintain optimal health and vigor. Wait until the foliage has withered completely before carefully lifting and separating the bulbs. Replant the divided bulbs in a suitable location or share them with fellow gardeners.
By following these care guidelines, you can ensure the continued health and success of your planted bulbs, enjoying their beautiful blooms season after season.
Tips and Tricks for Successful Bulb Planting in Fall
Planting bulbs in the fall can result in a stunning garden display in the spring. Here are some tips and tricks to ensure successful bulb planting:
1. Plan and Design: Before purchasing bulbs, plan your garden layout and consider the color combinations, heights, and bloom times of the bulbs. This will help create a visually pleasing and well-coordinated garden design.
2. Group Bulbs for Impact: Plant bulbs in clusters or drifts rather than scattering them individually. Grouping bulbs together creates a more impactful and natural-looking display of color and ensures that the blooms are easily visible.
3. Mind the Depth: Follow the recommended planting depth for each type of bulb. Planting bulbs too shallow or too deep can affect their growth and ability to bloom. Check the package instructions or consult a gardening guide for specific depth guidelines.
4. Consider Succession Planting: Extend the blooming period by planting bulbs with different bloom times. This allows for a continuous display of flowers throughout the spring season.
5. Add Bulb Booster: Incorporate bulb booster or bone meal into the planting hole to provide extra nutrients for the bulbs. This boosts their growth, promotes better flowering, and enhances overall performance.
6. Use Companion Plants: Plant bulbs alongside compatible annuals, perennials, or groundcovers. This creates a visually appealing combination and provides additional interest before and after the bulbs bloom.
7. Opt for Naturalizing Bulbs: Naturalizing bulbs are those that multiply and multiply over time. Consider planting bulbs like daffodils, crocuses, or snowdrops that can spread and create a beautiful carpet of blooms over the years.
8. Provide Winter Protection: If you live in an area with harsh winters, consider using a layer of mulch or protective coverings like straw or burlap to insulate the bulbs and prevent frost damage.
9. Label Bulbs: Keep track of the bulb varieties and their planting locations by labeling them. This helps you remember the names and ensures that you can care for them properly.
10. Learn from Experience: Keep records of your bulb planting endeavors. Note which varieties performed well, the planting depth, and any other factors that contributed to their success. This knowledge will be valuable for future bulb planting endeavors.
By following these tips and tricks, you can achieve successful bulb planting and create a vibrant and stunning garden display that will be the envy of your neighbors.
Common Problems and Solutions for Fall Bulb Planting
Fall bulb planting can sometimes come with a few challenges. Here are some common problems that you may encounter and their corresponding solutions:
1. Lack of Blooms: If your bulbs fail to produce blooms in the spring, it could be due to a few factors. One common reason is planting bulbs too shallow. Ensure that you are planting the bulbs at the recommended depth. Additionally, bulbs may require a chilling period to initiate blooming. Check the specific chilling requirements for each type of bulb and ensure they are met.
2. Pests and Wildlife Damage: Squirrels, rabbits, and other wildlife can be attracted to newly planted bulbs. To deter them, consider using physical barriers like wire mesh or chicken wire when planting. Alternatively, you can apply repellents or enlist the help of pets or motion-activated devices to scare away pests.
3. Disease and Rot: Bulbs are susceptible to diseases such as fungal rot. To prevent this, ensure that you are planting in well-draining soil and avoid overwatering. Remove any bulbs that show signs of rot and adjust your watering practices as needed.
4. Insufficient Sunlight: Lack of sufficient sunlight can result in weak growth and fewer blooms. Make sure to choose a planting location that receives at least six hours of direct sunlight per day for most flowering bulbs. If you have a shady garden, opt for bulbs that tolerate or even thrive in partial shade.
5. Competition from Weeds: Weeds can compete with bulbs for nutrients, water, and sunlight. It’s essential to keep the area around the bulbs weed-free. Regularly inspect the planting area and remove any weeds as they appear.
6. Improper Drainage: Bulbs require well-drained soil to prevent rot and fungal diseases. If you have heavy clay soil, amend it with organic matter to improve drainage. Alternatively, consider planting bulbs in raised beds or containers for better control over the soil conditions.
7. Overcrowding: Planting bulbs too closely together can result in overcrowding as they multiply and grow in subsequent years. This can lead to weakened growth and smaller blooms. Avoid overcrowding by planting bulbs at the recommended spacing and periodically thinning out overcrowded areas as needed.
8. Neglecting Watering: Proper watering is essential for bulb growth and development. Be sure to water bulbs regularly, especially during dry spells. Avoid overwatering, which can lead to rot, and make sure the soil is consistently moist but not waterlogged.
9. Failing to Fertilize: Bulbs benefit from a boost of nutrients for optimal growth. Apply a slow-release bulb fertilizer or a phosphorus-rich fertilizer after flowering, following the package instructions. This helps replenish the nutrients in the soil and prepares the bulbs for the next growing season.
10. Digging Up Bulbs Accidentally: During gardening activities, it’s easy to accidentally dig up or damage bulbs. To avoid this, mark the planting locations with garden markers or stakes. This ensures that you don’t disturb the bulbs during regular gardening tasks.
By being aware of these common problems and implementing the appropriate solutions, you can overcome any challenges and achieve a successful and thriving bulb garden.
Best Bulbs to Plant in Fall for Different Garden Styles
When it comes to choosing bulbs for fall planting, different garden styles call for different selections. Here are some recommendations for the best bulbs to plant in the fall for various garden styles:
1. Cottage Garden: For a charming cottage garden style, consider planting daffodils, tulips, hyacinths, and crocuses. These classic spring bulbs bring vibrant colors and a delightful fragrance to the garden.
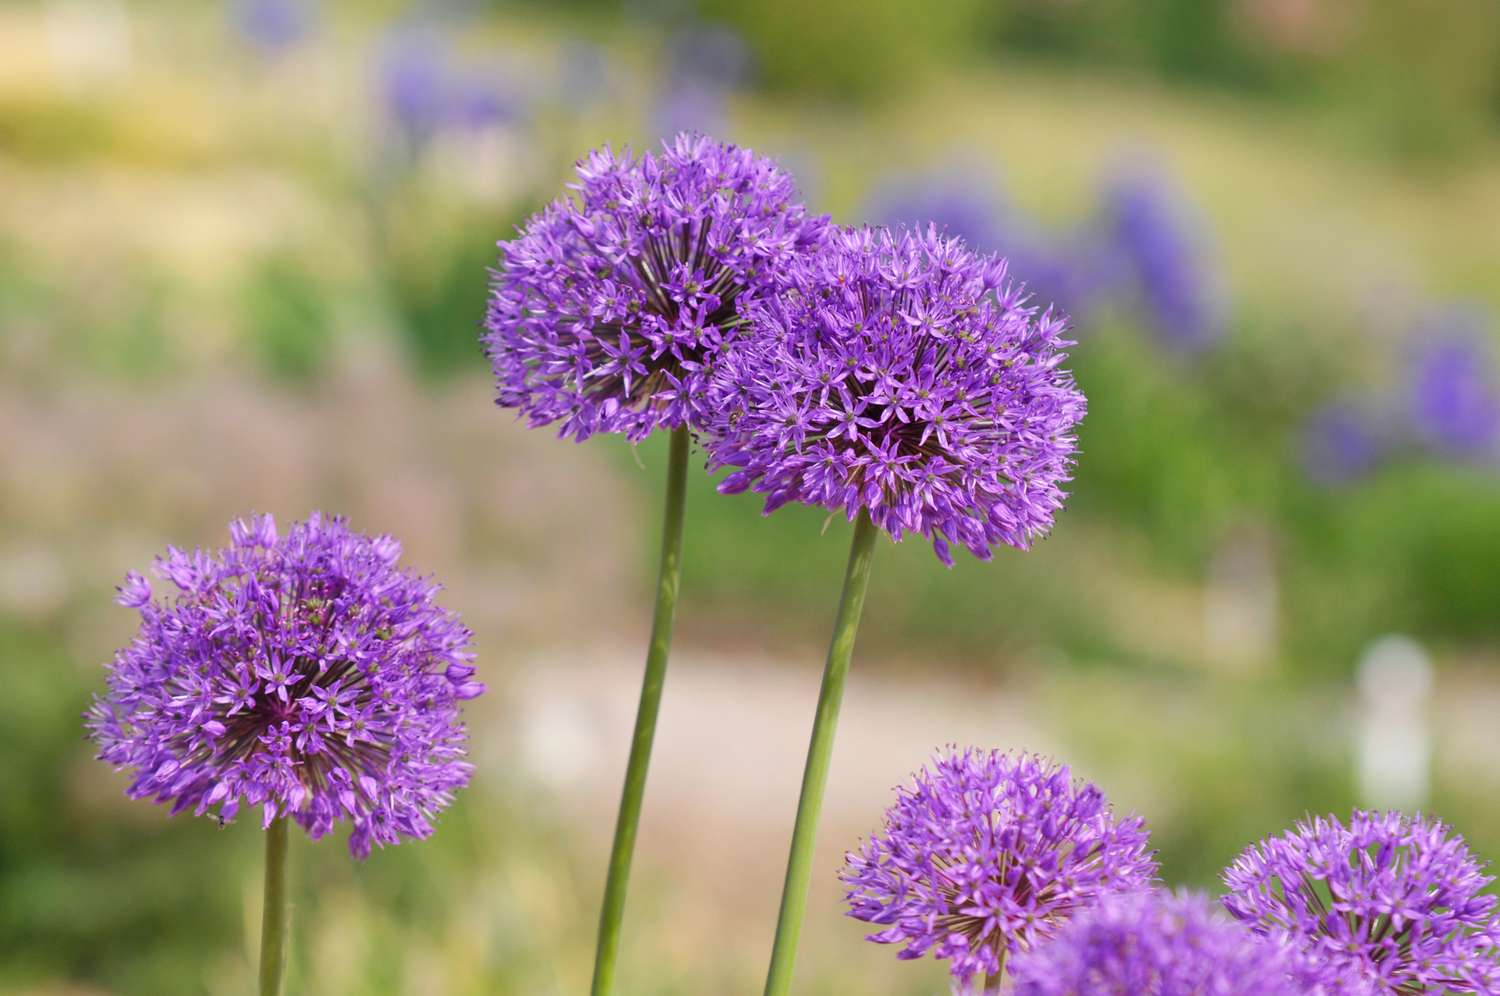
2. Formal Garden: A formal garden style calls for clean lines and a sense of symmetry. Opt for bulbs like alliums, lilies, and ornamental onions. With their tall and spiky blooms, they provide architectural height and a sophisticated elegance.
3. Naturalistic or Wildflower Meadow: To achieve a naturalistic or wildflower meadow style, go for bulbs like native crocus, muscari, and fritillaria. These bulbs have a more natural, airy growth habit and complement the meadow-like setting.
4. Modern or Contemporary Garden: A modern or contemporary garden style often embraces simplicity and minimalism. Bulbs with clean and sleek blooms like snowdrops, scilla, and lilies of the valley fit well in this style, providing a touch of elegance and sophistication.
5. Rustic or Country Garden: For a rustic or country garden style, opt for bulbs like alliums, gladiolus, and dahlias. These bulbs offer bold and vibrant colors, creating a cheerful and lively atmosphere.
6. Shade Garden: In a shade garden, bulbs that thrive in partial to full shade are ideal. Consider planting shade-loving bulbs like snowdrops, daffodils, and scilla. These bulbs will add much-needed color and interest to the shaded areas.
7. Rock Garden: In a rock garden setting, small and low-growing bulbs are the best choice. Look for bulbs like dwarf irises, crocuses, and scilla. These bulbs are perfect for adding pops of color and creating a whimsical look among the rocks.
8. Cutting Garden: In a cutting garden, where the focus is on growing flowers for bouquets and arrangements, choose bulbs like tulips, daffodils, and ranunculus. These bulbs provide a wide range of colors, shapes, and sizes, perfect for creating stunning floral arrangements.
9. Edible Garden: In an edible garden, consider planting bulbs that serve a dual purpose. Alliums, garlic, and shallots are excellent choices as they provide edible bulbs and add visual interest with their unique shapes and textures.
10. Container Garden: When creating a container garden, miniature bulbs like grape hyacinths, miniature daffodils, and crocuses work well. These bulbs are perfectly sized for containers and bring bursts of color and charm to patio or balcony gardens.
By selecting the right bulbs for your garden style, you can create a cohesive and visually appealing design that enhances the overall ambiance and beauty of your outdoor space.
Frequently Asked Questions about Fall Bulb Planting
Planting bulbs in the fall can bring beauty and color to your garden in the following spring. Here are some commonly asked questions about fall bulb planting:
Q: When is the best time to plant fall bulbs?
A: The best time to plant fall bulbs is typically in the late summer to early fall, before the first frost. This allows the bulbs to establish roots before the winter and bloom in the spring.
Q: How deep should I plant fall bulbs?
A: The planting depth varies depending on the type of bulb. As a general guideline, most bulbs should be planted at a depth that is two to three times their height. Consult the package instructions or a gardening guide for specific depth recommendations for each bulb variety.
Q: Do I need to water fall-planted bulbs?
A: Proper watering is important for the success of fall-planted bulbs. After planting, give the area a good watering to settle the soil and encourage root growth. During the growing season, water the bulbs regularly to keep the soil moist but not waterlogged.
Q: Can I plant bulbs in containers?
A: Yes, bulbs can be planted in containers. Choose a container with drainage holes and use well-draining potting soil. Ensure that the container is large enough to accommodate the growth of the bulbs. Water the container regularly and provide adequate sunlight for the bulbs to thrive.
Q: When will the fall-planted bulbs bloom?
A: The bloom time of fall-planted bulbs varies depending on the type of bulb and its specific requirements. Generally, most bulbs bloom in the spring, but the exact timing can range from early spring to late spring, depending on the variety.
Q: How can I protect fall-planted bulbs from animals?
A: Animals such as squirrels and rabbits can be attracted to fall-planted bulbs. To protect the bulbs, you can use physical barriers such as wire mesh or chicken wire when planting. Additionally, there are various animal repellents available that can help deter animals from digging up or eating the bulbs.
Q: Should I fertilize fall-planted bulbs?
A: Fall-planted bulbs benefit from the addition of fertilizer to promote healthy growth and abundant blooms. Apply a balanced bulb fertilizer or a fertilizer rich in phosphorus after planting and follow the package instructions for the application rate.
Q: Can I plant bulbs in an existing garden?
A: Yes, you can plant bulbs in an existing garden. Choose a planting location that has sufficient space and complements the existing plants. Prepare the soil by amending it if necessary, and make sure the bulbs receive adequate sunlight and proper drainage.
Q: Can I plant bulbs in the same spot every year?
A: While some bulbs can be left in the ground year after year, others may need to be dug up and divided periodically to maintain their health and vigor. Follow the specific instructions for each type of bulb, and if necessary, dig up and divide overcrowded bulbs to ensure proper growth and blooming.
Q: Can I plant fall bulbs in a raised bed?
A: Yes, fall bulbs can be planted in raised beds. Raised beds provide better control over the soil conditions, including drainage. Ensure that the raised bed has proper drainage and fill it with well-draining soil or a mixture of compost and soil.
By addressing some of the most frequently asked questions about fall bulb planting, you can approach the process with confidence and enjoy a beautiful and vibrant display of blooms in the spring.