
Best Time to Plant Garlic
Garlic is a versatile and flavorful bulb crop that can be easily grown in your garden. To ensure a successful garlic harvest, it’s crucial to plant it at the right time. While garlic can be planted in both the spring and fall, the timing will depend on your climate and growing conditions.
Planting Garlic in Spring:
In regions with milder winters, planting garlic in the spring is a viable option. The ideal time to plant garlic in the spring is when the soil has thawed and is workable. Generally, this is a few weeks before the last frost date. By planting in the spring, you allow the garlic bulbs to establish strong roots before the hot summer months kick in.
Planting Garlic in Fall:
For most regions, fall is the preferred time to plant garlic. Garlic requires a period of cold dormancy to develop bulbs, and planting in the fall allows the bulbs to go through this process naturally. They’ll remain dormant during the winter months, resume growth in early spring, and produce large, flavorful bulbs by summer.
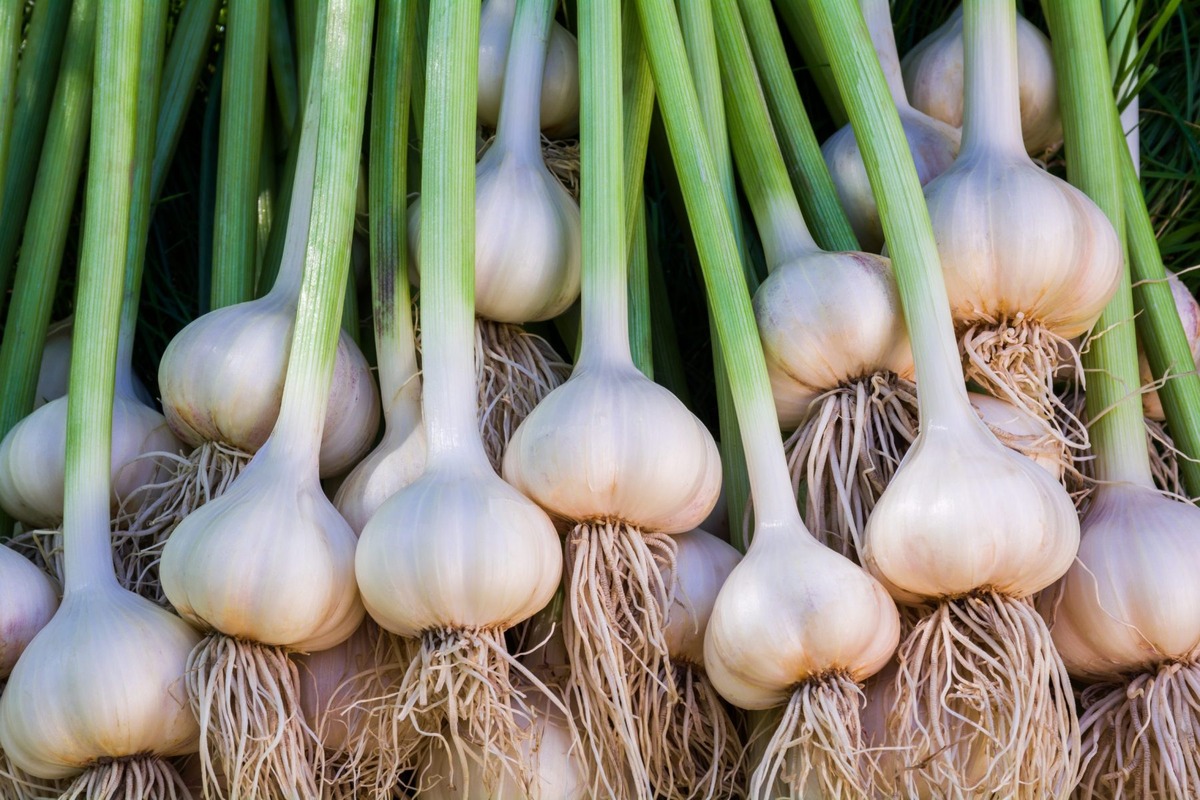
Choosing Garlic Bulbs for Planting:
When selecting bulbs for planting, it’s essential to choose high-quality, disease-free garlic bulbs. Look for bulbs that are firm, have intact wrappers, and are free from any signs of rot or fungal growth. Avoid using bulbs from the grocery store, as they may have been treated with chemicals to prevent sprouting.
Preparing the Soil for Garlic Planting:
Garlic thrives in well-drained soil with plenty of organic matter. Before planting, loosen the soil and incorporate compost or well-rotted manure to enrich it. Remove any rocks, weeds, or debris that may inhibit garlic bulb development. Additionally, ensure that the soil pH is between 6.0 and 7.0, as garlic prefers slightly acidic to neutral soil conditions.
Planting Garlic in Spring
Spring is a popular time to plant garlic, especially in regions with milder winters. By planting in the spring, you give your garlic bulbs a head start to establish strong roots before the hot summer months arrive. Here are some tips to successfully plant garlic in the spring:
1. Timing is crucial: The ideal time to plant garlic in the spring is when the soil has thawed and is workable. Typically, this occurs a few weeks before the last frost date in your area. Keep an eye on the weather conditions and plan accordingly.
2. Selecting the right garlic varieties: Choose garlic varieties that are specifically suited for spring planting. These varieties are bred to mature faster, allowing you to harvest them before the heat of summer. Check with your local garden center or seed catalog for suitable options.
3. Preparing the planting bed: Garlic prefers well-drained soil with a pH between 6.0 and 7.0. Start by loosening the soil and removing any weeds or debris. Incorporate organic matter, such as compost or well-rotted manure, to improve soil fertility and moisture retention.
4. Planting depth and spacing: Dig a shallow trench that is about 2 inches deep. Place the garlic cloves with the pointed end facing up, spacing them about 4-6 inches apart. Make sure the cloves are covered with soil, and gently firm it down.
5. Mulching: Apply a layer of organic mulch, such as straw or shredded leaves, around the garlic plants. This helps to conserve moisture, suppress weeds, and regulate soil temperature. Keep the mulch away from the base of the plants to prevent rotting.
6. Watering: Garlic needs consistent moisture during its growing period. Water the plants regularly, aiming to keep the soil evenly moist but not waterlogged. Avoid overhead watering, as this can encourage fungal diseases.
7. Fertilizing: Prior to planting, incorporate a balanced organic fertilizer into the soil. This will provide the garlic plants with essential nutrients for healthy growth. Avoid fertilizing the plants excessively, as this can lead to foliage development at the expense of bulb formation.
8. Managing pests and diseases: Keep an eye out for common pests like aphids, onion flies, and garlic nematodes. Use organic pest control methods as needed. Monitor the plants for any signs of disease, such as fungal infections or yellowing leaves, and take appropriate action to prevent further spread.
By following these guidelines, you can have a successful garlic harvest from spring-planted cloves. Enjoy the process and watch as your garlic grows into flavorful bulbs ready to enhance your culinary creations!
Planting Garlic in Fall
Fall is the optimal time to plant garlic in most regions. By planting in the fall, you take advantage of the colder weather and allow the garlic bulbs to naturally go through the required period of cold dormancy. Follow these steps for successful garlic planting in the fall:
1. Timing: Plant garlic in the fall after the hottest days of summer have passed and the soil temperature cools down. Aim to plant about 4-6 weeks before the ground freezes but when it’s still workable.
2. Choosing the right garlic bulbs: Select high-quality, disease-free garlic bulbs for planting. Look for bulbs that are firm, have intact wrappers, and show no signs of rot or damage. Consider purchasing bulbs from reputable nurseries or online sources specializing in garlic varieties suitable for fall planting.
3. Preparing the soil: Garlic thrives in well-drained soil with plenty of organic matter. Before planting, clear the area of weeds, rocks, and debris. Loosen the soil to a depth of about 8-10 inches and amend it with compost or well-rotted manure to improve its fertility and structure.
4. Planting depth and spacing: Separate the garlic bulbs into individual cloves just prior to planting. Place the cloves, pointed end up, in the soil about 2 inches deep. Space the cloves 6-8 inches apart within the rows, and leave around 12-18 inches between the rows to allow enough room for bulb development.
5. Mulching: After planting, apply a layer of organic mulch, such as straw or shredded leaves, to help insulate the garlic cloves during the winter. This protects them from extreme temperature fluctuations and helps conserve moisture in the soil.
6. Watering: Ensure the garlic bed is well-watered after planting. This encourages the cloves to establish roots before winter dormancy. However, be cautious not to overwater, as garlic bulbs can rot in saturated soil. Throughout winter, water as needed during dry spells or periods of low rainfall.
7. Winter care: As the temperatures drop, the garlic cloves will enter a dormant period. It’s essential to monitor the garlic bed for weeds and remove them promptly. Weeds compete with garlic for nutrients and moisture, which can affect bulb development.
8. Spring growth: In early spring, as the soil begins to warm, you’ll see shoots emerging from the garlic cloves. This is an encouraging sign that your garlic is successfully growing. Continue to monitor soil moisture and weed presence, making sure the garlic plants are getting adequate sunlight.
By planting garlic in the fall and providing the necessary care, you can expect a bountiful harvest of flavorful garlic bulbs the following summer. Enjoy the satisfaction of growing your own garlic and add its distinct flavor to your culinary adventures!
Choosing Garlic Bulbs for Planting
Choosing the right garlic bulbs is crucial for a successful garlic growing experience. The quality and health of the bulbs you select will directly impact the growth, flavor, and yield of your garlic crop. Follow these tips when choosing garlic bulbs for planting:
1. Seek out reputable sources: Purchase garlic bulbs from reputable nursery centers, local farmers, or online seed companies specializing in garlic varieties. These sources often provide garlic that has been carefully selected and grown specifically for planting purposes.
2. Consider garlic varieties: There is a wide range of garlic varieties, each with its own unique flavors, sizes, and growing requirements. Consider the culinary characteristics you desire, such as mild or strong flavor, and choose a variety suitable for your climate and preferred taste profiles.
3. Healthy bulbs: Look for garlic bulbs that are firm and plump, with tight, intact wrappers. Avoid bulbs that feel soft or spongy, as they may be compromised or prone to diseases. Ensure that the cloves are not damaged, rotted, or discolored.
4. Certified disease-free bulbs: To minimize the risk of introducing diseases into your garden, choose garlic bulbs that are certified disease-free. Certified bulbs are tested and guaranteed to be free of common garlic diseases, such as white rot or bloat nematode.
5. Size matters: Consider the size of the garlic bulbs when making your selection. Larger bulbs typically produce larger cloves, which can lead to bigger garlic bulbs at harvest time. However, keep in mind that some smaller varieties may still pack exceptional flavor into a compact size.
6. Garlic type: There are two main types of garlic: hardneck and softneck. Hardneck garlic varieties produce a central scape (flower stalk) that can be snapped off and eaten or used in cooking. Softneck garlic varieties do not produce a scape but have a longer storage life. Choose the type that best suits your culinary needs and preference.
7. Save your own bulbs: If you have grown garlic successfully in previous years, saving your own bulbs is an option. Set aside the largest, healthiest bulbs from your harvest, and use them as seed garlic for the following year. This allows you to develop your own regionally adapted garlic varieties over time.
8. Organic and heirloom options: If organic gardening is important to you, consider purchasing organic or heirloom garlic bulbs. Organic garlic is grown without the use of synthetic pesticides or fertilizers, while heirloom varieties are open-pollinated and can provide unique flavors and characteristics.
By selecting quality garlic bulbs for planting, you increase your chances of growing robust, disease-resistant plants that will reward you with flavorful and satisfying garlic harvests. Take your time to research and choose the right garlic varieties that suit your taste preferences and growing conditions, and enjoy the journey of cultivating your very own garlic crop.
Preparing the Soil for Garlic Planting
Preparing the soil properly is essential for setting the stage for healthy and productive garlic plants. By creating the right growing conditions, you can ensure that your garlic bulbs develop strong roots, flourish, and produce flavorful cloves. Here are some steps to prepare the soil for garlic planting:
1. Choose the right location: Garlic thrives in well-drained soil with full sun exposure. Select a sunny spot in your garden that receives at least 6-8 hours of direct sunlight per day. Avoid areas with excessive moisture or poor drainage, as this can lead to root rot and hinder garlic growth.
2. Clear the area: Remove any existing weeds, rocks, or debris from the planting area. Weeds compete with garlic for nutrients and can impede bulb development. Clearing the area also allows for easier soil preparation and reduces potential disease and pest issues.
3. Loosen the soil: Garlic prefers loose and well-aerated soil. Use a garden fork, tiller, or spade to break up any compacted soil. Loosen the soil to a depth of at least 8-10 inches to provide ample room for root development and improve drainage.
4. Incorporate organic matter: Enrich the soil by adding organic matter such as compost, well-rotted manure, or leaf mold. Organic matter improves soil structure, fertility, and moisture retention. Spread a layer of organic matter over the planting area and work it into the soil using a garden fork or tiller.
5. Adjust the pH: Garlic prefers a slightly acidic to neutral soil pH between 6.0 and 7.0. Test the soil pH using a soil testing kit, and if necessary, adjust it by adding lime to raise pH or sulfur to lower pH. Follow the recommendations from your soil test for proper adjustment.
6. Provide adequate drainage: Garlic bulbs can rot in waterlogged soil. Ensure proper drainage by avoiding areas prone to standing water or heavy clay soil. If necessary, amend heavy clay soil by adding sand, perlite, or compost to improve drainage.
7. Avoid excessive nitrogen: While garlic requires nutrients for healthy growth, excessive nitrogen can result in lush foliage at the expense of bulb development. Prior to planting, incorporate a balanced organic fertilizer into the soil following the package instructions to provide essential nutrients without overdoing nitrogen.
8. Mulch after planting: Once the soil is prepared and garlic cloves are planted, apply a layer of organic mulch, such as straw or shredded leaves. This helps retain moisture, suppress weeds, and regulate soil temperature during the growing season. Keep the mulch a few inches away from the garlic stems to prevent rot and disease.
By taking the time to properly prepare the soil for garlic planting, you set the foundation for a successful crop. The improved soil structure, fertility, and drainage will support the growth of robust garlic plants and ensure a bountiful harvest of flavorful garlic bulbs.
How to Plant Garlic
Planting garlic is a straightforward process that, when done correctly, sets the stage for successful growth and a plentiful harvest. Whether you’re a beginner or an experienced gardener, follow these steps to plant garlic:
1. Prepare the garlic bulbs: Carefully separate the garlic bulbs into individual cloves just prior to planting. Choose healthy cloves with intact wrappers, and discard any damaged or discolored ones. Keep the cloves in a cool and dry place until ready for planting.
2. Select the planting site: Choose a sunny location with well-drained soil. Ideally, the soil should have a pH between 6.0 and 7.0. Avoid areas prone to waterlogging or heavy clay soil, as it can hinder garlic growth. Clear the area of any weeds or debris before planting.
3. Dig the planting holes: Using a trowel or your hands, dig small holes in the prepared soil. The holes should be about 2 inches deep, spaced 4-6 inches apart within the rows. Leave around 12-18 inches between the rows to allow for bulb development.
4. Position the cloves: Place each garlic clove in the planting hole with the pointed end facing up. The basal plate, which is the flat bottom end of the clove, should be facing downward. Make sure to position the cloves upright for proper growth.
5. Cover and firm the soil: Gently cover the garlic cloves with soil, ensuring that they are adequately buried but not too deep. Lightly firm the soil around the cloves to secure them in place. Avoid compacting the soil too much, as it can hinder root development.
6. Mulch the planting bed: Apply a layer of organic mulch, such as straw or shredded leaves, to the garlic bed. Mulch helps retain moisture, suppress weeds, and regulate soil temperature. Keep the mulch a few inches away from the base of the garlic plants to prevent rotting.
7. Water the newly planted cloves: Water the newly planted garlic cloves thoroughly after planting. This helps settle the soil and provides moisture to initiate growth. Aim to keep the soil consistently moist but not overly saturated. Check the soil moisture regularly and water as needed.
8. Provide ongoing care: Throughout the growing season, ensure that the garlic bed receives adequate sunlight, water, and weed control. Monitor the soil moisture and adjust watering as necessary to avoid excessive dryness or waterlogging. Remove any weeds that compete with the garlic plants for nutrients and water.
By following these steps, you can plant garlic with confidence and set the stage for a successful crop. With proper care and attention, you’ll soon enjoy the flavorful rewards of your homegrown garlic harvest.
Watering Garlic Plants
Proper watering is essential for the healthy growth and development of garlic plants. Garlic requires consistent moisture throughout its growing season to produce robust bulbs. Follow these guidelines to ensure effective watering for your garlic plants:
1. Consistency is key: Aim to provide consistent moisture to the garlic plants from planting until harvest. Inconsistent watering can lead to issues such as stunted growth, smaller bulbs, or splitting cloves. Avoid allowing the soil to completely dry out or become overly saturated.
2. Monitor soil moisture: Regularly check the soil moisture level in the garlic bed. Stick your finger about an inch into the soil to determine if it feels moist or dry. Garlic prefers evenly moist soil, so water when the top inch of soil feels dry to the touch.
3. Water deeply: When watering, apply water deeply enough to reach the root zone. Shallow watering can encourage shallow root growth, which makes the plants more susceptible to drought stress. Ensure that the water reaches at least 6 inches deep into the soil.
4. Frequency of watering: The frequency of watering will depend on factors such as climate, soil type, and rainfall. During dry spells or periods of low rainfall, garlic plants may require watering every 5-7 days. Adjust the frequency based on the moisture needs of your specific growing conditions.
5. Watering methods: Use watering methods that allow for gentle and even distribution of water. Drip irrigation, soaker hoses, or watering cans with a fine rose attachment are all suitable options. Avoid using sprinklers that splash water onto the foliage, as this can encourage fungal diseases.
6. Timing of watering: Water early in the morning to allow foliage to dry before evening, minimizing the risk of disease. Morning watering also ensures that the plants have sufficient moisture to cope with the day’s heat and evaporation.
7. Mulching for moisture retention: Apply a layer of organic mulch, such as straw or shredded leaves, around the garlic plants. Mulch helps conserve soil moisture by reducing evaporation and suppressing weed growth. Ensure that the mulch layer is several inches thick but kept away from the base of the plants to prevent rotting.
8. Adjust watering as harvest approaches: As the garlic plants near maturity, typically signaled by the browning and drying of the foliage, reduce watering. This helps initiate the curing process and allows the outer wrappers to dry and harden before harvest.
By providing consistent and appropriate moisture to your garlic plants, you create an optimal environment for their growth and help them produce healthy, flavorful bulbs. Regular monitoring and adjusting of watering practices will ensure that your garlic crop thrives throughout the growing season.
Mulching Garlic Beds
Mulching plays a vital role in the successful cultivation of garlic. By applying a layer of organic mulch to your garlic beds, you can provide numerous benefits to the plants and the soil. Follow these guidelines to effectively mulch your garlic beds:
1. Benefits of mulching: Mulching offers several advantages for garlic plants. It helps conserve soil moisture by reducing evaporation, minimizes weed growth, regulates soil temperature, and prevents erosion. Additionally, mulch acts as a natural barrier, protecting the delicate roots of garlic plants from extreme temperature fluctuations.
2. Timing of mulching: After planting the garlic cloves, wait until the soil has settled and the plants have emerged before applying mulch. This is usually 1-2 weeks after planting. Mulching too early can hinder the emergence of the shoots and delay the growth of the plants.
3. Choosing the right mulch: Use organic mulch materials that will break down over time and improve the soil. Popular choices for mulching garlic beds include straw, dried leaves, untreated grass clippings, or shredded wood chips. Avoid using mulches that may contain weed seeds or have been treated with herbicides.
4. Applying mulch: Spread a layer of mulch around the garlic plants, ensuring the entire bed is covered. Aim for a mulch layer that is around 2-4 inches thick. Keep the mulch a few inches away from the base of the plants to prevent rotting and allow air circulation.
5. Replenishing mulch: Mulch gradually decomposes over time, so it’s important to replenish it as needed. Check the thickness of the mulch layer periodically and add more if it has significantly decomposed or has thinned out. This helps maintain the benefits of mulching throughout the growing season.
6. Weed control: Mulch acts as a natural weed suppressant, smothering weeds and preventing their growth. However, some persistent weeds may still emerge through the mulch. Regularly inspect the garlic bed for any weed growth and manually remove them to prevent competition for nutrients and moisture.
7. Watering under mulch: When watering the garlic plants, ensure that the water penetrates through the mulch layer and reaches the root zone. Mulch helps retain moisture, but it can also inhibit water from reaching the soil if it forms a compacted layer. Water deeply to encourage the roots to grow downwards.
8. Mulching after harvest: After harvesting your garlic bulbs, leave the mulch in place on the bed. It will continue to decompose, adding organic matter to the soil. This not only improves soil fertility but also helps prepare the bed for future planting.
By mulching your garlic beds, you create a favorable growing environment for the plants and promote healthier, more productive garlic crops. Enjoy the benefits of mulching as you watch your garlic plants thrive and produce flavorful bulbs.
Harvesting Garlic
Harvesting garlic is an exciting and rewarding step in the gardening process. The timing of the harvest is crucial to ensure that the garlic bulbs have developed fully and are ready for storage and culinary use. Here are some guidelines for harvesting garlic:
1. Timing: Garlic is usually ready to harvest when the foliage has started to turn yellow or brown. This typically occurs in mid to late summer, depending on the garlic variety and growing conditions. Avoid waiting too long, as overripe bulbs may split or deteriorate.
2. Inspect the foliage: Before harvesting, carefully inspect the garlic foliage. Look for at least half of the leaves turning yellow or brown. This indicates that the bulbs have matured and are full of flavor. Be cautious not to remove the foliage too early, as it plays a significant role in the bulb’s development.
3. Prepare the soil: Prior to harvesting, ensure that the soil around the garlic bed is relatively dry. This prevents mud from sticking to the bulbs, making them easier to clean and cure. Gently loosen the soil around the bulbs using a garden fork or trowel to minimize damage during harvest.
4. Lift the bulbs: To harvest garlic, carefully lift the bulbs from the soil using a garden fork or shovel. Insert the tool a few inches away from the base of the plant, gradually lift the bulbs, and gently shake off excess soil. Handle the bulbs carefully to avoid bruising or damaging them.
5. Cure the garlic: After lifting the bulbs, it’s crucial to cure them before storage. Lay the garlic plants in a single layer on a well-ventilated surface, such as a shady porch or a well-ventilated shed. Avoid direct sunlight, as it can cause sunscald. Allow the garlic bulbs to cure for about 2-3 weeks.
6. Trim the foliage: After the curing period, trim the foliage of the garlic bulbs to about 1-2 inches above the bulb. This helps to neaten the appearance and remove any foliage that may hinder airflow during storage. Be careful not to trim too close to the bulb, as this can increase the risk of storage diseases.
7. Storage: Once cured and trimmed, garlic bulbs can be stored for several months. Choose a cool, dry, and well-ventilated storage area. Braiding the cured garlic bulbs or placing them in mesh bags or netting can help maximize airflow and prevent moisture buildup.
8. Enjoy your harvest: With your garlic bulbs properly harvested, cured, and stored, you can now savor the flavors in your culinary creations. Use the harvested garlic in your favorite recipes or share them with friends and family to spread the joy of homegrown goodness.
Following these steps will help you achieve a successful garlic harvest, allowing you to enjoy the fruits of your labor and the distinctive flavors that fresh, homegrown garlic brings to your meals.