
Choosing the Right Variety of Garlic
Garlic is not just a flavorful ingredient, but it also has various health benefits. Whether you’re a seasoned gardener or a novice, choosing the right variety of garlic to plant is crucial for a successful harvest. With so many different types of garlic available, it’s important to consider several factors before making your selection.
First, decide whether you want hardneck or softneck garlic. Hardneck varieties, such as Rocambole and Porcelain, are known for their rich, strong flavors and are perfect for regions with colder climates. They produce a central flowering stalk called a scape, which can be harvested and used in culinary dishes. On the other hand, softneck garlic, like Silverskin and Artichoke, is milder in taste and tends to have more cloves per bulb. Softneck garlic is more adaptable to various climates and is ideal for braiding and long-term storage.
Consider the size of the garlic bulb as well. If you prefer larger cloves for cooking, opt for varieties like Elephant Garlic. Conversely, if you’re looking for smaller cloves, Silverskin garlic is a good choice.
The flavor of garlic also varies among different varieties. Some have a more pungent and intense taste, while others are milder and sweeter. If you enjoy a strong garlic flavor, consider planting a variety like Asiatic or Creole. For a milder taste, Artichoke or Silverskin garlic is a better option.
Another important factor to consider is the level of disease resistance in the variety. Look for garlic varieties that are known for their resistance to common diseases like rust, white rot, and fusarium. This can help ensure the health and vigor of your garlic plants throughout the growing season.
Lastly, take into account the climate and growing conditions in your region. Some garlic varieties are better suited for colder climates, while others thrive in warmer areas. Research the recommended planting zones for each variety to determine the best options for your specific location.
By considering factors such as taste, bulb size, disease resistance, and climate adaptability, you can choose the right variety of garlic that suits your preferences and growing conditions. Remember, it’s always a good idea to experiment with different varieties to discover the ones that thrive best in your garden. Happy garlic planting!
Preparing the Soil for Planting Garlic
Proper soil preparation is essential for the successful growth of garlic. Garlic plants thrive in well-drained, fertile soil with a pH level between 6.0 and 7.0. Follow these steps to prepare your soil before planting garlic:
1. Clear the area: Remove any weeds, rocks, or debris from the planting area. This will ensure that the garlic bulbs have enough space to grow and access essential nutrients.
2. Loosen the soil: Use a garden fork or a tiller to break up the soil to a depth of 8 – 10 inches. This will improve the soil’s structure, allowing for better root growth and water penetration.
3. Amend the soil: Garlic thrives in organic-rich soil. Incorporate well-rotted compost or aged manure into the soil to improve its fertility and provide a steady release of nutrients. Aim for a soil amendment ratio of approximately 2-3 inches per square foot.
4. Adjust pH levels: Test the soil’s pH level using a soil testing kit. If the pH is below 6.0, add agricultural lime to raise it. If the pH is above 7.0, add elemental sulfur or acidic compost to lower it. Garlic prefers slightly acidic soil for optimal growth.
5. Check drainage: Garlic bulbs are prone to rot if the soil becomes waterlogged. Ensure that the planting area has proper drainage by avoiding low-lying areas or heavy clay soils. If necessary, consider building raised beds or adding organic matter to improve drainage.
6. Consider adding nutrients: Garlic plants benefit from a balanced supply of nutrients. Incorporate a slow-release organic fertilizer into the soil before planting to provide the necessary nutrients for growth. Follow the instructions on the fertilizer package for proper application rates.
7. Rake and level the soil: After incorporating amendments and fertilizers, use a garden rake to level the area and create a smooth planting surface.
By following these steps, you’ll ensure that the soil is well-prepared to provide a healthy growing environment for your garlic plants. Taking the time to prepare the soil properly will set the stage for a bountiful harvest and robust garlic bulbs.
Time and Season for Planting Garlic
Planting garlic at the right time and season is crucial for its growth and development. The timing will vary depending on your location and climate. Here are some guidelines to follow when determining the best time to plant garlic:
1. Fall Planting: In most regions, fall is the ideal time to plant garlic. Planting in the fall allows the garlic bulbs to establish roots before winter sets in. This leads to stronger plants and larger bulbs. Aim to plant garlic in the fall, around 4-6 weeks before the first expected frost. This gives the plants enough time to establish roots before the cold weather arrives.
2. Spring Planting: If you live in a region with mild winters or areas with short growing seasons, you can also plant garlic in the spring. However, keep in mind that spring-planted garlic may produce smaller bulbs compared to fall-planted garlic.
3. Soil Temperature: Before planting, it’s important to consider the soil temperature. Garlic bulbs need cool soil but not frozen ground to establish roots. The ideal soil temperature for garlic planting is between 50-65°F (10-18°C). If the soil temperature is too high, the garlic cloves may sprout prematurely and weaken the plant’s overall growth.
4. Climate Considerations: Different garlic varieties have specific climate preferences. Some varieties are better suited for colder regions, while others thrive in warmer climates. Choose garlic varieties that are recommended for your specific climate zone and planting season.
5. Daylight Hours: Garlic is sensitive to the length of daylight hours. The growth of garlic bulbs is influenced by the number of daylight hours they receive. Fall-planted garlic benefits from the cooler temperatures and shorter daylight hours, as it encourages bulb formation. Spring-planted garlic should have enough daylight hours to reach maturity before the summer heat.
Remember to consult local gardening resources, such as agricultural extension offices, for specific planting recommendations in your area. Factors such as average first frost date, local weather patterns, and regional climate conditions can all influence the best time and season for planting garlic.
By considering these guidelines and understanding the specific needs of garlic plants, you can ensure optimal timing for planting and maximize your chances of a successful harvest.
Garlic Seed Selection and Preparation
Choosing high-quality garlic seed is crucial for ensuring healthy plant growth and a bountiful harvest. Here are some important factors to consider when selecting and preparing garlic seed:
1. Choose Bulb-Grade Seed: Garlic seed, also known as cloves, should be sourced from disease-free bulbs. Look for bulbs that are firm and plump, with no signs of rot or damage. Avoid using garlic purchased from grocery stores, as it may not be suited for planting due to treatments or storage conditions.
2. Save Your Best Bulbs: If you’ve previously grown garlic successfully, consider saving some of the best bulbs from your previous harvest as seed for the next planting season. Select the largest, healthiest, and most flavorful bulbs to use as your garlic seed.
3. Break Cloves Apart: Before planting, gently separate the cloves from the garlic bulb. Each clove will develop into a new plant. Be careful not to damage the basal plate, the part where the roots will emerge.
4. Preparing Seed Cloves: Large cloves are more likely to produce large bulbs, while smaller cloves are better for increasing the number of plants. Some gardeners choose to plant the larger cloves for a bigger harvest, while using the smaller cloves for culinary purposes. However, keep in mind that smaller cloves may result in smaller bulbs.
5. Treat for Disease Prevention: To minimize the risk of disease, consider treating your garlic seed cloves with anti-fungal agents before planting. Soaking the cloves in a solution of diluted hydrogen peroxide or a natural fungicide can help reduce the risk of diseases such as white rot or fungal infections.
6. Pre-Planting Warm Water Soak: A few hours before planting, soak the garlic seed cloves in warm water (around 40-50°C) for 1-2 hours. This process can stimulate garlic cloves to break dormancy and enhance germination.
7. Pre-Chilling (For Spring Planting): If you are planting garlic in the spring, consider cold-stratifying the cloves to mimic overwintering conditions. Place the cloves in a plastic bag and refrigerate them for 4-6 weeks before planting. This exposure to cold temperatures can help trigger proper bulb development.
By carefully selecting and preparing your garlic seed, you can set a strong foundation for healthy plant growth and a successful harvest. Remember to choose disease-free bulbs, break the cloves apart gently, and consider pre-treating or pre-chilling the cloves as needed. With proper seed selection and preparation, your garlic plants will have a better chance of thriving and producing flavorful, robust bulbs.
How to Plant Garlic
Planting garlic is a straightforward process that requires attention to detail to ensure successful growth. Follow these steps to plant garlic in your garden:
1. Prepare the Soil: Start by preparing the soil as mentioned in the previous section. Clear the area of any debris, loosen the soil, amend it with organic matter, and ensure proper drainage.
2. Spacing: Garlic plants need enough space to grow and develop fully. Plant individual cloves approximately 4-6 inches apart, with each row spaced about 12 inches apart. This spacing allows for proper airflow and minimizes competition for nutrients.
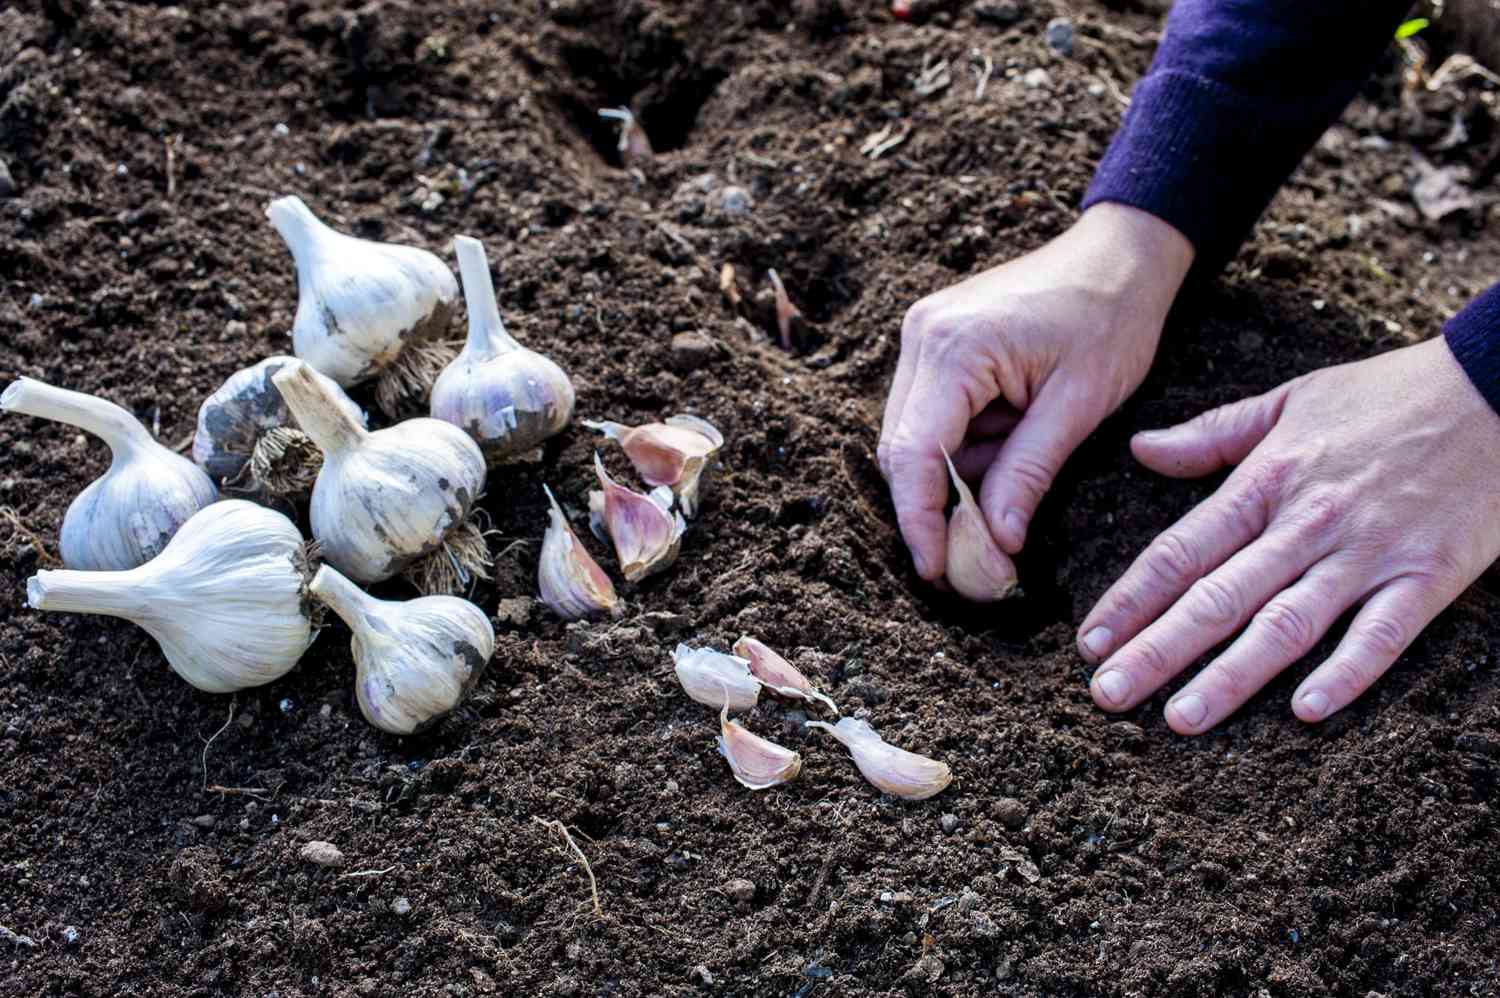
3. Planting Depth: Plant the garlic cloves with the pointed end facing up. Dig a hole that is roughly 2 inches deep, ensuring that the clove is planted with the tip about 1-2 inches below the soil surface.
4. Clove Orientation: Place each garlic clove in the hole with the flat basal plate facing down and the pointed tip facing up. This orientation helps the roots develop from the basal plate and the shoots emerge from the pointed end.
5. Cover and Mulch: Once the cloves are positioned properly, gently cover them with soil, firming it around the cloves to ensure good soil contact. Then, apply a layer of organic mulch, such as straw or shredded leaves, to help suppress weeds and maintain consistent soil moisture.
6. Watering: After planting, give the newly planted cloves a thorough watering to settle the soil and encourage root development. Keep the soil evenly moist but not waterlogged during the growing season, especially in dry spells.
7. Fertilizing: Garlic plants benefit from a balanced supply of nutrients. Consider applying a slow-release organic fertilizer at planting time to provide essential nutrients for growth. Follow the instructions on the fertilizer packaging for proper application rates.
8. Labeling: It’s a good practice to label the planted rows or beds, especially if you are planting multiple garlic varieties or if you have other crops nearby. This will help you identify the garlic variety and track their progress throughout the growing season.
9. Maintenance: Throughout the growing season, ensure that the garlic beds are kept weed-free. Remove any competing plants or weeds carefully so as not to disturb the garlic roots. Additionally, monitor the plants for signs of pests or diseases and take appropriate action, if necessary.
By following these steps, you can plant garlic with confidence and set the stage for healthy growth and a promising harvest. With proper care and attention, your garlic plants will thrive and reward you with delicious bulbs at harvest time.
Caring for Garlic Plants
Caring for garlic plants is relatively low maintenance, but there are a few key tasks to keep in mind to ensure healthy growth and maximize your harvest. Here are some essential care tips for garlic plants:
1. Watering: Garlic plants require consistent soil moisture throughout their growing season. Water the plants regularly, aiming for approximately 1 inch of water per week. Be mindful of not overwatering, as garlic bulbs can rot in overly saturated soil. Monitor the moisture levels and adjust watering accordingly, especially during dry spells or hot weather.
2. Mulching: Apply a layer of organic mulch around the garlic plants to help retain soil moisture, regulate temperature, and suppress weed growth. Mulch also helps prevent soil erosion and adds nutrients as it breaks down over time. Maintain a mulch depth of 2-4 inches, being careful not to bury the garlic plants themselves.
3. Weed Control: Keep the area around the garlic plants free from weeds. Weeds compete with garlic for nutrients, water, and sunlight. Regularly remove any weeds that appear, being cautious not to disturb the garlic plants’ shallow root system. Hand pulling or carefully using a hoe or hand cultivator is recommended.
4. Fertilizing: Garlic plants benefit from additional fertilization during their growing season. Apply a balanced, slow-release organic fertilizer once or twice during the growing period, following the package instructions for application rates. Avoid excessive nitrogen fertilizers, as they can promote excessive foliage growth at the expense of bulb development.
5. Scaping: Some hardneck garlic varieties produce scapes, which are curly flowering stalks that emerge from the center of the plant. These scapes can be removed to divert the plant’s energy towards bulb development. Harvest the scapes when they form a loop or curl, typically before they straighten out. The scapes are edible and can be used in cooking, providing a mild garlic flavor.
6. Pest and Disease Control: Monitor your garlic plants for signs of pests or diseases. Common garlic pests include aphids, onion maggots, and nematodes. If detected, use appropriate organic pest control methods to manage these issues. Keep an eye out for diseases such as white rot or rust, and promptly remove and discard any affected plants to prevent further spread.
7. Pruning: Remove any yellowing or damaged leaves as they appear. This focuses the plant’s energy on healthy foliage and bulb development. Be careful not to remove too many leaves, as they provide essential nutrients to the bulbs. Only prune leaves that are visibly declining.
8. Harvesting Scapes: As mentioned earlier, if you choose to let some scapes develop on your hardneck garlic plants, be sure to harvest them before they straighten out fully. Cut or snap off the scapes just above the topmost leaf to promote bulb growth.
By following these care tips, you can promote healthy growth, minimize pest and disease issues, and ultimately enjoy a bountiful harvest of flavorful garlic bulbs. With a little attention and care, your garlic plants will thrive and reward you with their delicious flavor and culinary versatility.
Harvesting and Storing Garlic
Harvesting garlic at the right time and storing it properly is essential to preserve its flavor and quality. Here are the key steps to ensure a successful garlic harvest and effective storage:
1. Timing the Harvest: The timing of garlic harvest depends on the variety and growing conditions. Typically, garlic is ready to be harvested when the lower leaves turn yellow and dry out. As the garlic bulb matures, the outer skin will become papery and dry. Avoid leaving garlic in the ground for too long, as over-mature bulbs may begin to separate into cloves, resulting in reduced storage life.
2. Harvesting Method: Use a garden fork or a shovel to gently lift the garlic bulbs from the soil. Be careful not to damage the bulbs or bruise them excessively. If you’re uncertain about the maturity of the bulbs, dig up one or two to check if they have reached the desired size and development.
3. Curing: After harvesting, garlic bulbs need to dry and cure to increase their shelf life and improve their flavor. Shake off excess soil and leave the garlic plants in a well-ventilated area, out of direct sunlight. Hang them in bundles, known as “garlic braids,” or lay them on a drying rack or wire mesh. Allow the bulbs to cure for 2-3 weeks until the outer skins become dry and papery.
4. Trimming and Cleaning: Once the garlic bulbs are fully cured, trim off the roots and remove any excess foliage, leaving about 1-2 inches of stem. Take care not to remove too much of the protective outer skin. Gently brush off any remaining soil or dirt from the bulbs.
5. Storage Conditions: Store your cured garlic in a cool, dry, and well-ventilated place. A temperature around 50-60°F (10-15°C) with a humidity level of 60-70% is ideal. Avoid storing garlic bulbs in plastic bags or airtight containers, as this can lead to excess moisture accumulation and spoilage. Instead, use breathable containers like mesh bags, vegetable racks, or woven baskets to allow for proper airflow.
6. Shelving and Organization: Arrange the garlic bulbs in a single layer to prevent them from touching and rotting. Check stored garlic periodically for any signs of rot or softness, and promptly remove any affected bulbs to prevent further spoilage.
7. Seed Saving: If you plan to save some garlic bulbs for planting in the next season, select the healthiest, largest, and best-formed bulbs for seed. Keep them separate from the bulbs that are intended for culinary use to maintain their quality and prevent accidental consumption.
By following these harvesting and storing practices, you can prolong the shelf life of your garlic, preserve its flavor, and ensure that you have a stock of homegrown garlic for months to come. Enjoy the fruits of your labor in your culinary creations, knowing you have fresh, flavorful garlic at your disposal.
Common Garlic Planting Mistakes to Avoid
While growing garlic can be a rewarding experience, there are some common mistakes that gardeners make. By being aware of these mistakes, you can avoid them and increase your chances of a successful garlic harvest. Here are some common garlic planting mistakes to avoid:
1. Planting Improperly-Sized Cloves: The size of the garlic cloves you plant can influence the size of the bulbs produced. Avoid planting tiny or damaged cloves as they are less likely to develop into full-sized bulbs. Instead, select large, healthy cloves for planting to maximize your garlic yield.
2. Planting too Deep or too Shallow: Garlic cloves should be planted at the right depth to allow for proper root development and good bulb formation. Planting cloves too deep can hinder their growth, while planting them too shallow may expose them to drying out or freezing. Aim to plant cloves at a depth of 1-2 inches, with the pointed tip facing up.
3. Overwatering or Underwatering: Finding the right balance of watering is crucial for proper garlic growth. Overwatering can lead to rot and fungal diseases, while underwatering can result in stunted growth and small bulbs. Monitor the soil moisture and water your garlic plants consistently, keeping the soil evenly moist but not waterlogged.
4. Neglecting Weed Control: Weeds compete with garlic plants for water, nutrients, and sunlight, which can hinder their growth. Neglecting weed control can result in smaller garlic bulbs and overall reduced plant health. Regularly remove weeds from the garlic patch to eliminate competition and give your garlic plants the best chance to thrive.
5. Failing to Provide Adequate Nutrients: Garlic plants benefit from a balanced supply of nutrients throughout the growing season. Failing to provide adequate fertilization can result in smaller bulbs and weaker plants. Incorporate organic fertilizers or compost into the soil before planting and consider side-dressing with a balanced fertilizer during the growing season to ensure sufficient nutrient availability.
6. Planting in the Wrong Season: Garlic has specific planting requirements and is typically planted in the fall for overwintering or in the spring for regions with milder winters. Planting garlic at the wrong time can lead to suboptimal growth or premature bolting. Research the recommended planting time for your specific region and choose the appropriate season to plant your garlic.
7. Ignoring Pest and Disease Management: Garlic is susceptible to various pests and diseases, including aphids, onion maggots, white rot, and rust. Ignoring pest and disease management practices can result in reduced garlic yield and quality. Monitor your plants regularly, take preventive measures such as companion planting or organic pest control methods, and promptly address any signs of pest or disease infestation.
By avoiding these common garlic planting mistakes, you can improve your chances of a successful harvest and enjoy a bountiful yield of flavorful garlic bulbs. Take the time to properly prepare the soil, plant garlic cloves correctly, provide adequate care, and address any issues promptly to ensure your garlic plants have the best growing conditions possible.
Garlic Planting FAQs
Planting garlic may raise some questions, especially for those new to growing this flavorful bulb. Here are some frequently asked questions about garlic planting, along with their answers:
Q: When is the best time to plant garlic?
A: It is generally recommended to plant garlic in the fall, about 4-6 weeks before the first expected frost. This allows the cloves to establish roots before winter sets in. However, in regions with mild winters or short growing seasons, garlic can also be planted in the spring.
Q: How deep should I plant garlic cloves?
A: Plant garlic cloves about 1-2 inches deep, with the pointed tip facing up. Planting too deep or too shallow can hinder growth and bulb formation.
Q: How far apart should I space garlic cloves?
A: Space garlic cloves about 4-6 inches apart, with each row spaced approximately 12 inches apart. Adequate spacing allows for proper airflow and minimizes competition for nutrients.
Q: What type of soil is ideal for growing garlic?
A: Garlic prefers well-drained, fertile soil with a pH level between 6.0 and 7.0. Incorporating organic matter, such as compost or aged manure, into the soil can improve fertility and drainage.
Q: How often should I water my garlic plants?
A: Garlic plants require consistent soil moisture. Water them regularly, aiming for approximately 1 inch of water per week. Ensure the soil is evenly moist but not waterlogged.
Q: Do garlic plants need fertilization?
A: Yes, garlic plants benefit from additional fertilization. Before planting, incorporate organic fertilizer or compost into the soil. Side-dress with a balanced fertilizer during the growing season to provide essential nutrients.
Q: When is garlic ready to be harvested?
A: Garlic is typically ready to be harvested when the lower leaves turn yellow and dry out. The outer skin of the garlic bulb becomes dry and papery. Harvesting time may vary depending on the variety and growing conditions.
Q: How should I store harvested garlic?
A: Store cured garlic in a cool, dry, and well-ventilated place with a temperature of around 50-60°F (10-15°C) and a humidity level of 60-70%. Avoid storing garlic in plastic bags or airtight containers, as this can lead to excess moisture accumulation. Use breathable containers like mesh bags or vegetable racks.
Q: Can I use garlic from the grocery store as planting stock?
A: It is generally not recommended to use garlic from the grocery store as planting stock. Grocery store garlic may have been treated to inhibit sprouting or may not be suited for growing conditions. Instead, source garlic cloves from a reputable seed supplier or save bulbs from a previous harvest.
By familiarizing yourself with these common garlic planting questions and their answers, you will be better equipped to grow healthy garlic plants and enjoy a successful harvest. Remember, every gardening journey is a learning experience, so don’t hesitate to seek additional guidance from local experts or fellow gardeners to enhance your garlic planting knowledge.