
Ingredients
When it comes to making your own window cleaning solution, you don’t need to rely on store-bought products filled with chemicals. With just a few simple ingredients, you can create an effective and eco-friendly cleaning solution for your windows. Here are some common ingredients you can use:
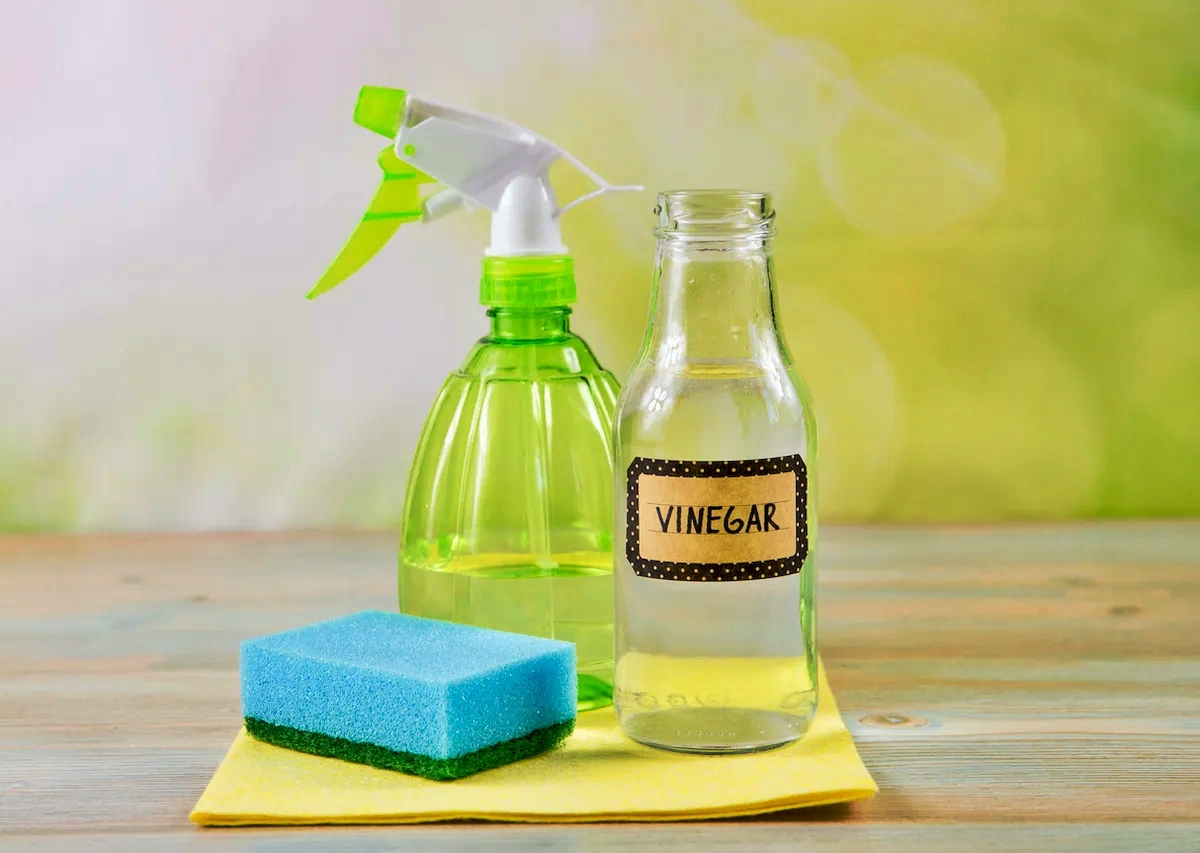
- Vinegar: Vinegar is a versatile cleaning agent that removes dirt, grime, and streaks from windows. It is acidic, which helps dissolve stubborn stains and leaves the glass sparkling.
- Water: The main component of any window cleaning solution is water. It helps dilute the other ingredients and provides the necessary consistency for effective cleaning.
- Ammonia: Ammonia is a powerful cleaner that cuts through grease and dirt on windows. However, it should be used with caution and in well-ventilated areas.
- Dish Soap: Dish soap is a gentle and effective option for removing grease and grime on windows. Opt for a mild, non-abrasive dish soap to prevent any damage to the glass.
- Rubbing Alcohol: Rubbing alcohol is excellent for removing tough stains, fingerprints, and smudges from windows. It evaporates quickly, leaving no residue behind.
- Lemon Juice: The acidic properties of lemon juice make it an excellent choice for tackling hard water stains and mineral buildup on windows.
- Cornstarch: Surprisingly, cornstarch can be used to create a homemade window cleaning solution. When mixed with water, it forms a paste that effectively cleans and polishes windows.
- Hydrogen Peroxide: Hydrogen peroxide is a natural disinfectant and can be used to clean windows, particularly to remove mold and mildew in bathroom windows.
- Club Soda: Club soda is a popular choice for cleaning windows due to its carbonation. It works well in removing streaks and leaving windows shiny and spotless.
- Baking Soda: Baking soda is another versatile ingredient that can cut through dirt and grime on windows. When combined with vinegar, it creates a powerful cleaning solution.
These ingredients can be easily found in your pantry or local grocery store. By using them, you can create a window cleaning solution that is effective, budget-friendly, and environmentally friendly. Experiment with different combinations to find the one that works best for your windows.
Method 1: Vinegar and Water
Vinegar is a popular ingredient for making homemade window cleaning solutions due to its powerful cleaning properties. It effectively cuts through dirt, grime, and streaks, leaving your windows clean and shiny. Here’s how to make a vinegar and water window cleaning solution:
- Mix one part white vinegar with one part water in a spray bottle. For example, if you have half a cup of vinegar, add half a cup of water.
- Shake the bottle gently to ensure the vinegar and water are well mixed.
- Spray the solution onto the window surface. Be sure to cover the entire glass area evenly.
- Use a microfiber cloth or a lint-free paper towel to wipe the solution in a circular motion. This helps to remove dirt and grime effectively.
- For stubborn stains or streaks, spray a little more solution onto the affected area and let it sit for a few moments before wiping it away.
- If you have high windows, use a sponge or a squeegee instead of a cloth for easier reach.
- Once you have cleaned the entire window, use a clean, dry microfiber cloth to buff the glass and remove any remaining streaks or residue.
- Repeat the process for all of your windows, inside and out, until they are gleaming and streak-free.
Using a vinegar and water solution is an affordable and eco-friendly way to clean your windows. The acidity of the vinegar helps break down dirt and grime, while the water provides the necessary dilution. Additionally, this solution is safe to use on most types of windows, including glass, vinyl, and even tinted windows.
Remember, always test the solution on a small, inconspicuous area of the window first to ensure it doesn’t cause any damage or discoloration. With regular cleaning using this vinegar and water method, your windows will stay crystal clear and sparkling.
Method 2: Ammonia and Water
Ammonia is a powerful cleaning agent that effectively cuts through grease and grime, making it an excellent choice for cleaning windows. However, it’s important to note that ammonia should be used with caution and in well-ventilated areas due to its strong fumes. Here’s how to make an ammonia and water window cleaning solution:
- In a clean spray bottle, mix one part ammonia with three parts water. For example, if you have half a cup of ammonia, add one and a half cups of water.
- Gently shake the bottle to ensure the ammonia and water are well blended.
- Spray the solution onto the window surface. Be sure to cover the entire glass area evenly.
- Use a microfiber cloth or a lint-free paper towel to wipe the solution in a circular motion. This helps to remove dirt, grime, and smudges effectively.
- For stubborn stains or heavily soiled windows, allow the solution to sit on the surface for a few minutes before wiping it away.
- For larger windows, consider using a squeegee to make the cleaning process faster and more efficient.
- Once you have cleaned the entire window, use a clean, dry cloth to buff the glass and remove any streaks or residue.
- Repeat the process for all of your windows, ensuring they are all sparkling clean and streak-free.
While ammonia is a powerful cleaner, it’s important to follow safety precautions when using it. Always work in a well-ventilated area and avoid mixing ammonia with other cleaning products, such as bleach, as it can release toxic fumes. Additionally, ammonia may not be suitable for all types of windows, so it’s best to test it on a small area first to ensure it doesn’t cause any damage or discoloration.
The ammonia and water window cleaning solution is particularly effective for removing tough dirt, grime, and fingerprints from windows. However, due to its strong odor and potential hazards, it may not be the preferred choice for everyone. Make sure to consider the alternative methods mentioned in this article to find the one that best suits your cleaning needs and preferences.
Method 3: Dish Soap and Water
Dish soap is a gentle yet effective option for cleaning windows. It helps remove grease, grime, and dirt, leaving your windows sparkling clean. Here’s how you can make a dish soap and water window cleaning solution:
- Fill a bucket or container with warm water. The amount of water will depend on the number of windows you plan to clean.
- Add a few drops of mild, non-abrasive dish soap to the warm water. Avoid using a dish soap that contains harsh chemicals or fragrances.
- Gently stir the mixture to ensure the dish soap is well dispersed in the water.
- Dip a soft sponge or lint-free cloth into the soapy water, making sure to wring out any excess water.
- Starting from the top, gently scrub the window surface in circular motions, working your way down.
- For stubborn stains or sticky residue, apply a bit more pressure while scrubbing or let the soapy water sit on the surface for a few minutes before rinsing.
- Once you have cleaned the entire window, rinse it thoroughly with clean water to remove any soap residue.
- Use a clean, dry cloth or squeegee to wipe away excess water and buff the glass until it is sparkling and streak-free.
- Repeat the process for all of your windows, inside and out, until they are all clean and shiny.
Dish soap and water is a gentle and effective window cleaning solution that is safe for most types of windows, including glass and vinyl. It is also an affordable option that can be easily found in most households. However, make sure to test the solution on a small, inconspicuous area first to ensure it doesn’t cause any damage or discoloration.
With regular cleaning using a dish soap and water solution, you can keep your windows looking crystal clear and free of dirt and grime. Remember to change the water and soap solution as needed to maintain optimum cleaning results.
Method 4: Rubbing Alcohol and Water
Rubbing alcohol is a versatile and effective ingredient for cleaning windows. It has the ability to dissolve oils, remove fingerprints, and eliminate stubborn stains, giving your windows a streak-free shine. Here’s how to make a rubbing alcohol and water window cleaning solution:
- In a spray bottle, mix equal parts of rubbing alcohol and water. For example, if you have half a cup of rubbing alcohol, add half a cup of water.
- Gently shake the bottle to ensure the rubbing alcohol and water are well mixed.
- Spray the solution onto the window surface, ensuring even coverage.
- Use a lint-free cloth, microfiber cloth, or paper towel to wipe the solution across the window in a circular motion. This helps to remove dirt, dust, and any smudges effectively.
- For stubborn stains or dried-on dirt, spray a little more solution directly onto the affected area and let it sit for a few moments before wiping it away.
- For larger windows, consider using a squeegee for faster and more efficient cleaning.
- Once you have cleaned the entire window, use a clean, dry cloth to buff the glass and remove any remaining streaks or residue.
- Repeat the process for all of your windows, both inside and out, until they are all sparkling clean and streak-free.
The combination of rubbing alcohol and water not only cleans your windows but also helps to disinfect them. It evaporates quickly, leaving no streaks or residue behind. However, it’s important to note that rubbing alcohol should be used in a well-ventilated area and kept away from open flames or sparks.
Before using a rubbing alcohol and water solution on all of your windows, test it on a small, inconspicuous area to ensure it doesn’t cause any damage or discoloration. This solution is suitable for most types of windows, including glass, vinyl, and even tinted windows.
With regular cleaning using a rubbing alcohol and water solution, you can keep your windows looking clear and spotless, giving your home a fresh and inviting appearance.
Method 5: Lemon Juice and Water
Lemon juice is a natural and effective ingredient for cleaning windows. Its acidic properties help break down grease, grime, and hard water stains, leaving your windows bright and shiny. Here’s how to make a lemon juice and water window cleaning solution:
- Squeeze the juice of one lemon into a spray bottle.
- Add an equal amount of water to the spray bottle. For example, if you have a quarter cup of lemon juice, add a quarter cup of water.
- Secure the spray bottle cap and shake well to mix the lemon juice and water together.
- Spray the solution onto the window surface, ensuring complete coverage.
- Use a lint-free cloth, microfiber cloth, or paper towel to wipe the solution across the window in a circular motion. This helps to remove dirt, grime, and stains effectively.
- For stubborn stains or hard water deposits, you can squeeze some fresh lemon juice directly onto the affected area and let it sit for a few minutes before wiping it away.
- For larger windows, consider using a squeegee to make the cleaning process more efficient.
- Once you have cleaned the entire window, use a clean, dry cloth to buff the glass and remove any residual streaks or residue.
- Repeat the process for all of your windows, both inside and out, until they are all sparkling clean and free of stains.
Lemon juice is not only a natural cleaner but also leaves a refreshing scent in your home. However, be cautious when using lemon juice on sensitive surfaces, such as marble or certain types of tinted windows, as its acidic nature may cause damage or discoloration. It’s a good idea to test the solution on a small, inconspicuous area first.
With regular cleaning using a lemon juice and water solution, your windows will stay clean and stain-free, adding a vibrant touch to your living space.
Method 6: Cornstarch and Water
Believe it or not, cornstarch can be used as a homemade window cleaning solution. It effectively removes dirt, grime, and streaks while leaving your windows with a polished finish. Here’s how to make a cornstarch and water window cleaning solution:
- In a bowl, mix two tablespoons of cornstarch with half a cup of water, stirring until the cornstarch is completely dissolved.
- Fill a spray bottle with plain water.
- Spray the window surface with plain water to dampen it.
- Apply the cornstarch and water mixture to the dampened window, using a lint-free cloth or sponge. Rub the mixture onto the glass in circular motions.
- Continue to scrub the window until the mixture dries to a powdery film.
- Once the mixture has dried, use a clean, dry cloth to wipe away the powdery film, revealing clean and streak-free windows.
- Repeat the process for all of your windows, inside and out.
The cornstarch and water solution acts as a gentle abrasive, helping to remove stubborn dirt and grime from your windows. As it dries, it absorbs excess moisture while leaving behind a polished finish. This method is particularly effective for cleaning and polishing windows without leaving streaks or residue behind.
It’s important to note that the cornstarch and water solution may not be suitable for all types of window surfaces. Be sure to test it on a small, inconspicuous area first to ensure it doesn’t cause any damage or discoloration.
By using a cornstarch and water solution, you can achieve clean, clear, and streak-free windows, transforming the appearance of your home or office space.
Method 7: Hydrogen Peroxide and Water
Hydrogen peroxide is a natural and versatile cleaning agent that can be used to clean windows effectively. It helps remove dirt, grime, and even mold or mildew on windows. Here’s how to make a hydrogen peroxide and water window cleaning solution:
- Mix equal parts of hydrogen peroxide and water in a spray bottle. For example, if you have half a cup of hydrogen peroxide, add half a cup of water.
- Gently shake the spray bottle to ensure the hydrogen peroxide and water are well mixed.
- Spray the solution onto the window surface, covering the entire glass area evenly.
- Allow the solution to sit for a few minutes to penetrate and loosen any tough stains or dirt.
- Using a lint-free cloth, sponge, or scrub brush, gently scrub the window in a circular motion. This will help to remove the dirt and grime effectively.
- For areas with stubborn stains or mold and mildew, apply a bit more solution and scrub with a brush or sponge.
- Once you have cleaned the entire window, rinse it thoroughly with clean water to remove any remaining solution or residue.
- Dry the window using a clean, lint-free cloth or allow it to air dry.
- Repeat the process for all of your windows, both inside and out, until they are all clean and free of dirt and stains.
Hydrogen peroxide is a powerful natural disinfectant, making it particularly useful for cleaning windows in high-moisture areas, such as bathrooms or kitchens. It helps eliminate bacteria, mold, and mildew, leaving your windows not only clean but also sanitized.
It’s important to note that hydrogen peroxide may have a bleaching effect on certain surfaces, so it’s best to test the solution on a small, inconspicuous area before using it on all of your windows. Additionally, avoid using hydrogen peroxide on colored or tinted windows, as it may cause discoloration.
With regular cleaning using a hydrogen peroxide and water solution, your windows will stay clean, fresh, and free of harmful bacteria or mold.
Method 8: Club Soda
Club soda is a popular choice for cleaning windows due to its carbonation properties. It can effectively remove dirt, grime, and streaks, leaving your windows sparkling clean. Here’s how to clean your windows using club soda:
- Pour club soda into a spray bottle.
- Generously spray the club soda onto the window surface, ensuring complete coverage.
- Allow the club soda to sit on the window for a few moments to loosen the dirt and grime.
- Take a lint-free cloth or paper towel and gently wipe the window in a circular motion. This will help remove the dirt and smudges effectively.
- For stubborn stains or streaks, spray additional club soda directly onto the affected area and let it sit for a few minutes before wiping it away.
- Once you have cleaned the entire window, use a clean, dry cloth to buff the glass and remove any remaining streaks or residue.
- Repeat the process for all of your windows, inside and out, until they are all clean and sparkling.
Club soda’s carbonation and mineral properties help to break down dirt and grime, making it an excellent natural cleaner for windows. Its gentle formula also makes it suitable for various window types, including glass, vinyl, and tinted windows.
Keep in mind that club soda may not be as effective for removing tough stains or heavily soiled windows. In such cases, you may consider combining club soda with other ingredients such as vinegar or dish soap for a more powerful cleaning solution.
With regular cleaning using club soda, you can maintain clean and streak-free windows without the need for harsh chemicals.
Method 9: Vinegar and Baking Soda
Vinegar and baking soda are two powerful ingredients that, when combined, create a natural and effective window cleaning solution. This dynamic duo works together to dissolve stubborn stains and eliminate dirt and grime. Here’s how to make and use a vinegar and baking soda window cleaning solution:
- In a spray bottle, mix equal parts white vinegar and water. For example, if you have half a cup of vinegar, add half a cup of water.
- Spray the vinegar and water solution directly onto the window surface.
- Sprinkle a small amount of baking soda onto the damp window, focusing on areas with tougher stains or buildup.
- As the baking soda reacts with the vinegar, it will create a fizzing effect. This reaction helps to loosen and lift dirt and grime.
- Using a lint-free cloth or sponge, gently scrub the window in a circular motion to ensure the baking soda and vinegar mixture is evenly spread.
- Pay extra attention to areas with stubborn stains or buildup, working the mixture into the surface to effectively remove the dirt.
- Once you have thoroughly cleaned the window, rinse it with clean water to remove any residue.
- Use a clean, dry cloth to buff the glass and ensure a streak-free shine.
- Repeat the process for all of your windows, both inside and out, until they are all clean and free of dirt and stains.
The combination of vinegar and baking soda creates a powerful cleaning solution that is effective for tackling even the toughest window stains. The acidity of the vinegar helps to dissolve grime, while the baking soda provides gentle abrasion, aiding in the removal of dirt and buildup.
It’s important to note that this mixture may not be suitable for all surfaces. Test the solution in a small, inconspicuous area first to ensure it doesn’t cause any damage or discoloration. Additionally, avoid using this method on sensitive surfaces such as marble or tinted windows.
By harnessing the natural cleaning power of vinegar and baking soda, you can achieve sparkling clean windows without the need for harsh chemicals.
Tips for Cleaning Windows Effectively
Cleaning windows can be a daunting task, but with the right techniques and tips, you can achieve stunning, streak-free results. Here are some tips to help you clean your windows effectively:
- Clean on a cloudy day or during cooler temperatures: Cleaning windows when it’s hot and sunny can cause the cleaning solution to dry quickly, leaving streaks. Choose a cloudy day or clean early in the morning or late in the evening when it’s cooler.
- Start with the right tools: Invest in high-quality tools such as a squeegee, microfiber cloths, lint-free paper towels, or a soft sponge. These will help you achieve better cleaning results with minimum streaking.
- Remove loose dirt and dust: Before applying any cleaning solution, use a soft brush or microfiber cloth to remove loose dirt, dust, and cobwebs from the window frames and sills.
- Choose the right cleaning solution: Depending on your preference and the type of windows you have, choose a suitable cleaning solution. Options include vinegar and water, ammonia and water, dish soap and water, or any other homemade or store-bought window cleaner.
- Work from top to bottom: Start at the top of the window and work your way down. This helps prevent cleaning solution from dripping onto already cleaned surfaces, causing streaks and spots.
- Use a squeegee for larger windows: For larger windows, using a squeegee can make the cleaning process faster and more efficient. Wipe the squeegee blade with a damp cloth between strokes to ensure it’s clean and free of debris.
- Don’t forget the corners and edges: Pay attention to the corners and edges of the windows where dirt and grime tend to accumulate. Use a soft brush, cotton swab, or an old toothbrush to clean these hard-to-reach areas.
- Dry with a lint-free cloth: After cleaning, use a lint-free cloth or a dry microfiber cloth to dry and buff the glass. This will help prevent streaks and leave your windows crystal clear.
- Clean both inside and outside: To achieve a complete clean, make sure to clean both the inside and outside of your windows. This will give your windows a uniform appearance and maximize the amount of sunlight that enters your space.
- Regular maintenance is key: To keep your windows looking their best, perform regular cleaning maintenance. Frequent cleaning will prevent dirt and grime from building up, making future cleaning tasks easier and more efficient.
By following these tips, you can ensure that your windows are clean, streak-free, and enhance the overall appearance of your home or office space.
Precautions to Take
Cleaning windows can be a straightforward task, but it’s important to take certain precautions to ensure your safety and protect the integrity of your windows. Here are some precautions to keep in mind while cleaning your windows:
- Protect yourself: Wear gloves, safety goggles, and protective clothing to avoid any potential accidents or skin irritations. This is particularly important when working with strong cleaning agents or climbing ladders.
- Check for loose or damaged windows: Before starting the cleaning process, inspect your windows for any cracks, loose or damaged frames, or broken glass. Cleaning windows in poor condition may worsen the damage or pose a safety risk.
- Maintain ladder safety: If you need to use a ladder to reach higher windows, ensure it is stable and on level ground. Always follow proper ladder safety guidelines, such as keeping three points of contact, not overreaching, and having someone nearby to assist if needed.
- Read and follow instructions: If you are using store-bought cleaning agents, read and follow the instructions provided on the product labels. Use them as directed and avoid mixing different cleaning agents together, as it can create harmful fumes or chemical reactions.
- Test solutions on a small area: Before applying any cleaning solution to your windows, test it on a small, inconspicuous area first. This will help you determine any potential adverse reactions or damage it may cause to your specific window surfaces.
- Avoid direct sunlight: Try to avoid cleaning windows during peak sunlight hours. Sunlight can cause the cleaning solution to dry quickly, resulting in streaks. Choose a cloudy day or clean when the windows are shaded.
- Secure window hardware: If your windows have hardware components like handles or locks, make sure they are securely fastened before cleaning. This prevents any accidental opening or damage to the hardware.
- Use care around window treatments: Be cautious around window treatments such as blinds, curtains, or shutters. Ensure they are properly secured and avoid getting them wet or tangled in cleaning tools.
- Never lean out of windows: Avoid leaning or reaching out of windows while cleaning, as this can be dangerous. Instead, use a sturdy stool or ladder to maintain your balance and reach the necessary areas.
- Keep children and pets away: During the cleaning process, it’s best to keep children and pets away from the area to prevent any accidents or exposure to cleaning solutions or tools.
By following these precautions, you can ensure a safe and successful window cleaning experience. Remember to prioritize safety and take necessary measures to protect yourself, your windows, and your surroundings.