
Choosing the Right Type of Paper
When it comes to making paper ornaments, choosing the right type of paper is crucial. The type of paper you select will determine the overall look, durability, and ease of folding for your ornament. Here are some factors to consider when choosing the perfect paper:
Weight: Opt for lightweight paper, such as origami paper or scrapbook paper, as it is easier to manipulate and fold. Avoid heavy cardstock, as it may make the folding process more challenging.
Color: Think about the color scheme you want for your ornament. Consider using solid-colored paper if you prefer a classic and minimalist design. If you’re feeling adventurous, patterned or textured paper can add visual interest to your ornament.
Texture: Experiment with different textured papers, such as metallic, glitter, or embossed paper, to add a unique touch to your ornament. The texture can enhance the overall appearance and make your creation stand out.
Printability: If you’re feeling creative, you can design and print your own customized paper for the ornaments. Look for inkjet or laser printer-friendly options and let your imagination run wild with personalized designs and patterns.
Durability: Consider how long you want your paper ornament to last. If it’s meant to be a temporary decoration, using regular paper or tissue paper can be a budget-friendly option. However, if you want a more durable ornament that can withstand multiple seasons, opt for thicker and more sturdy paper.
Size: Keep in mind the size and complexity of the ornament you want to create. Thinner paper is suitable for smaller, intricate designs, while thicker paper can provide more stability for larger or more complex ornaments.
By taking these factors into account, you can select the perfect paper for your ornament project. Remember to have fun and let your creativity shine through as you explore different types of paper and create unique designs that will add a festive touch to any occasion.
Gathering the Necessary Materials
Before diving into your paper ornament project, it’s essential to gather all the necessary materials. Having everything ready beforehand will ensure a smooth and enjoyable crafting experience. Here are the key materials you will need:
Paper: As mentioned earlier, select the type of paper that best suits your design and preferences. Origami paper, scrapbook paper, or even recycled paper can work perfectly for creating beautiful paper ornaments.
Scissors: A sharp pair of scissors will be essential for cutting out the paper shapes and trimming any excess edges. Choose scissors that are comfortable to hold and have a precise cutting edge.
Glue: Depending on your ornament design, you may need glue to attach different parts of the ornament together. Consider using a non-toxic adhesive that dries clear for an invisible and neat finish.
Ruler: A ruler will come in handy for measuring and creating straight lines on your paper. It will ensure accuracy and help you achieve precise folds and cuts.
Hole Puncher: If you plan on hanging your paper ornament, a hole puncher will be necessary to create a hole for the string or ribbon. Opt for a small-sized hole puncher for a neat and inconspicuous hole.
Decorative Elements: Get creative and gather various embellishments to personalize your ornaments. This can include glitter, sequins, beads, ribbons, or any other decorative items that suit your chosen design and theme.
Markers or Pens: If you want to add details or personalize your ornaments with names or messages, markers or pens in different colors will be handy. Choose permanent markers or fine-tipped pens that won’t smudge or fade over time.
Templates: If you’re following specific designs, it’s helpful to have templates or patterns to guide you. You can either print templates from online resources or create your own by tracing shapes onto cardboard or sturdy paper.
Make sure to gather all these materials before you begin crafting your paper ornaments. Having everything prepared and within reach will save you time and keep your creative process uninterrupted. Now that you have your materials ready, it’s time to start folding and creating beautiful paper ornaments!
Folding the Paper to Create the Basic Shape
Once you have chosen the right type of paper and gathered all the necessary materials, it’s time to start folding the paper to create the basic shape of your ornament. Here’s a step-by-step guide to help you get started:
- Prepare the Paper: Begin by cutting the paper into the desired shape and size for your ornament. If you’re using a template, trace it onto the paper and carefully cut along the lines. Ensure that the paper is flat and free from any creases or wrinkles.
- Choose a Folding Technique: Depending on the design and shape of your ornament, there are various folding techniques you can use. Common techniques include accordion folding, valley folding, or petal folding. Refer to your ornament design or template for specific folding instructions.
- Start Folding: With the paper in front of you, begin folding along the designated lines or creases. Use a ruler or your fingers to make the folds crisp and precise. Take your time and ensure that each fold is neatly aligned.
- Secure the Folds: Once you’ve completed the necessary folds, use glue or adhesive to secure the folds together. Apply a small amount of glue to the edges or flaps of the paper and press them firmly to hold the shape in place. Allow the glue to dry before moving on to the next step.
- Repeat and Expand: If your ornament design requires multiple folded pieces, repeat the folding process for each piece. Once all the individual folded pieces are ready, carefully expand or open them up to reveal the complete shape of your ornament.
- Tweak and Adjust: Take a close look at your folded ornament and make any necessary adjustments. Straighten any uneven folds, reshape any misaligned edges, or trim any excess paper if needed. This step will help ensure that your ornament looks polished and well-crafted.
Remember, the folding process may vary depending on the ornament design and your chosen folding technique. Take your time, be patient, and follow the instructions or template as closely as possible. Once you have successfully folded the paper into the basic shape of your ornament, you can move to the next step of adding decorative elements to enhance its beauty.
Adding Decorative Elements
Now that you have created the basic shape of your paper ornament, it’s time to let your creativity shine by adding decorative elements. These embellishments will enhance the visual appeal of your ornament and make it truly unique. Here are some ideas to get you started:
Glitter and Sequins: Add a touch of sparkle to your paper ornament by applying glitter or sequins. Use a clear-drying adhesive to carefully apply the glitter or sequins to the surface of the ornament. You can either cover the entire ornament or create a pattern or design with the glitter or sequins.
Ribbons and Bows: Attach a small ribbon or bow to your ornament to give it a festive touch. You can loop the ribbon through the hole or simply glue it onto the surface of the ornament. Experiment with different colors and textures of ribbon to achieve the desired look.
Patterned Paper: If you’re using solid-colored paper, you can add dimension and interest by incorporating patterned paper. Cut small shapes or strips of patterned paper and glue them onto the surface of the ornament. This will create a contrasting or complementary design element.
Personalized Details: Make your ornament even more special by adding personalized details. Use markers or pens to write names, dates, or special messages on the ornament. You can also attach small photos or printed images to create a customized ornament that holds sentimental value.
Embellishments: Get creative with various embellishments such as beads, charms, or small trinkets. Attach them to your ornament using glue or thread them onto a thin string and tie it around the ornament. These small additions can add texture and dimension to your creation.
Paper Cutouts: Use scissors or a craft knife to cut intricate shapes or patterns out of a different color or textured paper. Glue these cutouts onto the surface of your ornament, creating a striking layered effect. This technique works particularly well for creating snowflakes or intricate designs.
Remember to let your personal style and preferences guide your choices when adding decorative elements. Don’t be afraid to experiment and try different combinations until you achieve the desired look. Adding these embellishments will help transform your paper ornament into a beautiful and eye-catching decoration.
Attaching a String or Ribbon for Hanging
Now that your paper ornament is beautifully decorated, it’s time to attach a string or ribbon for hanging. This step will allow you to display your ornament on a Christmas tree, in a window, or anywhere else you desire. Here’s how to securely and stylishly attach a string or ribbon:
Choose the Right String or Ribbon: Select a string or ribbon that complements the design and color scheme of your ornament. Consider the thickness and strength of the string or ribbon, ensuring it can adequately support the weight of your ornament.
Locate the Ideal Attachment Point: Look for the most suitable spot on your ornament to attach the string or ribbon. This is typically near the top or in the center, depending on the ornament’s design. If your ornament has a hole or a loop specifically intended for hanging, use that as the attachment point.
Measure and Cut: Cut a piece of string or ribbon to the desired length for hanging your ornament. Consider the height and location where you plan to hang it, so it is easily visible and doesn’t hang too low or get tangled with other ornaments.
Secure the String or Ribbon: Attach the string or ribbon to the ornament by tying a secure knot or by gluing it in place. If your ornament has a hole or loop, thread the string or ribbon through it and tie a knot to secure it. Ensure the knot is tight and won’t easily come undone.
Consider Aesthetic Details: As you attach the string or ribbon, pay attention to the aesthetic details. Make sure the knot or attachment point is neat and concealed within the ornament if possible. You can also tie a small bow or create a loop at the top of the ornament for added visual appeal.
Test the Hanging: Before displaying your ornament, give it a gentle tug to ensure that the string or ribbon is securely attached. Test its strength and make any adjustments if necessary to ensure the ornament hangs straight and evenly.
Once you’ve successfully attached the string or ribbon to your paper ornament, it’s ready to be displayed and admired. Hang it on a Christmas tree, a garland, or any other desired location where it will add a festive touch to your home. Enjoy the satisfaction of creating a beautiful decoration that brings joy during the holiday season.
Adding Personal Touches and Customizations
While creating paper ornaments can be a fun and creative activity, adding personal touches and customizations makes them even more special. Personalizing your ornaments allows you to infuse them with sentimental value and create unique decorations that reflect your style and personality. Here are some ideas to help you add personal touches and customizations to your paper ornaments:
Family Photos: Incorporate small printed photos of your family or loved ones into your paper ornaments. Cut the photos into shapes that fit your ornament design, such as circles, hearts, or stars. Glue them onto the ornament to create a personalized and heartfelt decoration.
Name Tags: Use colored paper or tags to create name tags for each ornament. Write the names of family members or friends on the tags and attach them to the ornaments with a string or ribbon. This adds a thoughtful touch and allows everyone to have their own special ornament.
Handwritten Messages: Write personal messages, quotes, or wishes on your paper ornaments using metallic pens or markers. Let your creativity flow as you pen down thoughts of love, gratitude, or holiday cheer. These handwritten messages will add a heartfelt touch to your ornaments.
Monograms: Create monogrammed ornaments by cutting out the initials of family members or loved ones from decorative paper. Glue these initials onto the ornaments to add a personalized and elegant touch. You can also use stencils or templates to ensure precise and uniform lettering.
Memorable Dates: Cut out numbers or use decorative stickers to showcase significant dates, such as birthdays or anniversaries. Attach these numbers to the ornaments to commemorate special milestones. It’s a wonderful way to celebrate and remember important events in your life.
Favorite Symbols or Icons: Incorporate symbols or icons that hold personal meaning to you or your family. For example, if you love music, add small musical notes to your ornaments. If you’re passionate about sports, incorporate sports-related symbols. These symbols will make your ornaments truly unique and reflective of your interests.
Handprints or Fingerprints: If you’re feeling adventurous, create handprints or fingerprints on your paper ornaments. Use non-toxic paint to stamp or press your hand or fingers onto the ornaments carefully. This adds a personal and whimsical touch, especially for ornaments made with younger children.
Adding personal touches and customizations to your paper ornaments is a delightful way to make them meaningful and special. These customizations turn your creations into cherished keepsakes that can be enjoyed and treasured for years to come.
Creating Different Types of Paper Ornaments
The beauty of making paper ornaments is the endless variety of designs and styles that you can create. By experimenting with different techniques and shapes, you can craft a wide range of unique paper ornaments. Here are a few ideas to inspire you to create different types of paper ornaments:
Origami Ornaments: Explore the world of origami by folding intricate shapes like origami stars, cranes, or flowers. Origami ornaments are not only visually stunning but also provide a wonderful opportunity to showcase the art of paper folding.
Paper Quilling Ornaments: Paper quilling involves rolling and shaping thin strips of paper to create intricate designs. Experiment with various quilling techniques to form shapes like flowers, spirals, or geometric patterns. These delicate and detailed ornaments will add a touch of elegance to any holiday décor.
Cutout Ornaments: Cutout ornaments involve cutting intricate designs from a single sheet of paper. You can create beautiful snowflakes, stars, or silhouettes by carefully folding the paper and cutting out shapes. Hang these delicate cutouts near a light source to create enchanting shadows.
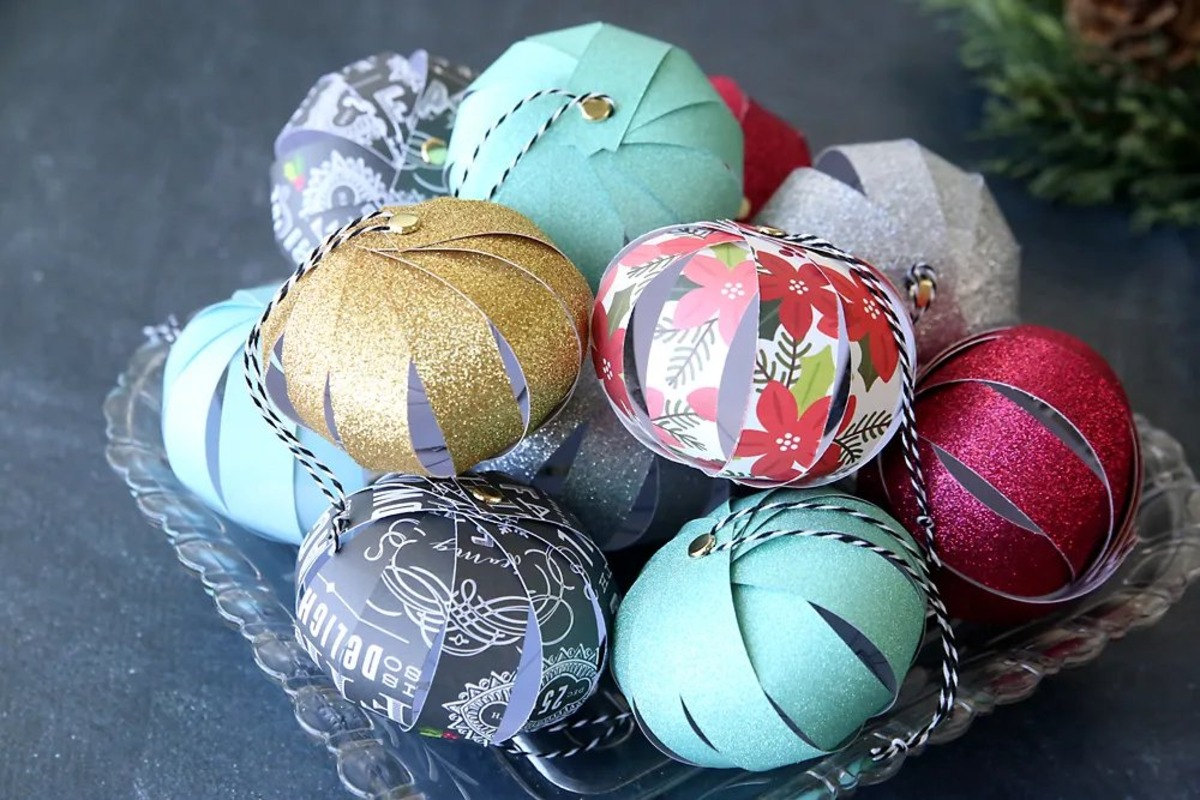
Paper Ball Ornaments: Create 3D spherical ornaments by folding and assembling multiple pieces of paper. You can experiment with different folding patterns to achieve various designs, such as accordion folds or interlocking shapes. These paper ball ornaments are visually striking and can be customized with decorative elements.
Paper Cone Ornaments: Craft cone-shaped ornaments by rolling and securing paper into a cone shape. Decorate the cones with glitter, ribbons, or small ornaments to enhance their charm. These versatile ornaments can be easily customized and can even double as mini gift holders.
Paper Wreaths: Instead of using traditional materials like leaves or flowers, create a wreath entirely from paper. Cut out multiple paper shapes, such as circles or hearts, and glue them together to form a circular wreath. Add embellishments like ribbons or bows to complete the festive look.
Pop-up Ornaments: Design interactive pop-up ornaments that surprise and delight. Use techniques like folding, cutting, and gluing to create elements that pop out when the ornament is opened or unfolded. These engaging ornaments add a playful touch to your holiday decorations.
Combining Multiple Techniques: Experiment by combining different paper crafting techniques. For example, you can incorporate quilling into a cutout ornament or add origami elements to a paper cone ornament. Let your imagination run wild and create unique hybrid designs.
Remember, the possibilities are endless when it comes to creating different types of paper ornaments. Don’t be afraid to try new techniques, mix and match styles, and let your creativity soar. Enjoy the process of bringing your ideas to life and creating one-of-a-kind paper ornaments for any occasion.
Displaying and Storing Paper Ornaments
Once you have created your beautiful paper ornaments, it’s time to decide how to display and store them properly. Here are some tips to ensure your ornaments are showcased effectively and protected when not in use:
Displaying:
– Christmas Tree: The most traditional way to display paper ornaments is by hanging them on a Christmas tree. Spread them evenly throughout the tree, placing sturdier ornaments towards the bottom branches. Ensure the branches can support the weight of the paper ornaments.
– Garland or Wreath: Incorporate your paper ornaments into a garland or wreath to add a festive and unique touch to your décor. Attach them using hot glue or thin string, evenly spacing them for a balanced look.
– Window or Wall: Use clear adhesive hooks or tape to stick the paper ornaments onto a window or wall. Arrange them in a visually appealing pattern or create a charming scene.
– Tabletop or Mantel: Arrange the paper ornaments on a tabletop or mantel, placing them in a decorative bowl, tray, or arrangement. Combine them with other seasonal elements like candles, greenery, or fairy lights.
Storing:
– Individual Wrapping: Wrap each paper ornament in tissue paper or place them in individual gift boxes to prevent them from getting damaged or tangled. This method is especially useful for delicate or intricate designs.
– Acid-Free Storage Boxes: Invest in acid-free storage boxes specifically designed for preserving paper ornaments. Line the boxes with tissue paper and place the ornaments inside, layering them with additional tissue paper for added protection.
– Label and Organize: To make it easier to locate specific ornaments in the future, label the storage boxes or containers with the names or descriptions of the ornaments inside. This way, you can easily find your favorite designs without searching through all the boxes.
– Cool and Dry Location: Store the ornaments in a cool, dry place away from direct sunlight and extreme temperature fluctuations. Excessive humidity or heat can cause the paper to warp or deteriorate. Attic spaces or basements might not be the ideal storage locations.
By displaying your paper ornaments creatively and storing them properly, you can ensure they are well-preserved and ready to be enjoyed year after year. Whether you choose to showcase them on a Christmas tree, walls, or tabletops, these handcrafted ornaments will add a touch of charm and personalization to your holiday décor.