
Materials Needed
Before starting the process of building your own ornament storage, it’s important to gather all the necessary materials. You don’t want to be halfway through the project only to realize you’re missing a vital component. Here’s a list of the materials you’ll need:
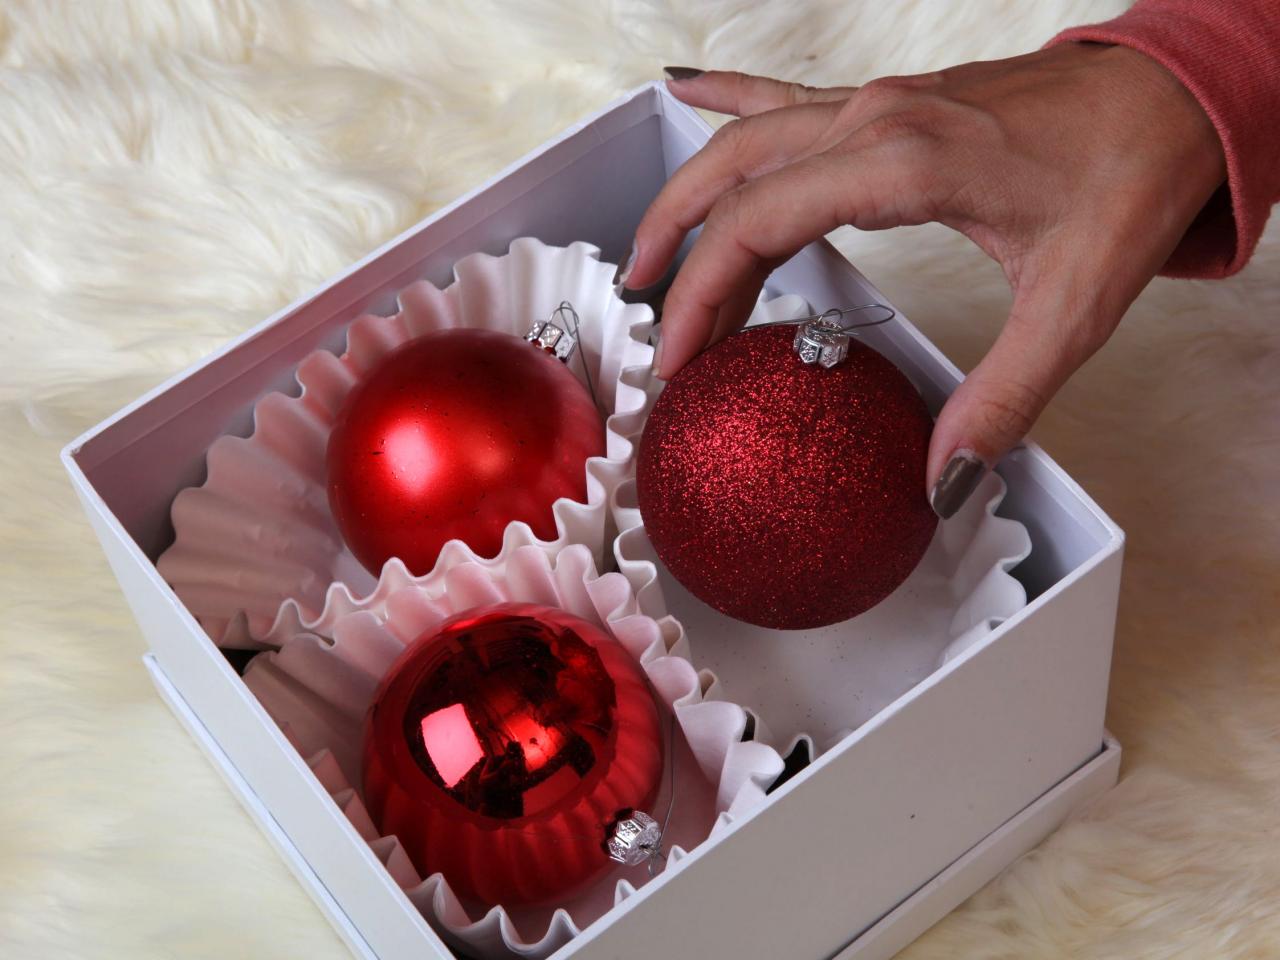
- Cardboard boxes or plastic containers: These will serve as the main storage units for your ornaments. Make sure they are sturdy and have enough space to accommodate all your ornaments.
- Dividers: To keep your ornaments separate and prevent them from clashing with each other, you’ll need dividers. These can be made from cardboard or purchased ready-made.
- Packing materials: Bubble wrap, tissue paper, or foam sheets will be essential for wrapping fragile ornaments and providing extra protection.
- Labels: As you organize your ornaments, it’s essential to label each container or section to easily identify what’s inside.
- Marker or pen: You’ll need a marker or pen to write the labels and keep things organized.
- Gloves: To handle delicate or fragile ornaments, it’s a good idea to have a pair of cotton gloves to protect them from fingerprints and potential damage.
- Tape: Clear packing tape or duct tape can be used to secure the boxes and dividers in place.
- Scissors or box cutter: These will come in handy for cutting dividers to the desired size, trimming excess packaging material, or making any necessary adjustments.
Having these materials ready before you start will make the process of building your own ornament storage much smoother and more efficient. Once you have gathered everything you need, you’ll be ready to move on to the next steps of measuring your ornaments and deciding on the storage containers.
Step 1: Measure Your Ornaments
Before you can begin creating your ornament storage solution, it’s important to measure all of your ornaments. This step ensures that you choose the right storage containers and dividers that will fit your ornaments securely and prevent them from getting damaged. Here’s how to measure your ornaments:
- Gather all of your ornaments in one place. Take note of their different shapes, sizes, and materials.
- Use a measuring tape or ruler to measure the height, width, and depth of each ornament. Make sure to measure the largest dimensions of each ornament.
- Record the measurements for each ornament on a piece of paper or a spreadsheet. This will help you later in determining the size and number of dividers needed.
- Consider any fragile ornaments that may require extra padding or special care. Measure their dimensions as well and make a note of any specific handling instructions.
By taking accurate measurements of your ornaments, you’ll be able to select the appropriate storage containers and dividers that will fit them comfortably. This step ensures that your ornaments won’t be squeezed too tightly or have too much extra space, reducing the risk of breakage during storage. Once you have measured all your ornaments, you’re ready to move on to the next step: deciding on the storage containers that will best suit your needs.
Step 2: Decide on the Storage Containers
After you have measured your ornaments, the next step is to decide on the type of storage containers that will be best for your needs. There are several options to consider, each with its own advantages and disadvantages. Here are a few common types of storage containers:
- Cardboard boxes: Cardboard boxes are a budget-friendly option and are readily available. They can be easily customized and cut to fit your ornaments.
- Plastic containers: Plastic containers are durable, stackable, and provide better protection against moisture and pests. They come in various sizes and shapes.
- Ornament storage boxes: These boxes are specifically designed for ornament storage and offer individual compartments for each ornament. They are often made of sturdy materials and provide excellent protection.
- Drawer organizers: If you have a dresser or cabinet with drawers, using drawer organizers can be a convenient way to store and organize your ornaments.
When deciding on the storage containers, consider factors such as the number and size of your ornaments, available storage space, and your budget. It’s essential to choose containers that provide enough room to accommodate your ornaments while keeping them secure and protected. Additionally, consider whether you prefer transparent containers that allow you to see the contents or colored ones that offer additional protection from light exposure.
Once you have decided on the type of storage containers, you can move on to purchasing the necessary supplies to build your ornament storage solution. In the next step, we’ll discuss the supplies you’ll need to complete the project.
Step 3: Purchase Required Supplies
Now that you have determined the type of storage containers you will be using, it’s time to gather the necessary supplies to complete your ornament storage project. Here are the supplies you will need:
- Cardboard boxes or plastic containers: Purchase the appropriate number and size of containers to accommodate all your ornaments.
- Dividers: Depending on the type of storage containers you have chosen, you may need to purchase dividers to keep your ornaments separated and protected.
- Packing materials: Invest in bubble wrap, tissue paper, or foam sheets to wrap fragile ornaments and provide extra cushioning.
- Labels and markers: Buy adhesive labels or stickers to label each container or section. A marker or pen will be needed to write the labels.
- Gloves: Consider purchasing a pair of cotton gloves to handle delicate ornaments and minimize the risk of smudges or breakage.
- Tape: Stock up on clear packing tape or duct tape to secure the boxes and dividers in place.
- Scissors or box cutter: Ensure you have sharp scissors or a box cutter for cutting dividers to size, trimming excess packaging material, or making any necessary adjustments.
It’s important to have all the supplies on hand before you start building your ornament storage. This will prevent any unnecessary delays or interruptions during the process. Make a shopping list and gather everything you need to ensure a smooth and organized project.
Once you have purchased all the required supplies, you can move on to the next steps of creating dividers for your ornaments and configuring the storage containers. These steps will help you create a customized and efficient storage solution for your ornaments.
Step 4: Create Dividers for the Ornaments
Now that you have your storage containers and supplies ready, it’s time to create dividers for your ornaments. Dividers are essential for keeping your ornaments separate and preventing them from colliding and potentially getting damaged. Here’s how you can create dividers:
- Measure the length, width, and height of your storage containers to determine the size of the dividers needed.
- Cut pieces of cardboard or foam board to the appropriate size. Make sure they fit snugly inside the containers without bending or bulging.
- If using cardboard, you can reinforce it by duct-taping the edges to add stability and durability.
- Divide the dividers into individual sections according to the size and shape of your ornaments. You can create compartments of various sizes to accommodate different ornament dimensions.
- Arrange the dividers inside the containers, ensuring that each ornament has its own designated space.
It’s important to create dividers that fit securely and provide adequate protection for your ornaments. The dividers should prevent any movement or shifting during storage, reducing the risk of breakage. Remember to consider the fragility and delicacy of certain ornaments, and provide additional padding or cushioning as needed.
If you prefer ready-made dividers, they are widely available online or at stores specializing in organizing products. These dividers are often adjustable and offer customizable configurations, making it easier to accommodate ornaments of various sizes and shapes.
With your dividers in place, you’re ready to move on to the next step: configuring the storage containers to create an organized and efficient ornament storage solution.
Step 5: Configure the Storage Containers
Now that you have your dividers in place, it’s time to configure the storage containers to create a well-organized and efficient ornament storage solution. Follow these steps to configure your storage containers:
- Place the dividers inside the storage containers, creating separate compartments for each ornament. Ensure that the dividers fit securely and provide enough space for each ornament.
- If using cardboard or foam dividers, you can tape them in place to prevent shifting during storage.
- Consider the weight and fragility of the ornaments. Place heavier and sturdier ornaments at the bottom of the container, with more delicate ornaments on top to prevent crushing or breakage.
- If using plastic containers, stack them carefully, ensuring that there is no excess pressure on the ornaments and dividers.
- Keep ornaments of similar shapes or themes together to make it easier to locate specific ones in the future. You can also arrange them by color or size, depending on your preference.
- If you have larger or odd-shaped ornaments that do not fit well in the dividers, consider wrapping them in tissue paper or bubble wrap and placing them in a separate section of the container.
By configuring your storage containers in a thoughtful and organized manner, you’ll be able to maximize the use of space, protect your ornaments from damage, and easily locate specific ornaments when needed.
Remember to avoid overpacking the containers to prevent any stress or pressure on the ornaments. Each ornament should have its own designated space to minimize the risk of breakage.
Once you have configured your storage containers, you can move on to the next step: wrapping fragile ornaments to provide them with an extra layer of protection.
Step 6: Wrap Fragile Ornaments
Protecting your fragile ornaments is crucial to ensure they remain intact during storage. In this step, you’ll learn how to safely wrap your delicate ornaments to provide an extra layer of protection. Follow these steps:
- Gather your fragile ornaments and the necessary wrapping materials such as bubble wrap, tissue paper, or foam sheets.
- Separate each fragile ornament and assess its size and delicacy. Some ornaments may require more cushioning than others.
- Take a piece of bubble wrap or tissue paper and wrap it gently around the ornament. Ensure that all sides are adequately covered and that the fragile parts are protected.
- Secure the bubble wrap or tissue paper using tape or twist ties. Be careful not to use excessive force that could damage the ornament.
- If the ornament has any delicate or protruding parts, consider adding an extra layer of protection by wrapping it in foam sheets or inserting it into a small box before wrapping it in bubble wrap or tissue paper.
It’s important to handle fragile ornaments with care during the wrapping process. Use gentle pressure and take your time to ensure that each ornament is properly wrapped and secure.
Once wrapped, place the fragile ornaments in their designated compartments within the storage containers. Be sure to position them in a way that minimizes the risk of movement and collision with other ornaments.
Remember, if you have particularly valuable or sentimental ornaments, it may be best to keep them separate and stored in a safe place to give them extra protection.
With your fragile ornaments securely wrapped and placed in the storage containers, you’re now ready for the next step: labeling and organizing the ornaments for easy retrieval.
Step 7: Label and Organize the Ornaments
Labeling and organizing your ornaments is essential for easy retrieval and maintaining order within your storage system. In this step, you’ll learn how to label and organize your ornaments effectively. Follow these steps:
- Take adhesive labels or stickers and write a description or code for each container or section. You can include details such as the theme, color, or any other identifying information.
- Attach the labels to the front or top of the storage containers, making sure they are visible and easy to read.
- Consider creating a log or inventory sheet to keep track of the ornaments you have stored. This can be a handy reference when you’re searching for specific ornaments in the future.
- If using drawer organizers or multiple storage containers, arrange them in a logical order. You can organize them by year, holiday, or any other system that makes sense to you.
- If you have ornaments that are particularly valuable or sentimental, consider placing them in a dedicated section or container to keep them separate and easily accessible.
- As you place the ornaments into the storage containers, take care to arrange them neatly and avoid any unnecessary jostling or movement.
By labeling and organizing your ornaments, you’ll be able to locate specific ornaments quickly and efficiently, saving you time and frustration during the holiday decorating season.
Remember to keep a copy of the inventory sheet or log in a safe place for reference in case you need to locate or add ornaments in the future.
With your ornaments labeled and organized, you’re ready for the next step: protecting the storage containers to ensure your ornaments stay safe during storage.
Step 8: Protect the Storage Containers
Protecting the storage containers is crucial to ensure that your ornaments remain safe and undamaged during storage. In this step, you’ll learn how to take precautions to protect the containers themselves. Follow these steps:
- Ensure that the storage area is clean and free from any potential hazards that could damage the containers. Remove any sharp objects or chemicals that could pose a threat.
- Consider placing moisture-absorbing packets or silica gel packs inside the storage containers to prevent moisture buildup and minimize the risk of mold or mildew.
- Store the containers in a dry and temperature-controlled area to avoid extreme temperatures that could damage the ornaments or containers.
- If storing in a basement or attic, elevate the containers off the floor to protect them from potential water damage.
- Place a cover or sheet over the storage containers to provide an additional layer of protection from dust or debris that could accumulate over time.
- Avoid stacking heavy objects on top of the containers, as this could cause damage or collapse.
By taking these protective measures, you can ensure that your storage containers and ornaments remain in optimal condition, ready to be enjoyed when the next holiday season arrives.
It’s recommended to check on the storage area periodically to ensure that there are no signs of damage or deterioration. If any issues arise, address them promptly to maintain the integrity of your ornaments and containers.
With your storage containers protected, you can move on to the final step: storing them in a safe and dry place until they are needed again.
Step 9: Store in a Safe and Dry Place
After all the hard work of organizing and protecting your ornaments and storage containers, it’s important to store them in a safe and dry place where they will remain undisturbed until the next holiday season. Follow these steps to ensure proper storage:
- Choose a storage area that is clean, dry, and free from extreme temperature fluctuations. Ideally, a closet or a designated storage space in your home would be the best option.
- Avoid storing the containers in areas prone to moisture, such as basements or attics, as excessive humidity can damage the ornaments.
- Ensure that the storage area is secure and protected from potential pests, such as rodents or insects, that could cause damage to your ornaments and storage containers.
- Stack the storage containers carefully, making sure that the weight is evenly distributed to avoid any crushing or collapsing.
- If you have multiple containers, consider creating a labeling system or an inventory list to make it easier to locate specific ornaments when needed.
- Do not place heavy objects on top of the storage containers, as this could lead to damage or breakage of the ornaments.
- Check on the storage containers periodically to ensure that they are not being damaged or affected by any environmental factors.
By storing your ornaments in a safe and dry place, you can maintain their condition and extend their lifespan for many years to come. It also ensures that they are easily accessible when you’re ready to decorate for the holidays again.
Remember to handle the storage containers with care when moving or repositioning them, and avoid any sudden or rough movements that could cause damage to the ornaments inside.
With your ornaments safely stored, you can have peace of mind knowing that they are protected and ready to be enjoyed when the holiday season arrives again.