
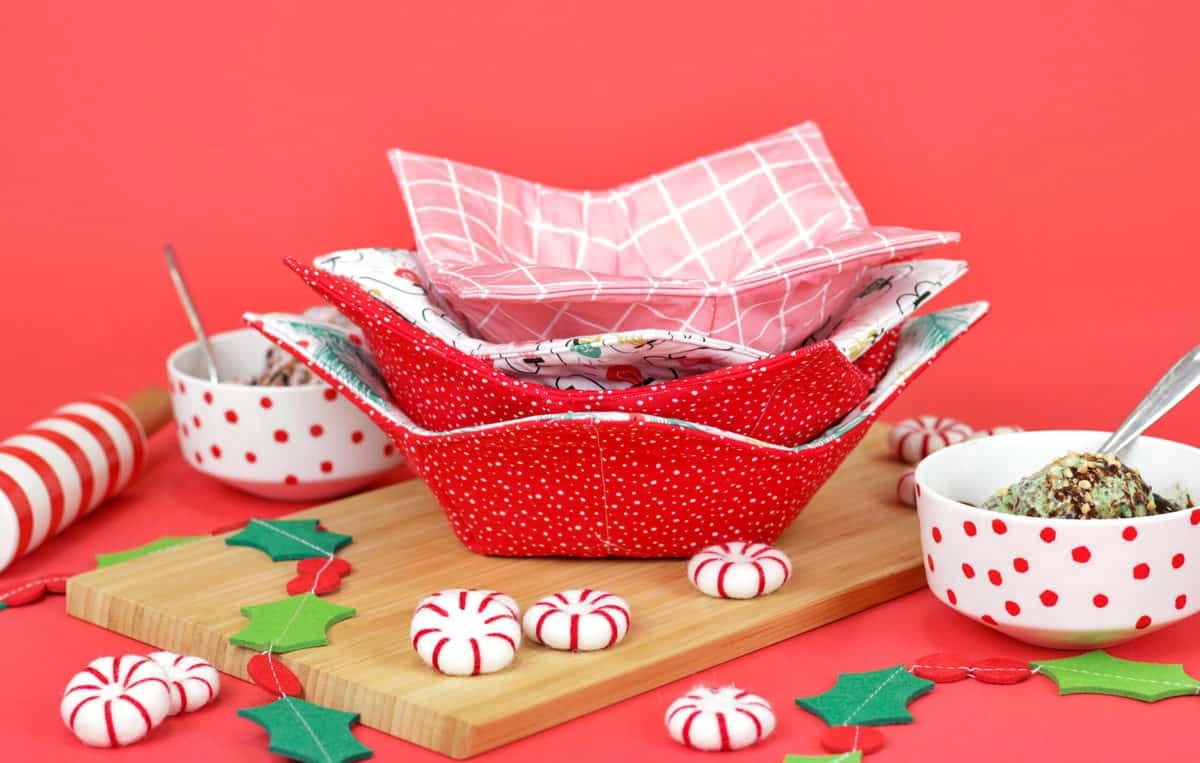
Materials Needed
Before you start making a microwave bowl cozy, gather the following materials:
- Fabric: Choose a cotton fabric with a fun pattern or design. You’ll need two 10-inch squares of fabric for each cozy.
- Insulation: Look for cotton batting or specialized microwave-safe batting to provide insulation between the fabric layers.
- Thread: Use a thread that matches or complements the fabric color.
- Pins or clips: These will help secure the fabric layers together while sewing.
- Ruler and fabric marker: These tools will be helpful for measuring and marking fabric.
- Scissors or rotary cutter: Use these to cut the fabric and insulation.
- Sewing machine: While it’s possible to sew the cozy by hand, a sewing machine will make the process quicker and more efficient.
- Iron: This will be used to press the fabric and create clean, crisp seams.
- Ironing board or pressing mat: Having a designated surface for ironing will make the process easier.
- Binding material: Choose a coordinating fabric for the binding, or use premade bias tape for a quicker finish.
- Binding clips or pins: These will secure the binding in place while sewing.
- Hand sewing needle: This will be useful for sewing the binding closed or attaching any decorative elements.
With these materials ready, you’re all set to embark on the journey of creating your very own microwave bowl cozy. Let’s move on to the next step!
Step 1: Cutting the Fabric
Before you start sewing, it’s important to cut the fabric into the necessary pieces. Follow the steps below:
- Take your chosen fabric and lay it flat on a clean working surface.
- Measure and mark two 10-inch squares on the fabric using a ruler and fabric marker.
- Once marked, carefully cut out the two fabric squares with scissors or a rotary cutter.
- Repeat this process with the second fabric if you want a reversible cozy with different patterns or colors.
- Double-check that both fabric squares are the same size and shape, making any necessary adjustments.
Remember to press the fabric pieces with an iron to remove any wrinkles. This will make it easier to sew and ensure a neat and professional finish.
Cutting the fabric is an essential first step in creating your microwave bowl cozy. Taking the time to accurately measure and cut the fabric will result in a well-fitting cozy that provides excellent insulation for your bowls. Now that you have your fabric pieces ready, let’s move on to the next step!
Step 2: Sewing the First Layer
Now that you have your fabric pieces ready, it’s time to sew the first layer of your microwave bowl cozy. Follow these steps:
- Place the two fabric squares on top of each other with the right sides facing inward. This will create a fabric sandwich with the wrong sides facing out.
- Secure the fabric layers together by pinning or clipping around the edges to keep them aligned during sewing.
- Using a sewing machine, start sewing around the edges of the fabric squares, leaving a 1/4 inch seam allowance.
- Leave a gap of around 2-3 inches along one side of the fabric for turning the cozy right side out later on.
- Backstitch at the beginning and end of your sewing to reinforce the stitches.
- Trim the excess fabric at the corners to reduce bulk and help create sharp, clean corners when you turn the cozy right side out.
- Once the first layer is sewn together, carefully remove the pins or clips.
Make sure to take your time and sew slowly, ensuring that the stitches are even and secure. This will create a sturdy first layer for your microwave bowl cozy. With the first layer complete, let’s move on to the next step!
Step 3: Adding Insulation
Adding insulation to your microwave bowl cozy will help protect your hands from the heat when handling hot bowls. Follow these steps to incorporate insulation into your cozy:
- Take your chosen insulation material, whether it’s cotton batting or microwave-safe batting, and cut it into a 10-inch square.
- Place the insulation square on top of one fabric layer, ensuring it covers the entire surface area.
- Secure the insulation in place by pinning or clipping it to the fabric layer.
- Sew around the edges of the fabric and insulation, following the same sewing path you used to sew the first layer. This will help keep the insulation securely sandwiched between the fabric layers.
Adding insulation to your cozy is crucial for providing effective heat protection. The insulation will act as a barrier between the hot bowl and your hands, preventing any accidental burns. With the insulation securely in place, let’s move on to the next step!
Step 4: Sewing the Final Layer
After adding the insulation, it’s time to sew the final layer of your microwave bowl cozy. Follow these steps:
- Place the second fabric square on top of the insulated layer, aligning the edges with the first fabric layer.
- Pin or clip the layers together to secure them in place.
- Starting from one side, sew around the edges of the fabric layers, using a 1/4 inch seam allowance. Leave a small opening of about 2-3 inches for turning the cozy right side out.
- Backstitch at the beginning and end of your sewing to reinforce the stitches.
- Trim any excess fabric at the corners to reduce bulk and create crisp corners when turning the cozy right side out.
By sewing the final layer, you are enclosing the insulation between the two fabric layers, creating a cozy pocket for your bowls. Take your time and ensure that the stitches are neat and secure. With the final layer sewn, we are nearing the completion of your microwave bowl cozy. Let’s move on to the next step!
Step 5: Cutting and Attaching the Binding
Next in the process of making your microwave bowl cozy is cutting and attaching the binding. Follow these steps:
- Measure and cut a strip of fabric for your binding. The width of the strip should be around 2.5 inches, and the length should be enough to go around the entire edge of the cozy with a little overlap.
- If using fabric for the binding, fold the strip in half lengthwise with the wrong sides facing, and press it with an iron to create a crease.
- Align one edge of the binding strip with the edge of the cozy, right sides together. Pin or clip in place, starting from the opening you left for turning the cozy right side out.
- Sew along the edge of the binding with a 1/4 inch seam allowance, attaching it to the cozy. Take your time and sew slowly, ensuring that the stitches catch both the binding and the cozy layer.
- When you reach a corner, stop sewing with the needle down, lift the presser foot, and pivot the fabric at a 45-degree angle. Lower the presser foot and continue sewing along the next edge.
- Continue sewing along the entire edge, stopping when you reach the starting point and leaving a small opening.
- Trim any excess binding, leaving a small overlap that will be used to finish the binding.
- Fold the binding over the raw edge of the cozy, encasing it neatly. Pin or clip it in place.
- Using a hand sewing needle and matching thread, stitch the opening closed and ensure the binding is securely attached to the cozy.
Adding the binding not only gives your microwave bowl cozy a finished look but also helps reinforce the edges for durability. Take your time and pay attention to the corners to achieve clean and professional-looking results. With the binding attached, your cozy is almost complete! Let’s move on to the next step.
Step 6: Finishing Touches
You’re in the final stretch of making your microwave bowl cozy! Follow these steps to add the finishing touches:
- Inspect the cozy for any loose threads or excess fabric. Trim any stray threads or fabric to achieve a clean and polished look.
- Add any decorative elements to personalize your cozy. This could include buttons, appliques, or even embroidery. Get creative and make it your own!
- Press the entire cozy with an iron to smooth out any wrinkles and ensure a neat appearance.
With these finishing touches, your microwave bowl cozy is now complete and ready to be used. It’s time to step back and appreciate your handmade creation!
Remember, you can make multiple cozies with different fabric patterns or colors to suit your style or to give as thoughtful gifts to family and friends. Enjoy using your cozy to keep your hands safe while enjoying warm bowls of soup, oatmeal, or any other delicious microwave meals.
Congratulations on completing your microwave bowl cozy! It’s time to put it to use and enjoy the benefits of having a handy and stylish accessory for your microwave-safe bowls.
Step 7: Using the Microwave Bowl Cozy
Now that you have your completed microwave bowl cozy, it’s time to put it to good use! Follow these guidelines for using your cozy safely:
- Place your microwave-safe bowl inside the cozy, ensuring it sits securely and is centered.
- Use the cozy to handle hot bowls straight from the microwave. The insulation will protect your hands from the heat, allowing you to hold the bowl comfortably.
- Make sure the cozy is fully covering the sides and bottom of the bowl to provide maximum insulation and protection.
- When reheating food in the microwave, use caution and follow the appropriate heating instructions for your specific dish.
- After each use, allow the cozy to cool completely before removing it from the bowl.
- Keep your cozy clean by washing it regularly. Read the care instructions for the fabric and batting used and follow them accordingly.
Using a microwave bowl cozy is a convenient and safe way to handle hot bowls without the risk of burning your hands. Enjoy your meals and snacks with peace of mind, knowing that your cozy provides a protective barrier between the hot bowl and your hands. Plus, the added bonus of stylish fabric patterns adds a touch of personality to your kitchen.
With these tips in mind, you’re now equipped to enjoy the benefits of your homemade microwave bowl cozy. Stay safe and cozy up to delicious warm meals without worrying about burned fingers!
Tips and Tricks
As you continue your journey of making microwave bowl cozies, here are some helpful tips and tricks to enhance your crafting experience:
- Experiment with different fabric patterns and colors to create a variety of cozies, making each one unique.
- Consider using coordinating fabrics for the outside and lining of the cozy for a polished look.
- If you don’t have a sewing machine, you can hand sew the cozy using a needle and thread. Just make sure to use sturdy stitches for durability.
- Customize your cozy by adding a hanging loop, making it easy to store and access when needed.
- For extra heat protection, use two layers of insulation instead of one. This will provide enhanced insulation properties.
- When selecting the insulation material, opt for microwave-safe batting that has been specifically designed for use in microwave projects.
- If you’re using bias tape for the binding, fold and press it before attaching it to the cozy, following the package instructions.
- Consider making cozies in different sizes to accommodate various bowl sizes, from small to extra-large.
- Add a layer of clear vinyl or oilcloth to the fabric for the outside of the cozy to make it easy to wipe clean.
- Get creative and add embroidery, appliques, or fabric embellishments to add a personal touch to your cozies.
Remember, practice makes perfect! Don’t be discouraged if your first cozy isn’t perfect. With each project, you’ll gain more confidence and improve your sewing skills.
Now armed with these tips and tricks, you’re ready to continue creating beautiful and functional microwave bowl cozies. Enjoy the process of sewing, and admire the results as you use your cozy to safely handle hot bowls in style!