
Choosing the Right Popcorn
When it comes to making delicious popcorn in a microwave popcorn bowl, selecting the right type of popcorn kernels is crucial. With so many options available, it’s important to know what to look for. Here are some factors to consider when choosing the right popcorn:
1. Popcorn Variety: There are different popcorn varieties, such as butterfly, mushroom, and snowflake. Butterfly popcorn pops into large, irregularly shaped pieces that are perfect for coating with seasonings. Mushroom popcorn pops into round, dense kernels, making it ideal for caramel or chocolate coatings. Snowflake popcorn yields light and fluffy pieces, making it great for buttery toppings.
2. Non-GMO: If you prefer to eat organic or non-genetically modified organisms (GMO) foods, look for popcorn brands that are non-GMO certified. This ensures that the popcorn has not been genetically modified during its cultivation process.
3. Quality and Freshness: Opt for popcorn kernels that are fresh. Look for packaging with a manufacturing date, and avoid buying popcorn that has expired or is close to its expiration date. Fresh popcorn kernels will result in better taste and texture.
4. Popping Ability: It’s important to choose popcorn kernels that have a high popping rate. Check the packaging for information about the percentage of kernels that will pop. Higher popping rates mean less waste and a higher yield of perfectly popped popcorn.
5. Taste Preferences: Consider your taste preferences when selecting popcorn. If you enjoy a buttery flavor, look for popcorn that has a rich, buttery taste. For those who prefer a healthier option, there are unsalted or low-sodium popcorn varieties available.
By considering these factors, you can choose the perfect popcorn kernels to make mouth-watering popcorn in your microwave popcorn bowl. Whether you’re craving a classic buttery snack or want to experiment with different toppings, the right popcorn kernels will help you achieve great results every time.
Preparing the Popcorn Bowl
Before you can start popping your delicious popcorn in the microwave, it’s important to prepare the popcorn bowl properly. Here are the steps to get your popcorn bowl ready:
1. Clean and Dry: Start by ensuring that your popcorn bowl is clean and dry. Any moisture or residue from previous use can affect the popping process and result in soggy popcorn. Use a clean cloth or paper towel to wipe the bowl and remove any excess moisture.
2. Grease the Bowl: To prevent the popcorn from sticking to the bowl, it’s a good idea to grease it lightly. You can use cooking spray or rub a small amount of oil on the inside of the bowl. This will help the popcorn pop smoothly and prevent it from burning.
3. Size Matters: Choose a microwave popcorn bowl that is the right size for the amount of popcorn you plan to make. If the bowl is too small, the popcorn may overflow, causing a mess in your microwave. On the other hand, if the bowl is too big, the heat may not distribute evenly, resulting in unevenly popped popcorn.
4. Microwave Safety: Ensure that the bowl you use is microwave-safe. Look for a label or symbol on the bottom of the bowl that indicates it can be used in the microwave. This is important to prevent any accidents or damage to your microwave.
5. Additional Precautions: If your popcorn bowl has a lid, make sure it fits securely. This will help trap the steam and heat, resulting in more evenly popped popcorn. If your bowl doesn’t have a lid, you can cover it with microwave-safe plastic wrap or a microwave-safe plate.
By following these steps to prepare your popcorn bowl, you’ll ensure that your popcorn pops perfectly every time. Taking a few moments to prepare the bowl will contribute to a hassle-free and enjoyable popcorn-making experience.
Adding the Popcorn Kernels
Now that your popcorn bowl is prepped and ready, it’s time to add the popcorn kernels. Follow these steps to ensure that you add the right amount of kernels for a delicious batch of popcorn:
1. Read the Instructions: Check the packaging of the popcorn kernels for any specific instructions or recommended measurements. Some brands may provide guidelines for the amount of kernels to use for a certain serving size.
2. Fill the Bowl: Pour the popcorn kernels into the prepared bowl. Aim to distribute them evenly across the bottom of the bowl, creating a single layer of kernels. Avoid overcrowding the bowl, as this can result in uneven cooking and unpopped kernels.
3. Avoid Overfilling: Be mindful not to overfill the bowl with popcorn kernels. As the popcorn pops, it will expand in size, and if the bowl is too full, it may overflow and make a mess in your microwave.
4. Adjust Based on Serving Size: Consider the desired amount of popcorn you want to make. Adjust the number of kernels accordingly. If you’re making popcorn for a single serving, a quarter to a half cup of kernels should be sufficient.
5. Experiment with Quantity: Depending on your personal preference, you can experiment with the quantity of popcorn kernels to achieve your desired taste and texture. Some people prefer more kernels for a denser batch of popcorn, while others prefer to use fewer kernels for a lighter and fluffier result.
6. Add Variety: If you’re feeling adventurous, you can mix different types of popcorn kernels together to create unique flavor combinations. For example, you can combine butterfly and mushroom kernels for a blend of textures and tastes.
By adding the right amount of popcorn kernels to your microwave popcorn bowl, you’ll be on your way to enjoying a delightful batch of homemade popcorn. Remember to personalize the quantity based on your preferences and don’t be afraid to experiment with different varieties to make your popcorn experience even more exciting.
Measuring the Oil and Salt
Once the popcorn kernels are in the bowl, it’s time to add the right amount of oil and salt for that perfect balance of flavor. Here’s how to measure the oil and salt effectively:
1. Oil Quantity: Measure the oil according to the serving size of popcorn you’re preparing. A general guideline is to use about 1 tablespoon of oil for every 1/4 cup of popcorn kernels. This ratio can be adjusted based on personal preference. If you prefer a lighter coating, you can reduce the amount of oil, while a richer flavor can be achieved by adding a little more.
2. Distribution: Drizzle the measured oil evenly over the popcorn kernels in the bowl. Using a spoon or silicone brush, gently toss or stir the kernels to ensure that they are coated with the oil. This will promote even cooking and prevent any dry or burnt spots.
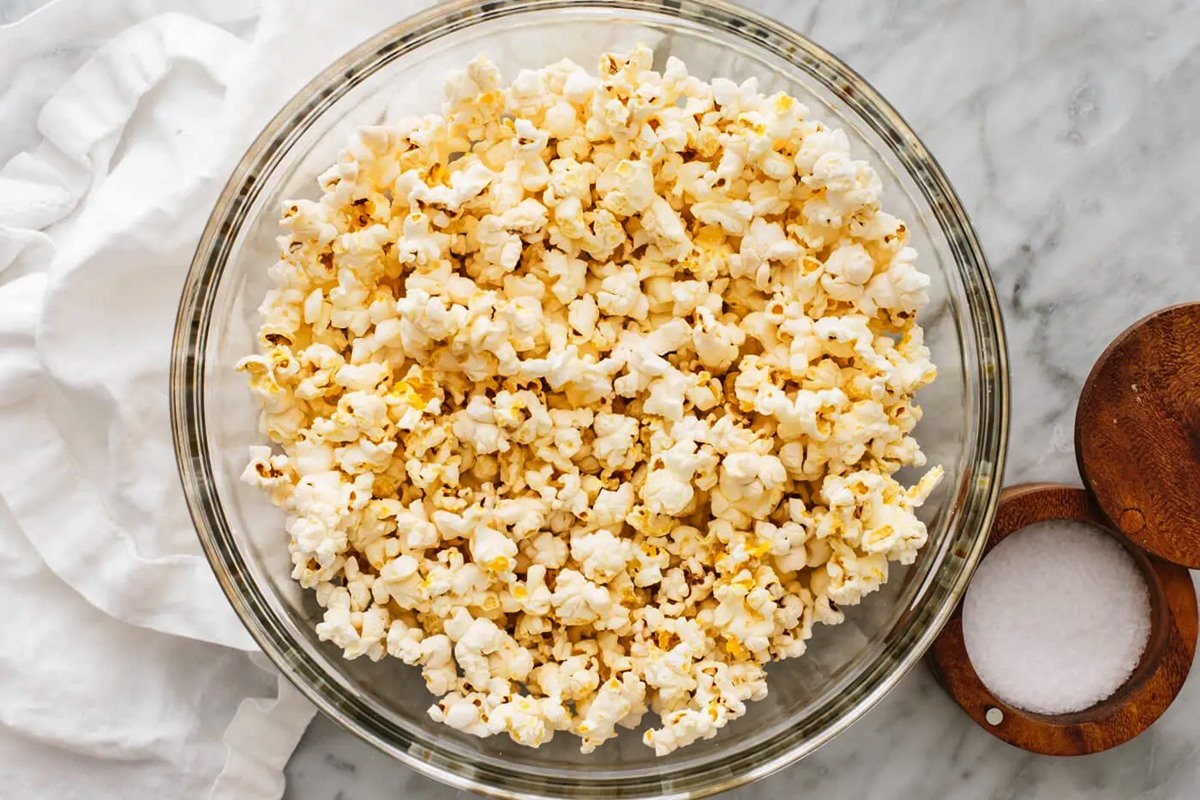
3. Salting: Adding salt to your popcorn is a matter of personal taste. Start by sprinkling a pinch of salt over the popcorn kernels. Give the bowl a gentle shake or stir to distribute the salt evenly. Taste a few popped kernels and adjust the salt level accordingly. You can add more salt if desired or leave it as is if it matches your preference.
4. Optional Flavorings: If you want to enhance the flavor of your popcorn, you can experiment with additional seasonings or flavorings. Some popular choices include cheese powder, paprika, garlic powder, or even chili powder for a spicy kick. Mix the desired flavorings in a separate bowl before adding them to the popcorn to ensure even distribution.
5. Remember: Less is More: It’s important not to go overboard with the oil and salt. Adding too much oil can result in greasy popcorn, while excessive salt can make it too salty. Start with small amounts and gradually add more if needed. You can always adjust the seasoning after the popcorn is cooked.
By measuring the oil and salt carefully, you’ll be able to achieve the desired flavor profile for your popcorn. Remember to be mindful of personal taste preferences and experiment with different seasonings to discover your perfect combination.
Covering the Bowl
Once you have added the oil and salt to the popcorn kernels in the microwave popcorn bowl, it’s crucial to cover the bowl properly. Covering the bowl helps trap the heat and steam, allowing the popcorn to cook more evenly and preventing any kernels from popping out. Here’s what you need to know about covering the bowl:
1. Lid: If your popcorn bowl comes with a lid, use it to cover the bowl securely. Ensure that the lid is properly aligned and fits tightly, forming a seal. This will help create the necessary steam and heat inside the bowl for optimal popcorn popping.
2. Microwave-Safe Plate: If your bowl doesn’t have a lid, you can use a microwave-safe plate as a cover. Place the plate on top of the bowl, allowing a slight gap for steam to escape. The plate should be large enough to cover the entire bowl and prevent any popcorn from escaping during the popping process.
3. Microwave-Safe Plastic Wrap: If you don’t have a lid or a microwave-safe plate, you can use microwave-safe plastic wrap to cover the bowl. Stretch the plastic wrap tightly across the top of the bowl, ensuring that all edges are sealed. Remember to leave a small venting space for steam to escape.
4. Ventilation: Regardless of the cover you choose, it’s essential to provide a slight venting option to allow steam to escape. This prevents excessive condensation from forming inside the bowl, which can result in soggy popcorn. The vent should be small enough to prevent popcorn kernels from popping out but large enough to release steam.
5. Safety Precautions: Always ensure that the covering you use is made of microwave-safe materials. Avoid using regular plastic wrap, as it may melt or release harmful substances when exposed to high heat. Check the label or packaging to verify that the cover you choose is suitable for microwave use.
By covering the popcorn bowl properly, you’ll create the ideal environment for the popcorn to pop evenly and reduce the risk of any mess or accidents in the microwave. Take the time to select the appropriate cover and ensure a secure fit for an enjoyable popcorn-making experience.
Cooking the Popcorn
With the popcorn bowl properly prepared and covered, it’s time to cook the popcorn in the microwave. Follow these steps to ensure a successful and satisfying popcorn experience:
1. Microwave Power Level: Start by setting the microwave to the appropriate power level. In most cases, using the high power setting works best for popping popcorn. However, if your microwave has a specific popcorn setting, follow the manufacturer’s instructions for the best results.
2. Cooking Time: The cooking time for popcorn can vary depending on the wattage of your microwave and the amount of popcorn being cooked. As a general guideline, start with a cooking time of 2-4 minutes. Keep a close eye on the popcorn as it cooks to prevent burning.
3. Listening for Popping Sounds: Once the microwave is running, listen for the popping sounds. The popcorn kernels will pop and expand, creating a distinct popping noise. As the popping slows to about 2-3 seconds between pops, it’s a sign that the popcorn is nearly done.
4. Avoid Opening the Microwave: While the popcorn is cooking, resist the temptation to open the microwave door to check on its progress. Opening the door can interrupt the cooking process and result in unevenly cooked popcorn. Trust the popping sounds and cooking time to determine when it’s ready.
5. Adjusting Cooking Time: If the popcorn stops popping before the cooking time is up, it’s a good indication that it’s done. However, if you notice that there are still many unpopped kernels, you may need to increase the cooking time by 30 seconds to a minute. This will allow the remaining kernels to pop.
6. Be Mindful of Burnt Popcorn: Pay attention to any burning smell during the cooking process. If you smell burning popcorn, it may have cooked for too long or at too high a power level. Adjust the cooking time and power level as needed for future batches to prevent burnt popcorn.
By following these guidelines, you’ll be able to cook your popcorn to perfection in the microwave. Remember, the cooking time and power level may vary, so it’s essential to adjust based on the wattage and performance of your specific microwave. With a little practice, you’ll be able to find the sweet spot for delicious, evenly popped popcorn.
Listening for the Popping Sounds
One of the key steps in cooking popcorn in the microwave is listening for the popping sounds. The popping sounds indicate that the popcorn kernels are heating up and popping, transforming into fluffy and delicious popcorn. Here’s what you need to know about listening for the popping sounds:
1. Distinctive Popping Noise: As the popcorn kernels heat up and pop, they create a distinctive popping noise. It’s a rhythmic sound that can be quite satisfying to hear. The popping noise occurs as the moisture inside the kernels turns into steam, causing the kernels to burst open and transform into fluffy popcorn.
2. Initial Popping: In the beginning, you’ll notice a few sporadic pops as the microwave heats up and the kernels start to pop. These initial pops are an indication that the popcorn-making process has begun.
3. Steady Popping: As the cooking time progresses, the popping sounds will become more frequent and steady. The popcorn kernels will continue to pop and expand, filling the microwave popcorn bowl. You’ll hear a continuous stream of popping noises as more and more kernels burst open.
4. Popping Speed: Pay attention to the speed of the popping sounds. As the popcorn cooks, the time between each pop will gradually increase. In the beginning, the pops may be rapid and close together. However, as the popcorn nears completion, the time between pops will become longer, indicating that most of the kernels have popped.
5. Final Pops: Towards the end of the cooking process, you may notice that the popping sounds slow down to about 2-3 seconds between each pop. This is a sign that the popcorn is nearly done, and there are only a few kernels left to pop. It’s essential to prevent overheating the popcorn, as it can lead to burnt or scorched kernels.
6. Trust Your Ears: While it’s tempting to open the microwave door to check on the popcorn, trust your ears and the popping sounds as your guide. Opening the door can interrupt the cooking process and result in unevenly cooked popcorn. Listen carefully for the popping sounds and use them as a reliable indicator of when your popcorn is ready.
By listening for the distinct popping sounds, you’ll be able to determine when your popcorn is perfectly cooked. Remember to consider the cooking time, power level, and the specific performance of your microwave to achieve the desired results. With practice, you’ll master the art of timing and enjoy a bowl of freshly popped popcorn every time.
Adjusting Cooking Time and Power Level
When cooking popcorn in the microwave, it’s important to be flexible with the cooking time and power level to achieve the perfect batch of popcorn. Every microwave is different, so it may take some trial and error to determine the optimal settings for your popcorn. Here’s how to adjust the cooking time and power level to make delicious popcorn:
1. Start with Recommended Times: If your popcorn brand provides guidelines for cooking in the microwave, start with the recommended cooking time on the packaging. This will give you a baseline to work with and can help you determine the appropriate time for your specific microwave.
2. Observe the Popping: As the popcorn cooks, observe the popping carefully. Pay attention to the timing and intensity of the popping sounds. If the popcorn kernels stop popping before the recommended time elapses, it may indicate that they are done popping. On the other hand, if there are still many unpopped kernels, you may need to increase the cooking time.
3. Adjust in Small Intervals: When adjusting the cooking time, do so in small increments. Add 10-15 seconds at a time to prevent overcooking or burning the popcorn. Check the popped kernels frequently to determine if they are evenly cooked and adjust the time accordingly.
4. Experiment with Power Levels: If your microwave has adjustable power levels, you can experiment with different levels to find the sweet spot for your popcorn. Higher power levels will heat the popcorn more quickly, but they may also increase the risk of burning. Lower power levels can extend the cooking time, but they may result in a less crispy texture.
5. Consider Wattage: The wattage of your microwave plays a crucial role in cooking time. Higher wattage microwaves tend to cook faster, while lower wattage microwaves may require a longer cooking time. Adjusting the cooking time and power level based on your microwave’s wattage can help you achieve the best results.
6. Take Notes: Keep track of any adjustments you make to the cooking time and power level for future reference. Note the settings that result in perfectly cooked popcorn, so you can replicate them in the future without relying solely on guesswork.
By adjusting the cooking time and power level to suit your microwave, you’ll be able to make delicious popcorn with the perfect balance of texture and flavor. Remember to make incremental adjustments and observe the popping process to ensure that your popcorn doesn’t burn or go undercooked.
Adding Flavorings and Toppings
One of the great things about making your own microwave popcorn is the ability to customize it with a variety of delicious flavorings and toppings. Adding these extras can take your popcorn to a whole new level of taste and enjoyment. Here are some ideas for adding flavorings and toppings to your popcorn:
1. Butter and Salt: The classic combination of melted butter and salt is a popular choice for popcorn lovers. Melt a small amount of butter and drizzle it over the popcorn. Sprinkle some salt on top and toss the popcorn until it is evenly coated. Adjust the amount of butter and salt based on your personal preference.
2. Cheese: Jazz up your popcorn by adding a sprinkle of grated cheese. Cheddar, Parmesan, or even a blend of different cheeses can add a savory and tangy flavor to your popcorn. The heat from the freshly popped popcorn will melt the cheese slightly, creating a deliciously cheesy treat.
3. Seasonings and Spices: Experiment with various seasonings and spices to add an extra kick to your popcorn. Some popular options include garlic powder, paprika, chili powder, or even a dash of cayenne pepper for some heat. Toss the popcorn with the desired seasonings to create a flavor profile that suits your taste.
4. Sweet and Caramel: If you have a sweet tooth, you can drizzle melted caramel or chocolate over your popcorn. Sprinkle it with a pinch of salt for a delightful combination of sweet and savory flavors. You can also mix in other sweet toppings like crushed candy bars, dried fruit, or colored sprinkles for a fun and festive treat.
5. Gourmet Blends: Get creative with gourmet blends by combining different ingredients. For example, mix popcorn with melted white chocolate and crushed peppermint candy for a delicious holiday-themed treat. You can also try mixing popcorn with dried herbs, roasted nuts, or even a hint of truffle oil for a more sophisticated flavor profile.
6. Popcorn Seasoning Mixes: If you’re looking for convenience, there are plenty of pre-made popcorn seasoning mixes available in stores. These mixes come in a variety of flavors, from classic buttery to unique combinations like dill pickle or spicy buffalo. Simply sprinkle the desired seasoning over your popcorn and give it a toss to evenly distribute the flavors.
Remember to add the flavorings and toppings immediately after cooking the popcorn, while it is still warm. This allows the flavors to adhere to the popcorn more effectively. Toss the popcorn gently to distribute the seasonings evenly. Be creative and have fun experimenting with different combinations to find your favorite flavors!
Removing the Bowl from the Microwave Safely
Once your popcorn is cooked to perfection, it’s important to handle the microwave popcorn bowl safely to avoid any risk of burns or accidents. Here are some guidelines for removing the bowl from the microwave safely:
1. Use Oven Mitts or Pot Holders: Before touching the popcorn bowl, protect your hands by using oven mitts or pot holders. The bowl and the popcorn inside can be extremely hot, and using mitts or pot holders will prevent you from accidentally burning yourself.
2. Slow and Steady: When removing the bowl from the microwave, do it slowly and steadily. Avoid any sudden movements or jerks that can cause the hot popcorn to spill or splatter. Take your time and maintain a firm grip on the bowl throughout the process.
3. Be Mindful of Steam: As you lift the bowl out of the microwave, be aware of the hot steam that may escape from the bowl. Keep your face and hands away from the steam to prevent any burns. It’s a good idea to tilt the bowl slightly to allow the steam to escape in a safe direction.
4. Set the Bowl on a Heat-Resistant Surface: Once you have removed the bowl from the microwave, place it on a heat-resistant surface. Avoid placing it on any surfaces that may be sensitive to heat or easily damaged. A heat-resistant mat or countertop works well to protect your surfaces.
5. Allow the Bowl to Cool: Give the popcorn bowl some time to cool down before handling it further or transferring the popcorn to a serving bowl. This will prevent any accidental burns and ensure the safety of both you and your popcorn.
6. Serve with Caution: When you’re ready to enjoy your popcorn, serve it with caution. Use a serving spoon or spatula to transfer the popcorn to individual bowls or containers. This will help distribute the heat evenly and prevent anyone from touching the hot popcorn directly.
By following these safety measures, you can remove the popcorn bowl from the microwave without any mishaps. Always prioritize your safety and take the necessary precautions to avoid any burns or accidents. Enjoy your homemade popcorn while it’s still warm and delicious!
Allowing the Popcorn to Cool
After cooking your popcorn in the microwave, it’s important to allow it to cool down before digging in. Allowing the popcorn to cool not only prevents you from burning your mouth but also ensures that you can fully enjoy its texture and flavors. Here are some guidelines for cooling your popcorn:
1. Patience is Key: It can be tempting to dive right into the bowl of freshly popped popcorn, but it’s essential to exercise patience and let it cool first. The popcorn kernels retain a significant amount of heat, and consuming it immediately can lead to discomfort or even burns.
2. Spread Out the Popcorn: After removing the popcorn from the microwave, spread it out in a single layer on a clean, heat-resistant surface. This helps dissipate the heat more evenly and allows the popcorn to cool faster.
3. Gentle Tossing: Periodically toss the popcorn gently with a spoon or spatula to promote even cooling. This ensures that all sides of the popcorn come in contact with the cooler air, speeding up the process.
4. Room Temperature Environment: If you have a little more time, you can set the popcorn in a room temperature environment to aid in the cooling process. Avoid placing it in direct sunlight or near any sources of heat, as this can prolong the cooling time.
5. Avoid Sealed Containers: Avoid sealing the popcorn in an airtight container or bag until it has completely cooled down. Trapping the heat and moisture can make the popcorn lose its crispness and become soggy.
6. Test the Temperature: Once the popcorn has cooled down for a few minutes, you can test its temperature by touching a few pieces. If they feel comfortably warm rather than hot, it indicates that the popcorn is ready to be enjoyed.
By taking the time to allow your popcorn to cool properly, you’ll be able to savor each bite without the risk of burning your mouth. The cooling process allows the popcorn to develop its desired texture and flavors, ensuring an enjoyable snacking experience.
Enjoying Your Microwave Popcorn
Now that your microwave popcorn has been cooked, cooled, and is ready to enjoy, it’s time to sit back, relax, and indulge in this tasty treat. Here are some tips on how to fully appreciate and savor your microwave popcorn:
1. Serve in Individual Bowls: Transfer the cooled popcorn into individual serving bowls or containers. This not only makes it easier to share but also adds a touch of presentation and makes each person’s snacking experience more enjoyable.
2. Get Comfy: Find a cozy spot to enjoy your popcorn. Whether it’s on the couch while watching a movie, snuggled up in bed with a good book, or sitting at your desk during a work break, creating a relaxing atmosphere enhances the enjoyment of your snack.
3. Share the Fun: Popcorn is often associated with social gatherings and movie nights, so consider inviting friends or family members to join you. Sharing the experience adds to the enjoyment and creates lasting memories.
4. Variety is key: Experiment with different flavor combinations and toppings to keep things interesting. Try adding some grated cheese, flavored salts, herbs, or even a drizzle of chocolate to your popcorn for a unique flavor twist.
5. Mindful Eating: Take your time and savor each bite. Pay attention to the textures, flavors, and aromas of the popcorn as you eat it. Mindful eating allows you to fully appreciate the experience and helps you avoid overindulging.
6. Store Properly: If you have any leftover popcorn, store it in an airtight container or resealable bag to maintain its freshness. Proper storage ensures that you can enjoy the popcorn for longer without losing its crunchiness.
7. Try New Recipes: Don’t be afraid to explore new popcorn recipes and experiment with different flavors. Explore online resources or get creative in the kitchen to create your own unique popcorn concoctions.
8. Appreciate the Process: Take a moment to appreciate the effort and creativity that went into making your microwave popcorn. From choosing the right popcorn kernels to adding flavorful toppings, the process is an opportunity to express your personal taste and creativity.
By following these tips, you can fully enjoy and make the most of your microwave popcorn experience. Whether it’s a solo snack session or a shared moment with loved ones, microwave popcorn offers a versatile and delicious treat that can be enjoyed in various settings and for various occasions.