
Choosing the Right Materials
When it comes to making a braided rug, selecting the right materials is crucial. Not only will it determine the durability and longevity of your rug, but it will also affect its overall appearance and feel. Here are some factors to consider when choosing the materials for your braided rug:
- Fabric: Opt for sturdy and long-lasting materials such as cotton, wool, or a blend of both. These fabrics are ideal for braiding and will ensure that your rug withstands daily wear and tear.
- Color and Pattern: Select fabrics that complement your decor and personal style. You can go for solid colors for a more minimalist look, or experiment with patterns and prints to add a touch of creativity to your rug.
- Texture: Consider the texture of the fabric and think about how it will feel underfoot. Soft and plush fabrics like chenille can add a cozy and luxurious touch to your rug, while rougher textures like jute or denim can create a more rustic or casual vibe.
- Quantity: Calculate the amount of fabric you will need based on the size of your rug. Remember to account for the width of the strips and the number of braids you plan to create. It’s always better to have a little extra fabric than to run out in the middle of your project.
- Preparation: Wash and dry your fabric before cutting it into strips. This will help prevent any shrinkage or color bleeding that could occur during the construction of the rug.
Taking the time to carefully choose the right materials for your braided rug will ensure a beautiful and durable finished product. Don’t be afraid to get creative with your fabric choices and have fun with different colors and textures. Once you have all your materials assembled, you can move on to the next step: preparing the strips of fabric.
Preparing the Strips of Fabric
Before you can start braiding your rug, you’ll need to prepare the fabric by cutting it into strips. Properly preparing the strips will ensure that they are even in size and easy to work with. Here’s how you can prepare the strips of fabric for your braided rug:
- Measure and mark: Determine the desired width of your fabric strips. Use a measuring tape and fabric chalk to mark the measurements along the edges of the fabric. Ensure that the markings are evenly spaced and straight.
- Cut the fabric: Using a sharp pair of fabric scissors, carefully cut along the marked lines to create the fabric strips. Take your time to ensure clean and straight cuts.
- Remove excess threads: After cutting the strips, inspect them for any loose or frayed threads. Use a pair of scissors or a seam ripper to remove any unwanted threads, ensuring that the edges of the strips are neat and clean.
- Join the strips: If the length of your fabric is not long enough for the entire strip, you may need to join multiple strips together. To do this, place the ends of two fabric strips together at a 90-degree angle and sew them together using a sewing machine or by hand. Ensure that the joins are secure and won’t come undone during the braiding process.
Remember to take your time and be precise when preparing the fabric strips. Evenly sized and well-constructed strips will make the braiding process much easier and result in a more uniform and professional-looking rug. Once all your fabric strips are ready, it’s time to move on to the next step: creating the braided base.
Creating the Braided Base
Now that you have prepared the fabric strips, it’s time to start creating the braided base for your rug. The braided base serves as the foundation upon which additional braids will be added to form the body of the rug. Follow these steps to create the braided base:
- Select three fabric strips: Choose three fabric strips of equal length and align their ends together. Pin them securely at the top to hold them in place.
- Braid the strips: Start braiding the three fabric strips together, just as you would braid hair. Cross the right strip over the middle strip, then cross the left strip over the new middle strip. Continue alternating sides until you’ve braided the entire length of the strips.
- Secure the end: Once you’ve reached the end of the strips, secure the braid by tying a tight knot at the bottom. This will prevent the braid from unraveling as you work on adding additional braids to the base.
- Continue adding braids: Repeat the braiding process with additional sets of three fabric strips. As you braid, make sure to align the new set of strips with the end of the previous braid and secure it tightly. Continue adding new braids until you achieve the desired width of your rug.
Take your time and maintain a consistent tension while braiding to ensure that your base is sturdy and even. It may be helpful to secure the top of the base to a stationary object, such as a table or a clamp, to keep it stable as you work.
Once you have created the braided base, you are ready to move on to the next step: adding additional braids to build the body of the rug.
Adding Additional Braids
With the braided base completed, it’s time to add additional braids to build the body of your rug. This step will create the unique and intricate design that makes braided rugs so visually appealing. Follow these steps to add additional braids:
- Select three fabric strips: Choose three fabric strips of equal length, just as you did for the braided base. Align their ends together and pin them securely at the top.
- Insert the new braid: Insert the new set of fabric strips into the first braid loop of the braided base. This will serve as the starting point for the new braid.
- Braid the strips: Begin braiding the new set of fabric strips with those from the braided base. Follow the same braiding technique used to create the base, crossing the right strip over the middle strip and then the left strip over the new middle strip. Continue braiding until you reach the end of the strips.
- Secure the end: Tie a tight knot at the bottom of the braid to secure it. This will prevent it from unraveling while you work on the next set of fabric strips.
- Continue the process: Repeat the steps above to add additional braids throughout the length of the braided base. Make sure to align the new set of strips with the end of the previous braid and secure it tightly. As you add more braids, the rug will gradually take shape and become thicker.
Remember to maintain a consistent tension while braiding and ensure that the edges of the braids are aligned neatly. This will result in a well-constructed and visually pleasing rug. Continue adding additional braids until you achieve the desired size and thickness for your braided rug.
Now that you have added the additional braids, it’s time to move on to the next step: sewing the braids together to create a cohesive rug.
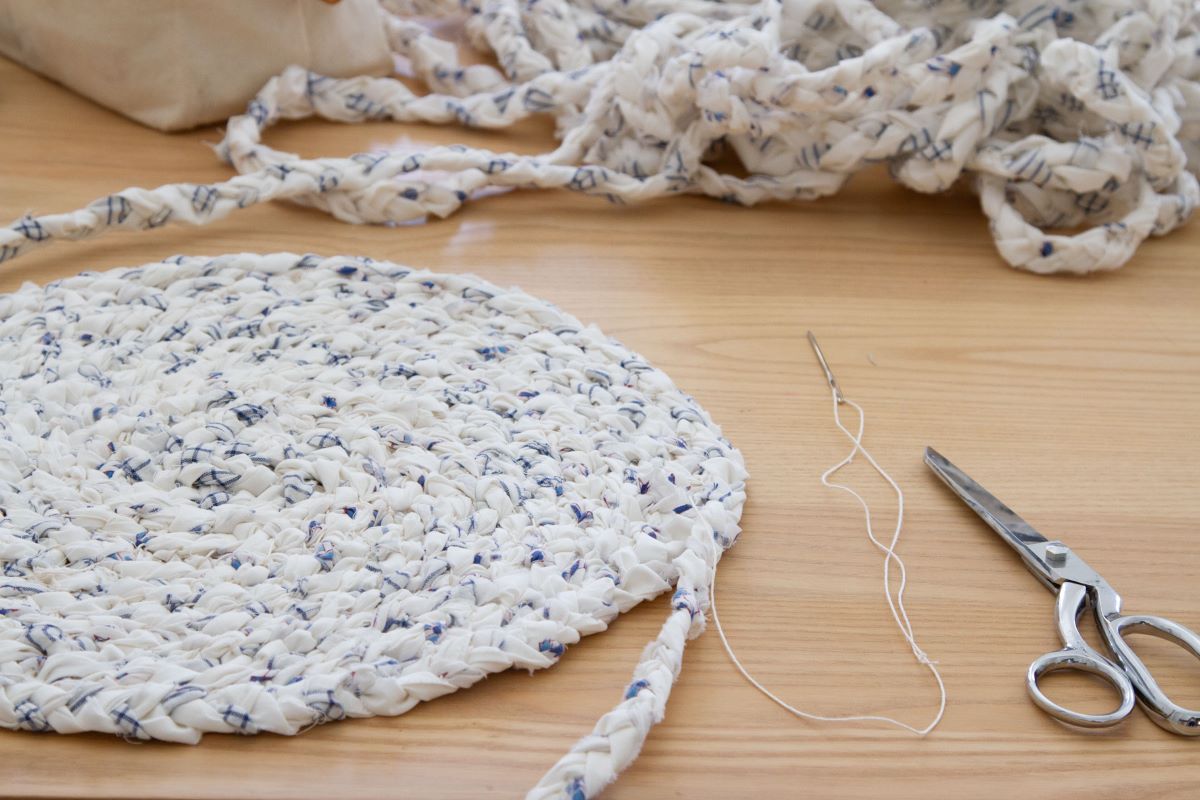
Sewing the Braids Together
Once you have finished adding the additional braids to your rug, the next step is to sew them together to create a cohesive and durable final product. Sewing the braids will secure them in place and ensure that your rug stays intact over time. Follow these steps to sew the braids together:
- Position the braids: Lay your braided rug flat on a table or other suitable workspace. Arrange the braids so that they fit together seamlessly, aligning the edges and corners as best as possible.
- Thread your needle: Use a strong and durable thread that matches the color of your rug. Thread the needle and tie a knot at the end to secure it.
- Beging sewing: Starting at one end of the rug, insert the needle through the first braid, passing through the top and bottom layers to secure them together. Take care to stitch close to the edge, but be mindful not to pierce through the fabric completely.
- Continue stitching: Work your way along the length of the braids, stitching them together at regular intervals. Make sure to maintain an even tension and keep the stitches as neat and consistent as possible.
- Secure the end: Once you reach the end of the rug, tie a knot with the thread to secure it. Trim any excess thread, being careful not to cut the fabric in the process.
Take your time during the sewing process to ensure that the braids are securely attached to each other. This will prevent the rug from coming apart or fraying. Additionally, double-check that the stitches are hidden within the braids, so they aren’t visible on the surface of the rug.
Now that you have sewn the braids together, your rug is taking its final shape. The next step is to finish the edges for a polished and professional look.
Finishing the Edges
Finishing the edges of your braided rug is crucial to achieve a polished and professional look. It helps protect the rug from fraying and adds a final touch of elegance. Here are some methods for finishing the edges of your braided rug:
- Folded edge: One option is to fold the edges of the rug inward and sew them down. This method creates a clean and tidy edge. Start by folding the fabric strip from the outer edge of the rug towards the back. Then, fold it again towards the front, overlapping the previous fold slightly. Secure the folded edge with pins and sew it in place using a whipstitch or a slip stitch.
- Bias tape: Another method is to use bias tape to neatly finish the edges. Bias tape is a narrow strip of fabric that is folded and used to encase raw edges. Measure the length of the rug’s edge and cut the bias tape accordingly. Align the folded edge of the bias tape with the raw edge of the rug. Pin and sew the bias tape in place, ensuring that the raw edge of the rug is completely encased within the tape.
- Binding tape: Binding tape can also be used to finish the edges of a braided rug. It is a wider strip of fabric that is folded in half and sewn along the edges of the rug. Align the folded edge of the binding tape with the raw edge of the rug and sew it in place, making sure the raw edge is enclosed within the tape. Binding tape provides a sturdy and attractive finish to the rug’s edges.
Choose the finishing method that suits your style and preference. You can opt for a method that matches the fabric of your rug or adds a contrasting touch. Whichever method you choose, ensure that the edges are securely sewn and neatly finished.
With the edges neatly finished, your braided rug is now complete! Remember to give it a thorough cleaning before placing it in your desired space.
Cleaning and Caring for Your Braided Rug
After all the hard work you’ve put into creating your braided rug, it’s important to know how to properly clean and care for it. Taking care of your rug will help preserve its beauty and extend its lifespan. Here are some tips for cleaning and maintaining your braided rug:
- Vacuum regularly: Regular vacuuming will help remove dirt, dust, and debris that can accumulate on the surface of your rug. Use a vacuum cleaner with a beater bar or rotating brush attachment to thoroughly clean the rug.
- Spot clean stains: If you notice any spills or stains on your rug, it’s essential to address them promptly. Blot the area with a clean cloth or sponge to remove any excess liquid. Avoid rubbing the stain, as it could worsen the problem. Use a mild detergent mixed with water to gently clean the stained area. Rinse with water and carefully blot dry.
- Avoid moisture: It’s crucial to prevent your braided rug from getting excessively wet or damp. Moisture can lead to mold and mildew growth, which can damage the rug. If the rug gets wet, make sure to dry it thoroughly before placing it back in its original location.
- Rotate the rug: To ensure even wear and tear, rotate your braided rug periodically. This will help prevent certain areas from becoming more worn than others, prolonging the rug’s lifespan.
- Protect from sunlight: Prolonged exposure to direct sunlight can cause your rug’s colors to fade over time. Consider placing your braided rug away from windows or using curtains or blinds to shield it from intense sunlight.
- Avoid heavy furniture: If you plan to place your braided rug under heavy furniture, use furniture pads or sliders to distribute the weight and prevent the rug from getting crushed or stretched.
- Professional cleaning: Depending on the size and complexity of your braided rug, you may consider having it professionally cleaned every few years. Professional cleaners can use specialized techniques and equipment to deep clean and revitalize your rug.
By following these cleaning and caring tips, you can ensure that your braided rug maintains its beauty and quality for years to come. With proper maintenance, your rug will continue to add warmth and charm to your home.