
Materials Needed
Before you embark on creating your very own tee shirt rug, it’s important to gather all the materials you’ll need for this project. Here’s a list of what you’ll need:
- Old tee shirts (at least 5 to 10, depending on the size of the rug)
- Scissors
- Ruler or measuring tape
- Non-slip rug pad (optional, but recommended)
When selecting tee shirts for this project, consider using ones that are no longer in use or have sentimental value. This way, you can create a rug that is not only functional but also holds special memories.
Make sure the tee shirts are clean before starting. You can wash and dry them beforehand to eliminate any dirt or odor.
As for the scissors, it’s best to use a pair that is sharp and comfortable to hold. This will make cutting the tee shirts easier and more efficient.
Having a ruler or measuring tape handy is crucial for ensuring consistency in the size of the tee shirt strips. Measure and cut them to the desired length, typically around 1 to 2 inches wide.
Lastly, consider using a non-slip rug pad to secure your tee shirt rug in place. This will prevent it from sliding or moving around on smooth surfaces, providing added safety and stability.
Now that you have all the necessary materials, you’re ready to move on to the next steps in creating your tee shirt rug!
Step 1: Gather Your T-Shirts
The first step in making a tee shirt rug is to gather the tee shirts you’ll be using for the project. Look through your wardrobe or ask friends and family if they have any old tee shirts they no longer wear. The more tee shirts you have, the larger and more colorful your rug can be.
Consider choosing tee shirts with different patterns, colors, and textures to add visual interest to your rug. This will create a unique and vibrant final product.
If you have sentimental tee shirts with logos, graphics, or slogans, incorporating them into your rug can give it a personal touch and serve as a cherished keepsake.
Remember, the condition of the tee shirts you choose is important. Look for ones that are still in good condition with minimal stains or holes. However, don’t worry too much if there are a few imperfections, as they can add character to the rug.
Once you’ve gathered your tee shirts, give them a quick check to ensure they are clean. If they are dirty, wash and dry them according to their care instructions before proceeding with the project.
This step is all about gathering the necessary materials and selecting the tee shirts that will make up your rug. It’s an exciting time as you start envisioning how your finished rug will look. So, take your time, be creative, and gather the tee shirts that best represent your style.
Step 2: Prepare the T-Shirts
Now that you have gathered your tee shirts, it’s time to prepare them for creating your rug. Follow these steps to get your tee shirts ready:
- Start by laying out each tee shirt on a flat surface. Smooth out any wrinkles or folds to ensure accurate measurements during the cutting process.
- Using your scissors, carefully remove the sleeves of the tee shirt. Cut just below the seam to create a clean and even edge.
- Next, cut along the bottom hem of the tee shirt to remove it. Again, cut just above the seam to maintain a neat finish.
- If there are any graphics or logos on the front or back of the tee shirt that you want to include in your rug, carefully cut around them to preserve these elements.
- Repeat this process for each tee shirt until you have prepared all of them.
Preparing the tee shirts is an essential step in ensuring that they are ready to be transformed into strips for braiding. By removing the sleeves and the bottom hem, you are creating a uniform base to work with.
Trimming around any graphics or logos that you want to include in your rug adds a special touch and preserves the memories associated with those tee shirts.
Take your time during this step to ensure precise and clean cuts. It sets the foundation for the next steps in creating your tee shirt rug.
Step 3: Cut the T-Shirts into Strips
Now that your tee shirts are prepared, it’s time to cut them into strips that will be used for braiding. Follow these steps to cut the tee shirts into strips:
- Lay a tee shirt flat on your work surface. Smooth out any wrinkles or folds.
- Using your ruler or measuring tape, measure and mark the tee shirt at the desired width for your strips. Typically, a width of 1 to 2 inches works well.
- With your scissors, carefully cut along the marked lines. Ensure that you cut all the way through the fabric, creating long strips.
- Continue this process for each tee shirt, cutting them into strips.
When cutting the tee shirts, it’s important to maintain consistency in the width of the strips. This will ensure that your rug has an even and uniform appearance.
If you prefer a thicker or thinner strip width, adjust your measurements accordingly. Keep in mind that thinner strips will require more braiding and may result in a smaller final rug size.
When finished, you should have a pile of tee shirt strips ready to be transformed into a beautiful, braided rug.
This step requires precision and attention to detail, as the quality of your cuts will impact the overall look of your rug. Take your time, use sharp scissors, and enjoy the process of transforming your tee shirts into strips.
Step 4: Create a Base for the Rug
Now that you have cut your tee shirts into strips, it’s time to create a base for your rug. Follow these steps to create the base:
- Decide on the shape and size of your rug. You can create a circular, rectangular, or oval-shaped rug, depending on your preference.
- If you’re using a non-slip rug pad, lay it down on your desired surface. This will provide stability and prevent your rug from sliding around.
- Take one tee shirt strip and tie a knot at one end. This will serve as the starting point of your braided rug.
- Position the knotted end at the center of your desired rug shape. This will be the focal point from which you’ll begin braiding the tee shirt strips.
- Secure the knotted end to the rug pad or surface by using a safety pin or sewing it in place. This will keep it from shifting during the braiding process.
The shape and size of your rug are personal choices that depend on your preferences and the space where the rug will be placed. Consider the intended purpose of your rug and the dimensions of the area to determine the appropriate size and shape.
If you choose to use a non-slip rug pad, it’s recommended to lay it down before starting the braiding process. This will prevent the rug from sliding or slipping on smooth surfaces and provide added stability.
Tying a knot at one end of a tee shirt strip and securing it as the starting point ensures that your braided rug stays intact and prevents unraveling as you progress through the braiding.
Once you’ve created the base for your rug, you’re ready to start braiding the tee shirt strips to form the body of the rug.
Step 5: Begin Braiding the Strips
With the base of your rug set up, it’s time to start braiding the tee shirt strips to create the body of the rug. Follow these steps to begin the braiding process:
- Divide the tee shirt strips into three equal sections.
- Take the strip on the right and cross it over the middle strip, so that it becomes the new middle strip.
- Take the strip on the left and cross it over the new middle strip.
- Repeat these steps, crossing the right strip over the middle and the left strip over the new middle, creating a continuous braid.
- Continue braiding until you reach the desired length or run out of tee shirt strips.
As you braid, keep the tension even to ensure a tight and secure rug. If the rug starts to become loose, you can gently pull on the strips to tighten the braid.
Be mindful of the order of crossing the strips to maintain consistency and create a visually appealing pattern. It’s helpful to keep the left and right strips separate to avoid confusion.
If you run out of a strip before reaching the desired length, simply attach a new strip by tying a knot at the end of the previous strip. Continue braiding with the new strip as if it were part of the original.
Take your time and enjoy the process of braiding. Visualize how the colors and patterns of the tee shirts come together to form a unique and personalized rug.
In the next step, you’ll learn how to continue the braiding process and add more tee shirt strips to your rug.
Step 6: Continue Braiding and Adding Strips
Now that you’ve started the braiding process, it’s time to continue and add more tee shirt strips to your rug. Follow these steps to seamlessly continue the braiding:
- As you reach the end of one tee shirt strip during the braiding process, simply overlap it with the beginning of a new strip.
- Tie a double knot to secure the two ends of the tee shirt strips together.
- Carry on with the braiding, treating the joined strips as if they were one continuous strip.
- Continue this process as you run out of tee shirt strips, joining new ones until you achieve the desired rug length.
The process of adding more tee shirt strips is simple and allows you to create a continuous braid without any breaks or gaps. It’s important to secure the ends tightly with a double knot to ensure that they don’t come undone.
When adding new strips, aim to join them at different points throughout the rug to distribute the thickness evenly. This will create a more seamless and cohesive appearance.
As you continue braiding and adding more strips, you’ll notice your rug taking shape and growing in size. It’s an exciting and creative process that allows you to see your hard work and dedication come to life.
Keep braiding until you achieve the desired length for your rug or until you run out of tee shirt strips. It’s up to you to decide the size and dimensions that best suit your space and needs.
In the next step, you’ll learn how to complete the braiding and finish off your tee shirt rug.
Step 7: Complete the Braiding
As you near the end of your rug, it’s time to complete the braiding process. Follow these steps to finish off your tee shirt rug:
- Continue braiding until you have only a few inches of tee shirt strips left.
- Tightly fold the remaining tee shirt strips inwards, securing them to the underside of the rug.
- Use a needle and thread or a fabric glue to secure the folded end of the tee shirt strips in place.
- Trim any excess fabric or loose threads to create a clean and tidy finish.
Make sure to fold the remaining tee shirt strips tightly to prevent them from unraveling or sticking out. This will create a neat and seamless appearance for your rug.
If you choose to use a needle and thread, sew through multiple layers of the folded tee shirt strips to ensure a strong and secure attachment. Alternatively, you can use fabric glue to bond the fabric together.
Trim any excess fabric or loose threads carefully to create a polished final look. Be cautious not to cut any of the braided sections in the process.
Completing the braiding process is a significant milestone in creating your tee shirt rug. It’s a time to celebrate your patience and dedication, as you’re only a few steps away from enjoying the final product.
In the next step, you’ll learn how to shape your rug and give it a finished appearance.
Step 8: Secure the End of the Braid
As you near the end of your tee shirt rug, it’s important to secure the final braid to ensure it stays intact. Follow these steps to secure the end of the braid:
- Take the last remaining section of the braid and tightly fold it over.
- Insert a safety pin through the folded section to hold it in place.
- Alternatively, you can use a needle and thread to stitch through the folded section, securing it to the underside of the rug.
- Trim any excess fabric or loose threads, as needed, for a clean and polished finish.
Folding the final section of the braid tightly ensures that it stays securely in place and doesn’t unravel over time. The safety pin acts as a temporary fastener while you finalize the securing process.
If you prefer a more permanent attachment, you can use a needle and thread to sew through the folded section. This method provides a stronger hold and ensures that the end of the braid remains securely in place.
After securing the end of the braid, take a moment to trim any excess fabric or loose threads. This step will give your rug a clean and finished appearance.
The end of the braid is the final touch to your tee shirt rug. By securing it properly, you ensure that your hard work and creativity will last for a long time.
In the next step, you’ll learn how to shape your rug and add optional finishing touches.
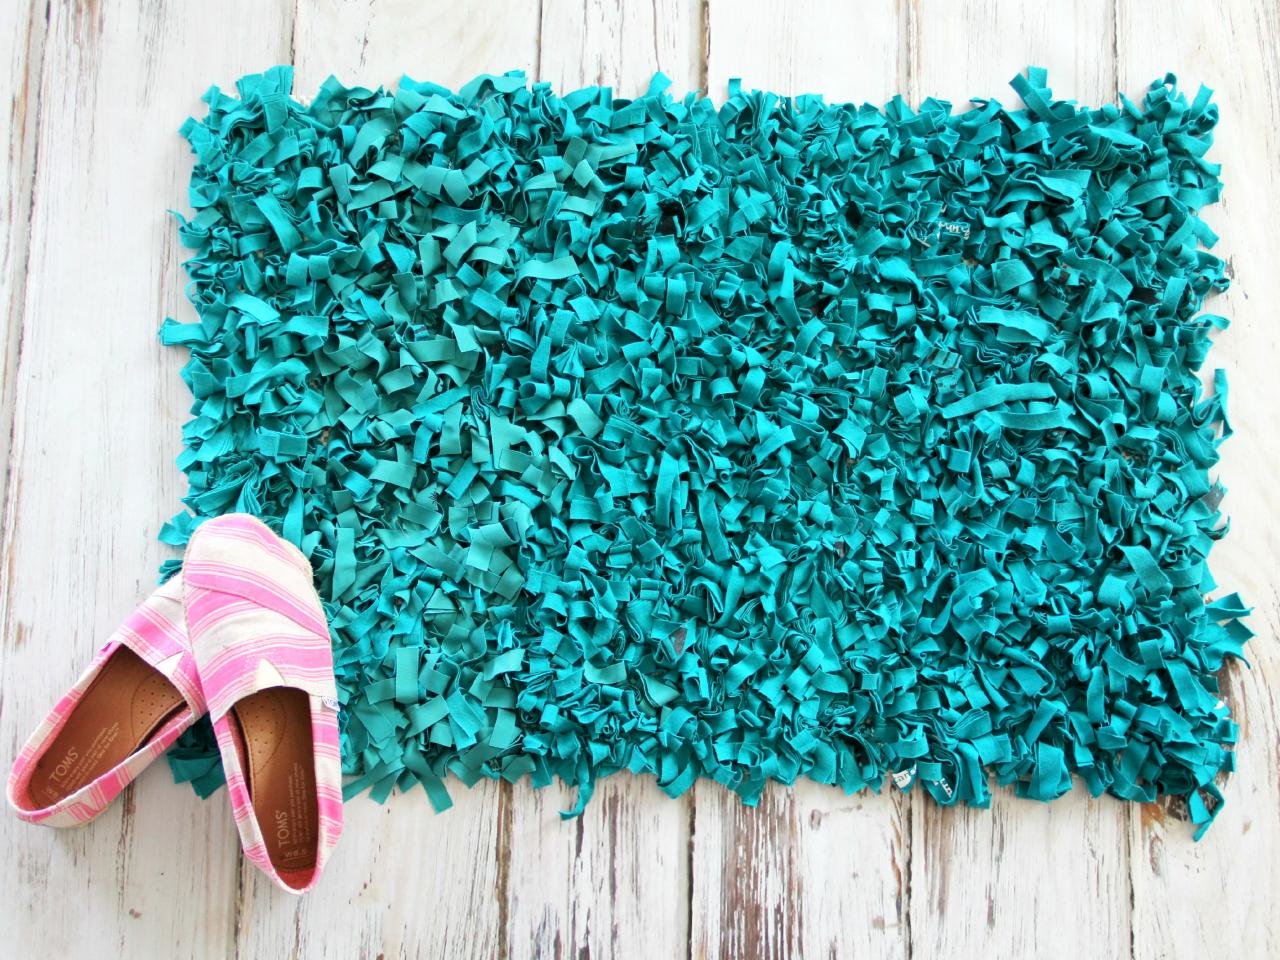
Step 9: Shape the Rug
Now that you have completed the braiding and securing process, it’s time to shape your tee shirt rug. Follow these steps to give your rug its final form:
- Decide on the desired shape for your rug. You can maintain the circular shape created during the braiding process or shape it into a rectangle or oval, if preferred.
- Gently manipulate the braided sections to mold the rug into the desired shape. Use your hands to adjust and flatten any uneven areas.
- If you’re using a non-slip rug pad, ensure that the rug is properly aligned and centered on it. This will prevent it from shifting or sliding on the floor surface.
- Once satisfied with the shape, take a moment to inspect the rug for any loose or uneven sections. If necessary, adjust the braids and resecure any loose ends.
Shaping the rug allows you to have complete control over its final appearance and ensures that it fits seamlessly into your desired space. Whether it’s a circular, rectangular, or oval shape, shaping your rug adds a finishing touch.
Be gentle when manipulating the braided sections to avoid pulling or damaging the rug. Using your hands to adjust the rug allows for a more organic and natural shaping process.
If you’re using a non-slip rug pad, double-check that the rug is securely positioned on it. This will enhance safety by preventing any unwanted movement or slipping.
Taking a moment to inspect the rug and make any final adjustments ensures that your rug looks its best. Check for any loose or uneven areas and resecure any loose ends to create a tidy and cohesive appearance.
In the next step, you’ll learn about optional finishing touches that can further elevate the look of your tee shirt rug.
Step 10: Optional Finishing Touches
With your tee shirt rug taking shape, it’s time to add some optional finishing touches to enhance its overall look. These finishing touches can be customized to reflect your personal style and add a unique touch to your rug. Consider the following options:
- Trim and shape the edges: Take a sharp pair of scissors and trim the edges of your rug to create a clean and defined border. This can give your rug a polished look.
- Add decorative elements: Consider adding decorative elements such as fabric flowers, buttons, or beads to your rug. Sew or glue them securely onto the rug to add a touch of creativity and personalization.
- Embroidery or appliqué: If you enjoy embroidery or have a knack for appliqué work, consider adding intricate designs or patterns to your rug. This can add a stunning visual element and showcase your artistic skills.
- Wash and fluff the rug: After completing your rug, give it a gentle hand wash or machine wash (if the materials allow) to freshen it up and fluff the fabric. This can help the rug regain its shape and softness.
These optional finishing touches allow you to add your personal flair to your tee shirt rug. They can transform a simple DIY project into a unique and eye-catching centerpiece for any room in your home.
Remember to consider the durability of any added elements and their compatibility with the rug’s materials. Choose methods that will ensure longevity and prevent damage to your hard work.
By experimenting with these optional finishing touches, you’ll be able to create a tee shirt rug that perfectly reflects your style and adds a personal touch to your living space.
Congratulations on creating your very own tee shirt rug! It’s now ready to be enjoyed and admired by all who see it.