
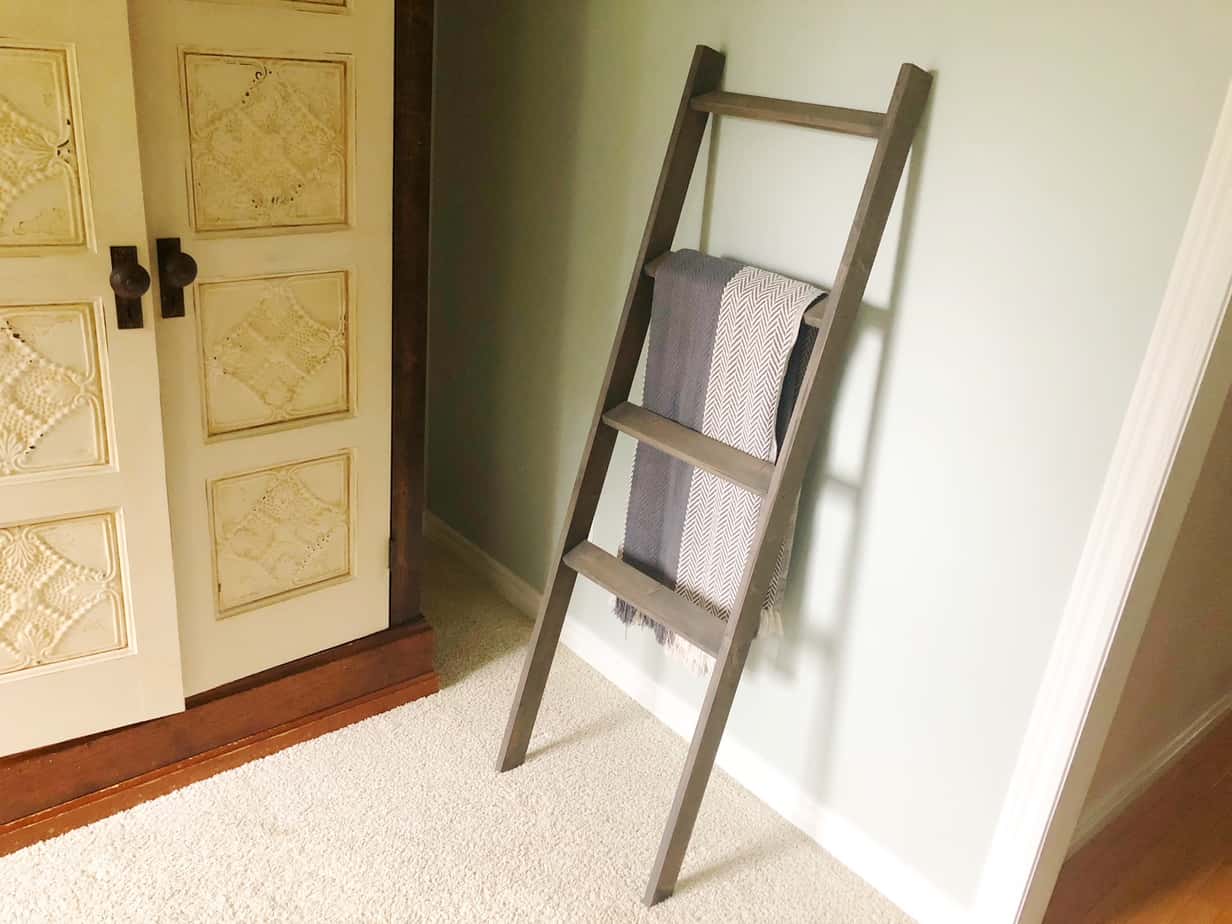
Choosing the Right Wood for Your Blanket Ladder
When it comes to making a blanket ladder, one of the most important decisions you’ll need to make is choosing the right type of wood. The type of wood you select will not only affect the overall appearance of your ladder but also its durability and strength. Here are a few key considerations to keep in mind when choosing the right wood for your blanket ladder:
- Type of Wood: There are several types of wood that work well for building a blanket ladder, including pine, oak, and poplar. Pine is a popular choice due to its affordability and ease of working with. Oak and poplar are more durable options but often come at a higher price point.
- Wood Grade: Different wood grades are available, ranging from select grade (highest quality) to common grade (more affordable but with more visible imperfections). Consider the desired aesthetic and your budget when selecting the wood grade for your ladder.
- Wood Thickness: The thickness of the wood will determine the overall sturdiness of your ladder. Thicker wood will provide a more stable structure, while thinner wood may be more flexible. Generally, 1×3 or 1×4 boards are commonly used for blanket ladders.
- Wood Finish: Consider whether you want to leave the natural wood grain visible or if you prefer to apply a stain or paint for a different look. Staining the wood can enhance its natural beauty, while painting allows for more customization options to match your home’s decor.
Take the time to carefully consider these factors before purchasing the wood for your blanket ladder. Remember, choosing the right wood will not only ensure a visually appealing ladder but also a sturdy and functional one that will stand the test of time.
Gathering the Tools and Materials You’ll Need
Before you can start building your blanket ladder, it’s essential to gather all the necessary tools and materials. Having everything prepared in advance will help streamline the construction process and ensure a smooth workflow. Here’s a list of the tools and materials you’ll need:
- Wood: Purchase the appropriate amount of wood based on the dimensions of your desired blanket ladder. Remember to account for the length of the rungs as well.
- Miter Saw or Circular Saw: A miter saw or circular saw will be needed to cut the wood to the desired lengths. Ensure that it is in good working condition and follow all safety guidelines.
- Sander and Sandpaper: To achieve a smooth and polished finish, you’ll need a sander and sandpaper. Start with coarse-grit sandpaper to remove any rough edges or imperfections, and gradually move to finer-grit sandpaper for a smooth finish.
- Tape Measure: Accurate measurements are crucial for ensuring the ladder is level and properly aligned. Use a tape measure to measure and mark the wood for cutting and assembly.
- Drill and Drill Bits: A drill will be needed to create pilot holes for screws during the assembly process. Make sure to have an assortment of drill bits suitable for the size of the screws you’ll be using.
- Screws: Choose screws that are appropriate for the size and type of wood you’re using. It’s generally recommended to use wood screws that are long enough to securely fasten the pieces together.
- Screwdriver: A screwdriver, either manual or electric, will be needed to drive the screws into the wood.
- Optional: Stain or Paint: If you prefer a stained or painted finish, gather the appropriate stain or paint, as well as brushes or rags for application. Ensure proper ventilation when using these materials.
- Optional: Protective Finish: To protect the wood and add durability, consider applying a clear protective finish, such as polyurethane or varnish, after staining or painting.
Having all these tools and materials on hand will make the construction process more efficient and enjoyable. Prepare your workspace and check that your tools are in good working order before starting your blanket ladder project.
Cutting Your Wood to Size
Once you have gathered all the necessary tools and materials, the next step in building your blanket ladder is cutting the wood to the appropriate sizes. This step is crucial to ensure that your ladder is structurally sound and aesthetically pleasing. Follow these steps to cut your wood to size:
- Measure and Mark: Use a tape measure to determine the desired length of each piece of wood for the ladder’s side rails and rungs. Mark the measurements clearly and double-check for accuracy.
- Cut the Side Rails: Using a miter saw or circular saw, carefully cut the side rails to the desired length. Ensure that the cuts are straight and even for a professional-looking finish. Repeat this step for each side rail.
- Cut the Rungs: Determine the number of rungs you’d like for your ladder, keeping in mind the spacing between each rung. Cut the rungs to the desired length using the saw. Alternatively, you can purchase precut dowels or rods for the rungs.
- Sand the Cut Edges: After cutting the wood, it’s important to sand the cut edges to smooth out any roughness or splinters. Use a sander or sandpaper to carefully sand the ends of each piece until they are smooth to the touch.
- Double-Check Measurements: Before proceeding to the assembly stage, double-check all the measurements and ensure that they are accurate. This will help prevent any issues during the ladder’s construction.
Remember to always wear appropriate safety gear, such as safety goggles and ear protection, when using power tools. Take your time during the cutting process to ensure precision and accuracy, as this will greatly contribute to the final quality of your blanket ladder.
Sanding down the Wood for a Smooth Finish
One of the key steps in making a blanket ladder is sanding down the wood to achieve a smooth and polished finish. This step not only enhances the overall appearance of your ladder but also helps ensure the safety and comfort of its use. Here are the steps to sand down the wood:
- Select the Right Sandpaper: Start with a coarse-grit sandpaper, such as 80 or 120 grit, to remove any rough surfaces, splinters, or imperfections. Gradually transition to finer-grit sandpaper, such as 220 or 320 grit, for a smoother finish.
- Sand the Surface: Using a sanding block or an electric sander, sand all the exposed surfaces of the wood, including the side rails and rungs. Move in a consistent, even motion along the grain of the wood to avoid creating any inconsistencies or scratches.
- Round the Edges: To add a softer touch and prevent sharp corners, use sandpaper or a sanding block to round the edges of the wood. This step can enhance the ladder’s appearance and make it safer to handle.
- Clean the Wood: After sanding, use a clean cloth or tack cloth to wipe away any dust or debris from the surface of the wood. This will ensure that the ladder is ready for the next steps, such as assembly or applying a finish.
- Optional: Fill in Wood imperfections: If you notice any visible gaps, cracks, or minor imperfections in the wood, you may choose to fill them using wood filler or putty. Follow the manufacturer’s instructions for proper application and allow it to dry before sanding again.
Sanding down the wood is an essential step in the construction of a blanket ladder. It not only improves the ladder’s appearance but also ensures a comfortable and safe user experience. Take your time during this step to achieve a smooth and flawless finish.
Assembling the Frame for Your Blanket Ladder
Now that you have prepared the wood by cutting it to size and sanding it down, it’s time to assemble the frame of your blanket ladder. This step will bring all the individual pieces together to create the structure of the ladder. Follow these steps to assemble the frame:
- Arrange the Side Rails: Begin by placing the side rails on a flat surface, parallel to each other. Ensure that the inside edges are facing up and the bottom ends are even.
- Position the Rungs: Determine the desired spacing between each rung. Measure and mark the positions on both side rails. Use a tape measure to ensure accuracy and consistency.
- Create Pilot Holes: To prevent the wood from splitting, it’s recommended to create pilot holes before inserting screws. Use an appropriate drill bit to create pilot holes at the marked positions on the side rails.
- Attach the Rungs: Position each rung between the side rails, aligning them with the pilot holes. Insert screws through the pilot holes and into the rungs, securing them in place. Repeat this step for each rung.
- Tighten the Screws: Once all the rungs are attached, use a screwdriver or drill to tighten the screws. Ensure that they are secure but be careful not to overtighten and damage the wood.
- Check for Stability: After assembling the ladder frame, check for stability by gently shaking the ladder. If any wobbling or instability is detected, double-check the screws and make any necessary adjustments.
Assembling the frame is a pivotal step in building your blanket ladder. Take your time to align the pieces properly and ensure that the ladder is sturdy and secure. Once the frame is assembled, you can move on to the next steps of adding the rungs and applying finishes, if desired.
Adding the Rungs to Your Blanket Ladder
Adding the rungs to your blanket ladder is the next step in the construction process. The rungs not only provide support and stability but also add aesthetic appeal to the ladder. Follow these steps to add the rungs to your blanket ladder:
- Measure and Mark: Determine the desired spacing between each rung. Measure and mark the positions on both side rails using a tape measure. Ensure that the marks are aligned and evenly spaced.
- Create Pilot Holes: To prevent the wood from splitting, create pilot holes at the marked positions on both side rails. Use a drill with the appropriate drill bit for the size of the screws you’ll be using.
- Align the Rungs: Position each rung at the marked positions between the side rails. Ensure that they are evenly aligned and straight. Use clamps to hold the rungs in place temporarily, if necessary.
- Insert Screws: Insert screws through the pilot holes and into the rungs to secure them in place. Use a screwdriver or drill to tighten the screws, but be careful not to overtighten and damage the wood.
- Repeat for Remaining Rungs: Continue measuring, marking, creating pilot holes, aligning, and inserting screws for each remaining rung. Take your time to ensure that each rung is securely attached and aligned with the side rails.
- Check for Stability: Once all the rungs are attached, check for stability by gently shaking the ladder. Make sure that all the rungs are securely fastened and the ladder is sturdy.
Adding the rungs is a critical step in the construction of your blanket ladder. Proper alignment and secure attachment of the rungs will ensure the ladder’s stability and functionality. Take your time and double-check your work to create a sturdy and visually appealing ladder.
Optional: Staining or Painting Your Blanket Ladder
After assembling the frame and adding the rungs to your blanket ladder, you have the option to further enhance its appearance by applying a stain or paint. Staining or painting your ladder allows you to customize its look to match your personal style or the décor of your space. Here are the steps to stain or paint your blanket ladder:
- Prepare the Surface: Before applying any stain or paint, ensure that the wood surface is clean and free of dust and debris. Use a clean cloth or tack cloth to wipe away any residual sanding particles.
- Choose Your Stain or Paint: Select the type of stain or paint that suits your desired finish. Consider factors such as the wood grain, color, and compatibility with the material of the ladder.
- Apply the Stain or Paint: Using a natural bristle brush or foam brush, apply the stain or paint evenly, following the grain of the wood. Start at one end and work your way towards the other, ensuring thorough and consistent coverage. Apply multiple coats for a richer color, allowing each coat to dry before applying the next.
- Allow Drying Time: After applying the stain or paint, allow sufficient drying time as per the manufacturer’s instructions. This will ensure that the finish sets properly and is ready for use.
- Apply a Protective Finish (Optional): If desired, apply a clear protective finish, such as polyurethane or varnish, over the stained or painted surface. This will add an extra layer of protection and durability to your ladder.
- Let it Cure: Once the ladder is completely finished, allow it to cure for the recommended time before placing it in your desired location or adding blankets or other items.
Staining or painting your blanket ladder is an optional but rewarding step that adds a personal touch to your creation. Take your time during this process to ensure a smooth and flawless finish. The result will be a beautiful and customized ladder that complements your space.
Optional: Adding a Protective Finish to Your Blanket Ladder
Once you have assembled and finished your blanket ladder, you have the option to further protect and enhance its appearance by adding a protective finish. Applying a protective finish not only adds durability but also helps to preserve the wood and maintain its beauty over time. Here’s how you can add a protective finish to your blanket ladder:
- Choose the Right Protective Finish: There are various options for protective finishes, such as polyurethane, varnish, or lacquer. Consider the type of wood you used for your ladder and the level of protection you desire to select the most suitable finish.
- Prepare the Surface: Before applying the protective finish, ensure that the ladder is clean and free from any dust or debris. Use a clean cloth or tack cloth to wipe down the surface, removing any particles.
- Apply the Protective Finish: Follow the manufacturer’s instructions on the protective finish product for application. Use a brush or a clean, lint-free cloth to evenly apply the finish to all exposed surfaces of the ladder. Apply thin and even coats, allowing sufficient drying time between each application.
- Sand between Coats (Optional): For an extra smooth and flawless finish, you can lightly sand the surface between coats of the protective finish using fine-grit sandpaper. This helps to remove any imperfections and ensures better adhesion between layers.
- Allow for Proper Drying and Curing: After applying the final coat, allow the ladder to dry and cure according to the manufacturer’s recommendations. This will ensure that the protective finish fully sets and provides the intended level of protection.
- Monitor and Maintain: Regularly inspect the blanket ladder for any signs of wear or damage, and touch up the protective finish as needed. This will help to maintain the ladder’s appearance and longevity over time.
Adding a protective finish to your blanket ladder is an optional step but highly recommended to preserve its beauty and extend its lifespan. It adds an extra layer of protection against daily wear and tear, ensuring that your ladder continues to look stunning for years to come.