
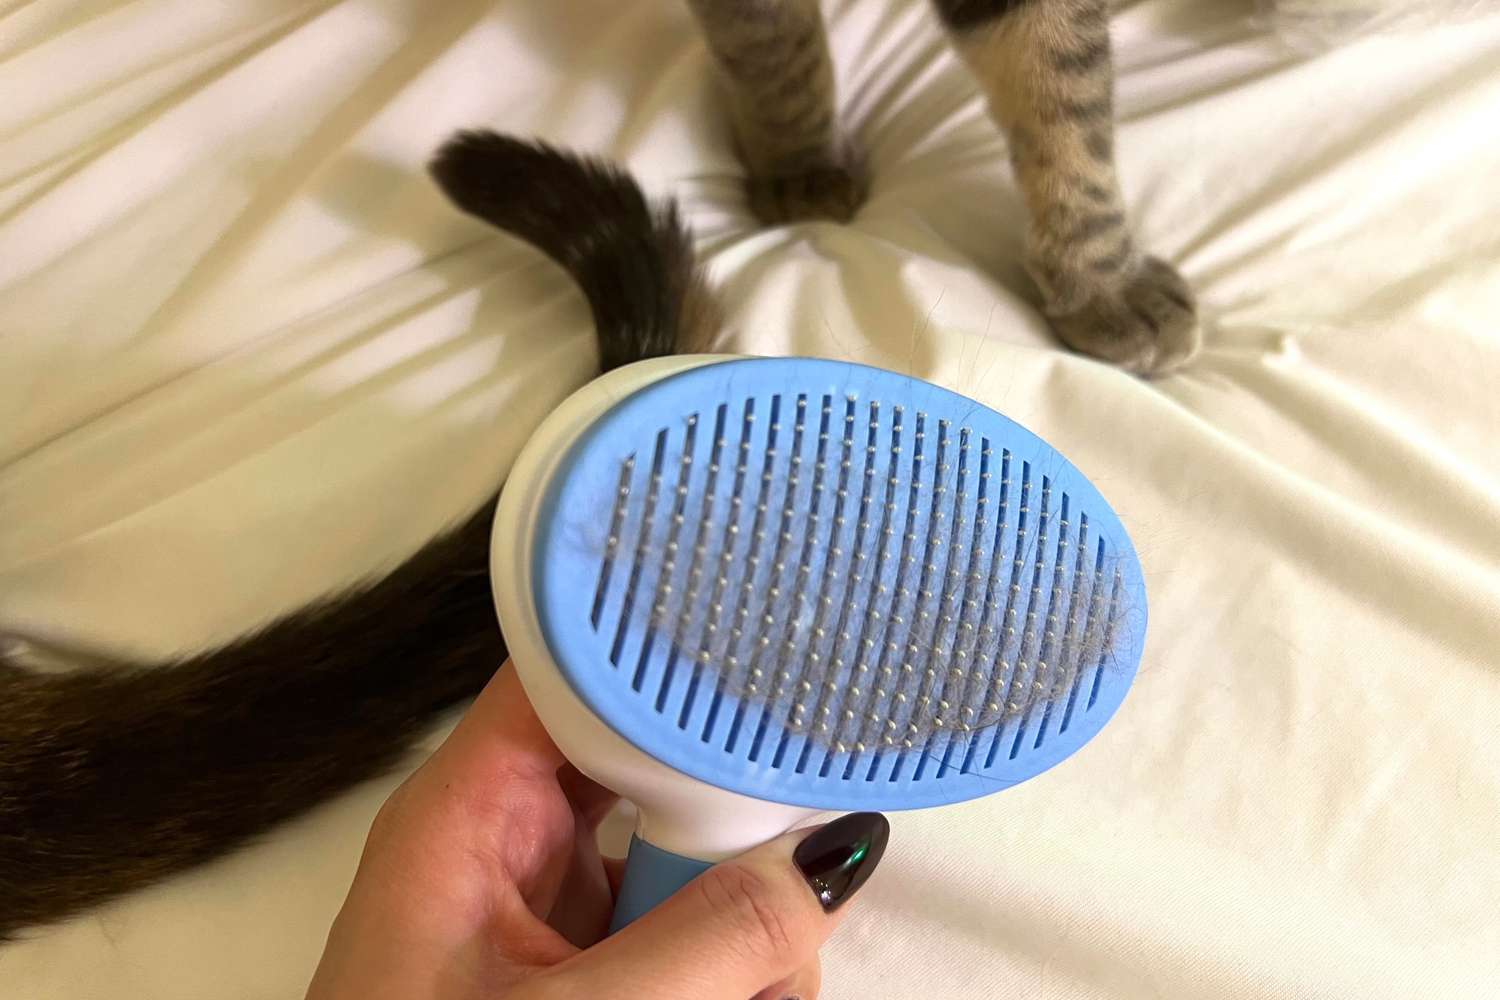
Why is it important to clean your slicker brush?
A slicker brush is an essential tool for pet owners to keep their furry friends’ coats neat and tangle-free. However, many pet owners underestimate the importance of regular cleaning and maintenance for their slicker brushes. Cleaning your slicker brush is not just about keeping it hygienic; it also plays a vital role in maintaining its effectiveness and longevity. Here’s why it’s important to clean your slicker brush regularly:
1. Preventing Bacterial Build-Up: When you brush your pet’s coat, the slicker brush collects loose hair, dirt, debris, and even oils from their skin. Over time, if left uncleaned, these substances can accumulate and create a breeding ground for bacteria. Using a dirty brush can transfer these bacteria back onto your pet’s coat, potentially causing skin irritations or infections.
2. Maintaining Brush Efficiency: As you brush your pet, the bristles of the slicker brush become filled with hair and debris. This build-up can reduce the effectiveness of the brush, making it less efficient in removing loose fur, tangles, and mats from your pet’s coat. Regular cleaning ensures that your slicker brush remains in optimal condition, maintaining its ability to effectively groom your pet.
3. Preventing Cross-Contamination: If you have multiple pets in your household, using a dirty slicker brush on one pet can transfer allergens, parasites, or skin diseases to another. Regularly cleaning your slicker brush helps prevent cross-contamination between pets, keeping each one healthy and happy.
4. Prolonging the Lifespan of Your Brush: A well-maintained slicker brush can last for a long time, saving you money in the long run. Regular cleaning and proper storage help prevent the bristles from becoming matted or damaged, ensuring that your brush remains effective and durable for years to come.
5. Ensuring Comfortable Grooming Sessions: Pets with sensitive skin can experience discomfort if brushed with a dirty slicker brush. By keeping your brush clean, you provide a more pleasant grooming experience for your pet, reducing the risk of skin irritations and ensuring they enjoy their grooming sessions.
Now that you understand why it’s important to clean your slicker brush regularly, in the following sections, we will guide you through the step-by-step process of cleaning and maintaining your slicker brush to ensure it remains in top condition.
How often should you clean your slicker brush?
Cleaning your slicker brush on a regular basis is crucial to maintain its effectiveness and hygiene. The frequency of cleaning depends on several factors, including the frequency of use and the coat type of your pet. Here are some guidelines to help you determine how often you should clean your slicker brush:
1. Frequency of Use: If you regularly groom your pet with a slicker brush, it is recommended to clean it after each grooming session. This will prevent the build-up of hair, dirt, and debris, ensuring that your slicker brush remains clean and ready for the next grooming session.
2. Coat Type: The type of coat your pet has also influences how often you should clean the slicker brush. Pets with long, thick coats or excessive shedding may require more frequent cleaning to prevent the brush from getting clogged and to maintain its efficiency. On the other hand, pets with short coats or minimal shedding may need less frequent cleaning, but regular cleaning is still essential to remove any build-up of dirt or oils.
3. Allergies or Skin Conditions: If your pet has allergies or skin conditions, it is advisable to clean the slicker brush more frequently. This helps minimize the risk of triggering an allergic reaction or aggravating any existing skin issues. By regularly cleaning the brush, you can ensure a cleaner and safer grooming experience for your pet.
4. Hygiene Considerations: Even if your pet has a coat that does not require frequent grooming, it is important to maintain good hygiene practices. Cleaning the slicker brush regularly helps remove any potential bacteria or allergens that may have accumulated on the bristles, ensuring a clean and safe brushing experience for your pet.
What are the tools needed to clean a slicker brush?
When it comes to cleaning a slicker brush, having the right tools on hand makes the process much easier and more effective. Here are the essential tools you’ll need to clean your slicker brush:
1. Tweezers or a Comb: Tweezers or a small comb can be handy for removing stubborn trapped hairs from the bristles of the brush. These tools allow you to gently loosen and lift the hairs that may have gotten tangled or wedged between the bristles.
2. Cleaning Brush or Toothbrush: A cleaning brush or an old toothbrush can be used to remove loose hair, dirt, and debris from the slicker brush. The bristles of the cleaning brush or toothbrush can help dislodge any trapped particles, making it easier to clean the bristles thoroughly.
3. Mild Soap or Shampoo: Using a mild soap or pet-friendly shampoo can help remove any built-up oils and dirt on the slicker brush. Avoid using harsh detergents or chemicals that may damage the brush or irritate your pet’s skin. Make sure to rinse the brush thoroughly after cleaning to remove any soap residue.
4. Warm Water: Warm water is an essential component of the cleaning process. It helps loosen dirt, debris, and trapped hair from the bristles of the slicker brush. Make sure the water is not too hot, as extreme temperatures can damage the brush.
5. Towel or Cloth: After cleaning and rinsing the slicker brush, use a clean towel or cloth to dry it thoroughly. Moisture can deteriorate the brush and create a conducive environment for bacterial growth. Ensure that the brush is completely dry before storing it.
6. Disinfectant (Optional): While not necessary for regular cleaning, a pet-safe disinfectant can be used to sanitize the slicker brush, especially in cases where there may be concerns about bacteria or fungal growth. Consult with your veterinarian for advice on suitable disinfectants for pet grooming tools.
Having these tools readily available will help streamline the process of cleaning your slicker brush, ensuring that it is kept in optimal condition for your pet’s grooming needs.
Step-by-step guide on how to clean a slicker brush
Cleaning your slicker brush regularly is important to maintain its effectiveness and cleanliness. Follow these step-by-step instructions to properly clean your slicker brush:
Step 1: Remove Excess Hair: Start by using your fingers or a comb to remove any loose hair or debris that may be stuck in the bristles. Gently pull the hair away from the brush, discarding it into a trash bin.
Step 2: Use Tweezers or a Comb: If there are stubborn hairs caught between the bristles, use tweezers or a comb to carefully loosen and remove them. Work gently to avoid damaging the bristles or the brush itself.
Step 3: Prepare Cleaning Solution: Fill a basin or sink with warm water and add a small amount of mild soap or pet-friendly shampoo. Mix the solution to create a soapy mixture.
Step 4: Soak the Brush: Submerge the slicker brush in the soapy water, making sure that all the bristles are covered. Let it soak for a few minutes to allow the soap to penetrate and loosen any dirt or oils on the brush.
Step 5: Scrub Gently: Remove the brush from the soapy water and use a cleaning brush or an old toothbrush to gently scrub the bristles. Pay extra attention to any areas with build-up or stubborn dirt. Be careful not to apply excessive pressure that could damage the bristles.
Step 6: Rinse Thoroughly: Rinse the slicker brush under running water, ensuring that all the soap residue is removed. Hold the brush with bristles facing downward to ensure thorough rinsing.
Step 7: Dry the Brush: Use a clean towel or cloth to blot excess water from the brush. Then, lay the brush on a towel or hang it to air dry completely. Ensure that the brush is completely dry before storing or using it again.
Step 8: Optional Disinfection: If desired, you can use a pet-safe disinfectant to sanitize the brush further. Follow the instructions on the disinfectant product and ensure it is thoroughly rinsed off before drying.
Cleaning your slicker brush regularly using this step-by-step guide will help maintain its cleanliness and ensure it continues to be an effective grooming tool for your pet.
Tips for maintaining a clean slicker brush
In addition to regular cleaning, there are some helpful tips you can follow to ensure that your slicker brush stays clean and in optimal condition:
1. Clean After Each Use: Make it a habit to clean your slicker brush after every grooming session. This will prevent hair and debris from accumulating and becoming harder to remove later on.
2. Use a Slicker Brush Cleaning Tool: Invest in a slicker brush cleaning tool or a brush rake designed specifically for removing trapped hairs in the bristles. These tools make it easier to remove stubborn hair without damaging the brush.
3. Regularly Inspect the Brush: Take a moment to inspect your slicker brush for any signs of damage or wear. Check for loose bristles or bent pins, as these can affect the brush’s performance and potentially harm your pet’s skin. Replace the brush if necessary.
4. Store Properly: When not in use, store your clean slicker brush in a dry, well-ventilated place. Avoid storing it in humid areas, as moisture can promote bacterial growth and cause damage to the brush. Consider using a brush cover or a plastic bag to protect it from dust and dirt.
5. Remove Excess Hair Before Cleaning: Prior to cleaning your slicker brush, use your fingers or a comb to remove as much loose hair as possible. This will make the cleaning process more effective and prevent hair from clogging your sink or drain.
6. Avoid Harsh Cleaners: Stick to mild soap or pet-friendly shampoos when cleaning your slicker brush. Harsh chemicals or detergents can damage the brush and potentially cause skin irritation for your pet.
7. Clean Multiple Brushes Separately: If you own multiple slicker brushes or grooming tools, clean each one separately to avoid cross-contamination. This is especially important if you have pets with different coat types or skin conditions.
8. Replace Worn Out Brushes: Over time, the bristles on your slicker brush may become worn out or bent, making it less effective in grooming your pet. If you notice this, it’s time to replace the brush and get a new one.
9. Clean Regularly, Even with Infrequent Use: Even if you don’t use your slicker brush on a daily basis, it’s still important to clean it regularly. Dust, dirt, and debris can accumulate over time, so giving it a thorough cleaning every few weeks will help maintain its cleanliness and effectiveness.
By following these tips, you can ensure that your slicker brush remains clean, hygienic, and ready for efficient grooming sessions with your beloved pet.
How to deep clean a heavily soiled slicker brush
If your slicker brush is heavily soiled or has not been cleaned in a while, a deep cleaning is necessary to restore its cleanliness and effectiveness. Here’s how you can deep clean a heavily soiled slicker brush:
Step 1: Prepare a Cleaning Solution: Fill a sink or basin with warm water and add a few drops of mild soap or pet-friendly shampoo. Mix the solution to create a soapy mixture.
Step 2: Remove Excess Hair and Debris: Use your fingers or a comb to remove any loose hair and debris from the slicker brush. Discard the collected hair into a trash bin.
Step 3: Soak in the Cleaning Solution: Submerge the slicker brush in the soapy water, making sure all the bristles are completely covered. Allow the brush to soak for at least 30 minutes to loosen dirt, oils, and build-up.
Step 4: Scrub the Bristles: After soaking, use a cleaning brush or an old toothbrush to gently scrub the bristles of the slicker brush. Pay special attention to areas with stubborn dirt or trapped debris. Be careful not to apply too much pressure or damage the bristles.
Step 5: Rinse Thoroughly: Rinse the brush under running water, ensuring all the soap residue is removed. Hold the brush with bristles facing downward to ensure thorough rinsing.
Step 6: Disinfect (Optional): If necessary, you can use a pet-safe disinfectant to further sanitize the slicker brush. Follow the instructions on the disinfectant product and ensure it is thoroughly rinsed off before drying.
Step 7: Dry Completely: Pat the slicker brush dry using a clean towel or cloth to remove excess water. Then, lay the brush on a towel or hang it to air dry completely. It’s important to ensure that the brush is completely dry before using or storing it.
Step 8: Inspect and Store: After the brush is dry, inspect it for any damage or wear. Replace the brush if there are loose or damaged bristles. Store the slicker brush in a dry, well-ventilated area to prevent moisture buildup and maintain its cleanliness.
Deep cleaning a heavily soiled slicker brush may require more time and effort, but it is essential to restore its hygiene and optimal performance. By following these steps, your slicker brush will be ready to tackle any grooming task with ease.
Can you use soap or detergent to clean a slicker brush?
When it comes to cleaning a slicker brush, using soap or detergent is a common practice. However, it’s important to choose the right type of soap or detergent to ensure the safety and integrity of the brush. Here’s what you need to know:
Mild Soap or Pet-Friendly Shampoo: It is generally safe to use mild soap or pet-friendly shampoo to clean a slicker brush. These products are specifically formulated to be gentle on pets’ skin and coat. Look for soap or shampoo that is free from harsh chemicals, fragrances, and dyes. Make sure to rinse the brush thoroughly after cleaning to remove any soap residue.
Avoid Harsh Detergents or Chemicals: Harsh detergents or chemicals should be avoided when cleaning a slicker brush. These can be too harsh on the bristles and may cause damage or discoloration. Additionally, some detergents may contain ingredients that can be harmful to pets if left on the brush or transferred to their coat during grooming.
Consider Unscented or Hypoallergenic Products: If your pet has sensitive skin or allergies, it’s best to choose unscented or hypoallergenic soap or shampoo. These products are less likely to cause any skin irritations or reactions during the cleaning process.
Check Manufacturer’s Instructions: Some slicker brush manufacturers provide specific cleaning instructions or recommendations. It’s a good idea to check the manufacturer’s instructions that came with your brush to ensure you are following their guidelines for cleaning.
Thoroughly Rinse the Brush: After cleaning the slicker brush with soap or shampoo, it’s crucial to rinse it thoroughly to remove any residual soap. Lingering soap residue can be irritating to your pet’s skin and may also affect the brush’s effectiveness if not properly rinsed off.
Regular Maintenance: Apart from using soap or detergent, it’s important to regularly remove loose hair and debris from the slicker brush after each use. This helps prevent build-up and maintain the brush’s cleanliness and effectiveness.
Is it necessary to disinfect a slicker brush?
Disinfecting a slicker brush is not always necessary for regular cleaning, but there are certain situations where it can be beneficial or even necessary. Here are some factors to consider when deciding whether to disinfect a slicker brush:
1. Pet Health Conditions: If your pet has a contagious skin condition, like ringworm or mange, or if they have been infested with parasites, such as fleas or ticks, disinfecting the slicker brush is important. It helps prevent the spread of these pathogens or pests to other pets in your household.
2. Shared Brush: If you use a slicker brush on multiple pets, especially if they have different health conditions or if one is known to have parasites, disinfecting the brush between use is essential. This prevents cross-contamination and the potential spread of skin infections or parasites between pets.
3. Deep Cleaning: During a deep cleaning of a heavily soiled slicker brush, it can be a good idea to include a disinfection step. This helps ensure that any bacteria or fungi that may have built up on the brush are eliminated.
4. New Pet: If you are introducing a new pet into your household, it is recommended to disinfect the slicker brush before using it on the new pet. This reduces the risk of bringing any potential diseases or parasites from the previous owner’s pet to the new arrival.
5. Hygiene Concerns: If cleanliness and hygiene are of utmost importance to you, you may choose to disinfect the slicker brush regularly as part of your cleaning routine. This can give you peace of mind that the brush is free from any potential pathogens.
Disinfection Methods: When disinfecting a slicker brush, you can use pet-safe disinfectants or sanitizers that are specifically designed for grooming tools. Follow the instructions provided with the product and ensure thorough rinsing to remove any residual disinfectant before using the brush on your pet.
Note: It’s important to strike a balance between maintaining cleanliness and preserving the integrity of the slicker brush. Excessive use of harsh disinfectants or prolonged exposure to moisture during the disinfection process can potentially damage the brush or compromise its effectiveness.
Ultimately, the decision to disinfect a slicker brush depends on individual circumstances. It’s important to consider factors such as the health of your pet, the condition of their coat, and any specific hygiene concerns to determine whether disinfection is necessary for maintaining a clean and safe grooming routine.
How to store a clean slicker brush
Proper storage of a clean slicker brush is essential to maintain its cleanliness and prolong its lifespan. Here are some tips on how to store your slicker brush:
1. Dry the Brush: Before storing, ensure that the slicker brush is completely dry. Excess moisture can lead to mold or bacterial growth, which can compromise the brush and make it unhygienic.
2. Choose a Dry Location: Find a dry, well-ventilated area to store your slicker brush. Avoid humid environments like bathrooms or basements, as they can promote moisture accumulation.
3. Use a Brush Cover or Bag: Consider using a brush cover or a brush bag to protect the bristles of your slicker brush from dust, dirt, and other debris. This helps keep the brush clean and ready for use when needed.
4. Keep Away from Pets’ Reach: Store the slicker brush in a location where your pets cannot reach it. Dogs or cats may be tempted to chew on the bristles or play with the brush, which can damage it and pose a hazard to their safety.
5. Separate Brushes: If you have multiple slicker brushes or grooming tools, it’s best to store each one separately. This prevents the bristles from tangling or damaging each other and makes it easier to locate the specific brush you need.
6. Avoid Stacking: Avoid stacking or placing heavy objects on top of the slicker brush, as it can deform or flatten the bristles, reducing its effectiveness. Place the brush in an upright position or lay it flat in a drawer or designated storage container.
7. Regularly Inspect the Storage Area: Periodically check the storage area for any signs of moisture, pests, or damage. Make sure the area remains clean and free from any environmental factors that could compromise the condition of the brush.
8. Replace Damaged Brushes: If you notice any significant damage or wear on the slicker brush, it may be time to replace it. Damaged bristles can be less effective and potentially harm your pet’s skin during grooming.
By following these storage tips, you can ensure that your clean slicker brush remains in excellent condition, ready to provide efficient grooming and care for your beloved pet.