
Preparing the Oven
Before you begin cleaning your non self-cleaning oven, it’s important to properly prepare it to ensure efficient and safe cleaning. By taking a few simple steps, you can make the cleaning process easier and more effective.
The first step in preparing your oven is to remove any loose debris or food particles. Use a damp cloth or sponge to wipe away any crumbs or spills on the oven floor and walls. Be thorough in this step, as it will make the overall cleaning process smoother.
Next, you’ll want to disconnect the oven from its power source. This is essential for your safety while cleaning. Locate the power cord and unplug it from the electrical outlet. If your oven is hardwired, you may need to turn off the circuit breaker that supplies power to the oven.
Once the oven is disconnected from power, you can remove the oven racks. These racks can be cleaned separately, and removing them will not only make it easier to clean the oven interior but also prevent any damage to the racks during the cleaning process.
If your oven has a heating element at the bottom, you may need to remove it as well. Check the manufacturer’s instructions on how to safely remove and clean the heating element.
Lastly, it’s a good idea to protect the surrounding area from any potential messes. Lay down a towel or a sheet of plastic under and around the oven to catch any drips or spills. This will make cleanup after the cleaning process much easier.
By following these steps to prepare your oven, you’ll create a clean and safe environment for the cleaning process. Now that your oven is ready, it’s time to move on to the next steps of cleaning.
Removing the Oven Racks
One of the first steps in cleaning a non self-cleaning oven is to remove the oven racks. Over time, these racks can accumulate grease, grime, and burnt-on food residue, making them difficult to clean while inside the oven. By removing them, you can give them a thorough cleaning and make the overall cleaning process more efficient.
To remove the oven racks, start by opening the oven door fully and locating the racks inside. Depending on your oven model, there may be multiple racks stacked on different levels. Carefully pull each rack towards you until it reaches its stop position. Lift the front of the rack and then bring it towards you, sliding it out of the oven.
Place the oven racks on a protected surface such as a towel or a bathtub lined with an old towel. This will prevent any scratches or damage to other surfaces. If the racks are particularly dirty or greasy, you can soak them in warm, soapy water to help loosen the grime.
Using a non-abrasive scrub brush or sponge, scrub the oven racks thoroughly to remove any residue. Pay special attention to areas with stubborn greasy spots or burnt-on food. Rinse the racks with clean water to remove any remaining soap residue.
Once the oven racks are clean, dry them thoroughly before putting them back into the oven. Moisture on the racks can cause them to rust over time. You can use a towel or air-dry them for a few hours to ensure they are completely dry.
Remember to also clean any accessories that may have been placed on the racks, such as baking sheets or oven-safe pans. These can also accumulate grease and food debris, and cleaning them along with the oven racks will ensure a thorough cleaning of your oven.
By removing and cleaning the oven racks separately, you will not only achieve a better cleaning result but also prolong the lifespan of the racks. With the oven racks cleaned and ready, you are now prepared to move on to the next steps of cleaning your non self-cleaning oven.
Creating a Homemade Oven Cleaner
When it comes to cleaning a non self-cleaning oven, you don’t need to rely on harsh chemical cleaners. You can make your own homemade oven cleaner using simple ingredients that are effective yet safe for your oven and the environment. Creating a homemade oven cleaner is not only cost-effective but also allows you to have control over what goes into the cleaning solution.
One popular homemade oven cleaner recipe involves the use of baking soda and vinegar. Baking soda is a natural abrasive that helps to break down grease and grime, while vinegar acts as a natural degreaser and helps to loosen stubborn stains.
To create the homemade oven cleaner, you will need:
- 1 cup of baking soda
- Warm water
- Vinegar
Start by removing any loose debris from the oven. Then, mix the baking soda with enough warm water to form a thick paste. The consistency should be spreadable but not too runny.
Using a sponge or brush, apply the baking soda paste to the interior of the oven, focusing on areas with heavy grease or stains. Be sure to cover the walls, floor, and the inside of the oven door. Allow the baking soda paste to sit for at least 30 minutes or longer to allow it to penetrate and break down the grime.
While the baking soda paste is doing its work, you can prepare a vinegar spray. Fill a spray bottle with vinegar and mist it over the baking soda paste in the oven. The combination of vinegar and baking soda will create a fizzing reaction, helping to lift the dirt and grease.
Using a sponge or scrub brush, gently scrub the oven surfaces with the baking soda and vinegar mixture. Pay extra attention to any stubborn stains or heavily soiled areas. The abrasive nature of the baking soda will help in loosening the grime, while the vinegar will help to dissolve any grease.
Once you have thoroughly scrubbed the oven, use a damp cloth or sponge to wipe away the baking soda residue. Rinse the cloth or sponge frequently to ensure you are removing all the residue. It may require several rinses to remove all traces of the paste.
With the homemade oven cleaner, you can effectively remove grease and grime from your non self-cleaning oven without the need for harsh chemicals. It’s a natural and eco-friendly alternative that is safe to use. Once you have finished cleaning with the homemade oven cleaner, you can move on to the next steps of the oven cleaning process.
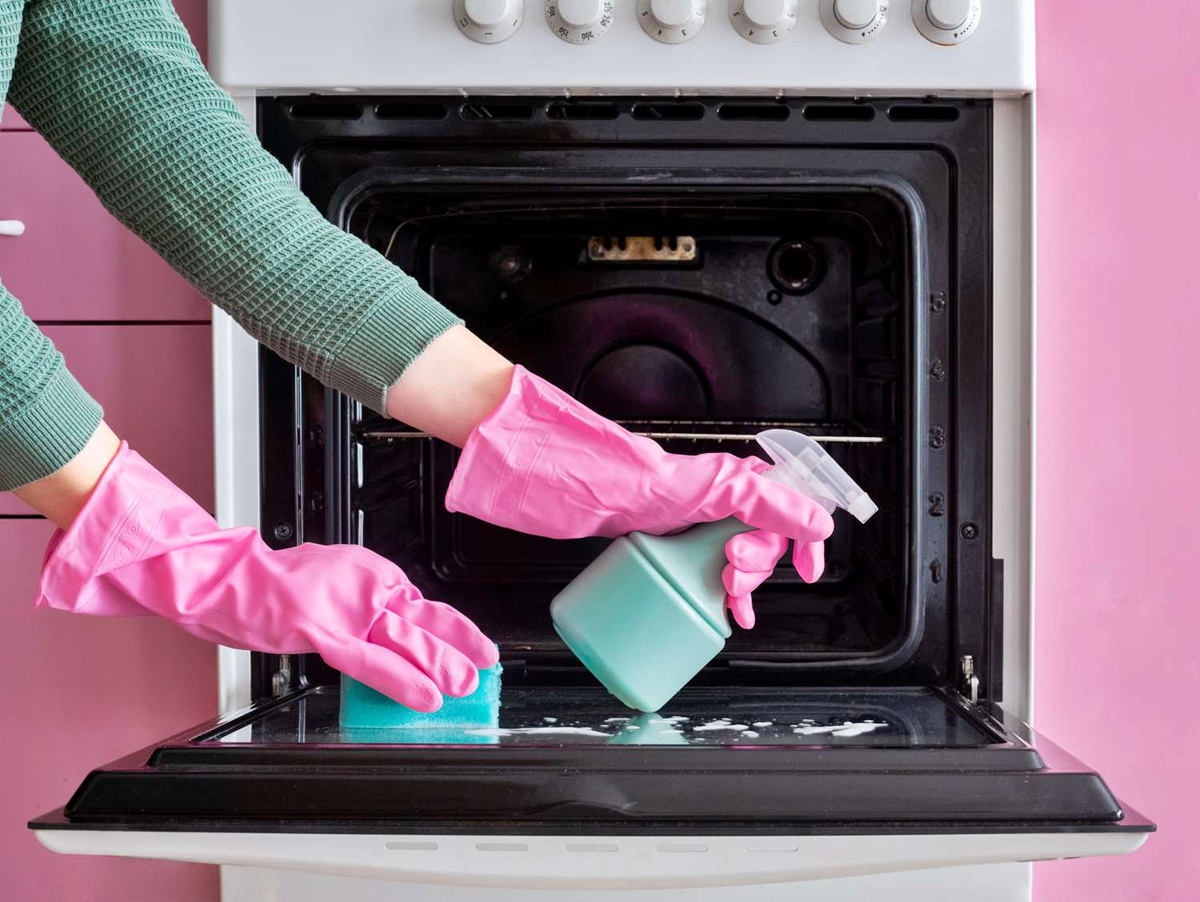
Applying the Oven Cleaner
Now that you have prepared your homemade oven cleaner, it’s time to apply it to the interior of your non self-cleaning oven. Applying the cleaner effectively and evenly will ensure that all areas are covered and that the cleaning process is efficient.
To start, make sure that your oven is cool before applying the cleaner. You don’t want to risk any burns or injuries from hot surfaces. Once it’s cool, begin by using a damp cloth or sponge to wipe away any loose debris or crumbs.
Next, take your homemade oven cleaner, which is a mixture of baking soda and vinegar, and apply it to the interior of the oven. Use a sponge or brush to spread the cleaner evenly across all surfaces, including the sides, bottom, and the inside of the oven door. Pay extra attention to areas with heavy grease or stains.
The baking soda in the cleaner acts as a gentle abrasive, helping to break down grease and grime, while the vinegar assists in loosening stubborn stains. By allowing the cleaner to sit on the surfaces for a period of time, it will have a better chance of effectively removing built-up dirt.
Once you have applied the cleaner to all areas, you can let it sit for at least 30 minutes or longer. This will allow the baking soda and vinegar to work their magic and loosen the grime. If you have particularly stubborn stains, you may want to let the cleaner sit overnight.
While the cleaner is working, you can also take this time to clean the oven racks and the oven door separately. Refer to the respective sections of this cleaning guide for detailed instructions on how to clean them.
After the cleaner has had sufficient time to work, use a sponge or scrub brush to gently scrub the surfaces of the oven. The baking soda acts as a mild abrasive, helping to dislodge dirt and grease. Be thorough in your scrubbing, paying extra attention to any areas that require additional cleaning.
As you scrub, you may notice the cleaner fizzing and bubbling. This reaction is the result of the baking soda and vinegar working together to break down the grime. Continue scrubbing until you are satisfied with the cleanliness of the oven.
Once you have finished scrubbing, use a damp cloth or sponge to wipe away the cleaner residue. Rinse the cloth or sponge frequently to ensure you are removing all traces of the cleaner. It may require multiple rinses to completely remove the residue and reveal a clean oven surface.
With the cleaner applied and thoroughly scrubbed, you have taken a significant step towards restoring your non self-cleaning oven to its sparkling clean state. The next sections will focus on cleaning the oven racks, oven door, and exterior to achieve an overall thorough cleaning.
Scrubbing and Cleaning the Oven
Now that you have applied the oven cleaner and let it sit for some time, it’s time to scrub and clean the interior of your non self-cleaning oven. This step will remove the loosened dirt, grease, and stains, leaving you with a clean and fresh oven.
Start by moistening a sponge or scrub brush with warm water. Use this damp tool to scrub the oven surfaces, focusing on areas where grease and stains are particularly stubborn. Apply gentle pressure and use circular motions to dislodge dirt and grime.
Pay special attention to the walls, floor, and inside of the oven door. These are the areas that tend to accumulate the most residue. Take your time to thoroughly scrub these surfaces, ensuring that all residue is removed.
If you encounter any stubborn stains or grease spots, you can use a paste made from baking soda and water. Apply the paste to the affected areas and let it sit for a few minutes before scrubbing. The baking soda’s abrasiveness will aid in lifting the stains, making them easier to remove.
For tough-to-reach areas, such as the corners or around the oven’s heating elements, use a small brush or an old toothbrush. These tools can help you scrub away dirt and grime from tight spots that your sponge or scrub brush may not reach effectively.
As you continue to scrub and clean the oven, rinse the sponge or scrub brush frequently. This will help eliminate any buildup of residue and ensure that you are working with a clean tool throughout the process.
After you have thoroughly scrubbed the oven, use a clean cloth or sponge dampened with water to wipe away any remaining residue. Rinse the cloth or sponge as needed. This step will remove any leftover cleaning solution and leave the oven surface fresh and clean.
Once you are satisfied with the cleanliness of the oven, take a dry cloth or towel and wipe down the interior surfaces to remove excess moisture. Ensuring that the oven is completely dry will help prevent any potential rusting or damage.
With the interior of your non self-cleaning oven scrubbed and cleaned, you are now ready to move on to cleaning the oven racks and the oven door. The next sections will guide you through the process of achieving a thorough clean for these parts of your oven.
Cleaning the Oven Racks
After scrubbing and cleaning the interior of your non self-cleaning oven, it’s time to shift your focus to the oven racks. Over time, these racks can accumulate grease, grime, and baked-on residue, requiring a separate cleaning process to get them back to their pristine condition.
To begin cleaning the oven racks, start by removing them from the oven. Refer to the earlier section on how to remove the oven racks if you need a reminder on how to safely take them out.
Once you have removed the oven racks, you can choose to clean them in your sink or bathtub, depending on their size and your preference. Place a towel at the bottom to protect the surface, and either fill the sink or bathtub with warm water and dish soap or create a cleaning solution with a mixture of warm water and vinegar.
Submerge the oven racks into the water or cleaning solution, ensuring that they are fully submerged to allow for effective cleaning. Let them soak for at least 30 minutes to loosen any built-up grime or grease.
Using a non-abrasive scrub brush or sponge, start scrubbing the oven racks. Pay close attention to any areas with stubborn stains or baked-on residue. Use gentle yet firm pressure to remove the dirt and grime.
Rinse the oven racks with clean water to wash away any remaining soap residue. Ensure that you thoroughly rinse off the cleaning solution and check that there are no traces of soap left on the racks.
After rinsing, inspect the oven racks. If there are any lingering stains or areas that still require cleaning, you can use a paste made of baking soda and water. Apply the paste to the affected areas and let it sit for a few minutes before scrubbing and rinsing again.
Once you are satisfied with the cleanliness of the oven racks, use a towel or allow them to air dry completely. Ensure that there is no moisture left on the racks, as this can lead to rust or damage over time.
With the oven racks now clean and dry, you can replace them back into the oven. Ensure that they are properly positioned on their designated grooves or support brackets.
By cleaning the oven racks separately, you ensure that they are free from grease and grime, preventing any unwanted odors and maintaining their functionality. Cleaning the oven racks is an essential step in achieving a thorough clean for your non self-cleaning oven.
Cleaning the Oven Door
The oven door is an important part of your non self-cleaning oven that should not be overlooked when it comes to cleaning. Over time, the oven door can accumulate greasy fingerprints, food splatters, and other stains that can affect its clarity and appearance. Cleaning the oven door will not only improve its overall look but also enhance your cooking experience.
To start cleaning the oven door, begin by preparing a cleaning solution. You can mix a small amount of dish soap with warm water in a bowl or use a glass cleaner that is safe for oven doors.
Dampen a soft cloth or sponge with the cleaning solution, ensuring it is not too wet to avoid water penetrating through the vents or seams of the oven door. It is crucial to use a non-abrasive cloth or sponge to prevent scratching the glass or damaging the oven door’s surface.
Gently wipe the exterior surface of the oven door with the damp cloth or sponge, paying particular attention to areas with visible stains or residue. Use even strokes and avoid using excessive force to avoid damaging the glass.
If the oven door has a window or glass panel, you can use a glass-specific cleaner to achieve a streak-free and clear finish. Spray the glass cleaner directly onto a lint-free cloth or paper towel and wipe the glass in a circular motion until it is clean and transparent.
For stubborn stains or dried-on food particles, apply a paste made of baking soda and water directly to the affected areas. Allow the paste to sit for a few minutes to loosen the debris before gently scrubbing it with a soft brush or cloth. Rinse the area with clean water and wipe it dry.
After cleaning the oven door, it’s essential to wipe it down with a clean, dry cloth or towel to remove any remaining moisture. This step helps to prevent streaks or water spots from forming on the surface of the oven door.
It’s worth noting that the oven door hinges may accumulate dirt and grime over time. If necessary, use a soft brush or cloth to clean the hinges as well.
By regularly cleaning the oven door, you can maintain its clarity and appearance, allowing you to monitor your cooking without any hindrance. A clean oven door also enhances the overall aesthetics of your non self-cleaning oven.
Cleaning the Oven Exterior
When it comes to cleaning your non self-cleaning oven, it’s essential not to forget about the exterior. Over time, the outside of your oven can accumulate dust, grease, fingerprints, and other dirt that can detract from its overall appearance. Cleaning the oven exterior will not only make it look more presentable but also help maintain its longevity by preventing the buildup of debris that could potentially affect its performance.
To begin cleaning the oven exterior, start by preparing a cleaning solution. A mild dish soap mixed with warm water is usually sufficient for most surfaces. Avoid using harsh chemicals or abrasive cleaners that could damage the oven’s exterior.
Dampen a soft cloth or sponge with the cleaning solution, making sure it is not too wet. Gently wipe down the exterior surfaces of the oven, including the top, sides, front, and control panel. Pay attention to areas that are prone to grease or dirt buildup, such as the handle and control knobs.
If there are any tough stains or stubborn grease marks, you can create a paste using baking soda and water. Apply the paste directly to the affected areas and let it sit for a few minutes to loosen the dirt. Then, gently scrub with a soft brush or cloth to remove the stains. Rinse the area with clean water and wipe it dry.
For stainless steel surfaces, it’s important to use a cleaner specifically designed for stainless steel. Apply the cleaner according to the manufacturer’s instructions and use a soft cloth to gently wipe down the stainless steel surfaces. Wipe in the direction of the grain to prevent scratching or damaging the surface.
Don’t forget to clean any vents or crevices around the oven exterior. Use a soft brush or the brush attachment of a vacuum cleaner to remove dust and other debris from these areas. Pay attention to any ventilation holes to ensure they are clear from obstruction.
Once you have wiped down the oven exterior, use a clean, dry cloth or towel to remove any remaining moisture. This step helps to prevent streaks or water spots from forming on the surface of the oven.
In addition to the regular cleaning, it’s good practice to periodically inspect the oven exterior for any signs of damage or wear. Check for loose knobs, cracked panels, or any other issues that may require maintenance or repair.
By regularly cleaning the oven exterior, you can keep it looking its best while ensuring that it functions properly and remains in good condition for years to come.
Removing Stubborn Stains
While cleaning your non self-cleaning oven, you may encounter stubborn stains that require some extra effort to remove. These stains could be the result of baked-on food residue, grease splatters, or other tough-to-remove substances. With the right techniques and a little patience, you can effectively tackle these stubborn stains and restore the beauty of your oven.
One method for removing stubborn stains is using a paste made from baking soda and water. Mix these two ingredients together to form a thick paste. Apply the paste directly to the stain and let it sit for a few minutes to allow the baking soda to work its magic. Then, gently scrub the stained area with a soft brush or sponge. The abrasive nature of the baking soda will help lift the stain without damaging the interior of the oven.
If the stain persists, you can also try using a mixture of equal parts vinegar and water. Apply this solution to the stain and let it sit for a few minutes. Vinegar is a natural degreaser and can help break down stubborn stains. After allowing the vinegar solution to work, scrub the stain again with a soft brush or sponge. Rinse the area with clean water to remove any residue.
For particularly tough stains that do not respond to baking soda or vinegar, you may need to rely on a commercial oven cleaner. Be sure to choose a cleaner specifically designed for use in non self-cleaning ovens. Follow the instructions on the cleaner’s packaging carefully, as different products may have different application methods and contact times. Always wear gloves and work in a well-ventilated area when using commercial cleaners.
If you are concerned about using chemicals, you can also try using a steam cleaner specifically designed for ovens. Steam cleaning can be a highly effective method for removing stubborn stains and baked-on residue. Steam cleaners use the power of steam to penetrate and loosen dirt, making it easier to wipe away stains.
Remember, when dealing with stubborn stains, it’s important to remain patient and persistent. Some stains may require repeated scrubbing or the use of different cleaning methods. Avoid using harsh scrub brushes or abrasive materials that could damage the oven’s interior.
By using the right techniques and cleaning agents, you can successfully remove stubborn stains from your non self-cleaning oven. With some effort and dedication, you can achieve a spotless and beautiful oven interior.
Odor Removal
Over time, your non self-cleaning oven may develop unpleasant odors due to accumulated grease, burnt-on food residue, or other cooking-related factors. These odors can affect the overall freshness of your kitchen and even impact the taste of your prepared meals. Fortunately, there are several effective methods you can use to eliminate these odors and maintain a clean and pleasant-smelling oven.
One of the simplest ways to remove odors from your oven is by using baking soda. Baking soda is a natural deodorizer that can help absorb and neutralize unpleasant smells. Start by sprinkling a generous amount of baking soda on the bottom of your oven. Leave the baking soda in place for a few hours or overnight, allowing it to absorb the odors. Then, use a damp cloth or sponge to wipe away the baking soda, along with the absorbed odors. Repeat this process if necessary.
Vinegar is another effective option for odor removal. Fill a heat-safe dish or bowl with white vinegar and place it on the top rack of your oven. Heat the oven to a low temperature, around 250°F (121°C), and leave the vinegar inside for about 30 minutes. The heat will help activate the vinegar, which will naturally eliminate the odors. After the allotted time, turn off the oven and allow it to cool. Remove the dish of vinegar and discard it. This method will not only remove odors but also leave your oven smelling fresh.
Lemon is known for its natural fresh scent and deodorizing properties. Cut a lemon in half and squeeze its juice into a heat-safe dish or bowl. Place the lemon halves in the dish as well. Similar to the vinegar method, heat the oven to a low temperature and leave the lemon inside for about 30 minutes. The heat will release the lemon’s scent, effectively eliminating any unpleasant odors. Once again, allow the oven to cool before removing the dish and lemon halves.
If you prefer a commercial solution, there are odor-eliminating sprays specifically designed for ovens available on the market. Follow the manufacturer’s instructions for usage and apply the spray as directed. These sprays often contain enzymes that break down and neutralize the odorous particles, leaving your oven smelling clean and fresh.
In addition to these odor removal methods, it’s essential to practice good ventilation while cooking and properly dispose of any food waste, grease, and spills. Regularly cleaning your oven will also help prevent odors from building up over time.
By utilizing these odor removal techniques and maintaining good cleaning habits, you can ensure that your non self-cleaning oven remains free from unwanted odors, allowing you to enjoy a fresh and delightful kitchen environment.
Reassembling the Oven
After thoroughly cleaning your non self-cleaning oven, it’s time to reassemble it and prepare it for use. Properly reassembling the oven ensures that all components are in their correct places, allowing for efficient and safe operation. Follow these steps to successfully reassemble your oven:
The first step is to replace the oven racks. Take the clean and dry oven racks that you removed earlier and position them back into the oven. Ensure that they are properly aligned with the grooves or support brackets, allowing them to slide in smoothly. Double-check that the racks are securely in place.
If you have removed any heating elements during the cleaning process, make sure to reinstall them correctly. Refer to the oven’s manual or specific instructions for your oven model to ensure proper placement and connection of the heating elements.
Once the oven racks and heating elements are in place, close the oven door gently but firmly to ensure a tight seal. Check that the door closes completely and securely without any gaps.
Now, it’s time to reconnect the power to the oven. If your oven has a power cord, plug it back into the electrical outlet. If it is hardwired, turn on the circuit breaker that supplies power to the oven. Confirm that the oven is receiving power by checking the display or indicator lights, if applicable.
Before using your oven for cooking, it’s advisable to do a test run. Set the oven to a low temperature, around 200°F (93°C), and allow it to preheat for a short period. This will help burn off any remaining residue or cleaning agent, and ensure that your oven is ready for use.
During the test run, you may notice a slight odor or smoke as any residual cleaning products or contaminants burn off. This is normal and should dissipate quickly. If the odor persists or is strong, ventilate the area by opening windows or turning on a kitchen exhaust fan.
After the test run, check that all functions of the oven are working correctly. Ensure that the temperature control, timer, and any other features are functioning as expected.
With the oven reassembled and properly functioning, you are now ready to use it for cooking your favorite recipes. Remember to follow proper safety precautions when operating the oven and continue to maintain its cleanliness regularly to ensure optimal performance and longevity.
Tips for Maintaining a Clean Oven
Keeping your non self-cleaning oven clean not only ensures a pleasant cooking experience but also prolongs the lifespan of the appliance. Follow these tips to maintain a clean and well-functioning oven:
1. Clean up spills promptly: Accidents happen, but it’s crucial to address spills and drips as soon as they occur. Wipe up any spills or food debris inside the oven as soon as it has cooled down. This prevents them from baking onto the surfaces and becoming more difficult to remove later.
2. Use oven-safe containers: When cooking or baking, opt for oven-safe dishes and containers that are less likely to spill or overflow. Using oven-safe pans, baking sheets, and pots will help minimize the chances of food dripping and causing unwanted messes inside the oven.
3. Place a baking sheet or foil under dishes: To catch any potential spills or drips, place a baking sheet or aluminum foil on the lower rack of the oven. This provides an extra layer of protection, making cleanup easier and preventing the need for extensive oven cleaning.
4. Use oven liners: Consider using oven liners or mats on the bottom of the oven to catch any spills or drips. These liners can be easily removed and cleaned, helping to prevent any buildup of residues on the oven floor.
5. Regularly clean oven racks: Remove and clean the oven racks separately on a regular basis to prevent grease buildup. Soaking them in warm, soapy water or using a baking soda paste can help remove stubborn stains and grime.
6. Wipe down the exterior regularly: Don’t forget to clean the exterior of your oven as well. Wipe it down regularly with a damp cloth to remove fingerprints, grease, and dust. Use a stainless steel cleaner for stainless steel surfaces.
7. Avoid using harsh chemicals: Stick to non-abrasive, mild cleaning agents when cleaning your oven. Harsh chemicals can damage the oven’s surfaces and leave strong odors. Baking soda, vinegar, and dish soap are effective, safe alternatives for most cleaning tasks.
8. Practice good ventilation: Proper ventilation is essential during cooking to prevent smoke and unwanted odors from lingering in the oven. Use the oven’s range hood or a kitchen exhaust fan to keep the air circulating and minimize the buildup of cooking odors.
9. Schedule regular deep cleanings: In addition to routine maintenance, plan for periodic deep cleanings to thoroughly remove any accumulated grease and grime. This could be done every three to six months or as needed, depending on your cooking habits.
10. Follow the manufacturer’s instructions: Always consult the manufacturer’s manual for specific cleaning recommendations and any precautions related to your oven model. Following the instructions will ensure that you maintain the oven’s warranty and avoid unintended damage.
By incorporating these tips into your oven maintenance routine, you can enjoy a clean and efficient non self-cleaning oven for years to come. Regular care and maintenance will not only keep your oven looking its best but also contribute to better tasting and more enjoyable meals.