
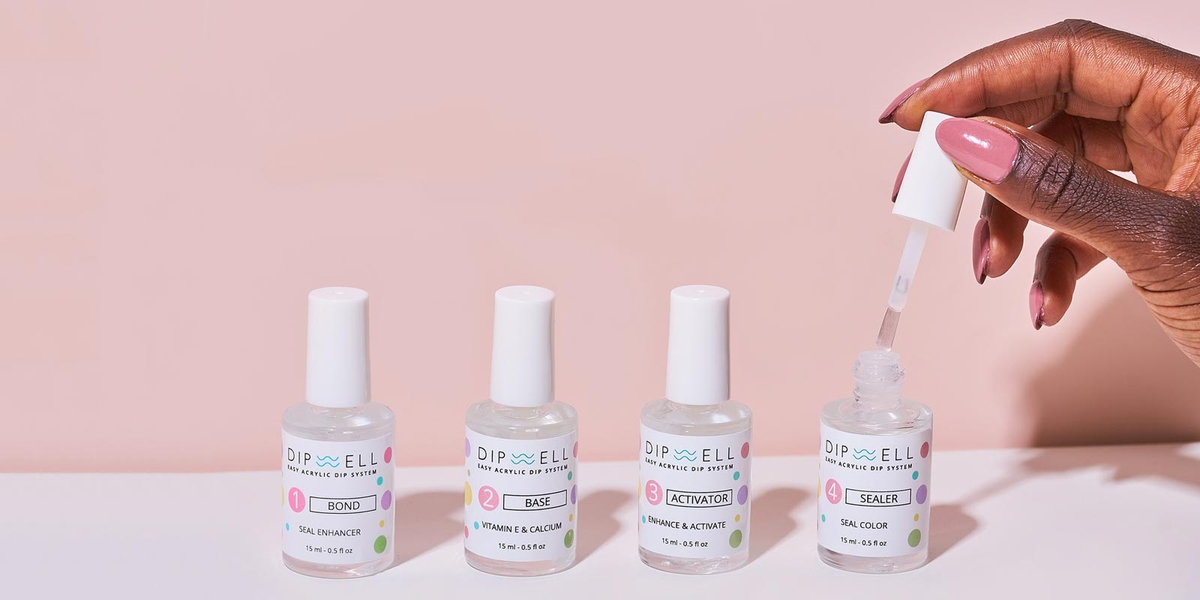
Reasons to Clean Your Dip Powder Brush
Keeping your dip powder brush clean is essential for maintaining the quality of your manicure and ensuring optimal application. Here are a few key reasons why cleaning your dip powder brush on a regular basis is important:
- Hygiene: Over time, your dip powder brush collects dust, debris, and remnants of old nail powders. Failure to clean your brush can lead to the buildup of bacteria, increasing the risk of infections and spreading germs. Regular cleaning helps maintain good hygiene and keeps your nails healthy.
- Color Accuracy: If you don’t clean your dip powder brush thoroughly between colors, old pigments can mix with new ones, resulting in a muddy or distorted shade. By cleaning your brush properly, you ensure that each color remains true to its original pigment, allowing for precise and vibrant nail designs.
- Longevity: Regular cleaning extends the lifespan of your dip powder brush. Over time, excess powder can accumulate inside the bristles, making them hard and clumpy. This affects the brush’s performance, making it less efficient when picking up and applying powder. By cleaning your brush regularly, you help maintain its original shape, softness, and effectiveness.
- Smooth Application: A clean brush allows for a smoother and more even powder application. When the bristles are free from any residue, they can easily grip the powder, resulting in a more controlled and precise application. This leads to a flawless and professional-looking manicure every time.
- Prevent Cross-Contamination: If you use your dip powder brush on multiple clients or share it with others, it’s crucial to clean it thoroughly between uses to prevent cross-contamination. This helps eliminate the risk of transferring bacteria, fungi, or other nail infections from one person to another.
By prioritizing the cleanliness of your dip powder brush, you not only ensure the longevity and effectiveness of the brush, but also promote overall nail hygiene and create stunning manicures that reflect your attention to detail and professionalism.
How Often Should You Clean Your Dip Powder Brush?
Proper maintenance and cleaning of your dip powder brush are crucial for optimal performance and long-lasting use. However, the frequency at which you clean your brush may vary depending on several factors. Here are some guidelines to help you determine how often you should clean your dip powder brush:
- After Each Use: It is recommended to clean your dip powder brush after every use. This ensures that any leftover powder is completely removed from the bristles, preventing it from hardening and affecting the brush’s performance.
- Between Color Changes: If you are using different colors in the same session, it’s essential to clean your brush thoroughly between color changes. This prevents color contamination and ensures accurate color application.
- When the Bristles Become Stiff or Clumpy: If you notice that the bristles of your dip powder brush have become stiff or clumpy, it’s a clear sign that it needs cleaning. Excess powder build-up can cause the bristles to lose their flexibility, making it challenging to pick up the powder effectively.
- When Changing Nail Shapes: If you change your nail shape, such as going from square to almond or coffin, consider cleaning your brush to remove any old powder remnants or shape-specific residue. This helps maintain the integrity of your new shape and ensures precise application.
- Professional Use: If you are a nail technician and frequently use your dip powder brush on multiple clients, cleaning it after each client is essential. This helps prevent cross-contamination and ensures a hygienic environment for both you and your clients.
Ultimately, the frequency of cleaning your dip powder brush depends on how often you use it and the specific circumstances surrounding its use. However, it’s always better to err on the side of caution and clean your brush more frequently than not. This ensures that you consistently achieve beautiful and flawless manicures while maintaining the longevity of your brush.
Supplies Needed to Clean Your Dip Powder Brush
When it comes to cleaning your dip powder brush, having the right supplies is essential to ensure effective and thorough cleaning. Here are the necessary items you’ll need to clean your dip powder brush:
- Acetone or Nail Polish Remover: Acetone or nail polish remover is a crucial ingredient in cleaning your dip powder brush. It helps to dissolve and remove any residual powder or polish from the bristles.
- Cotton Balls or Pads: You’ll need cotton balls or pads to apply the acetone or nail polish remover. These absorbent materials help assist in the cleaning process and ensure the removal of any debris from the brush.
- Mild Soap or Brush Cleaner: To thoroughly cleanse your dip powder brush, you can use a mild soap or a specialized brush cleaner. These products help remove any remaining residue and thoroughly clean the bristles.
- Bowl or Container: A bowl or container is useful for holding the acetone or nail polish remover during the cleaning process. Ensure that the container is deep enough to fully submerge the bristles of your brush.
- Tweezers or Brush Cleaning Tool: Tweezers or a brush cleaning tool can be handy for gently removing any stubborn powder or polish from the bristles. These tools help to restore the brush’s original shape and cleanliness.
- Towel or Paper Towel: Having a towel or paper towel nearby allows you to dry your brush after cleaning, removing any excess liquid and ensuring it is ready for future use.
By having these supplies readily available, you’ll be well-equipped to clean your dip powder brush effectively and ensure its longevity. It’s important to prioritize the cleanliness of your brush to maintain optimal performance and achieve flawless manicures.
Step-by-Step Instructions on How to Clean Your Dip Powder Brush
Cleaning your dip powder brush is a simple and essential task to maintain its performance and prolong its lifespan. Follow these step-by-step instructions to effectively clean your brush:
- Prepare the Supplies: Gather all the necessary supplies, including acetone or nail polish remover, cotton balls or pads, mild soap or brush cleaner, a bowl or container, tweezers or a brush cleaning tool, and a towel or paper towel.
- Remove Excess Powder: Begin by gently tapping your brush against a clean surface or flicking it to remove any loose or excess powder. This step helps get rid of as much loose residue as possible before cleaning.
- Soak the Brush: Pour enough acetone or nail polish remover into a bowl or container to fully submerge the bristles of your brush. Place the brush in the liquid and let it soak for about 10-15 minutes. This helps to dissolve any remaining powder or polish.
- Clean the Bristles: Take a cotton ball or pad and saturate it with acetone or nail polish remover. Gently but firmly swipe the bristles of the brush back and forth on the saturated cotton ball or pad. Continue this motion until no more residue comes off onto the cotton. Repeat as necessary until the brush appears clean.
- Rinse the Brush: Rinse the brush under lukewarm water to remove any remaining acetone or nail polish remover. Be sure to rinse the bristles thoroughly to eliminate any potential residue.
- Wash the Brush: Apply a small amount of mild soap or brush cleaner to the bristles and gently massage it into the brush. Rinse the brush once again under lukewarm water to remove the soap or cleaner.
- Dry the Brush: Use a clean towel or paper towel to gently squeeze out any excess water from the bristles. Gently reshape the brush with your fingers or tweezers, ensuring the bristles are in their original shape. Lay the brush flat on a towel or paper towel and let it air dry completely.
Remember to clean your dip powder brush after each use, especially when switching colors, to maintain its cleanliness and performance. By following these simple steps, you’ll keep your brush in excellent condition and ensure flawless and beautiful manicures every time.
Alternative Methods to Clean Your Dip Powder Brush
While the traditional method of cleaning your dip powder brush with acetone or nail polish remover works effectively, there are alternative methods you can explore. These methods may provide additional options based on your preferences or availability of supplies. Here are a few alternative methods to clean your dip powder brush:
- Brush Cleaning Solution: Instead of using acetone or nail polish remover, you can try a specialized brush cleaning solution. These solutions are specifically formulated to clean and disinfect makeup brushes and can be effective in removing dip powder residue from your brush.
- Isopropyl Alcohol: Isopropyl alcohol can be used as an alternative to acetone or nail polish remover. It effectively breaks down and removes dip powder residue from the bristles. Simply soak the brush in a small container of isopropyl alcohol, swirl it around to loosen the powder, and then gently wipe clean with a cotton pad or paper towel.
- Brush Shampoo or Baby Shampoo: Another alternative is to use brush shampoo or baby shampoo. These gentle cleansers can effectively remove dip powder residue without damaging the bristles. Apply a small amount of shampoo to the bristles, lather it up by swirling the brush in your palm or on a textured silicone mat, and then rinse thoroughly with lukewarm water.
- Vinegar Solution: A vinegar solution can be an effective alternative for cleaning dip powder brushes. Mix equal parts white vinegar and warm water in a bowl or container, then soak the brush in the solution for about 15 minutes. Afterward, gently wipe the bristles with a clean cloth or paper towel to remove any remaining residue.
- Brush Cleaning Mat: Investing in a brush cleaning mat can help facilitate the cleaning process. These textured mats have ridges and grooves that help loosen and remove stubborn dip powder residue from the bristles. Simply swirl the brush on the mat with a cleaning solution or soap to dislodge the powder.
It’s important to note that when using alternative methods, you should still follow proper cleaning techniques and ensure that the brush is thoroughly rinsed and properly dried to maintain its integrity and effectiveness.
By exploring these alternative cleaning methods, you can find the one that best suits your preferences and supplies, ensuring your dip powder brush remains clean and ready for flawless manicures.
How to Properly Store Your Dip Powder Brush
Proper storage of your dip powder brush is just as important as cleaning it regularly. By storing your brush correctly, you can help maintain its shape, cleanliness, and overall performance. Follow these guidelines on how to properly store your dip powder brush:
- Clean and Dry the Brush: Before storing your dip powder brush, make sure it is clean and completely dry. Any residual moisture can lead to the growth of bacteria or mold. Allow the brush to air dry thoroughly after cleaning.
- Protect the Bristles: To protect the bristles of your dip powder brush, consider using a brush cap or brush guard. These protective covers help prevent the bristles from getting bent or damaged during storage.
- Store in an Upright Position: The best way to store your dip powder brush is in an upright position. This helps maintain the shape of the bristles and prevents them from becoming misshapen or splayed. You can use a brush holder or a cup to keep the brush upright.
- Avoid Exposure to Moisture: Moisture can damage the bristles and promote bacterial growth. Store your dip powder brush in a dry and well-ventilated area, away from humid environments such as bathrooms or near sinks.
- Separate From Other Brushes: If you have multiple nail brushes or makeup brushes, it’s best to store your dip powder brush separately. Mixing brushes can lead to cross-contamination or transfer of product residue, compromising the cleanliness and efficacy of your dip powder brush.
- Keep Away From Direct Sunlight: Direct sunlight can cause the bristles of your dip powder brush to fade or become brittle over time. Choose a storage location that is away from direct sunlight to preserve the quality of your brush.
- Regularly Inspect and Replace: It’s important to regularly inspect your dip powder brush for any signs of wear or damage. If you notice bent or frayed bristles, it may be time to replace your brush to ensure optimal performance.
By following these simple guidelines, you can ensure that your dip powder brush remains clean, protected, and ready for use whenever you need it. Proper storage not only preserves the lifespan of your brush, but it also helps you achieve flawless and professional-looking manicures.
Tips for Maintaining a Clean Dip Powder Brush
Maintaining a clean dip powder brush is essential for achieving flawless manicures and prolonging the lifespan of your brush. Here are some valuable tips to help you maintain a clean dip powder brush:
- Clean Immediately: Clean your dip powder brush immediately after each use. This prevents any leftover powder from hardening and becoming difficult to remove.
- Use a Brush Cleaning Solution: Invest in a specialized brush cleaning solution. These solutions are designed specifically for cleaning makeup brushes and are effective in removing dip powder residue from the bristles.
- Be Gentle: When cleaning your brush, be gentle to avoid damaging the bristles. Use light pressure and gentle swirling motions to remove any residue.
- Dry Properly: Ensure that your dip powder brush is completely dry before storing it. Excess moisture can lead to bacterial growth and compromise the cleanliness of your brush.
- Store Separately: Store your dip powder brush separately from other brushes to prevent cross-contamination. The residue from other brushes can transfer onto your dip powder brush, affecting the quality of your manicures.
- Deep Clean Regularly: In addition to cleaning after each use, deep clean your dip powder brush at least once a month. This ensures a thorough removal of any leftover residue that may accumulate over time.
- Replace When Necessary: Regularly inspect your dip powder brush for any signs of wear or damage. If the bristles become bent, frayed, or lose their shape, it may be time to replace the brush for optimal performance.
- Avoid Sharing: While it may be tempting to share your dip powder brush with others, it’s best to avoid doing so. Sharing brushes can lead to the transfer of bacteria or other infections.
- Use Brush Caps: Consider using brush caps or protectors to keep the bristles of your dip powder brush in excellent condition during storage. These caps help maintain the shape and cleanliness of the brush.
- Keep an Extra Brush: It’s always a good idea to have an extra dip powder brush on hand. This allows you to use one brush while the other is being cleaned and dried.
By following these tips, you can ensure that your dip powder brush remains clean, hygienic, and ready for flawless manicures every time. Taking proper care of your brush ensures optimal performance and longevity, allowing you to achieve professional-level results.
Common Mistakes to Avoid When Cleaning Your Dip Powder Brush
While it’s important to clean your dip powder brush regularly, there are certain mistakes that can compromise its cleanliness and effectiveness. Avoiding these common mistakes will help ensure that your brush stays in excellent condition and delivers flawless manicures. Here are some key mistakes to avoid when cleaning your dip powder brush:
- Using Harsh Chemicals: Avoid using harsh chemicals or cleaning solutions that can damage the bristles of your brush. Stick to gentle and mild cleansers specifically formulated for brush cleaning.
- Scrubbing Too Vigorously: Scrubbing your dip powder brush too vigorously can cause the bristles to fray or lose their shape. Use gentle motions and avoid excessive force to prevent damage to the brush.
- Skipping Rinse Steps: Thoroughly rinsing your dip powder brush after cleaning is essential to remove any leftover residue from the bristles. Skipping the rinsing step can leave behind product buildup, affecting future application.
- Forgetting to Dry Properly: Allowing your dip powder brush to air dry completely is crucial before storing it. Neglecting proper drying can lead to microbial growth and compromise the cleanliness of the brush.
- Storing the Brush While Damp: Never store your dip powder brush while it is still damp. This creates an environment where bacteria can thrive and compromise the quality of your brush.
- Not Cleaning Between Color Changes: Failing to clean your dip powder brush between color changes can result in cross-contamination and affect the accuracy of color application. Always clean the brush thoroughly when switching to a new color.
- Using Hot Water: Avoid using hot water to clean your dip powder brush, as it can damage the bristles and affect their shape. Stick to lukewarm or room temperature water for cleaning.
- Not Replacing Worn-Out Brushes: Over time, the bristles of your dip powder brush may become worn out, bent, or frayed. Continuing to use a brush in this condition can compromise its performance. Replace your brush when necessary to maintain optimal results.
- Sharing Your Brush: Sharing your dip powder brush with others increases the risk of cross-contamination and the spread of bacteria or infections. It’s best to use your own brush and avoid sharing with others.
- Ignoring Regular Cleaning: Consistency is key when it comes to cleaning your dip powder brush. Ignoring regular cleaning can lead to a buildup of residue and negatively impact the performance of the brush.
By avoiding these common mistakes, you can ensure that your dip powder brush remains clean, hygienic, and in optimal condition. Taking proper care of your brush will help you achieve stunning manicures and maintain the longevity of your brush.
Frequently Asked Questions about Cleaning Dip Powder Brushes
When it comes to cleaning dip powder brushes, you may have questions or concerns about the process. Here are some frequently asked questions and their answers to help clarify any uncertainties:
- Q: How often should I clean my dip powder brush?
A: It is recommended to clean your dip powder brush after every use to prevent residue buildup. Additionally, thorough cleaning between color changes is important to prevent color contamination and ensure accurate application. - Q: Can I use regular soap to clean my dip powder brush?
A: Regular soap may not be as effective in removing dip powder residue. It is recommended to use a mild soap or a specialized brush cleaner designed for removing makeup or nail product residue. - Q: Can I clean my dip powder brush with just water?
A: While rinsing your brush with water can help remove loose residue, it may not be sufficient for a thorough cleaning. Acetone or nail polish remover is typically used to dissolve and remove dip powder residue effectively. - Q: How should I dry my dip powder brush after cleaning?
A: After cleaning, gently squeeze out excess water from the bristles using a clean towel or paper towel. Allow the brush to air dry completely before storing it to prevent bacterial growth. - Q: Can I use the same brush for different dip powder colors?
A: It is not recommended to use the same brush for different dip powder colors without proper cleaning in between. Without cleaning, leftover pigments can mix, resulting in inaccurate color application and muddy shades. - Q: How do I know when it’s time to replace my dip powder brush?
A: Keep an eye out for signs of wear, such as bent or frayed bristles, loss of shape, or decreased performance. If your brush is no longer functioning as it should, it’s time to consider replacing it. - Q: Can I share my dip powder brush with others?
A: It is generally best to avoid sharing your dip powder brush with others, as it can lead to cross-contamination or the spread of infections. It’s recommended to use your own brush for hygienic purposes. - Q: Can I clean my dip powder brush with vinegar?
A: Yes, you can use a vinegar solution as an alternative to acetone or nail polish remover. Mix equal parts white vinegar and warm water, soak the brush, and then gently wipe clean to remove dip powder residue.
By addressing these frequently asked questions, you can gain a better understanding of how to properly clean your dip powder brush and address any concerns you may have. Remember, maintaining a clean brush is essential for achieving beautiful and professional-looking manicures.
Final Thoughts on Cleaning Your Dip Powder Brush
Cleaning your dip powder brush is a crucial step in maintaining the quality of your manicures and ensuring optimal performance. By regularly cleaning your brush, you not only remove residue and prevent color contamination but also promote overall nail hygiene and prevent the spread of infections.
Remember to clean your dip powder brush after each use and between color changes to maintain its cleanliness and accuracy. Use the proper supplies, such as acetone or nail polish remover, cotton balls or pads, and a mild soap or brush cleaner, to effectively remove residue from the bristles.
Proper storage is equally important to preserve the longevity and performance of your dip powder brush. Store it upright, protect the bristles with a brush cap or guard, and keep it in a dry and well-ventilated area away from direct sunlight.
In case you encounter any challenges or have questions about cleaning your dip powder brush, refer to the frequently asked questions section for guidance. Avoiding common mistakes, such as using harsh chemicals, scrubbing too vigorously, or sharing your brush, will help ensure that your brush remains in excellent condition.
By maintaining a clean dip powder brush, you are not only enhancing the cleanliness and accuracy of your application but also promoting the overall quality and longevity of your brush. With a clean brush at your disposal, you can achieve flawless and professional-looking manicures that reflect your attention to detail and commitment to nail care.