
Why Cleaning Your Roller Brush is Important
Regularly cleaning your roller brush is an essential task that often gets overlooked. Whether you use a roller brush for painting, applying sealant, or even grooming your pet, keeping it clean is crucial for maintaining its effectiveness and longevity. Here are a few reasons why cleaning your roller brush should be a top priority:
- Improved Performance: Over time, debris, paint residue, and other substances can build up on your roller brush, causing it to become less efficient. A dirty roller brush can result in streaks, clumps, or uneven paint application, compromising the quality of your finish. By cleaning your roller brush, you can ensure that it operates at its optimal level, providing smooth and even coverage every time.
- Extend the Lifespan: A clean roller brush has a longer lifespan compared to a dirty one. When paint or other materials dry on the brush, they can harden the bristles, making them stiff and less effective. This can lead to bristle breakage or shedding, reducing the brush’s durability and effectiveness. Regular cleaning helps remove these deposits, preserving the brush’s bristles and overall functionality.
- Prevent Contamination: If you use your roller brush for multiple types of paints or substances, not cleaning it thoroughly between uses can result in cross-contamination. This can affect the color and texture of your paint, leading to inconsistent results. By cleaning your roller brush after each use, you can prevent the risk of unintentionally mixing or contaminating your paint, ensuring consistent application each time.
- Health and Hygiene: Cleaning your roller brush is not only essential for maintaining its performance, but it is also crucial for your health and hygiene. A dirty roller brush can harbor bacteria, mold, and other harmful substances that can contaminate the paint or grooming products you are using. Regular cleaning helps eliminate these potential health hazards, promoting a safe and hygienic environment.
By understanding the importance of cleaning your roller brush, you can ensure that you achieve excellent results with each use and prolong its lifespan. Now that we know why it’s important to clean your roller brush, let’s explore the tools you will need to get the job done.
Tools You Will Need for Cleaning Your Roller Brush
Before you begin the process of cleaning your roller brush, it’s important to gather the necessary tools. Here are the essential items you will need:
- Warm Water: Water is the primary component for cleaning your roller brush. Make sure to use warm water, as it helps to dissolve any paint or residue more effectively.
- Mild Soap or Detergent: Choose a mild soap or detergent to use as a cleaning agent. Avoid using harsh chemicals that may damage the bristles of the brush.
- Bucket or Sink: You will need a container large enough to soak your roller brush. A bucket or sink works well for this purpose.
- Brush Cleaning Tool: A brush cleaning tool, such as a brush comb or wire brush, is useful for removing stubborn debris from the bristles of the roller brush.
- Protective Gloves: Wearing protective gloves is recommended, especially if you are using chemical cleaners. This will help keep your hands safe from any potential irritants.
- Old Cloth or Paper Towels: Keep some old cloth or paper towels nearby to dry off the roller brush after cleaning.
Having these tools ready beforehand will ensure a smooth and efficient cleaning process. Once you have gathered all the necessary tools, you can proceed with the step-by-step guide to cleaning your roller brush.
Step-by-Step Guide to Cleaning Your Roller Brush
Now that you have the necessary tools, you can follow these simple steps to effectively clean your roller brush:
- Remove Loose Debris: Start by removing any loose debris or excess paint from the roller brush. Use your hands or a scraper tool to gently remove the buildup. Take care not to damage the bristles while doing this.
- Soak in Warm Water: Fill a bucket or sink with warm water and add a mild soap or detergent. Submerge the roller brush in the water and let it soak for 10 to 15 minutes. This will help to soften any dried paint or residue on the bristles.
- Scrub the Bristles: After soaking, take a brush cleaning tool, such as a brush comb or wire brush, and gently scrub the bristles of the roller brush. Move the brush cleaning tool back and forth along the bristles to loosen any remaining paint or debris.
- Rinse Thoroughly: Once you have scrubbed the bristles, rinse the roller brush under warm running water. Continue rinsing until the water runs clear and there are no traces of soap or residue left on the brush.
- Dry the Roller Brush: After rinsing, shake off any excess water from the roller brush. Then, lay it on a clean cloth or paper towels to air dry. Make sure the brush is completely dry before using or storing it to prevent mold or mildew growth.
Following these steps will ensure that your roller brush is thoroughly cleaned and ready for future use. Now that you know how to clean a roller brush, let’s explore some tips for maintaining a clean brush and alternative cleaning methods.
Removing Loose Debris from the Roller Brush
Before you begin the process of deep cleaning your roller brush, it’s crucial to remove any loose debris or excess paint from the bristles. This initial step will make the subsequent cleaning process more effective. Here’s how to remove loose debris from your roller brush:
- Scrape off Excess Paint: If there is still wet paint on the roller brush, gently scrape off as much of it as possible using a scraper tool or the edge of a flat object. Be careful not to damage the bristles in the process.
- Use Your Hands to Remove Large Debris: With the excess paint removed, use your hands to inspect the bristles and remove any large debris. Gently run your fingers through the bristles, starting from the base and working towards the tips. This will help dislodge and remove any clumps or loose particles.
- Tap the Roller Brush: Holding the roller brush over a trash bin or drop cloth, lightly tap it against your palm or a hard surface. This tapping motion will dislodge any remaining loose debris or dried paint from the bristles. Continue tapping until no further debris falls out.
- Use a Brush Comb: If there are still stubborn debris or dried paint on the bristles, use a brush comb or wire brush to gently comb through the bristles. Start from the base of the bristles and brush towards the tips. This combing action helps remove any remaining debris that may be stuck between the bristles.
By effectively removing the loose debris from your roller brush, you set the foundation for a more thorough cleaning process. Now that we have taken care of removing loose debris, let’s move on to the next step: soaking the roller brush in a cleaning solution.
Soaking the Roller Brush in a Cleaning Solution
After removing the loose debris from your roller brush, the next step is to soak it in a cleaning solution. This helps to further break down any dried paint or residue on the bristles, making it easier to clean. Here’s how to soak your roller brush in a cleaning solution:
- Prepare a Cleaning Solution: Fill a bucket or sink with warm water, ensuring that it’s enough to completely submerge the roller brush. Add a mild soap or detergent to the water and mix it well to create a cleaning solution. Avoid using harsh chemicals that could potentially damage the bristles.
- Submerge the Roller Brush: Place the roller brush into the bucket or sink, ensuring that the bristles are fully immersed in the cleaning solution. Gently swish the brush back and forth to dislodge any remaining debris and to allow the cleaning solution to penetrate the bristles.
- Let it Soak: Allow the roller brush to soak in the cleaning solution for about 10 to 15 minutes. This soaking period helps to soften and break down any dried paint or residue on the bristles, making it easier to clean.
- Agitate the Brush: After the soaking time, use your hand or a brush cleaning tool to agitate the bristles of the roller brush. Gently rub the bristles together or lightly brush them to further loosen any trapped debris. This agitation helps to dislodge and remove stubborn residue from the bristles.
By soaking your roller brush in a cleaning solution, you allow the cleaning agents to work their magic and help break down any dried-on paint or residue. Once you’ve completed the soaking process, it’s time to move on to the next step: scrubbing the roller brush with a brush cleaning tool.
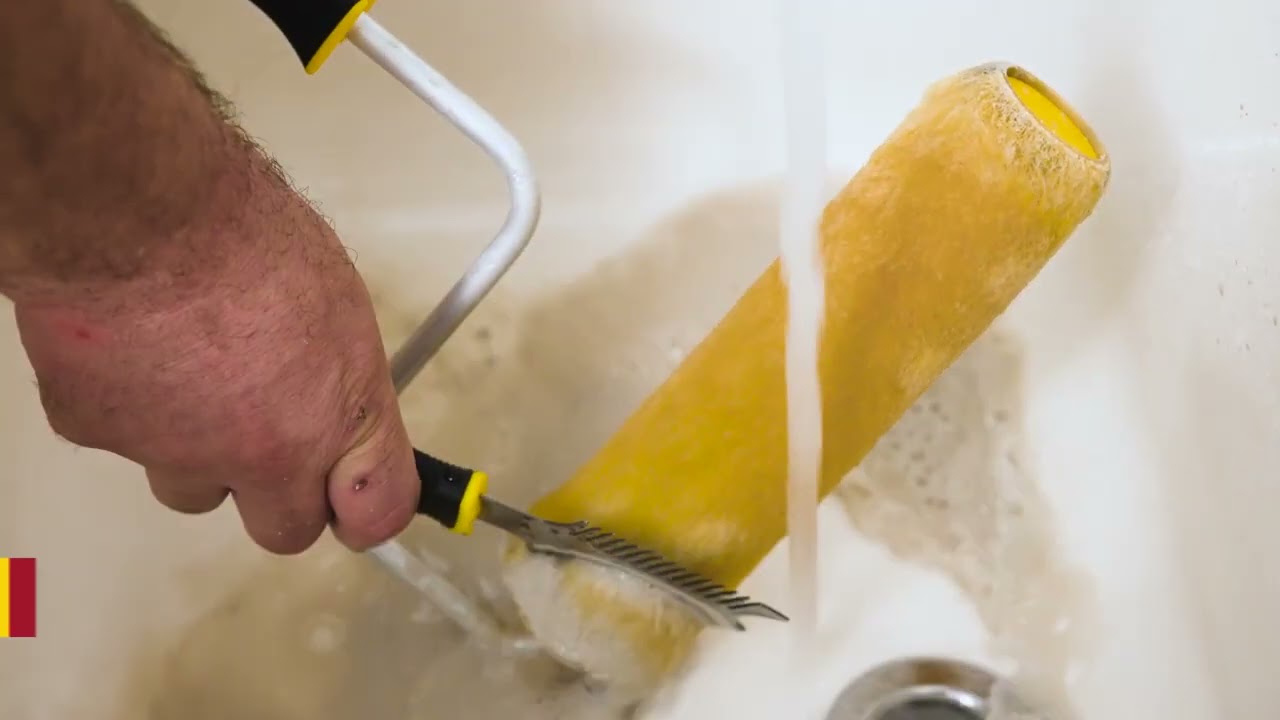
Scrubbing the Roller Brush with a Brush Cleaning Tool
After soaking your roller brush in a cleaning solution to loosen any dried paint or residue, the next step is to scrub the bristles with a brush cleaning tool. This will help remove any remnants of debris and ensure a thorough cleaning. Follow these steps to scrub your roller brush:
- Select a Brush Cleaning Tool: Choose a brush cleaning tool that is suitable for your roller brush. Options include brush combs, wire brushes, or even an old toothbrush. The goal is to use a tool with bristles or bristle-like features to effectively scrub the roller brush.
- Hold the Roller Brush: Hold the roller brush firmly with one hand, ensuring a secure grip. This will provide stability as you scrub the bristles.
- Scrub the Bristles: Take the brush cleaning tool and begin scrubbing the bristles of the roller brush. Start at the base of the bristles and work your way towards the tips, applying gentle pressure. Use a back-and-forth or circular motion to thoroughly scrub all sides of the bristles.
- Focus on Stubborn Deposits: If there are any stubborn paint or residue deposits on the bristles, spend extra time scrubbing those areas. Apply a bit more pressure or use the brush cleaning tool to target and remove the stubborn debris.
- Rinse and Repeat: After scrubbing, rinse the roller brush under warm running water to remove any loosened debris or cleaning solution. Continue rinsing until the water runs clear and there are no traces of residue left on the bristles. Repeat the scrubbing process if necessary until the bristles appear clean.
By scrubbing the roller brush with a brush cleaning tool, you can effectively remove any remaining debris and ensure a thorough clean. Once you have completed this step, the next crucial step is to rinse and dry the roller brush properly.
Rinse and Dry the Roller Brush
After scrubbing the roller brush with a brush cleaning tool, it’s important to rinse and dry it properly. This final stage of the cleaning process ensures that your roller brush is free from any remaining debris or cleaning solution. Here’s how to rinse and dry your roller brush:
- Rinse Thoroughly: Hold the roller brush under warm running water and rinse it thoroughly. Continue rinsing until the water runs clear and there are no traces of residue left on the bristles. This step helps to remove any loosened debris and cleaning solution from the brush.
- Squeeze Out Excess Water: After rinsing, gently squeeze the bristles of the roller brush to remove any excess water. Do this by starting at the base of the bristles and working your way towards the tips. Avoid twisting or wringing the bristles, as this can cause damage or misshape the brush.
- Air Dry: Lay the roller brush flat on a clean cloth or a paper towel to air dry. Ensure that the brush is placed in a well-ventilated area. Allow sufficient time for the roller brush to completely dry before using or storing it. This helps to prevent mold or mildew growth on the bristles.
- Comb the Bristles: Once the roller brush is dry, use a brush comb or your fingers to gently comb through the bristles. This step helps to restore the natural shape and fluffiness of the bristles, ensuring that they are ready for future use.
By properly rinsing and drying your roller brush, you ensure that it is free from any residue and ready to provide a clean and even application. With a clean and well-maintained roller brush, you’ll be able to achieve optimal performance for your painting or grooming projects. Now that you’ve learned how to clean and dry your roller brush, let’s explore some helpful tips for maintaining a clean brush and alternative methods for cleaning it.
Tips for Maintaining a Clean Roller Brush
Maintaining a clean roller brush not only ensures its longevity but also guarantees optimal performance for your painting or grooming tasks. Here are some helpful tips to keep your roller brush clean and in excellent condition:
- Clean Immediately: Make it a habit to clean your roller brush immediately after use. This prevents paint or other substances from drying and becoming harder to remove.
- Use the Right Cleaning Solution: Choose a mild soap or detergent that is suitable for the type of paint or substance used with your roller brush. Using the correct cleaning solution helps maintain the bristles’ integrity and prevents damage.
- Thoroughly Rinse: When rinsing the roller brush, ensure that you remove all traces of cleaning solution or debris. Residue left on the bristles can affect the quality of your next project.
- Store Properly: Store your roller brush in a clean and dry place to prevent dust or debris from accumulating on the bristles. Additionally, consider using a brush cover or plastic wrap to protect the brush from damage.
- Inspect Before Reuse: Before using the roller brush again, inspect it for any remaining debris or damage. Ensuring that the brush is clean and in good condition guarantees a smooth and flawless application.
- Replace when Necessary: Over time, the bristles of a roller brush can wear down or become damaged. If you notice any significant damage or bristle loss, it’s time to replace the brush for optimal performance.
By following these tips, you can prolong the lifespan of your roller brush and maintain its effectiveness. Remember, a clean roller brush is key to achieving professional-looking results in your painting or grooming projects. Now, let’s explore some alternative methods for cleaning a roller brush, in case you don’t have access to the traditional cleaning tools and solutions.
Alternative Methods for Cleaning a Roller Brush
If you don’t have access to the traditional cleaning tools and solutions, or if you’re looking for alternative methods for cleaning your roller brush, there are a few techniques you can try. Here are some alternative methods for cleaning a roller brush:
- Vinegar Solution: Create a mixture of warm water and vinegar, using a ratio of 3:1. Submerge the roller brush in this solution for about 15 minutes, then scrub the bristles with a brush cleaning tool. Rinse thoroughly with warm water afterwards.
- Fabric Softener Soak: Dilute fabric softener with warm water, using a ratio of 1:1. Soak the roller brush in this mixture for about 30 minutes. The fabric softener helps to break down paint or residue on the bristles. After soaking, rinse the brush thoroughly.
- Boiling Water: Boil a pot of water and carefully pour it over the bristles of the roller brush. The hot water helps to soften dried paint or debris, making it easier to remove. Use a brush cleaning tool or your hands to scrub the bristles while rinsing with warm water.
- Dish Soap and Baking Soda: Create a paste using dish soap and baking soda. Apply the paste to the bristles of the roller brush and scrub gently with a brush cleaning tool. Rinse the brush thoroughly with warm water afterwards.
- Pressure Washer: If you have access to a pressure washer, you can use it to clean your roller brush. Hold the brush securely and use the pressure washer on a low setting to rinse off the bristles, removing paint or residue.
These alternative cleaning methods can be useful if you don’t have the traditional cleaning tools or solutions readily available. However, always exercise caution and ensure that the method you choose is suitable for your roller brush. After cleaning with alternative methods, remember to rinse the roller brush thoroughly with warm water and allow it to air dry.
By trying these alternative cleaning methods, you can effectively clean your roller brush and get it ready for your next project. Now you have a variety of options to choose from, based on what works best for your specific circumstances. With a clean roller brush, you can achieve outstanding results in your painting or grooming endeavors.
Troubleshooting Common Issues with a Roller Brush
While cleaning your roller brush can help prevent and resolve many issues, sometimes there may be other common problems that you encounter. Here are some troubleshooting tips for common issues with a roller brush:
- Dry and Hard Bristles: If the bristles of your roller brush become dry and hard, try soaking them in warm water mixed with fabric softener. After soaking, rinse thoroughly and allow the brush to air dry. This method helps to restore the softness and flexibility of the bristles.
- Uneven Paint Application: If you’re experiencing streaks or uneven paint application, it could be due to a buildup of paint residue on the roller brush. Make sure to thoroughly clean the brush before each use and remove any excess paint from the bristles to ensure smooth and even coverage.
- Bristle Shedding: If you notice bristle shedding with your roller brush, it may be an indication that the brush needs to be replaced. Over time, the bristles can become worn or damaged, leading to shedding. Consider investing in a new roller brush to avoid bristle fallout during your projects.
- Sticky Roller Surface: When using a roller brush for adhesive substances like tape or glue, it may leave a sticky residue on the roller surface. To remove the stickiness, soak the roller brush in warm soapy water and scrub gently with a brush cleaning tool. Rinse thoroughly and allow it to air dry.
- Brush Marks: If you’re noticing visible brush marks after using a roller brush, it could be due to factors such as using the wrong roller cover or incorrect application technique. Make sure you’re using the appropriate roller cover for the surface and apply the paint smoothly with even pressure to minimize brush marks.
By troubleshooting these common issues with a roller brush, you can overcome challenges and achieve better results in your painting or grooming projects. Remember, proper cleaning, maintenance, and using the right technique can significantly affect the performance of your roller brush. Now armed with these troubleshooting tips, you can tackle any obstacles that come your way.