
Determine the Type of Water Filter Cartridge
When it comes to changing a water filter cartridge, the first step is to determine the type of cartridge you have. This is important because different cartridges have different installation and replacement methods. Here are a few common types of water filter cartridges:
- Carbon Filter Cartridge: This type of cartridge uses activated carbon to remove impurities and improve water taste. It is commonly used for basic filtration needs.
- Reverse Osmosis (RO) Filter Cartridge: RO cartridges use a membrane to remove contaminants through a fine filtration process. They are ideal for areas with high levels of dissolved solids.
- Sediment Filter Cartridge: Sediment filters are designed to remove debris and particles like sand, silt, and rust from the water. They are often used as a pre-filter before other types of filtration.
- UV Filter Cartridge: UV filters use ultraviolet light to kill bacteria and disinfect the water. They are commonly used in systems that require additional microbial protection.
To determine the type of cartridge you have, you can refer to the user manual or check the label on the cartridge itself. If you are unsure, you can also consult a professional or contact the manufacturer for guidance. It’s essential to know the type of cartridge you have before proceeding with the replacement to ensure that you choose the right replacement cartridge.
Once you have determined the type of water filter cartridge, you can move on to the next step of gathering the necessary tools and supplies.
Gather the Necessary Tools and Supplies
Before you can start replacing your water filter cartridge, it’s important to gather all the necessary tools and supplies. Having everything you need on hand will make the process smoother and more efficient. Here are the essential items you’ll need:
- New Cartridge: Make sure you have a compatible replacement cartridge for your specific filter system. Refer to the manufacturer’s instructions or consult a professional if you’re unsure.
- Filter Wrench: Some filter housings may require a wrench to loosen or tighten them. Check if your filter housing has this requirement and have the appropriate wrench ready.
- Bucket or Container: You’ll need a container to catch any water that may spill during the cartridge replacement process. A bucket or a large container will suffice.
- Clean Cloth or Towel: Have a clean cloth or towel handy to wipe away any dirt or residue from the filter housing or components.
- Teflon Tape: Teflon tape is useful for creating a tight seal when reconnecting water connections. It helps prevent leaks and ensures a secure fit.
- Gloves (Optional): Wearing gloves can protect your hands from any chemicals or contaminants that may be present on the old cartridge or inside the filter housing.
By gathering all these tools and supplies beforehand, you’ll be fully prepared to tackle the water filter cartridge replacement task without interruptions. It’s important to ensure that the new cartridge you have is compatible with your system to avoid any complications during the installation process.
Once you have gathered everything you need, you are ready to proceed with the next steps of shutting off the water supply and releasing pressure before removing the old cartridge.
Shut Off the Water Supply
Before you begin removing the old water filter cartridge, it is crucial to shut off the water supply to prevent any water from flowing into the system. This step will help minimize the risk of leaks and make the cartridge replacement process much easier. Follow these steps to shut off the water supply:
- Locate the main water supply valve: The main water supply valve is typically located near the water meter or where the water enters your home. It may be in a basement, utility closet, or outside on the side of the house. If you’re unsure, consult your home’s blueprints or contact a plumber.
- Turn off the main water supply valve: Use a wrench or turn the valve handle clockwise until it is completely closed. This will stop the flow of water into your home and ensure that no water enters the filtration system.
- Check for water flow: To confirm that the water supply is shut off, turn on a faucet in your home to see if water continues to flow. If no water comes out, it means the supply is successfully shut off.
It is important to shut off the water supply before proceeding with cartridge replacement to avoid any water leakage or potential damage to the filter system. By following these steps, you will ensure a smooth and hassle-free transition to the next step – releasing pressure and removing the old cartridge.
Release Pressure and Remove the Old Cartridge
Once the water supply is shut off, the next step in replacing a water filter cartridge is to release any built-up pressure in the system and remove the old cartridge. Follow these steps to complete this task:
- Open a faucet to relieve pressure: To release the pressure within the filter system, open a faucet that is connected to the system. This will allow any remaining water and pressure to escape. Wait a few moments until water flow stops completely before proceeding.
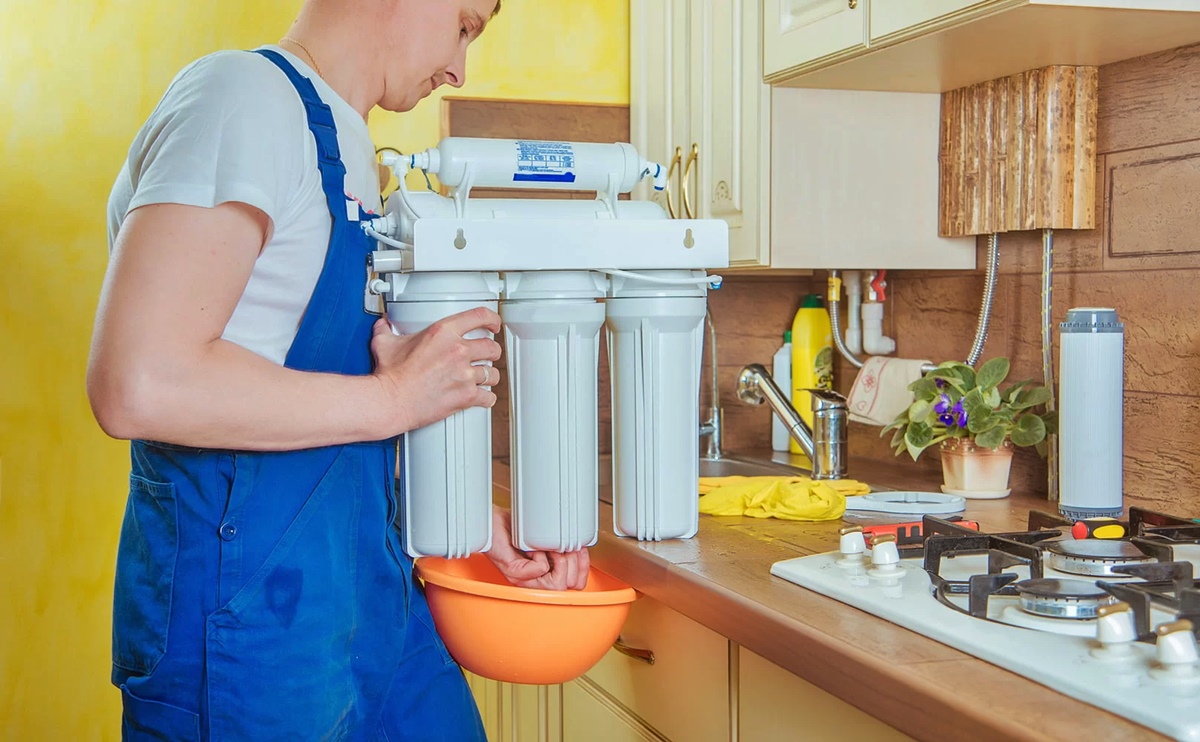
- Locate the filter housing: The water filter housing is typically cylindrical and located after the point of water entry. It may be connected to the main water line or under the sink. Consult the manufacturer’s instructions if you’re unsure about its location.
- Prepare a container: Place a bucket or a large container underneath the filter housing to catch any water that may spill during the removal process.
- Use a filter wrench: If your filter housing has grooves or requires additional tools for removal, use a filter wrench to loosen the housing. Insert the wrench onto the housing and turn it counterclockwise to loosen it and remove the housing from its mounting.
- Remove the old cartridge: With the housing removed, gently pull out the old cartridge and dispose of it properly. Be cautious as it may still contain water and debris.
Removing the old cartridge is an important step in the replacement process, as it allows for a fresh installation and continued efficient filtration. Properly disposing of the old cartridge is necessary to avoid any environmental harm. After removing the old cartridge, you can move on to the next step of cleaning the filter housing.
Clean the Filter Housing
Once you have removed the old water filter cartridge, it is essential to clean the filter housing before installing the new cartridge. Cleaning the housing will help ensure optimal performance and prevent any contaminants or debris from affecting the filtration process. Follow these steps to clean the filter housing:
- Inspect the housing for debris: Check the inside of the filter housing for any dirt, sediment, or residue that may have accumulated. Use a flashlight to get a clear view, if necessary.
- Remove larger debris: If you notice any significant debris, such as sand or large particles, use a clean cloth or paper towel to wipe it away carefully.
- Flush the housing: With the larger debris removed, rinse the filter housing with clean water. Use a mild detergent if necessary, and scrub gently with a soft brush or sponge to remove any remaining dirt or residue.
- Rinse thoroughly: After cleaning, rinse the filter housing with clean water to ensure that no detergent or cleaning solution remains inside. Thoroughly rinse the housing until the water runs clear.
- Dry the housing: Once you have completed rinsing, use a clean cloth or towel to dry the filter housing. Make sure it is completely dry before proceeding to the next step.
Cleaning the filter housing is crucial to maintain the efficiency and longevity of the water filtration system. By removing any debris or residue, you will ensure that the new cartridge functions optimally and that the filter housing remains in good condition.
With the filter housing cleaned and dried, you are now ready to proceed with the installation of the new water filter cartridge.
Install the New Cartridge
After cleaning the filter housing, the next step in replacing a water filter cartridge is to install the new cartridge. The installation process may vary slightly depending on the type of cartridge and the specific filtration system. Here are the general steps to follow:
- Check the new cartridge for any packaging or protective covers: Before installing the new cartridge, make sure to remove any packaging materials or protective covers that may be covering the cartridge.
- Inspect the cartridge for any defects: Take a moment to inspect the new cartridge for any visible defects or damage. If you notice anything out of the ordinary, contact the manufacturer for a replacement.
- Align the cartridge with the housing: Align the new cartridge with the housing, ensuring that it fits snugly and securely. Follow any specific instructions provided by the manufacturer regarding alignment or orientation.
- Insert the cartridge into the housing: Gently insert the new cartridge into the filter housing, taking care not to damage any o-rings or seals. Ensure that the cartridge is properly seated in its place.
- Tighten the filter housing: Use your hands to tighten the filter housing. If the housing requires additional tools, use them to ensure a secure fit. Be cautious not to overtighten, as this can damage the housing or seals.
It is essential to follow the manufacturer’s instructions regarding the installation of the specific cartridge and filter housing. Some cartridges may require additional steps or considerations. Take your time during this step to ensure a proper installation, as it will impact the efficiency and effectiveness of the filtration system.
Once the new cartridge is securely installed, you can move on to the next step of reconnecting the water supply and checking for any potential leaks.
Reconnect the Water Supply
After installing the new water filter cartridge, the next step is to reconnect the water supply. This will allow water to flow through the filtration system and ensure clean, filtered water throughout your home. Here’s what you need to do to reconnect the water supply:
- Inspect the filter housing and connections: Before reconnecting the water supply, check the filter housing and connections for any damage, leaks, or loose fittings. Tighten any loose connections if necessary.
- Apply Teflon tape (if needed): If your filter system requires it, wrap a few layers of Teflon tape clockwise around the threaded connections. This will help create a tight seal and prevent leaks.
- Reattach the filter housing: Align the filter housing with its mounting and carefully screw it back into place. Use your hands to tighten it securely, avoiding over-tightening to prevent damage.
- Turn on the water supply: Slowly open the main water supply valve in a counterclockwise direction. This will allow water to flow into the filter system.
- Check for leaks: After turning on the water supply, carefully inspect all connections, including the filter housing, for any signs of leakage. If you notice any leaks, tighten the connections or seek professional assistance.
It is crucial to ensure a proper connection and no leaks during this step. Properly reattaching the filter housing and checking for leaks will help maintain the integrity of the system and prevent water damage or loss of water pressure.
Once you have reconnected the water supply and checked for any leaks, you can proceed to the next step of flushing the system to remove any trapped air or loose particles.
Check for Leaks
After reconnecting the water supply and ensuring a proper installation, it is essential to check for any leaks in your water filter system. Detecting and addressing leaks promptly will help prevent water damage and ensure the effective functioning of the filtration system. Follow these steps to check for leaks:
- Observe the filter housing: Carefully inspect the filter housing and the connections to ensure there are no visible signs of water leakage. Pay close attention to the areas where the housing is attached to the system and any threaded connections.
- Check for drips or puddles: Look for any drips or puddles of water around the filter housing or connections. A small amount of water may be present initially as the system adjusts, but continuous dripping or pooling is a sign of a leak.
- Monitor water pressure: Turn on your faucets or run water through the filtration system to gauge the water pressure. If you notice a significant decrease in water pressure, it could indicate a leak somewhere in the system.
- Listen for hissing or whistling sounds: Listen for any unusual sounds, such as hissing or whistling, which could indicate a leak in the system. These sounds may accompany the flow of water through damaged or loose connections.
If you identify any leaks during the checking process, take immediate action to address them. Here are a few steps you can take to address leaks:
- Tighten connections: If you notice any loose connections, use a wrench or your hand to tighten them. Be careful not to overtighten, as it can damage the housing or connections.
- Replace faulty or damaged parts: If you discover any cracks, breaks, or damaged components, such as seals or O-rings, replace them as soon as possible. Contact the manufacturer or consult a professional for the appropriate replacement parts.
- Seek professional assistance: If you are unable to locate or address the source of the leak, it may be best to seek assistance from a qualified plumber or technician. They will have the expertise and tools to identify and fix the issue.
By checking for leaks and addressing them promptly, you can ensure the proper functioning of your water filter system and avoid any potential water damage or loss of filtration efficiency.
Once you have checked for leaks and resolved any issues, you can move on to the next step of flushing the system to remove any trapped air or loose particles.
Flush the System
Flushing the water filter system is an important step after replacing the cartridge to remove any trapped air, loose particles, or residual impurities. Flushing helps ensure optimal performance and clean water throughout your home. Follow these steps to flush the system:
- Open the faucet: Select a faucet connected to the water filter system, preferably one that is farthest from the filter housing. Slowly turn on the faucet to allow water to flow.
- Run water for a few minutes: Let the water run for about 5-10 minutes or until it runs clear. This will help flush out any air pockets, loose particles, or carbon fines that may be present in the system.
- Monitor the water flow: Pay attention to the water flow during the flushing process. If you notice any discoloration or strange odors, continue running the water until it becomes clear and odor-free.
- Repeat the process with other faucets: Repeat the flushing process with other faucets connected to the water filtration system. This will ensure that all water outlets in your home receive clean, filtered water.
During the flushing process, it is normal to experience a temporary reduction in water pressure or cloudy water. This is caused by the displacement of air and the removal of any loose particles. Flushing the system helps eliminate these issues and ensures the highest quality of filtered water.
Once you have flushed the system and the water runs clear from all faucets, you can proceed to enjoy the benefits of your newly replaced water filter cartridge. Remember to follow the recommended maintenance schedule and manufacturer’s instructions for future filter replacements to maintain the efficiency and longevity of your filtration system.
Dispose of the Old Cartridge Properly
Properly disposing of the old water filter cartridge is crucial to ensure environmental sustainability and prevent any potential contamination. Here are some guidelines to help you dispose of the old cartridge properly:
- Check local regulations: Before disposing of the old cartridge, research local regulations and guidelines regarding the disposal of water filter cartridges. Some areas may have specific instructions or recycling programs in place.
- Separate the components: If possible, separate the various components of the cartridge. Remove any plastic or metal parts, such as the housing or fittings, and segregate them for recycling if applicable. Dispose of any disposable parts separately as well.
- Recycle if available: Check if there are any recycling facilities or drop-off centers that accept water filter cartridges in your area. Recycling helps reduce waste and allows for the recovery of valuable materials.
- Dispose in regular trash if needed: If recycling options are not available, wrap the old cartridge in a plastic bag or wrap it in a secure manner. Place it in your regular trash and dispose of it according to your local waste disposal guidelines.
- Contact the manufacturer: Some manufacturers have specific instructions or programs for cartridge disposal. Contact the manufacturer or check their website for information on how to properly dispose of their specific cartridge model.
Remember, improperly disposing of the old cartridge can harm the environment. It is important to be mindful of the materials used in the cartridge and follow the appropriate disposal methods to minimize any negative impact.
By disposing of the old cartridge correctly, you complete the water filter cartridge replacement process in a responsible and sustainable manner. Your efforts contribute to the well-being of the environment and help ensure clean and safe water for everyone.