
Materials Needed
Before you start building your wall shelf with hooks, it’s important to gather all the necessary materials. Here’s a comprehensive list of what you’ll need:
- Wood: Choose a sturdy and durable wood material for the shelf. Common options include pine, plywood, or reclaimed wood. Make sure to measure and cut the wood according to the desired dimensions of your shelf.
- Sandpaper: To ensure a smooth and splinter-free surface, you’ll need sandpaper with varying grits. Start with a coarse grit to remove any rough spots and gradually transition to a finer grit for a polished finish.
- Drill: A power drill is essential for creating holes in the wood to attach the hooks and mount the shelf. Ensure that it is equipped with the appropriate drill bits for your project.
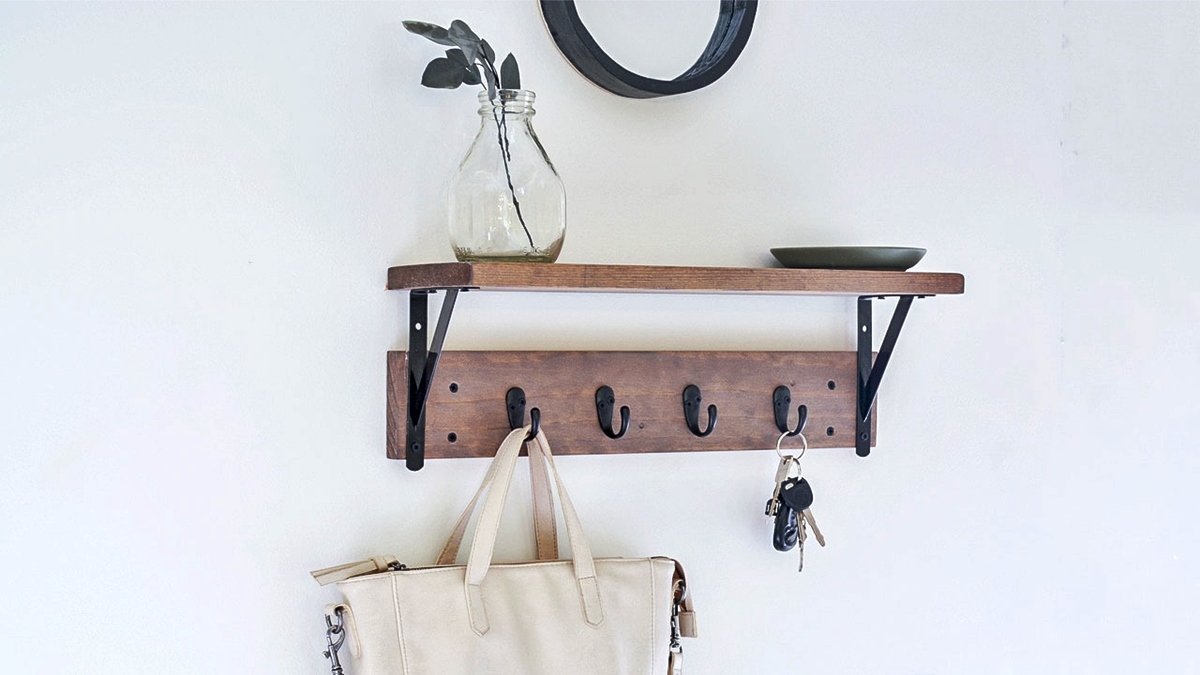
- Hooks: Choose hooks that are sturdy and suitable for holding various items such as coats, keys, or hats. Consider the style and design that will complement your wall shelf.
- Paint or Stain: Decide whether you want to paint the wood to match your decor or apply a stain to showcase its natural beauty. Select high-quality paint or stain that is compatible with the type of wood you’re using.
- Paintbrushes: Depending on the painting technique you choose, have a few different sizes and types of brushes on hand for precise application.
- Mounting Hardware: To securely attach the shelf to the wall, you’ll need appropriate mounting hardware such as wall anchors and screws. Ensure that they are strong enough to support the weight of the shelf and any items you’ll be hanging.
- Screwdriver: Ensure you have the appropriate screwdriver, either flathead or Phillips, to tighten screws during installation.
- Measuring Tape: Accurate measurements are crucial for a properly aligned and balanced shelf. Use a measuring tape to guide you throughout the project.
- Safety Equipment: Don’t forget to prioritize safety by wearing protective goggles, a dust mask, and gloves while working with wood and power tools.
By gathering all these materials in advance, you can streamline the construction process and ensure a successful outcome for your wall shelf with hooks.
Step 1: Measure and Cut the Wood
The first step in building your wall shelf with hooks is to measure and cut the wood according to your desired dimensions. This will ensure that your shelf fits perfectly in the designated space and meets your specific needs. Follow these instructions to complete this step:
- Measure: Use a measuring tape to determine the desired length, width, and depth of your shelf. Consider the available wall space and the items you plan to display or hang on the hooks.
- Mark the measurements: Use a pencil to mark the measurements directly on the wood. Double-check your measurements to minimize errors and ensure accuracy.
- Cut the wood: With the help of a circular saw, table saw, or hand saw, carefully cut the wood along the marked lines. It’s essential to use proper safety precautions, such as wearing safety goggles and gloves, and following the manufacturer’s instructions for your specific saw.
- Sand the edges: Use sandpaper or a sanding block to smooth out any rough edges or splinters resulting from the cutting process. Pay extra attention to the corners and edges to achieve a polished and professional look.
This step is crucial as it sets the foundation for the rest of the project. Accurate measurements and precise cutting will ensure that your wall shelf fits seamlessly and looks aesthetically pleasing. Take your time and double-check your measurements to avoid any unnecessary setbacks or adjustments later on. Once you’ve completed this step, you’re ready to move on to the next one: sanding the wood.
Step 2: Sand the Wood
After cutting the wood for your wall shelf with hooks, the next step is to sand the surface. Sanding will not only create a smooth and polished finish but also remove any imperfections or rough spots. Follow these steps to effectively sand the wood:
- Start with a coarser grit: Begin sanding the wood with a coarse-grit sandpaper. This will help smooth out any rough areas and remove any splinters or uneven edges. Sand in the direction of the wood grain for the best results.
- Transition to finer grits: Gradually move on to finer grit sandpaper to achieve a smoother finish. This will help remove the scratches and marks left by the coarser grit sandpaper. Remember to sand in the same direction as the wood grain.
- Check for smoothness: Periodically run your hand over the surface of the wood to ensure that it feels smooth and free of any rough patches. If you encounter any rough spots, continue sanding until the entire surface is consistently smooth.
- Round the edges: To achieve a more polished look, consider using a sanding block or sandpaper to gently round the edges of the wood. This will give your wall shelf a more finished appearance and prevent any sharp corners.
- Remove dust: After sanding, wipe away any dust or debris from the wood using a clean cloth or a tack cloth. This will prepare the surface for painting or staining.
Sanding is an important step in preparing the wood for finishing. By taking the time to sand the surface, you’re ensuring a smooth and visually appealing outcome. This step is particularly crucial when using reclaimed wood or wood with rough textures. Once you’ve completed the sanding process, you’re ready to move on to the next step: drilling holes for the hooks.
Step 3: Drill Holes for the Hooks
Creating holes for the hooks is an essential step in building your wall shelf. These holes will provide a secure attachment point for the hooks, enabling you to hang items such as coats, keys, or hats. Follow these instructions to effectively drill holes in the wood:
- Mark the hole positions: Determine where you want to place the hooks on the wood. Use a ruler or measuring tape to mark the exact locations. Ensure that the markings are evenly spaced and aligned with your desired design.
- Select the appropriate drill bit: Choose a drill bit that matches the size of the hooks you will be using. It should be slightly smaller in diameter to provide a snug fit for the hooks.
- Secure the wood: Place the wood securely on a work surface or clamp it down to prevent any movement during the drilling process. This will help maintain accuracy and avoid any accidents.
- Drill the holes: Use a power drill with the selected drill bit to create the holes at the marked positions. Start drilling slowly and steadily, applying gentle pressure to prevent any splintering or damage to the wood. Drill straight into the wood, ensuring that the holes are perpendicular to the surface.
- Test the fit: After drilling the holes, check if the hooks fit properly. If needed, use sandpaper to slightly widen or smoothen the holes for a better fit.
By following these steps, you’ll ensure that your hooks are securely attached to the wall shelf. Take your time and exercise caution while drilling to prevent any mistakes or damage to the wood. Once you have successfully drilled the necessary holes, you’re ready to proceed to the next step: painting or staining the wood.
Step 4: Paint or Stain the Wood
Painting or staining the wood is a crucial step in adding a finishing touch to your wall shelf with hooks. It allows you to personalize the shelf, match it with your existing decor, or highlight its natural beauty. Follow these steps to effectively paint or stain the wood:
- Prepare the surface: Ensure that the wood is clean and free from any dust or debris. Use a damp cloth to wipe away any contaminants and allow the wood to dry completely before proceeding.
- Apply a primer (if necessary): If you are using a light-colored paint or working with porous wood, it may be necessary to apply a primer before painting. The primer helps to create a smooth and even base for the paint.
- Choose your paint or stain: Select high-quality paint or wood stain in your preferred color or finish. Consider the overall style and aesthetic you want to achieve for your wall shelf.
- Apply the paint or stain: Use a paintbrush or a foam brush to apply an even coat of paint or stain to the wood. Start from one end and work your way to the other, following the direction of the wood grain. Apply additional coats if necessary, allowing each coat to dry before applying the next.
- Consider distressing or layering (optional): If you want to give your wall shelf a distressed or aged look, you can lightly sand certain areas or apply multiple layers of paint, allowing some areas to show through. Experiment with different techniques until you achieve the desired effect.
- Allow drying time: After applying the paint or stain, allow the wood to dry thoroughly. Follow the instructions provided by the manufacturer for specific drying times.
By carefully painting or staining the wood, you can enhance the appearance of your wall shelf and make it a statement piece in your space. Take your time, use smooth and even brush strokes, and allow the paint or stain to dry properly for the best results. Once the paint or stain has dried, you’re ready to move on to the next step: attaching the hooks to the wood.
Step 5: Attach the Hooks to the Wood
Attaching the hooks to the wood is a crucial step in completing your wall shelf with hooks. These hooks will provide functional hanging solutions for items like coats, keys, or hats. Follow these instructions to effectively attach the hooks to the wood:
- Position the hooks: Determine the placement of the hooks on the wood. Ensure they are evenly spaced and centered for a balanced look. Use a pencil to mark the precise locations.
- Choose the appropriate screws: Select screws that are suitable for the size and weight of the hooks. Make sure they are shorter than the thickness of the wood to prevent them from protruding.
- Pre-drill pilot holes: Use a drill bit slightly smaller than the diameter of the screws to create pilot holes at the marked locations. This will prevent the wood from splitting when you attach the screws.
- Attach the hooks: Position the hooks over the pilot holes and insert the screws through the hooks and into the pre-drilled holes. Use a screwdriver or drill to tighten the screws securely, making sure the hooks are firmly attached to the wood.
It’s essential to ensure that the hooks are securely fastened to the wood, as they will bear the weight of the items you’ll be hanging. Take your time and double-check the alignment and tightness of the screws to avoid any potential damage or accidents. Once you’ve attached all the hooks, you’re ready to move on to the final step: mounting the shelf to the wall.
Step 6: Mount the Shelf to the Wall
The final step in building your wall shelf with hooks is to mount it securely to the wall. This step ensures that your shelf is stable and able to withstand the weight of the items you’ll be hanging on the hooks. Follow these instructions to effectively mount the shelf to the wall:
- Choose the mounting location: Decide where you want to place your wall shelf. Use a stud finder or electronic stud sensor to locate the wall studs. Mounting the shelf directly onto the studs provides maximum stability and strength.
- Mark the mounting holes: Hold the shelf against the wall at the desired height and use a pencil to mark the locations of the mounting holes on the wall. Use a level to ensure that the shelf is straight and properly aligned.
- Pre-drill pilot holes: Use a drill bit slightly smaller than the diameter of the wall anchors or screws to create pilot holes at the marked locations. This will prevent the wall from cracking or splitting when you insert the anchors or screws.
- Insert the wall anchors: If you’re not able to mount the shelf directly onto the wall studs, insert wall anchors into the pilot holes. These anchors provide additional support and stability. Tap them gently into the holes using a hammer until they are flush with the wall surface.
- Secure the shelf to the wall: Align the mounting holes of the shelf with the pilot holes or anchors on the wall. Insert the screws provided with the wall anchors or use appropriate screws for mounting directly onto the studs. Use a screwdriver or drill to tighten the screws until the shelf is securely attached to the wall.
- Double-check stability: Once the shelf is mounted, give it a gentle tug to ensure it is securely attached to the wall. Make sure it doesn’t wobble or feel unstable. If needed, add additional screws or anchors for extra support.
Mounting the shelf properly is crucial for its structural integrity and safety. Take your time and ensure that the shelf is level and securely fastened to the wall. Once you’ve completed this step, you can step back and admire your finished wall shelf with hooks, ready to be used and enjoyed in your space.