
Choosing the Right Materials and Tools
Before beginning any DIY project, it’s essential to gather the necessary materials and tools. For constructing a coat rack with a shelf, you’ll need a few key items:
- Wood: Choose a sturdy, durable wood that can support the weight of coats and other items. Popular options include oak, pine, or maple. Ensure the wood is properly sized and free of any flaws or defects.
- Measuring tape: Accurate measurements are crucial for ensuring the coat rack fits perfectly in your desired space. A quality measuring tape will be your best friend throughout the entire project.
- Saw: Depending on the complexity of your design, you may need a handsaw or a power saw to cut the wood to size. Ensure that the saw you choose is appropriate for the thickness of the wood.
- Sandpaper: Smooth out any rough edges or imperfections on the wood before assembling the coat rack. A medium grit sandpaper (around 120-150 grit) is ideal for this task.
- Screwdriver: You’ll need a screwdriver to attach the various components of the coat rack, such as the hooks and shelf brackets. Choose a screwdriver that matches the type of screws you’ll be using.
- Hooks and brackets: Select hooks and brackets that are both functional and aesthetically pleasing. Consider the size and weight capacity of the hooks, ensuring they can securely hold coats and other items.
- Level: To ensure your coat rack is straight and balanced when mounted on the wall, use a level tool. This will help you avoid any lopsided or uneven installations.
- Pencil and paper: Before cutting or assembling any pieces, sketch out a rough design of your coat rack with measurements. This will serve as a useful reference point during the construction process.
By selecting high-quality materials and having the correct tools on hand, you’ll set yourself up for success when building your coat rack with a shelf. Remember to take your time and double-check your measurements to achieve professional-looking results.
Measuring and Planning
Before you start cutting and assembling the wood pieces, taking accurate measurements and creating a solid plan is crucial. These steps will help ensure that your coat rack with a shelf fits perfectly and functions efficiently:
1. Determine the placement: Decide where you want to mount the coat rack. Consider factors such as the height, accessibility, and available wall space in that area.
2. Measure the dimensions: Use a measuring tape to determine the desired length, width, and height of your coat rack. Take into account the size of the space and the number of hooks and shelves you want to include.
3. Sketch your design: Draw a rough sketch of your coat rack, including the measurements and placement of each component. This will serve as a helpful reference throughout the construction process.
4. Plan for the shelf: Decide on the size and location of the shelf on your coat rack. Consider its functionality and how it will complement the overall design. Ensure there is enough space between the hooks and the shelf for hanging coats without any hindrance.
5. Consider the wall type: Depending on the type of wall you’ll be mounting the coat rack on, determine the appropriate hardware and installation method. Drywall may require anchors or toggle bolts, while studs provide more stability for heavier racks.
6. Double-check measurements: Before proceeding to cut the wood, re-measure and confirm all the dimensions. It’s crucial to be precise to ensure a flawless fit and a professional-looking outcome.
7. Make a materials list: Based on your measurements, create a list of materials needed, including the specific lengths and quantities of wood, screws, hooks, and any additional hardware necessary for the project.
By carefully measuring and planning your coat rack with a shelf, you’ll avoid costly mistakes and ensure a successful construction process. Taking the time to create a thorough plan will save you time and frustration later on, resulting in a functional and aesthetically pleasing addition to your home.
Cutting the Wood Pieces
Once you have your measurements and plan in hand, it’s time to cut the wood pieces for your coat rack with a shelf. Follow these steps to ensure accurate and precise cuts:
1. Gather the necessary tools: Make sure you have a saw suitable for cutting the type and thickness of wood you’ve chosen. A table saw or circular saw will provide clean and straight cuts.
2. Mark the measurements: Use a pencil and a measuring tape to mark the dimensions of each wood piece according to your plan. Take your time to ensure accurate measurements, as this will directly impact the final look and functionality of your coat rack.
3. Safety first: Before starting any cutting, put on safety goggles and consider using a clamp or workbench to secure the wood in place. This will help prevent accidents and ensure clean, precise cuts.
4. Cut the wood: Using the saw, carefully and slowly cut along the marked lines. Keep a steady hand and maintain control of the saw to achieve straight cuts. If you’re using a circular saw, guide it along a straight edge for more accuracy.
5. Double-check the cuts: After cutting each piece, check that it matches your desired measurements. Make any necessary adjustments or recuts if needed.
6. Sand the cut edges: Use sandpaper or a sanding block to smooth out any rough edges or splinters from the cut wood pieces. This will ensure a finished appearance and prevent any snags on clothing or hands.
7. Label the pieces: To make the assembly process easier, label each cut piece with a pencil or masking tape. This will help you identify which parts go where during the construction.
Remember to take your time and exercise caution while cutting the wood pieces. Double-checking your measurements and using proper safety precautions will lead to well-fitted components for your coat rack with a shelf.
Sanding and Preparing the Wood
After cutting the wood pieces for your coat rack with a shelf, the next step is to sand and prepare them to ensure a smooth and polished finish. Follow these steps to properly prepare the wood:
1. Gather the necessary materials: Prepare sandpaper or a sanding block with medium grit (around 120-150 grit) for initial sanding, and fine grit (around 220-320 grit) for final smoothing.
2. Sand the surfaces: Begin by using the medium grit sandpaper to sand all the surfaces of the wood pieces, including the front, back, and sides. Sand in the direction of the grain, applying even pressure to smooth out any rough spots, edges, or imperfections.
3. Round the edges: To give the wood a softer and more finished look, lightly sand the edges, rounding them slightly. This will also prevent any sharp corners that could catch on clothing or cause injury.
4. Smooth the surfaces: Switch to the fine-grit sandpaper or sanding block and go over all the sanded areas again to achieve a smooth finish. This step will remove any remaining roughness or scratches from the previous sanding.
5. Wipe off dust: After sanding, use a clean cloth or tack cloth to wipe away any dust or debris from the wood surfaces. This ensures a clean working surface for the next steps of construction.
6. Apply wood conditioner (optional): If you’re using a type of wood that is prone to blotching or has uneven absorbency, consider applying a wood conditioner before staining or finishing. Wood conditioner helps the wood absorb stains and finishes more evenly.
7. Inspect the wood: Take a close look at each piece of wood to ensure it is smooth, free of rough spots, and ready for assembly. Make any additional sanding adjustments or touch-ups as necessary.
By properly sanding and preparing the wood, you’ll create a more professional-looking and enjoyable finished coat rack with a shelf. Take your time during this step to achieve the best results, as the quality of the wood preparation can greatly impact the overall appearance and longevity of your project.
Assembling the Frame
With the wood pieces cut and prepared, it’s time to assemble the frame of your coat rack with a shelf. Follow these steps to ensure a sturdy and well-constructed frame:
1. Lay out the pieces: Start by laying out all the wood pieces according to your design plan. This will help you visualize how they fit together and ensure you have everything you need.
2. Attach the sides: Begin by attaching the side pieces to the bottom piece of the frame. Apply wood glue to the joint areas and secure them with screws or nails. Use a level to ensure the sides are perfectly vertical.
3. Add the top piece: Once the sides are attached to the bottom piece, place the top piece across the tops of the sides. Apply wood glue and fasten it securely with screws or nails.
4. Reinforce the joints: For additional strength, consider adding corner braces or brackets at the joints of the frame. These can be attached with screws and will ensure the frame remains stable and durable.
5. Check for squareness: Use a measuring tape or a carpenter’s square to check that the frame is square and all corners are at right angles. Make any necessary adjustments by applying gentle pressure or tapping the frame with a mallet.
6. Allow the glue to dry: If you used wood glue in the assembly process, allow sufficient time for it to dry completely. Follow the manufacturer’s instructions for the recommended drying time.
7. Sand any rough edges: After the glue is dry, inspect the frame for any rough or uneven edges. Use sandpaper or a sanding block to smooth out these areas, ensuring a polished and professional appearance.
By following these steps, you’ll assemble a sturdy and well-constructed frame for your coat rack with a shelf. Take your time during the assembly process to ensure accuracy and attention to detail, resulting in a quality finished product.
Attaching the Shelf
With the frame of your coat rack complete, it’s time to move on to attaching the shelf. The shelf not only adds functionality but also serves as a decorative element. Follow these steps to securely attach the shelf:
1. Measure and mark: Use a measuring tape to determine the desired height of the shelf within the frame. Mark this height on the inside walls of the frame to ensure consistent placement.
2. Apply wood glue: Apply a generous amount of wood glue along the top edges of the frame where the shelf will rest. This will help create a strong bond between the shelf and the frame.
3. Position the shelf: Carefully place the shelf onto the glue, aligning it with the marked height on the frame. Press down gently to ensure even contact with the glue and a snug fit.
4. Secure the shelf: To further reinforce the attachment, use screws or nails to secure the shelf in place. Drive the fasteners through the sides of the frame and into the edges of the shelf, ensuring a secure and stable connection.
5. Check for level: Use a level to ensure that the shelf is level within the frame. Make any necessary adjustments by gently tapping the shelf or using shims under one side if required.
6. Wipe away excess glue: If any glue seeped out during the attachment process, wipe it away with a damp cloth or sponge. This will help prevent unsightly glue marks or dried residue.
7. Allow the glue to dry: If you used wood glue, allow ample time for it to dry and cure according to the manufacturer’s instructions. This will ensure a strong bond between the shelf and the frame.
By following these steps, you’ll securely attach the shelf to the frame of your coat rack. This will provide a functional space to store additional items while adding an extra touch of style to your coat rack design.
Adding the Hooks
Adding hooks is the final step in building your coat rack with a shelf, and it is where the functionality truly comes to life. Follow these steps to ensure the hooks are securely attached:
1. Determine hook placement: Decide on the spacing and layout of the hooks on the front or sides of your coat rack. Consider the size and number of hooks, ensuring they are evenly spaced and positioned for easy access.
2. Mark hole positions: Use a pencil or marker to mark the desired placement of each hook on the wood. Double-check your measurements and spacing to ensure accuracy.
3. Pre-drill holes: Use a drill bit slightly smaller than the diameter of the screws or hooks to pre-drill pilot holes at the marked positions. This will help prevent the wood from splitting when attaching the hooks.
4. Attach the hooks: Place a hook over each pre-drilled hole and insert the screws or attach the hooks according to the manufacturer’s instructions. Use a screwdriver to securely fasten each hook to the wood.
5. Check for stability: Give each hook a gentle tug to ensure it is firmly attached and won’t come loose. If necessary, tighten the screws or make any adjustments to ensure stability.
6. Test the weight capacity: Hang some lightweight items, such as jackets or bags, on the hooks to ensure they can securely hold the desired weight. Make any necessary reinforcement or adjustments if needed.
7. Consider additional hooks: Depending on your needs, you may choose to add additional hooks to accommodate more items. Ensure that the weight distribution is balanced and the coat rack remains stable.
By following these steps, you’ll add the finishing touch to your coat rack by securely attaching the hooks. This will provide a convenient and organized place to hang coats, bags, and other items, making your coat rack functional and visually appealing.
Finishing Touches
Now that your coat rack with a shelf is complete, it’s time to add some finishing touches to enhance its appearance and durability. Consider the following steps to give your project that final polish:
1. Sand and smooth: Give the entire coat rack a final sanding to ensure all surfaces are smooth and free of any rough spots. Pay extra attention to areas where the wood pieces meet to ensure a seamless look.
2. Fill any gaps: If there are any small gaps or imperfections in the wood joints, use wood filler to fill them in. This will create a seamless appearance and provide additional stability.
3. Stain or paint: Decide whether you want to stain or paint the coat rack to match your desired aesthetic. Apply your chosen finish evenly, following the manufacturer’s instructions. Allow sufficient drying time before moving on to the next step.
4. Apply a clear coat: To protect the wood and enhance its longevity, consider applying a clear coat of polyurethane or varnish. This will provide an extra layer of durability and give the coat rack a polished look.
5. Mount it securely: Determine the appropriate wall-mounting method based on the type of wall you have. Ensure that the coat rack is securely fastened to the wall, using appropriate anchors, screws, or other hardware.
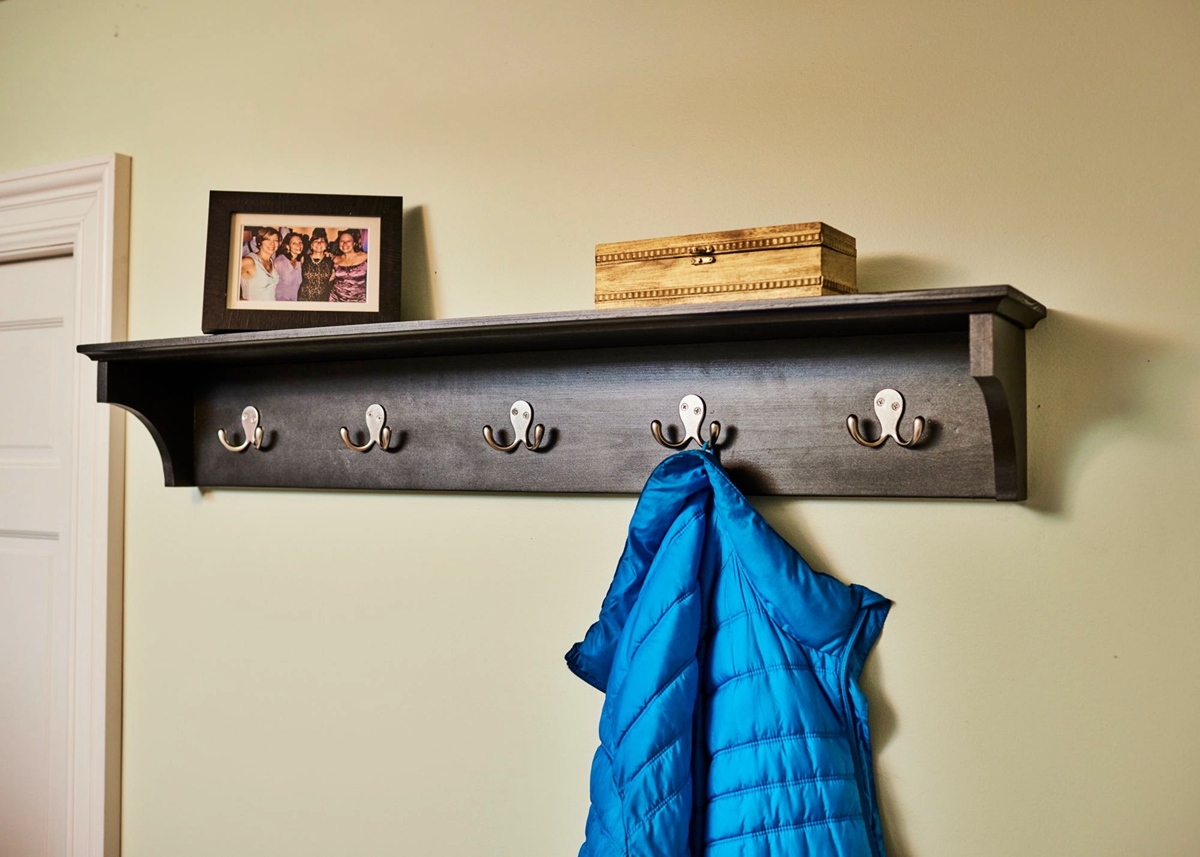
6. Style the shelf: Add some decorative elements to the shelf, such as small plants, picture frames, or decorative knick-knacks. This will personalize the coat rack and make it more visually appealing.
7. Organize and enjoy: Once the coat rack is mounted, start organizing your coats, bags, and other items. Take a step back and admire your completed project, knowing that it’s both functional and aesthetically pleasing.
By paying attention to these finishing touches, you’ll elevate your coat rack with a shelf from a simple DIY project to a stylish and functional addition to your home. Take pride in your craftsmanship and enjoy the convenience and organization your new coat rack provides.