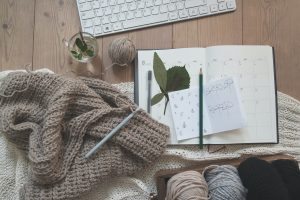
Types of Granny Squares
Granny squares are a versatile crochet motif that can be used to create various patterns and designs. There are several types of granny squares, each with its own unique features:
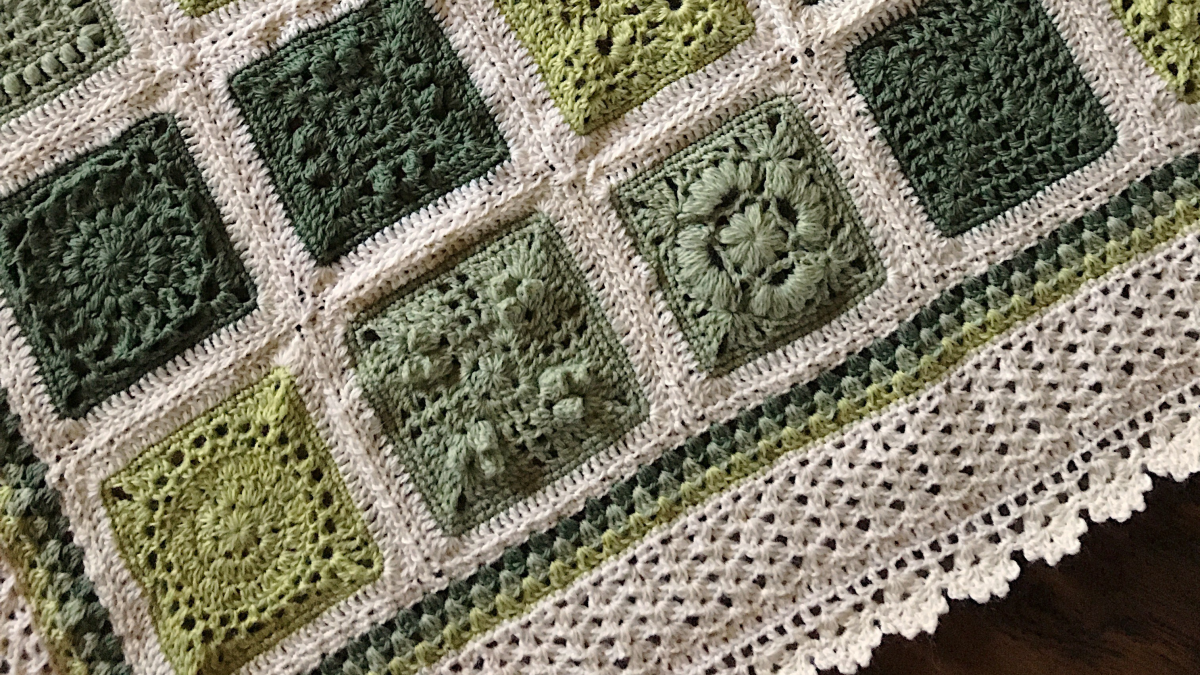
- Classic Granny Square: This is the most common and basic type of granny square. It is a square made up of clusters of double crochet stitches separated by chain spaces. The number of clusters and the size of the square can be adjusted to create different variations.
- Solid Granny Square: Unlike the classic granny square, this type is made using only double crochet stitches without any chain spaces. The resulting square has a solid and dense texture, perfect for a warm and cozy blanket.
- Popcorn Granny Square: In this variation, popcorn stitches are used to create a raised texture. Popcorn stitches are clusters of double crochet stitches worked together and then secured with a chain stitch. This square adds an interesting and playful element to the blanket.
- Motif Granny Square: Motif granny squares feature unique shapes and intricate designs. They are often more complex to make and require careful attention to detail. These squares can be used to create eye-catching patterns and add a touch of elegance to the blanket.
- Flower Granny Square: Perfect for a spring-themed blanket, the flower granny square features a floral design at the center. Petals are worked around the central motif, creating a visually appealing and feminine look.
These are just a few examples of the many types of granny squares you can use to make your blanket. Feel free to experiment with different patterns, colors, and combinations to create a unique and personal design.
Standard Granny Square Size
When creating a granny square blanket, it’s important to determine the size of the individual squares. While there is no one-size-fits-all answer, there are some common standard sizes that you can consider:
The most commonly used size for a standard granny square is 4 inches by 4 inches (10 cm by 10 cm). This size is versatile and allows for easy customization. However, you can adjust the size of the square according to your preference and the desired final dimensions of your blanket.
The size of the granny square will also depend on the weight of the yarn and the size of the crochet hook you are using. If you want a smaller square, you can use a thinner yarn and a smaller hook. Conversely, if you want a larger square, opt for a thicker yarn and a larger hook.
Keep in mind that the size of the square will affect the overall size of the blanket. If you want a smaller blanket, you can create more squares to compensate. If you want a larger blanket, you will need fewer squares.
It’s important to note that the standard size of the granny square is not set in stone. You can adjust the size to suit your personal preferences and project requirements. Just be sure to keep the square sizes consistent throughout the blanket to maintain a uniform appearance.
Remember, the size of the granny squares will determine the overall dimensions of your blanket. Consider the intended use of the blanket and the recipient’s preferences when deciding on the size of the squares. Whether you want a small lap blanket or a large bedspread, finding the right standard size for your granny squares is crucial.
Determining Blanket Size
Before you start crocheting your granny square blanket, it’s important to determine the desired size of the finished piece. The size of the blanket will depend on several factors, including its intended use and personal preference.
Consider the following when determining the size of your blanket:
- Intended Use: Think about how the blanket will be used. Will it be a cozy lap blanket for lounging on the couch or a bedspread to cover a queen-size bed? The purpose of the blanket will help you determine how large it needs to be.
- Recipient’s Size: If the blanket is intended for a specific individual, consider their size. A lap blanket for a child will be smaller than one for an adult. Take measurements if necessary to ensure the ideal size.
- Yarn Quantity: The amount of yarn you have available may also influence the size of the blanket. If you have a limited amount of yarn, you may need to make a smaller blanket or adjust the design to incorporate smaller squares or motifs.
- Design and Pattern: Certain designs and patterns may require specific dimensions. Some patterns include specific multiples or repeat sequences that determine the size of each square. Follow the pattern instructions to achieve the desired size.
Once you have considered these factors, you can determine the approximate dimensions of your blanket. Use a tape measure to visualize the size or create a mock layout on a flat surface. This will help you visualize the finished dimensions and make any necessary adjustments before starting your project.
Keep in mind that the size of the blanket will directly affect the number of granny squares needed to complete it. A larger blanket will require more squares, while a smaller blanket will need fewer. Take this into account when calculating how many squares to make.
By carefully considering the intended use, recipient’s size, yarn quantity, and design, you can determine the ideal size for your granny square blanket. Taking the time to plan and calculate the dimensions will ensure that you create a blanket that not only looks beautiful but also serves its purpose effectively.
Calculating the Number of Squares Needed
One of the key aspects of planning a granny square blanket is determining how many squares you will need to complete the project. Calculating the number of squares is crucial to ensure you have enough materials and to estimate the time required to finish the blanket.
To calculate the number of squares needed, follow these steps:
- Blanket Size: Determine the desired dimensions of your blanket. Measure the width and length in inches or centimeters. For example, if you want a blanket that is 40 inches wide and 60 inches long, you will need to calculate the number of squares required to cover this area.
- Square Size: Decide on the size of your granny squares. Common sizes range from 4 inches by 4 inches to 6 inches by 6 inches. Based on your personal preference and the overall size of your blanket, choose an appropriate square size.
- Calculate Width: Divide the width of your blanket (in inches or centimeters) by the width of your granny square. For example, if your blanket width is 40 inches and your square width is 4 inches, you would divide 40 by 4, resulting in 10 squares needed across the width of the blanket.
- Calculate Length: Similarly, divide the length of your blanket (in inches or centimeters) by the length of your granny square to determine the number of squares needed across the length. Continuing with the previous example, if your blanket length is 60 inches and your square length is 4 inches, dividing 60 by 4 would give you 15 squares needed along the length.
- Total Squares: Multiply the number of squares needed across the width by the number of squares needed along the length to get the total number of squares needed for the blanket. In the above example, multiplying 10 (width) by 15 (length) would give you a total of 150 squares.
Keep in mind that this calculation represents the minimum number of squares needed to cover the blanket. You may need to adjust the number slightly to create a symmetrical design or account for border details.
Calculating the number of squares needed for your granny square blanket will provide you with a clear idea of the amount of work required and help you plan your project effectively. It will also ensure that you have sufficient materials and that your finished blanket looks evenly and beautifully crafted.
Additional Factors to Consider
While calculating the number of squares and determining the size of your granny square blanket are important, there are additional factors that you should consider to ensure a successful and satisfying project:
- Border and Edging: Think about whether you want to add a border or decorative edging to your blanket. This can enhance the overall look and provide a clean and finished edge. Take into account the additional space these elements will require when calculating the number of squares.
- Color Pattern: Decide on the color pattern for your granny squares. This includes the number of colors, their arrangement, and any pattern or sequence you want to create. Consider the impact of color changes on the number of squares needed and plan accordingly.
- Yarn Requirements: Choose the yarn you will use for your granny squares. Consider the composition, weight, and quantity of the yarn required. Keep in mind that different yarns may have different yardage per skein, which can affect the number of skeins needed.
- Pattern Variations: Explore different pattern variations for your granny squares. You can experiment with stitches, textures, and motifs to add visual interest to your blanket. Keep track of the variations and adapt the number of squares needed accordingly.
- Square Placement: Plan the layout of your granny squares. Consider if you want a structured grid pattern or a more random placement. This will affect the overall look of your blanket and may require adjustments in the number of squares needed.
Additionally, it’s helpful to create a sample square to gauge your tension and ensure consistency throughout the project. This will help you maintain uniformity in size and prevent any discrepancies in the final blanket.
By considering these additional factors, you can tailor your granny square blanket to your preferences and achieve the desired outcome. Taking the time to plan and consider these aspects will help you enjoy the crocheting process and create a beautiful and personalized blanket.
Different Layout Patterns for Granny Squares
When it comes to creating a granny square blanket, there are various layout patterns to consider. These patterns determine how the individual granny squares are arranged and joined together to form the final design. Choose a layout pattern that best suits your aesthetic preference and the overall look you want to achieve.
Here are a few popular layout patterns for granny squares:
- Grid Layout: In this classic layout, the granny squares are arranged in a symmetrical grid pattern. They are joined together horizontally and vertically, forming neat rows and columns. This layout gives a structured and organized feel to the blanket.
- Offset Grid Layout: Similar to the grid layout, the offset grid pattern creates an interesting visual effect. The squares are arranged in a staggered formation, creating diagonal lines and a more dynamic look. This layout adds a touch of modernity and movement to the blanket.
- Diagonal Layout: In the diagonal layout, the granny squares are joined together diagonally, forming diagonal rows across the blanket. This layout provides a sense of movement and can add a unique touch to your blanket design.
- Mixed Layout: If you prefer a more eclectic look, you can mix different layouts together. For example, you can combine a grid layout with diagonal rows or incorporate smaller squares into larger ones. This allows for more creativity and customization in your blanket design.
- Random Layout: For a more free-spirited and organic look, you can arrange your granny squares in a random order. There are no specific rules or patterns to follow, and you can let your creativity guide you. This layout adds a sense of whimsy and uniqueness to your blanket.
Remember, the layout pattern you choose will affect the overall aesthetics of your granny square blanket. Take the time to plan and visualize how the squares will be arranged before joining them together. You can use graph paper or digital tools to map out different layout options to help you make an informed decision.
By experimenting with different layout patterns, you can create a granny square blanket that reflects your personal style and vision. Don’t be afraid to get creative and try new combinations to make your blanket truly one-of-a-kind.
Joining Methods for Granny Squares
Once you have crocheted all your granny squares, the next step is to join them together to form a cohesive blanket. There are several methods you can use to join the squares, each with its own unique look and level of complexity. Choose a joining method that suits your skill level and desired outcome.
Here are a few common joining methods for granny squares:
- Whip Stitch: The whip stitch is a simple and commonly used method for joining granny squares. With a tapestry needle and matching yarn, you sew the squares together by stitching through the loops along the edges. This method creates a flat and invisible seam, ideal for those who prefer a seamless look.
- Slip Stitch: The slip stitch join is another easy method that provides a neat and secure finish. You crochet the squares together by slip stitching through the corresponding stitches along the edges. This method creates a visible seam, adding a decorative element to your blanket.
- Single Crochet Join: The single crochet join involves working single crochet stitches to merge the squares together. This method creates a sturdy and visible join with a distinct raised ridge. The single crochet join can add a decorative touch to your blanket and is great for those who enjoy texture.
- Join-as-you-go: Join-as-you-go is a popular method for blankets with a continuous motif or pattern sequence. With this method, you crochet the squares together as you work on the final round of each square. This eliminates the need for sewing and creates a seamless and flowing design.
- Joining with Slip Stitch and Chain Spaces: This method combines slip stitches and chain spaces for an open and lacy join. You slip stitch through the loops on the edge of one square while chaining spaces, then slip stitch through the corresponding loops on the second square. This method creates an airy and delicate join.
When choosing a joining method, consider both the design and purpose of your blanket. Some methods may be more suitable for a casual, rustic look, while others create a more polished and intricate finish. Experiment with different methods on a sample or spare squares to see which one you prefer before committing to joining all the squares of your blanket.
By selecting the right joining method for your granny squares, you can seamlessly bring your individual squares together to create a beautiful and cohesive blanket. Pay attention to the aesthetics and functionality of the join to achieve a finished result that matches your vision.
How to Finish off the Blanket
Finishing off your granny square blanket is an exciting moment, as it marks the completion of your project. Here are some steps to help you achieve a polished and professional-looking finish:
- Weave in Ends: Start by weaving in all the loose ends of yarn from joining and changing colors. Use a tapestry needle to thread the ends through the stitches on the back of the blanket, ensuring they are secure and hidden.
- Block the Blanket: Blocking is an important step to give your blanket a polished appearance. Wet blocking and steam blocking are two common methods. Wet blocking involves soaking the blanket in lukewarm water, gently squeezing out the excess water, and then laying it flat to dry. Steam blocking involves using a steam iron to lightly press and shape the blanket. Follow the instructions for your specific yarn to avoid damaging it.
- Add a Border: Adding a border is optional but can provide a clean and finished look to your blanket. Choose a simple border that complements the overall design or opt for a more intricate pattern. Some popular border options include a single crochet border, picot edge, or shell stitch border. Remember to consider the desired dimensions of your finished blanket when adding the border.
- Block Again: Once you have added the border, block the blanket again to set the shape and ensure that the border lies flat. This step helps the blanket maintain its shape and drape properly.
- Review and Make Adjustments: Take a step back and review your finished blanket. Check for any loose threads, uneven stitches, or areas that need adjustment. Make any necessary corrections to ensure the high-quality appearance of your finished blanket.
After completing these steps, celebrate your achievement! Your granny square blanket is now finished and ready to be enjoyed. It’s the perfect time to snuggle up with your creation or gift it to someone special.
Remember that practice makes perfect when it comes to finishing off your blanket. Don’t be discouraged if your first attempt doesn’t turn out exactly as you envisioned. With each project, you’ll gain more experience and improve your skills.
By following these steps, you can ensure that your granny square blanket is beautifully finished and ready to be cherished for years to come. Enjoy the satisfaction of completing a handmade masterpiece!