
Choosing the Right Variety of Sweet Potatoes
When it comes to planting sweet potatoes, choosing the right variety is essential to ensure a successful harvest. With a wide range of options available, it’s important to consider factors such as taste, texture, yield, and suitability for your growing conditions. Here are some popular sweet potato varieties to consider:
- Beauregard: This is one of the most widely grown sweet potato varieties due to its excellent taste and high yield. Beauregard sweet potatoes have a moist, deep orange flesh and are perfect for baking, frying, or mashing.
- Jewel: Known for its vibrant orange flesh and exceptional sweetness, Jewel sweet potatoes are a favorite among home gardeners. They are versatile and can be used in various sweet and savory dishes.
- Covington: Covington sweet potatoes have a rich, sweet flavor and a creamy texture. This variety is ideal for roasting, baking, or making sweet potato fries.
- O’Henry: With its pale, creamy flesh and mildly sweet flavor, O’Henry sweet potatoes are a popular choice for those who prefer a lighter taste. They are great for boiling, steaming, or making sweet potato pies.
- Murasaki: Murasaki sweet potatoes originate from Japan and are known for their beautiful purple skin and creamy white flesh. They have a delicate, slightly nutty flavor and are often used in Asian-inspired dishes.
Before selecting a sweet potato variety, consider your personal taste preferences and the intended use for your harvest. Additionally, take into account the climate and soil conditions in your region, as some varieties perform better in certain environments. Researching and consulting with local experts or nurseries can provide valuable insights into the most suitable sweet potato varieties for your area.
By choosing a variety that aligns with your preferences and growing conditions, you can ensure a bountiful harvest of sweet potatoes that are perfect for your culinary adventures.
Preparing the Soil for Planting
Preparing the soil is a crucial step in successfully growing sweet potatoes. These plants thrive in loose, well-draining soil with a pH level between 5.8 and 6.2. Here are some steps to help you prepare your soil:
- Clear the area: Start by clearing the planting area of any weeds, rocks, or debris. This will ensure that the sweet potato slips have ample space to grow.
- Loosen the soil: Sweet potatoes require loose soil for proper root development. Use a garden fork or tiller to loosen the soil to a depth of at least 12 inches. Remove any large clumps or rocks that may impede root growth.
- Amend the soil: Sweet potatoes like soil that is rich in organic matter. Incorporate compost or well-rotted manure into the soil to improve its fertility. This will provide essential nutrients and improve moisture retention.
- Test the pH level: Use a soil testing kit to determine the pH level of your soil. If the pH is too low or too high, adjust it by adding lime to raise the pH or sulfur to lower it, following the instructions on the packaging.
- Provide drainage: Sweet potatoes don’t like standing water. Ensure that your planting area has proper drainage by creating raised beds or mounds. This will prevent excess moisture and reduce the risk of rotting.
It’s important to note that sweet potatoes are heavy feeders, meaning they require plenty of nutrients to grow and produce a bountiful harvest. Before planting, consider incorporating a balanced organic fertilizer or a slow-release fertilizer into the soil to provide these essential nutrients.
By properly preparing the soil, you create an optimal growing environment for your sweet potatoes. This improves their chances of developing strong roots, healthy foliage, and ultimately, a rewarding harvest.
Planting Sweet Potato Slips
Planting sweet potato slips is a critical step in the cultivation process. Sweet potato slips are young vines that have been sprouted from mature sweet potatoes. Here’s how to plant them successfully:
- Timing: Wait until the danger of frost has passed and the soil temperature reaches around 50°F (10°C) before planting your sweet potato slips. This typically occurs a few weeks after the last frost date in your area.
- Prepare the slips: If you’re growing your own slips, start by suspending a sweet potato in a jar of water, ensuring that the bottom half is submerged. Place the jar in a warm area with plenty of indirect sunlight. After a few weeks, the sweet potato will develop small roots and several sprouts, which are ready for planting.
- Choose a planting location: Select a spot in your garden that receives full sun for at least 6-8 hours a day. Ensure that the soil is well-drained to prevent waterlogging, as excessive moisture can cause the sweet potatoes to rot.
- Plant the slips: Dig holes or create small mounds in the prepared soil, spacing them about 12-18 inches apart. Gently plant the sweet potato slips, ensuring that the roots are covered and the leaves are above the soil surface.
- Water thoroughly: After planting the slips, give them a deep watering to help settle the soil and establish their root systems. Continue to water regularly, keeping the soil consistently moist but not waterlogged, throughout the growing season.
- Provide support if needed: As the sweet potato vines grow, they may become long and sprawling. Consider providing support such as trellises, stakes, or cages to keep the vines upright and prevent them from overcrowding other plants.
Remember to adjust the planting depth based on your soil type. In heavier clay soils, slightly elevate the sweet potato slips above the ground to promote better drainage, whereas in lighter sandy soils, plant them slightly deeper to prevent drying out.
By following these steps for planting sweet potato slips, you’ll ensure they get off to a healthy start and have the best chance of producing a plentiful harvest.
Watering and Mulching Tips
Proper watering and mulching are essential for the successful growth of sweet potatoes. These tips will help you maintain adequate moisture levels and promote healthy plants:
- Watering frequency: Sweet potatoes require consistent moisture, especially during the initial stages of growth. Water the plants deeply once or twice a week, ensuring that the soil is evenly moist but not waterlogged. Monitor the weather conditions and adjust the watering frequency accordingly.
- Deep watering: When watering, aim to moisten the soil to a depth of 6-8 inches. This encourages the sweet potato roots to grow deeply, increasing their access to nutrients and improving their resistance to drought.
- Mulching benefits: Applying a layer of mulch around the base of the sweet potato plants offers numerous benefits. Mulching helps conserve soil moisture, suppresses weed growth, and regulates soil temperature. It also prevents the sweet potatoes from coming into direct contact with the soil, reducing the risk of rotting or damage.
- Choosing mulch: Organic mulch, such as straw, shredded leaves, or wood chips, works best for sweet potatoes. Apply a layer of mulch about 2-3 inches thick, making sure to keep it away from the base of the plant to prevent stem rot.
- Mulching timing: Apply mulch after the soil has warmed up and the sweet potato plants have established. This is typically around 2-3 weeks after planting. Mulching too early can hinder soil heat absorption and delay plant growth.
- Regularly check moisture levels: Even with mulch, it’s important to monitor the soil moisture regularly. Check the top few inches of soil and water as needed to maintain adequate moisture levels. Avoid overwatering, as excessive moisture can lead to root rot.
By following these watering and mulching tips, you’ll provide your sweet potato plants with the right amount of moisture, enhance their growth, and protect them from weed competition and temperature fluctuations.
Providing Proper Nutrients
Proper nutrition is crucial for the optimal growth and development of sweet potato plants. By providing the right nutrients, you can ensure healthy foliage, strong roots, and a bountiful harvest. Here are some tips for nourishing your sweet potatoes:
- Soil test: Before planting, conduct a soil test to determine any nutrient deficiencies or imbalances. This will help guide you in selecting the appropriate fertilizers and amendments for your sweet potatoes.
- Organic matter: Sweet potatoes thrive in soil rich in organic matter. Incorporate compost, well-rotted manure, or other organic materials into the soil before planting to improve its fertility and nutrient content.
- Slow-release fertilizer: Consider applying a slow-release organic fertilizer specifically formulated for root crops. This will provide a steady supply of nutrients over time, reducing the risk of over-fertilization.
- Balance of nutrients: Sweet potatoes require a balance of nitrogen (N), phosphorus (P), and potassium (K). Nourish the plants with a fertilizer that has an NPK ratio of around 5-10-10 or 10-20-20 to support their overall growth and root development.
- Side dressing: About four weeks after planting, supplement the soil with additional fertilizer by side-dressing along the rows of sweet potato plants. This provides a boost of nutrients when the plants need it the most.
- Regular monitoring: Throughout the growing season, monitor the plants for any signs of nutrient deficiencies, such as yellowing leaves or stunted growth. If deficiencies are detected, adjust your fertilization practices accordingly.
- Avoid over-fertilization: While it’s important to provide adequate nutrition, be cautious not to over-fertilize, as this can lead to excessive vegetative growth at the expense of tuber development. Follow the recommended application rates and timing provided on the fertilizer packaging.
Remember, every garden is unique, and nutrient requirements can vary depending on factors such as soil composition and climate. Regular observation and adjustments based on the plants’ needs will help ensure they receive the necessary nutrition for optimal growth and a successful sweet potato harvest.
Managing Pests and Diseases
Like any other crop, sweet potatoes are susceptible to pests and diseases that can threaten their health and productivity. Implementing effective pest management strategies is essential to protect your plants. Here’s how to manage common pests and diseases:
- Regular inspection: Monitor your sweet potato plants regularly for any signs of pests or diseases. Look for chewed leaves, wilting, discoloration, or the presence of pests such as aphids, sweet potato weevils, or whiteflies.
- Integrated Pest Management (IPM): Implement an integrated approach to pest management by combining preventive measures, cultural practices, and targeted treatments. This includes practices such as crop rotation, maintaining proper spacing between plants, and removing infested plants or debris promptly.
- Biological control: Consider using beneficial insects, such as ladybugs or praying mantises, to control aphid populations. Introduce these beneficial insects into your garden to naturally reduce pest numbers.
- Organic insecticides: If necessary, use organic insecticides or neem oil to control pests without harming beneficial insects or contaminating the environment. Apply these products according to the instructions on the packaging.
- Disease-resistant varieties: Planting disease-resistant sweet potato varieties can help reduce the risk of common diseases. Research and select varieties that have shown resistance to diseases prevalent in your area.
- Fungal diseases: To prevent fungal diseases, such as sweet potato scurf or powdery mildew, ensure proper air circulation around the plants by spacing them adequately. Avoid overhead watering, as this can promote moisture-related diseases.
- Early detection and treatment: If you notice any signs of disease, take immediate action. Remove and destroy affected plant parts to prevent the spread of the disease. Treat with organic fungicides or consult with a local agricultural extension office for specific recommendations.
- Cultural practices: Practice good garden hygiene by removing plant debris, cleaning tools after use, and rotating crops annually. These practices help minimize the carryover of pests and diseases from one season to the next.
Remember, prevention is key when it comes to managing pests and diseases in your sweet potato garden. By staying vigilant and taking proactive measures, you can keep your plants healthy and thriving throughout the growing season.
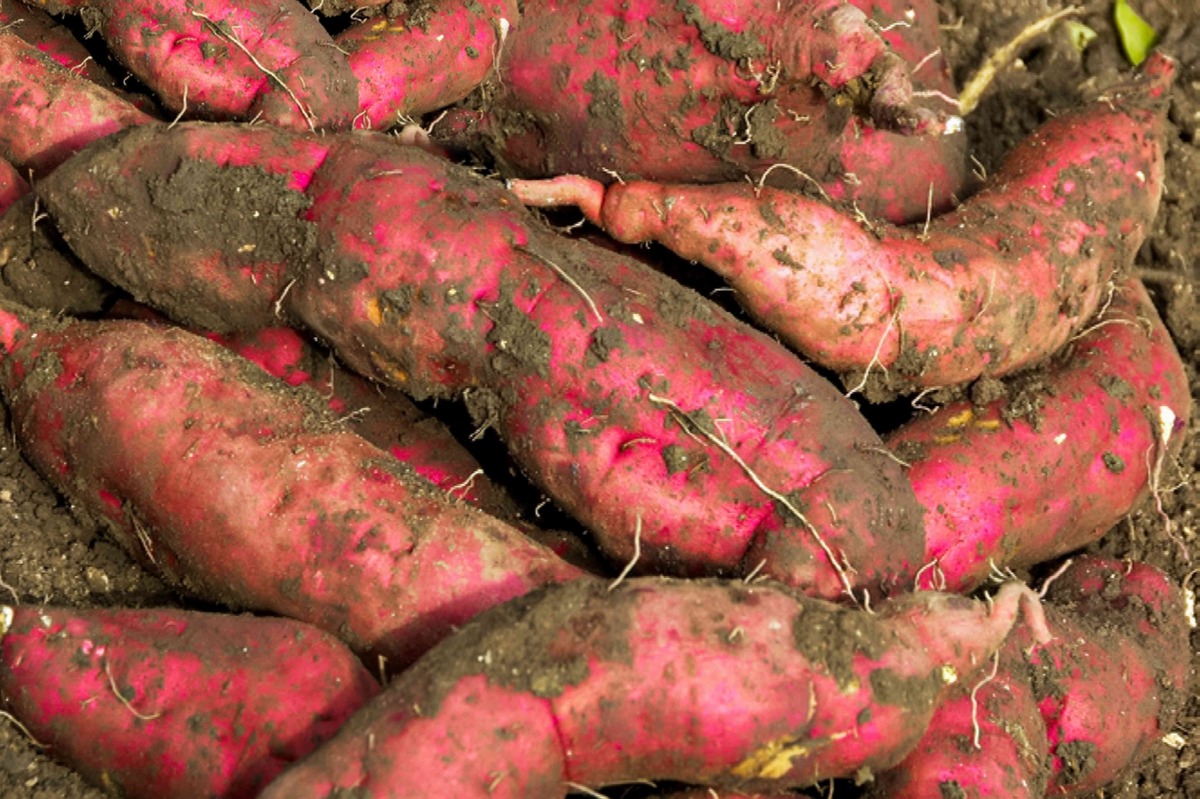
Harvesting Sweet Potatoes
Harvesting sweet potatoes at the right time ensures that you get the maximum flavor and storage potential from your crop. Follow these guidelines for a successful sweet potato harvest:
- Timing: Sweet potatoes are typically ready for harvest between 90 to 120 days after planting, depending on the variety. The foliage will begin to yellow and die back, indicating that the sweet potatoes are mature.
- Pre-harvest preparation: Stop watering the sweet potato vines about two weeks before harvest to allow the skins to toughen and improve storage quality. This helps prevent rotting during storage.
- Harvesting method: Carefully dig around the base of the plants, using a garden fork or shovel. Do not pull or yank the vines, as this can damage the tubers. Lift the plants gently from the soil, taking care to avoid bruising or puncturing the sweet potatoes.
- Tuber storage: Lay the harvested sweet potatoes in a single layer to cure for about 10 days in a warm, dry, and well-ventilated area, away from direct sunlight. This process allows the skins to further toughen and any minor wounds to heal.
- Temperature and humidity: Once cured, store the sweet potatoes in a cool (about 55-60°F or 13-16°C), dark, and humid environment, such as a basement or root cellar. The storage area should have a humidity level of around 85-90% to prevent them from drying out.
- Storage containers: Use slatted wooden crates, mesh bags, or cardboard boxes to store the sweet potatoes. Avoid using plastic bags or airtight containers, as they can create excess moisture and promote rotting.
- Avoid bruising: Handle the sweet potatoes with care during harvest and storage to prevent bruising, which can lead to decay. Sort and remove any damaged or diseased sweet potatoes to prevent the spread of rot.
- Long-term storage: With proper curing and storage conditions, sweet potatoes can be stored for several months. Check the stored sweet potatoes regularly and remove any that show signs of decay or softness to prevent further spoilage.
Harvesting sweet potatoes at the right time and providing proper post-harvest care will ensure that you can enjoy their delicious flavor and nutritional benefits for months to come.
Storing Sweet Potatoes for Long-Term Use
Proper storage is crucial to maintain the quality and flavor of sweet potatoes for an extended period. Here are some tips for storing sweet potatoes for long-term use:
- Curing: After harvest, curing is an important step to toughen the skin and improve the flavor and storage life of sweet potatoes. Place your harvested sweet potatoes in a warm (about 80-85°F or 27-29°C) and humid environment for about 10 days. A basement or any other well-ventilated area will work well for this process.
- Prepare for storage: Prior to storing, inspect each sweet potato and remove any damaged or infected ones. Handle them carefully to avoid bruising, as even small bruises can lead to decay during storage.
- Temperature and humidity: Find a cool storage location with a temperature of around 55-60°F (13-16°C) and a high humidity level of 85-90%. The humidity prevents the sweet potatoes from drying out, while the cool temperature helps slow down sprouting and decay.
- Storage containers: Use storage containers that provide good airflow, such as slatted wooden crates, mesh bags, or cardboard boxes. Avoid using plastic bags or airtight containers, as they can trap moisture and promote rotting.
- Storage environment: Keep the sweet potatoes in a dark area, away from direct sunlight. Exposure to light can cause greening of the skin and the formation of solanine, a naturally occurring toxic compound.
- Regular checking: Monitor the stored sweet potatoes regularly and remove any that show signs of decay or softness. One spoiled sweet potato can quickly spread decay to others.
- Separate storage: Store different sizes separately to prevent contact and potential damage during storage. Large sweet potatoes can bruise or crush smaller ones, accelerating spoilage.
- Avoid refrigeration: Refrigeration is not suitable for sweet potatoes as it can negatively impact their flavor and texture. The cold temperature can convert starches to sugars, resulting in an off-taste and a gritty, unpleasant texture.
- Rotate your stock: To ensure that you consume the sweet potatoes before they start to deteriorate, regularly rotate your stock. Use the older sweet potatoes first and replace them with fresh ones from the storage.
By following these storage tips, you can prolong the shelf life of sweet potatoes and enjoy their delicious flavor and nutritional benefits throughout the year.