
Choosing the Right Air Plant for Your Home
When it comes to selecting an air plant for your home, there are a few key factors to consider. Not all air plants are the same, and each species has its own unique set of care requirements. By understanding these factors, you can choose the right air plant that will thrive in your specific living environment.
One important consideration is the size of the air plant. Air plants come in various sizes, ranging from small, delicate specimens to larger, more robust plants. Think about the available space in your home and the aesthetic you’re trying to achieve. If you have limited space, smaller air plants like Tillandsia ionantha or Tillandsia caput-medusae are great choices. On the other hand, if you want to make a bold statement, consider larger varieties like Tillandsia xerographica or Tillandsia fasciculata.
Another factor to consider is the lighting conditions in your home. While air plants can tolerate a wide range of lighting conditions, it’s essential to choose a species that matches the light levels available in your space. For brighter areas with direct sunlight, consider sun-loving species like Tillandsia streptophylla or Tillandsia bergeri. If your home has lower light levels, opt for shade-tolerant varieties such as Tillandsia stricta or Tillandsia bulbosa.
Consider the humidity levels in your home as well. Some air plants prefer higher humidity, while others can tolerate drier conditions. If you live in a more humid environment or have a natural source of moisture nearby (like a bathroom), you can choose air plants that thrive in higher humidity, such as Tillandsia cyanea or Tillandsia tectorum. In drier environments, opt for air plants that are more tolerant to dry conditions, like Tillandsia capitata or Tillandsia neglecta.
Additionally, think about your ability to provide the necessary care for the air plants you choose. Some species require more attention and frequent watering, while others can withstand periods of neglect. If you’re a first-time air plant owner or have a busy schedule, consider low-maintenance varieties like Tillandsia brachycaulos or Tillandsia harrisii.
Lastly, don’t forget to consider the aesthetic appeal of the air plant. Air plants come in a variety of shapes, textures, and colors, offering endless opportunities for creative displays. Whether you prefer the silvery-grey leaves of Tillandsia xerographica or the vibrant pink blooms of Tillandsia aeranthos, choose an air plant that resonates with your personal style and complements your home décor.
By carefully selecting the right air plant for your home based on size, lighting, humidity, maintenance needs, and aesthetics, you can ensure that your air plant thrives and adds beauty to your living space.
Light Requirements for Air Plants
Light is a crucial element for the health and well-being of air plants. Understanding their light requirements is essential to ensure that they receive adequate exposure and thrive in your home. Here are some key points to consider:
1. Bright Indirect Light: Most air plants thrive in bright indirect light. This means placing them near a window where they can receive filtered sunlight or a few feet away from a well-lit area. Avoid placing air plants in direct sunlight, as it can scorch their leaves. If your home lacks natural light, you can also use artificial grow lights to provide the necessary light intensity.
2. The intensity of Light: Different air plant species have varying tolerances for light intensity. Some species, such as Tillandsia stricta and Tillandsia ionantha, can tolerate brighter light, while others, like Tillandsia bulbosa and Tillandsia caput-medusae, prefer lower light conditions. Observe how your air plant responds to the light you provide. If the leaves start turning brown or yellow, it may be an indication of too much light and you should adjust the placement accordingly.
3. Duration of Light: Air plants generally require 10-14 hours of light each day. However, they also need a period of darkness to rest and rejuvenate. Avoid keeping them in constant light without any dark periods. Providing a regular light schedule simulating natural day and night cycles can promote better growth and overall health of the plants.
4. Lighting Considerations for Different Environments: The light available in your home can vary depending on factors such as window orientation and obstructions. If your home has strong, direct sunlight, consider placing air plants a few feet away from the window to avoid leaf burn. In spaces with lower light levels, such as north-facing windows or rooms with limited natural light, choose air plant varieties that are more tolerant to lower light conditions, such as Tillandsia neglecta or Tillandsia gardneri.
5. Rotation: To ensure even growth and prevent the plant from leaning towards a light source, rotate your air plants regularly. Every few weeks, turn the plant in a different direction so that all sides receive equal exposure to light. This helps maintain a balanced and symmetrical appearance.
Remember, finding the perfect balance of light for your air plants may require some trial and error. Observe how your plants respond and adjust their placement accordingly. With the right amount and quality of light, your air plants will thrive and showcase their unique beauty in your home.
Watering and Misting Techniques for Air Plants
Proper watering is essential for the overall health and well-being of air plants. Unlike traditional houseplants, air plants do not draw nutrients from soil but absorb moisture through their leaves. Understanding the correct watering and misting techniques will help you maintain healthy and thriving air plants. Here are some guidelines to follow:
1. Water Quality: Air plants are sensitive to the quality of water they receive. To ensure optimal health, it is best to use filtered or purified water. Avoid using tap water, as it often contains chemicals like chlorine, which can harm the plants over time.
2. Soaking Method: One of the most effective ways to water air plants is through the soaking method. Fill a bowl or basin with water that is at room temperature. Submerge the air plant in the water, ensuring that all the leaves are fully immersed. Let it soak for 20-30 minutes. After soaking, remove the plant from the water and gently shake off any excess moisture.
3. Mist and Spray: Misting is another popular method for watering air plants. Fill a spray bottle with filtered water and mist the plants once or twice a week. Mist every angle of the plant, ensuring that all the leaves are lightly coated with water. Avoid misting too close or with excessive force, as this can damage the delicate leaves.
4. Drying Time: After watering or misting, it is crucial to allow the air plants to dry completely. Excess moisture can lead to rot and cause damage to the plant. Place the air plants in a well-ventilated area with good air circulation. Avoid placing them in closed containers or terrariums without proper airflow.
5. Watering Frequency: The frequency of watering depends on various factors, including the species of air plant, the prevailing humidity level, and the environmental conditions. As a general guideline, aim to water air plants once a week. However, you may need to adjust the watering frequency based on your specific environment. Monitor the plants closely and water when the leaves start to curl or look dry.
6. Adjusting Watering Schedule: During hot and dry periods, air plants may require more frequent watering. In contrast, during cooler and more humid conditions, they may need less water. Pay attention to their physical appearance and make adjustments to the watering schedule accordingly.
Remember, finding the right balance of watering for your air plants may take some time and observation. By following these techniques and adjusting them based on the specific needs of your air plants, you can ensure they receive the appropriate moisture and stay healthy and vibrant.
Temperature and Humidity for Air Plants
Creating the right temperature and humidity conditions is essential for the well-being and growth of air plants. These unique plants thrive in specific environmental conditions, and understanding their temperature and humidity requirements will ensure their optimal health. Here are some key considerations:
Temperature: Air plants generally prefer temperatures between 50°F (10°C) and 90°F (32°C). While they can tolerate a wide range of temperatures, it is best to avoid extreme heat or cold. Drastic temperature fluctuations can stress the plants and affect their overall health. If you keep air plants indoors, ensure that they are not exposed to drafts from air conditioning units, heaters, or direct contact with windows during extreme weather conditions.
Humidity: Air plants are naturally adapted to thrive in humid environments, making proper humidity levels important for their well-being. Ideally, the humidity for air plants should be around 50%-60%. If you live in a drier climate, you can maintain adequate humidity levels by misting the plants regularly, placing them near a humidifier, or creating a humidity tray filled with water and pebbles. Conversely, if you live in a very humid environment, ensure there is sufficient air circulation to prevent excessive moisture buildup, which can lead to rot and fungal issues.
Humidity Requirements for Specific Species: Different species of air plants may have varying humidity requirements. Species like Tillandsia ionantha and Tillandsia caput-medusae can tolerate lower humidity levels compared to species like Tillandsia tectorum and Tillandsia cyanea, which thrive in higher humidity environments. Take into account the specific needs of your air plant species when determining the appropriate humidity levels.
Monitoring and Adjusting: It’s important to monitor the temperature and humidity levels in the area where you keep your air plants. You can use a hygrometer to measure humidity and keep track of the temperature. If the humidity is consistently low, you may need to provide additional moisture through misting or other methods mentioned earlier. On the other hand, if the humidity is excessively high, ensure that there is proper ventilation to prevent stagnant air around the plants.
Avoiding Extremes: Air plants are adaptable to a certain extent, but extreme temperature or humidity conditions can negatively impact their health. Avoid placing air plants in direct sunlight or near heat sources that can cause overheating. Similarly, avoid placing them in excessively damp or poorly ventilated areas that can lead to moisture-related issues.
By providing suitable temperature and humidity conditions for your air plants, you can create an environment where they can thrive and showcase their unique beauty. Pay attention to their specific needs, monitor the environment, and make necessary adjustments to ensure optimal growth and health.
Fertilizing Air Plants
Although air plants can survive without regular fertilization, providing them with proper nutrients can enhance their growth, bloom production, and overall health. While they extract nutrients from the air and rainfall, the limited availability of these sources might make supplementing their diet with fertilizer beneficial. Here are some key points to consider when fertilizing air plants:
1. Choosing the Right Fertilizer: Selecting a suitable fertilizer is crucial for the well-being of air plants. Look for a water-soluble fertilizer specifically formulated for epiphytic plants or bromeliads. These fertilizers contain essential micronutrients like nitrogen, phosphorus, and potassium, as well as trace elements that air plants require for healthy growth. Avoid using fertilizers high in nitrogen, as this can lead to excessive leaf growth at the expense of flowering.
2. Dilution and Frequency: It is important to dilute the fertilizer to avoid over-fertilization, which can harm the plants. Follow the instructions on the fertilizer package for the recommended dilution ratios. As a general guideline, fertilize air plants once a month during the growing season (spring and summer) and reduce or stop fertilization during the dormant period (fall and winter). Adjust the fertilization schedule based on the specific instructions and the individual needs of your air plants.
3. Applying the Fertilizer: To apply the fertilizer, water the air plants first and ensure they are well-hydrated. Then, either submerge the plants in a diluted fertilizer solution for a few minutes or gently mist them with the diluted fertilizer mixture. Ensure that the fertilizer comes in contact with the entire plant, including the base and the leaves. After fertilization, allow any excess fertilizer to drain off or mist with plain water to prevent build-up on the leaves, which can lead to burning or damage.
4. Organic Alternatives: If you prefer to use organic fertilizers, consider using natural options like compost tea or organic liquid fertilizers. These options provide nutrients in a more natural and gentle manner, promoting the overall health of air plants. Remember to follow the dilution instructions provided by the manufacturer.
5. Monitoring and Adjusting: Observe how your air plants respond to the fertilizer and monitor their growth. If you notice signs of over-fertilization, such as brown or burnt tips on the leaves, reduce the frequency or strength of the fertilizer. On the other hand, if the plants show signs of slow growth or lack of vibrancy, you may need to increase the frequency or strength of the fertilizer application. Regular monitoring and adjustment will help you find the right balance for your air plants.
6. Water Rinse: Approximately once a month, after a few fertilization cycles, it’s a good practice to give your air plants a thorough water rinse. This will help remove any fertilizer residue and prevent build-up on the leaves, ensuring the optimal health and longevity of the plants.
Fertilizing air plants can provide them with essential nutrients to support their growth and overall vitality. By following these guidelines and monitoring the responses of your air plants, you can ensure they receive the right amount of fertilization for optimal health and beauty.
Air Plant Containers and Display Ideas
When it comes to showcasing your air plants, the right container and display can elevate their beauty and create a striking visual impact. Air plants don’t require soil, allowing for endless creative possibilities when it comes to choosing containers and display options. Here are some ideas to inspire you:
1. Glass Terrariums: Glass terrariums provide a stunning display for air plants, creating a mini-ecosystem. These enclosed glass containers help maintain higher humidity levels around the plants, creating a microclimate that mimics the natural environment for air plants. Select a terrarium design that suits your style, whether it’s a geometric terrarium, hanging terrarium, or a larger tabletop version.
2. Hanging Displays: Hanging your air plants can add an element of whimsy and allow them to be showcased at eye level. Use macramé plant hangers, decorative hooks, or wall-mounted planters to suspend your air plants and create an intriguing focal point in your space. You can also incorporate different levels and heights to create an eye-catching arrangement.
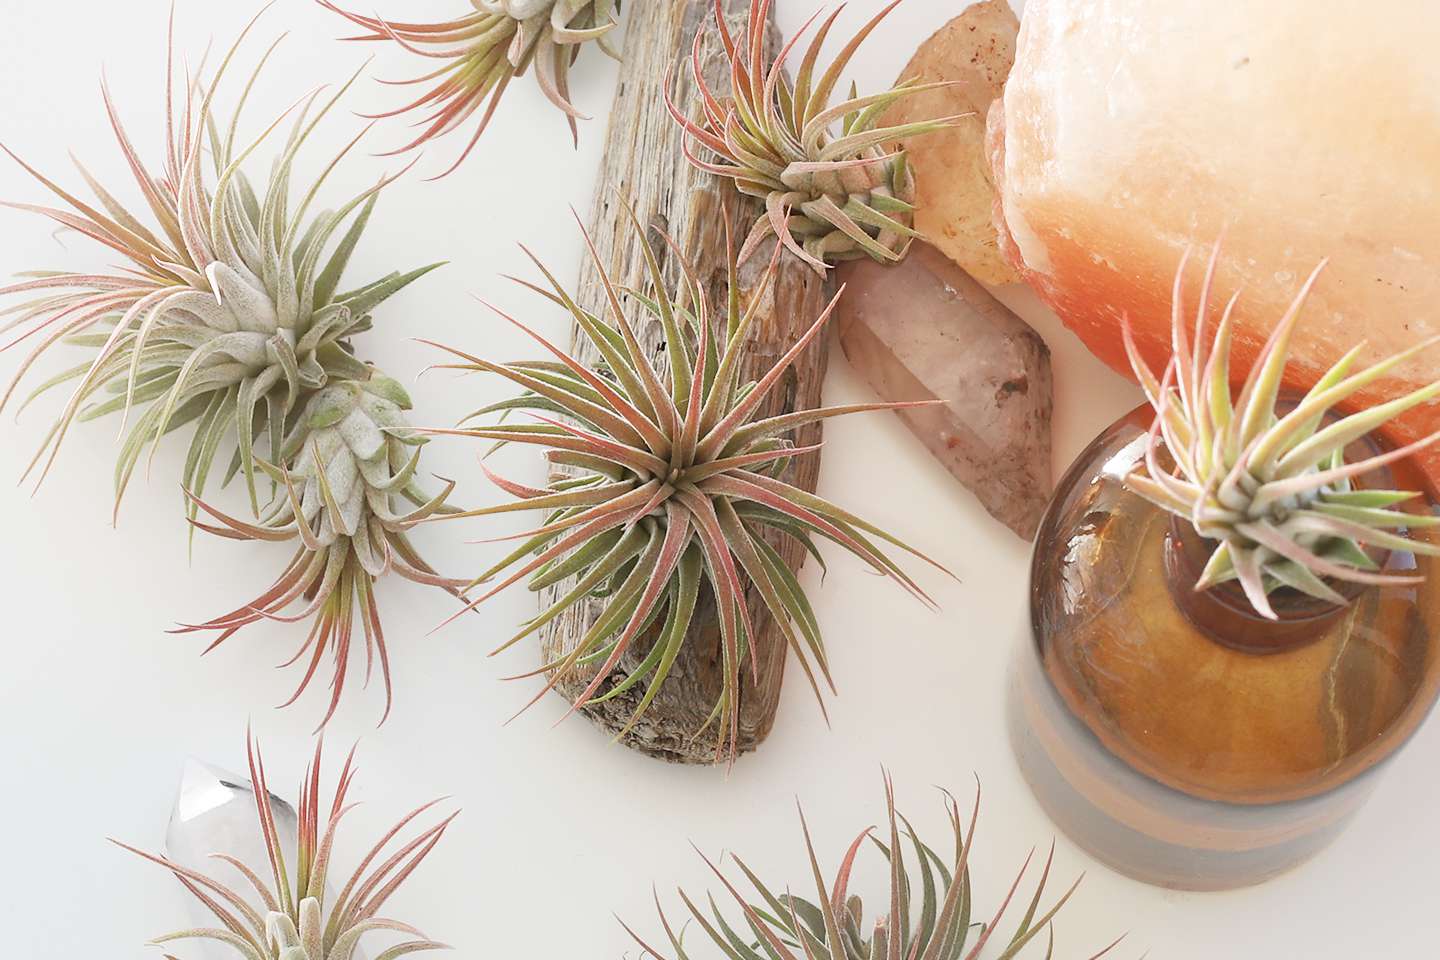
3. Driftwood or Branches: Natural elements like driftwood, branches, or twigs can provide a unique and organic display for air plants. Nestle your air plants within the crevices or attach them to the branches using non-toxic glue or plant-safe wire. This creates an interesting and dynamic visual display, where the air plants seem to effortlessly interact with their natural surroundings.
4. Decorative Bowls and Dishes: Choose decorative bowls or dishes made of materials such as ceramic, concrete, or wood to create a stylish container for your air plants. These containers can be filled with decorative pebbles, sand, or moss to provide stability for the plants while adding texture and visual interest.
5. Wall-mounted Displays: Get creative with wall-mounted displays to transform your air plants into living wall art. Hang air plants in small individual planters or create a larger arrangement using a modular system that allows for flexibility and customization. This not only showcases your air plants but also adds a unique and living element to your walls.
6. Unique & Upcycled Containers: Explore unconventional containers to display your air plants. Upcycle items like seashells, vintage teacups, or antique glass bottles, giving them a new purpose. This not only adds character and charm but also helps to create a one-of-a-kind display that reflects your personal style.
Remember to consider the specific needs of your air plants when choosing containers and displays. Ensure that the chosen containers provide enough air circulation and allow for proper drainage to prevent moisture-related issues. Regularly assess the health of your air plants and make adjustments if needed.
With the wide array of creative options available, you can find the perfect container and display that enhances the natural beauty of your air plants while adding a touch of artistic flair to your living space.
Proper Air Circulation for Air Plants
Adequate air circulation is essential for the health and well-being of air plants. These unique plants, also known as epiphytes, thrive in areas with good airflow. Proper air circulation helps prevent moisture buildup, decreases the risk of fungal or bacterial issues, and ensures that the plants receive fresh oxygen. Here are some important considerations for maintaining proper air circulation for your air plants:
1. Avoid Closed Containers: While air plants can be displayed in enclosed containers like terrariums, it is important to ensure that there is adequate ventilation. Closed containers without proper airflow can trap excess moisture, leading to rot or fungal growth. If you choose to use a closed container, periodically open it for a few hours to allow fresh air to circulate around the plants.
2. Spacing: Ensure that your air plants are not overcrowded. Allow sufficient space between them to allow air to freely flow around each plant. Overcrowding can restrict air movement and create a humid microenvironment that promotes the growth of pathogens.
3. Placement: Consider the placement of your air plants in your home. Avoid placing them in areas with stagnant air, such as corners or closed-off rooms. Instead, choose locations with good natural air circulation, such as near windows or in areas where there is regular airflow from fans or HVAC vents.
4. Natural Breezes: Harness natural breezes to promote air circulation for your air plants. Place them near open windows or doors, allowing air to gently flow around them. Natural airflow can help reduce the risk of stagnant air and enhance the overall health of the plants.
5. Airy Display Options: Opt for display options that promote good air circulation. Choose hanging displays, wall-mounted stands, or open shelves that allow air to circulate freely around the plants. Avoid dense materials or containers that restrict airflow or trap moisture.
6. Regular Maintenance: Regularly assess the health of your air plants and their surrounding environment. If you notice any signs of excess moisture, such as a musty smell or discoloration on the leaves, it may indicate poor air circulation. Adjust the placement or display of your air plants accordingly to encourage better airflow.
7. Cleaning: Periodically clean the leaves of your air plants to ensure optimal air circulation. Dust and debris can accumulate on the leaves, hindering their ability to absorb nutrients and moisture from the air. Gently rinse the plants under lukewarm water or mist them, removing any dust or debris that may have settled on the leaves.
By implementing proper air circulation practices, you can create an ideal environment for your air plants to thrive. Good airflow helps regulate moisture levels, prevents stagnation, and ensures the overall health and longevity of these fascinating plants.
Propagating Air Plants
Propagating air plants, also known as multiplying or reproducing them, is an exciting process that allows you to expand your collection and share the beauty of these unique plants. While air plants primarily reproduce by producing offsets or “pups,” there are a few different methods you can use to propagate them. Here are some common techniques for propagating air plants:
1. Offsets: Offsets are natural side shoots that air plants produce as part of their growth process. These miniature versions of the parent plant can be gently separated from the main plant once they have grown to about one-third the size of the parent plant. To separate them, carefully twist or wiggle the offset until it comes loose. Place the offset in a new home, ensuring that its base makes contact with a suitable growing surface.
2. Seed Propagation: While propagating air plants from seeds is possible, it is a more time-consuming process and requires patience. It is best suited for experienced growers and those who want to experiment with different varieties. To propagate from seeds, collect the seeds and sow them in a suitable growing medium. Maintain consistent humidity, warmth, and moisture levels to promote germination and initial growth.
3. Division: Division is a method used for larger air plant varieties that produce clumps or rosettes. Using clean and sharp gardening shears, carefully divide the clump into separate individual plants. Ensure that each division has enough roots attached. Plant the divided clumps or rosettes in suitable growing conditions, allowing new roots to establish.
4. Leaf Cuttings: While less common, leaf cutting propagation can be attempted for certain air plant species. Take a healthy leaf and cut it into sections, ensuring that each section has a portion of the leaf base. Place the leaf cuttings in a suitable growing medium, mist lightly, and provide a warm and humid environment. Over time, new plantlets may emerge from the leaf cuttings, which can then be transferred to their own growing space.
5. Tissue Culture: Tissue culture is a more advanced form of propagating air plants and is typically done in a controlled laboratory environment. This technique involves taking small tissue samples from the parent plant and cultivating them in a nutrient-rich medium. Tissue culture allows for rapid multiplication and the production of a large number of new plants in a short period.
Regardless of the propagation method you choose, it’s important to provide proper care and suitable growing conditions for the newly propagated air plants. Give them sufficient light, appropriate watering, and the necessary environmental factors to encourage their growth and establishment.
Propagating air plants can be an enjoyable and rewarding experience. Experiment with different techniques and explore the fascinating world of multiplying these captivating plants. With patience and care, you can expand your air plant collection and share their beauty with others.
Common Mistakes to Avoid When Caring for Air Plants
Caring for air plants may seem simple, but there are several common mistakes that many plant enthusiasts make. By being aware of these pitfalls, you can ensure the health and longevity of your air plants. Here are some common mistakes to avoid:
1. Overwatering: One of the most common mistakes is overwatering air plants. While they do need moisture, allowing the plants to sit in water or constantly keeping them wet can lead to rot and other issues. Instead, follow a regular watering schedule and ensure the plants have proper drainage to avoid waterlogging.
2. Insufficient Air Circulation: Air plants thrive in areas with good air circulation. Placing them in stagnant or poorly ventilated spaces can lead to a buildup of moisture and increase the risk of fungal or bacterial infections. Ensure there is ample airflow around the plants, avoiding closed containers without adequate ventilation.
3. Incorrect Lighting: Air plants require proper lighting to thrive. Placing them in areas with too much direct sunlight can result in leaf burn, while inadequate light can lead to weak growth and poor health. Find the right balance by providing bright, indirect light for most air plant species.
4. Using Tap Water: Tap water often contains minerals and chemicals that can harm air plants over time. Avoid using tap water and opt for filtered or purified water instead. Alternatively, you can collect rainwater for watering your air plants.
5. Neglecting Regular Maintenance: Air plants may be low-maintenance, but they still require some attention. Neglecting regular maintenance, such as removing dead leaves or adjusting watering schedules as the seasons change, can lead to the decline of your air plants. Stay proactive and consistently assess their needs.
6. Overfertilizing: While air plants can benefit from the occasional fertilization, it is important to follow the recommended dilution rates and frequency. Overfertilizing can cause nutrient burn or interfere with the natural growth patterns of the plants. Stick to a balanced fertilization schedule to avoid harming your air plants.
7. Lack of Humidity: Air plants naturally thrive in humid environments. If you live in a particularly dry climate, it is important to provide adequate humidity for your plants. Mist them regularly or consider using a humidifier or humidity tray to maintain the moisture levels they require.
8. Ignoring Warning Signs: Pay attention to any changes in the appearance of your air plants. Yellowing leaves, dry or crispy foliage, or a lack of growth can all indicate underlying issues. Address these warning signs promptly by adjusting watering, lighting, or environmental conditions to restore the health of your air plants.
Avoiding these common mistakes and understanding the specific care needs of your air plants will help you provide the proper environment for their growth and well-being. By giving them the attention they require, you can enjoy beautiful and thriving air plants that will enhance your living space.
Troubleshooting Tips for Sick or Unhealthy Air Plants
Even with proper care, air plants can occasionally encounter issues that affect their health and appearance. If your air plants are showing signs of being sick or unhealthy, taking prompt action can help restore their vitality. Here are some troubleshooting tips to address common issues with air plants:
1. Overwatering: If you notice rot, browning, or a mushy appearance of the base or leaves, it is likely due to overwatering. To remedy this, remove the affected areas using clean and sharp tools. Adjust your watering frequency and make sure the plants have proper drainage. Allow the plants to dry completely between waterings to prevent future overwatering issues.
2. Underwatering: If the leaves appear shriveled, curled, or are turning brown, it may indicate underwatering. Ensure you are watering your air plants adequately based on their specific needs. Submerge them in water or thoroughly mist them, ensuring they are hydrated. Increase the frequency of watering if necessary, especially in drier environments.
3. Insufficient Light: If your air plants are displaying elongated or stretched growth, it may indicate a lack of sufficient light. Move the plants to a brighter location with indirect sunlight or consider using grow lights to supplement their light requirements. Monitor their growth and adjust their placement accordingly to ensure they receive the optimal amount of light.
4. Light Burn: Air plants exposed to excessive direct sunlight can experience leaf burn, resulting in brown or scorched leaves. Move the plants to a more shaded area, away from the direct path of sunlight. If necessary, filter the light through sheer curtains or place them in a location with diffused lighting to protect them from excessive sun exposure.
5. Poor Air Circulation: Stagnant air can lead to the development of fungal or bacterial issues. Ensure that your air plants have proper air circulation by placing them in an area with good ventilation. Increase air movement using fans or by periodically opening windows to promote healthy air circulation around the plants.
6. Fertilizer Burn: If you notice brown or scorched tips on your air plant leaves, it may be a sign of fertilizer burn. Reduce or dilute the concentration of the fertilizer you use, and ensure that you are following the recommended fertilization schedule. Rinse the plants thoroughly with water to remove any excess fertilizer that may be causing the burn.
7. Lack of Humidity: Dry air can cause air plants to show signs of dehydration and stress. Increase humidity levels by misting the plants regularly or placing them near a humidifier. Creating a humidity tray or grouping air plants together in a tray filled with water and pebbles can also help provide the needed moisture.
8. Pest Infestation: Air plants can be susceptible to pests such as mealybugs or aphids. If you notice small insects or cotton-like masses on your plants, gently wipe them off using a cotton swab dipped in rubbing alcohol or neem oil. For severe infestations, consider using an organic insecticidal soap or consult a professional for guidance.
By promptly identifying and addressing these issues, you can improve the health and well-being of your air plants. Regularly observe and care for your plants to prevent potential problems and ensure that they continue to thrive and bring beauty to your living space.