
Why should you change the water filter in your Samsung refrigerator?
Regularly changing the water filter in your Samsung refrigerator is crucial for several reasons. The water filter plays a vital role in maintaining the quality and safety of the water you consume. Here are the main reasons why you should prioritize changing the water filter:
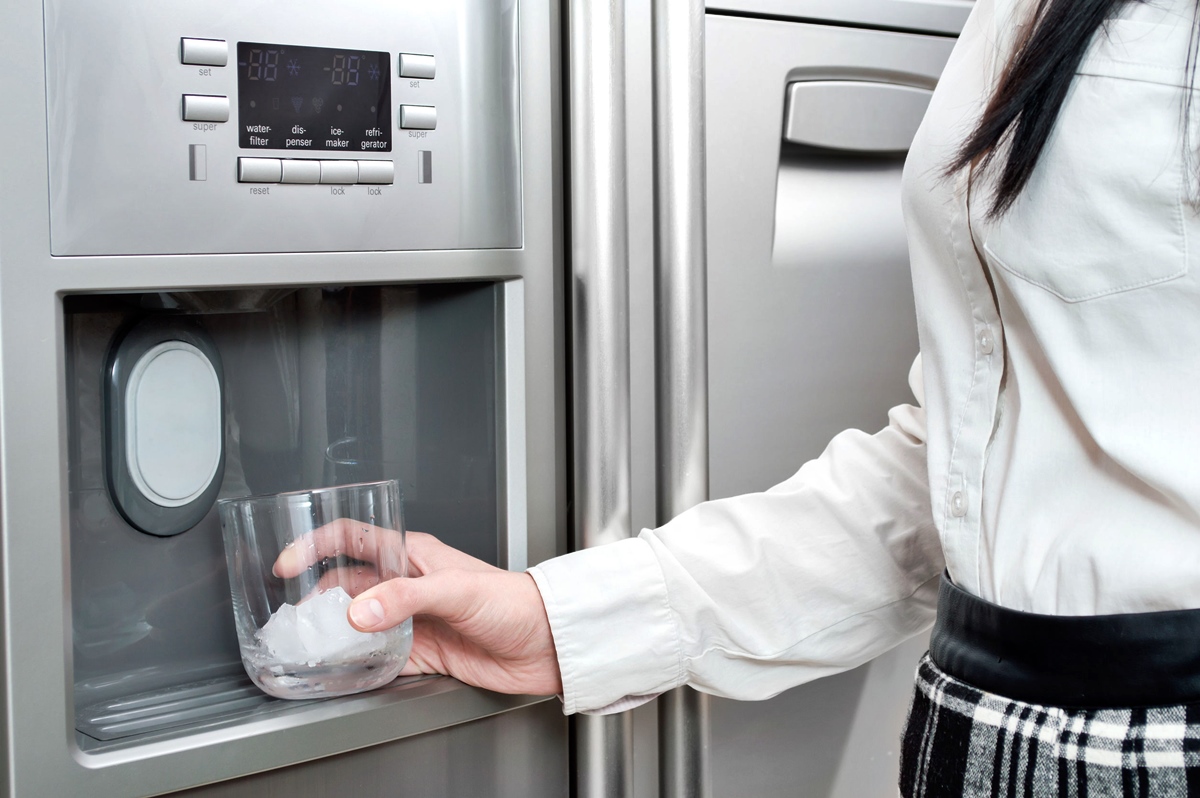
- Improved water quality: Over time, the water filter in your refrigerator can become clogged with impurities, including sediment, chlorine, and other contaminants. These impurities can affect the taste and odor of your water, making it less enjoyable to drink. By regularly changing the water filter, you can ensure that the water flowing from your refrigerator dispenser or ice maker is clean, clear, and free from unwanted particles.
- Health and safety: A clean and properly functioning water filter helps remove harmful substances from your drinking water, such as bacteria, viruses, and heavy metals. By changing the water filter as recommended, you can minimize the risk of consuming water that may contain potential health hazards. This is especially important if you have a compromised immune system, are pregnant, or have young children in your household.
- Optimal performance: A clogged or old water filter can restrict water flow, leading to decreased efficiency in your refrigerator’s water dispenser and ice maker. By changing the water filter regularly, you ensure the proper functioning of these components and maintain a steady water flow.
- Extend the life of your refrigerator: When the water filter is clogged, your refrigerator’s cooling system may have to work harder to maintain the desired temperature, putting unnecessary strain on the appliance. By changing the water filter regularly, you can help your refrigerator operate efficiently and potentially extend its lifespan.
- Manufacturer recommendations: Samsung recommends replacing the water filter every six months or after dispensing about 300 gallons of water, whichever comes first. Adhering to these guidelines ensures that your Samsung refrigerator continues to provide you with clean and refreshing water.
By understanding the importance of changing your Samsung refrigerator’s water filter, you can ensure the health, safety, and optimal performance of your appliance.
Step-by-step guide to changing the water filter in your Samsung refrigerator
Changing the water filter in your Samsung refrigerator is a simple process that you can easily accomplish with a few basic steps. Follow this step-by-step guide to ensure a seamless and successful filter replacement:
- Gather the necessary materials: Before starting, ensure that you have a replacement water filter compatible with your Samsung refrigerator model. Refer to your refrigerator’s manual or consult the manufacturer’s website to find the correct filter. You may also need a towel or cloth for any potential drips.
- Locate the water filter: The water filter is typically located inside the refrigerator compartment. The exact location may vary depending on your model, but it is commonly found in the upper right corner or at the bottom of the refrigerator.
- Prepare for the replacement: To avoid any water leakage, turn off the water supply to your refrigerator. This is usually done by turning the shut-off valve located behind or near the refrigerator. It’s also helpful to dispense a small amount of water from the dispenser to relieve any pressure in the system.
- Remove the old water filter: Once the water supply is turned off, carefully twist the old water filter counterclockwise. Some models may require you to push a release button or slide the filter cover to access the filter. Be prepared for a small amount of water to drip from the filter housing. Use a towel or cloth to catch any spills.
- Insert the new water filter: Take the new water filter out of its packaging and remove any protective caps or seals. Align the filter with the filter housing and insert it into place. Twist the filter clockwise until it locks securely into position. Make sure it is fully tightened to prevent any leaks.
- Flush the new water filter: Once the new filter is installed, it’s important to flush out any air or carbon residue. Run water through the dispenser for approximately five minutes or until the water flows smoothly and without any air bubbles. Discard the flushed water.
- Reset the filter indicator: If your Samsung refrigerator has a filter indicator light, it is crucial to reset it after replacing the filter. Consult your refrigerator’s manual to determine the specific method for resetting the indicator, as it can vary between models.
- Turn on the water supply: After completing the filter replacement and flushing process, turn the water supply back on. Double-check for any leaks around the filter housing or connections. If you notice any leaks, ensure the filter is properly installed or consult a professional if needed.
By following these step-by-step instructions, you can easily and successfully change the water filter in your Samsung refrigerator, ensuring clean and refreshing water for you and your family.
Things you’ll need to change the water filter
Before you begin the process of changing the water filter in your Samsung refrigerator, it’s important to gather the necessary materials. Having these items on hand will ensure a smooth and hassle-free filter replacement. Here’s a list of things you’ll need:
- Replacement water filter: Make sure to purchase a replacement water filter that is compatible with your specific Samsung refrigerator model. Refer to your refrigerator’s manual or check the manufacturer’s website for the correct filter part number.
- Towel or cloth: Having a towel or cloth nearby is helpful to catch any drips or spills that may occur during the filter replacement process.
- Owner’s manual: Keep your refrigerator’s owner’s manual readily available. It contains valuable information about your specific model’s water filter replacement process and any additional steps you need to follow.
- Protective gloves (optional): Wearing protective gloves is not mandatory, but it can be useful, especially if you prefer to keep your hands clean throughout the process.
- Tape or marker (optional): While not essential, having tape or a marker can be helpful to note down the date of the filter replacement for future reference. This can serve as a reminder for when you’ll need to change the water filter again.
By ensuring you have these necessary items on hand, you’ll be well-prepared to change the water filter in your Samsung refrigerator. This will help you maintain the quality and safety of the water you consume, ensuring a refreshing and clean water supply for you and your family.
Locating the water filter in your Samsung refrigerator
Before you can change the water filter in your Samsung refrigerator, you need to locate its position within the appliance. The exact location of the water filter may vary depending on your refrigerator model, but here are a few common areas where it is typically located:
- Upper-right corner: In many Samsung refrigerator models, the water filter can be found in the upper-right corner of the refrigerator compartment. Look for a rectangular or cylindrical housing with a twist-lock mechanism.
- Bottom of the refrigerator: Some Samsung refrigerator models feature the water filter at the bottom of the appliance, near the vegetable or crisper drawers. It may be located behind a cover that needs to be removed before accessing the filter.
- Inside the refrigerator compartment: In certain models, the water filter is situated inside the refrigerator compartment itself. Look for a small, round filter housing that can be accessed from within the fridge.
To determine the exact location of the water filter in your Samsung refrigerator, there are a few steps you can follow:
- Refer to your owner’s manual: Your refrigerator’s owner’s manual provides detailed information about the location of the water filter for your specific model. It will offer clear instructions and illustrations to help you find it.
- Check the Samsung website: If you no longer have the physical copy of your owner’s manual, or if you prefer a digital resource, visit the Samsung official website. They usually provide electronic manuals that can be easily searched and accessed.
- Look for signage or labels: Many Samsung refrigerators have labels or signs inside the refrigerator compartment that indicate the location of the water filter. Check for any visible markings that point to the filter’s position.
By locating the water filter in your Samsung refrigerator before attempting to change it, you can ensure a smooth and efficient filter replacement process. Always consult your owner’s manual or reliable sources of information for specific instructions pertaining to your particular refrigerator model.
Removing the old water filter
Once you have located the water filter in your Samsung refrigerator, the next step in the filter replacement process is to remove the old filter. Follow these steps to safely and properly remove the old water filter:
- Turn off the water supply: Before removing the old water filter, it’s important to turn off the water supply to your refrigerator. Locate the shut-off valve, typically located behind or near the refrigerator, and turn it clockwise to shut off the water flow. This will prevent any leaks or spills during the filter replacement process.
- Prepare for potential drips: When removing the water filter, be prepared for some water to drip from the filter housing. To avoid any mess, place a towel or cloth underneath the filter to catch any drips.
- Twist the old filter counterclockwise: Grip the old filter firmly with one hand and twist it counterclockwise. Most Samsung refrigerators have a twist-lock mechanism that allows you to easily remove the filter. You may need to apply a bit of pressure, but be cautious not to force it too much to prevent any damage to the filter housing.
- Release any residual pressure: After removing the old filter, it’s common to encounter some residual pressure. To release this pressure, dispense a small amount of water from the refrigerator’s dispenser. This will help relieve any built-up pressure in the system.
- Dispose of the old filter: Once the old filter has been removed, safely dispose of it according to your local regulations and guidelines. Check with your local waste management facility for proper disposal methods or recycling options for water filters. Some stores may also have specific programs in place for recycling used filters.
By following these steps, you will be able to safely and effectively remove the old water filter from your Samsung refrigerator. Remember to turn off the water supply, be prepared for drips, and dispose of the old filter properly before proceeding to install the new one.
Installing the new water filter
After successfully removing the old water filter from your Samsung refrigerator, it’s time to install the new one. Follow these steps to ensure a proper and secure installation:
- Remove the new filter from its packaging: Start by taking the new water filter out of its packaging. Remove any protective caps or seals that may be present to expose the filter.
- Align the filter with the housing: Hold the new filter and align it with the filter housing inside the refrigerator. Make sure the filter is facing the correct way, with the arrow or label indicating the flow direction facing towards you.
- Insert the new filter into the housing: Gently push the new filter into the housing until it stops. You may need to apply slight pressure to ensure a snug fit. Be careful not to push too hard or force the filter, as it should slide in smoothly.
- Twist the new filter clockwise: Once the filter is fully inserted, begin twisting it clockwise to lock it into place. This will secure it within the filter housing. Continue twisting until you feel the filter lock and it is securely tightened.
- Check for proper installation: After installing the new filter, double-check to ensure it is properly installed. It should be securely locked in place and not wobble or move when gently touched.
- Reset the filter indicator light (if applicable): If your Samsung refrigerator has a filter indicator light, follow the instructions in your owner’s manual to reset it after installing the new filter. This will ensure accurate tracking of the filter’s lifespan and prompt replacement reminders.
By following these steps, you will be able to successfully install the new water filter in your Samsung refrigerator. Ensure that the filter is aligned properly, securely inserted, and tightened to prevent any leaks or water bypassing the filter. Remember to consult your refrigerator’s owner’s manual for specific instructions related to your model.
Flushing the new water filter
After installing the new water filter in your Samsung refrigerator, it is essential to flush it to remove any air or carbon residue. This will ensure that the water flowing through the filter is clean and free from any potential contaminants. Follow these steps to properly flush the new water filter:
- Prepare a container for collecting water: Place a container, such as a pitcher or a large cup, under the refrigerator’s water dispenser. This will collect the water that flows during the flushing process.
- Dispense water through the dispenser: Push the dispenser lever or button on your refrigerator’s door to begin the water flow. Allow the water to run for approximately five minutes or until the stream becomes steady and free from any air bubbles.
- Discard the flushed water: As the water flows, it is normal to see some discoloration or particles during the initial flush. This is the result of trapped air and loose carbon fines being flushed out. Dispose of this water by pouring it down the sink.
- Continue flushing if necessary: If you notice any lingering discoloration or particles in the water, continue the flushing process until the water becomes clear and free from any impurities.
Flushing the new water filter is essential to ensure optimal performance and the highest quality water from your Samsung refrigerator. It helps remove any air pockets or loose carbon particles that may have been trapped during the installation process. By following these steps and thoroughly flushing the filter, you can enjoy clean, clear, and refreshing water.
Resetting the filter indicator light
If your Samsung refrigerator is equipped with a filter indicator light, it is important to reset it after installing a new water filter. The filter indicator light serves as a reminder to replace the filter when it has reached its recommended lifespan. Here’s how you can reset the filter indicator light:
- Locate the filter reset button or switch: Check your refrigerator’s user manual or look inside the refrigerator for the location of the filter reset button or switch. It is typically located near the water filter housing or on the control panel of the refrigerator.
- Press and hold the filter reset button: Once you have located the filter reset button, press and hold it for a few seconds. The exact duration may vary depending on your specific refrigerator model, so consult your manual for the recommended time length.
- Wait for the indicator light to change: After holding the filter reset button, wait for the indicator light to change. It may blink, turn off, or change color. This indicates that the filter indicator light has been successfully reset.
- Verify the reset: To confirm that the filter indicator light has been reset, check whether it is displaying the appropriate status. The light may have turned off or changed to a new color or icon, indicating a fresh filter installation.
- Record the new filter installation date: To help keep track of when to replace your water filter in the future, record the date of the new filter installation in a convenient location. You can use tape, a marker, or a calendar reminder to note down the date, ensuring that you replace the filter according to the manufacturer’s recommended timeline.
Resetting the filter indicator light is essential to ensure accurate tracking of your water filter’s lifespan and to receive timely reminders for filter replacement. Following these steps will help you reset the filter indicator light and keep your Samsung refrigerator operating efficiently and providing you with clean and filtered water.
How often should you change the water filter in your Samsung refrigerator?
Regularly changing the water filter in your Samsung refrigerator is essential to maintain the quality of your drinking water and the efficiency of your appliance. The frequency at which you should change the filter depends on various factors, including the model of your Samsung refrigerator and your water usage. Here are some general guidelines:
- Every six months: Samsung recommends replacing the water filter every six months or after dispensing approximately 300 gallons of water, whichever comes first. This timeframe ensures that you consistently have clean and filtered water.
- Visual indicators: Some Samsung refrigerators have visual indicators, such as filter replacement lights, that can help you determine when to change the filter. These indicators monitor the usage of the filter and may change color or display a specific symbol when it’s time for replacement.
- Water quality: If you notice a significant change in the taste, odor, or appearance of your water, it may indicate that the filter is no longer effectively removing impurities. In such cases, consider changing the filter sooner, even if you haven’t reached the recommended time or usage limit.
- Local water conditions: The quality of your water supply can vary depending on your location. If you live in an area with known issues such as high levels of sediment, chlorine, or other contaminants, you may need to change the filter more frequently to ensure optimal water quality.
- Household size and usage: The number of people in your household and your water usage habits also play a role in determining how often you should change the filter. A larger household with higher water consumption may need to replace the filter more frequently to maintain adequate filtration.
It’s essential to consult your specific refrigerator model’s user manual for manufacturer recommendations regarding filter replacement. Following the suggested guidelines and monitoring the water quality can help ensure that you change the water filter in your Samsung refrigerator at the appropriate intervals, providing you and your family with clean and refreshing water.
Tips and precautions for changing the water filter in your Samsung refrigerator
Changing the water filter in your Samsung refrigerator is a straightforward process, but it’s important to follow some tips and precautions to ensure a successful and safe filter replacement. Keep the following in mind when changing the water filter:
- Follow the manufacturer’s instructions: Familiarize yourself with the specific instructions provided in your Samsung refrigerator’s user manual. Each model may have slight variations in the filter replacement process, and it is important to adhere to the manufacturer’s guidelines.
- Use genuine Samsung filters: To ensure optimal performance and water quality, always use genuine Samsung water filters. Using counterfeit or off-brand filters can lead to compatibility issues and may compromise the effectiveness of filtration.
- Turn off the water supply: Before removing or installing the water filter, always turn off the water supply to your refrigerator. This helps prevent water leakage and spills during the process. Locate the shut-off valve and close it before starting the filter replacement.
- Prepare for water spills: When removing the old filter or installing the new one, there may be some water spills or drips. Have a towel or cloth nearby to catch any spills and protect your floor or other surfaces from water damage.
- Properly dispose of the old filter: Safely dispose of the old water filter according to local regulations and guidelines. Check with your local waste management facility for proper disposal methods or recycling options for water filters.
- Flush the new filter: After installing the new water filter, it is important to flush it to remove any air or carbon residue. Follow the manufacturer’s recommendations on how to properly flush the filter before using the water dispenser or ice maker.
- Regularly monitor the filter’s lifespan: Keep track of the filter’s lifespan and replace it at the recommended intervals. Note down the installation date on a calendar or use a reminder system to ensure that you change the filter in a timely manner.
- Consult a professional if unsure: If you are unsure about any step of the filter replacement or encounter any difficulties, it is advisable to seek professional assistance. Contact Samsung customer support or a qualified technician for guidance and support.
By following these tips and precautions, you can confidently and safely change the water filter in your Samsung refrigerator. These proactive measures will help maintain the quality of your water and keep your refrigerator running efficiently.