
Learning how to embroider is fast becoming one of the most popular hobbies that people are picking up. Why? Many find it therapeutic, like learning how to meditate for one’s mental health. It is also easy and affordable to get started, plus you get the bonus of creating something useful after. Before you dive into it, however, the key to making it work is having the proper knowledge. Our guide will give you the A to Z so that even embroidery beginners with no prior experience would be able to do it well.
What is Embroidery?
It is basically the practice of adding a decorative stitch drawing to fabric through the use of a needle in thread. To render one, different styles of stitches are often used. In some cases, other embellishments are added. This includes sequins, beads, and even pearls.
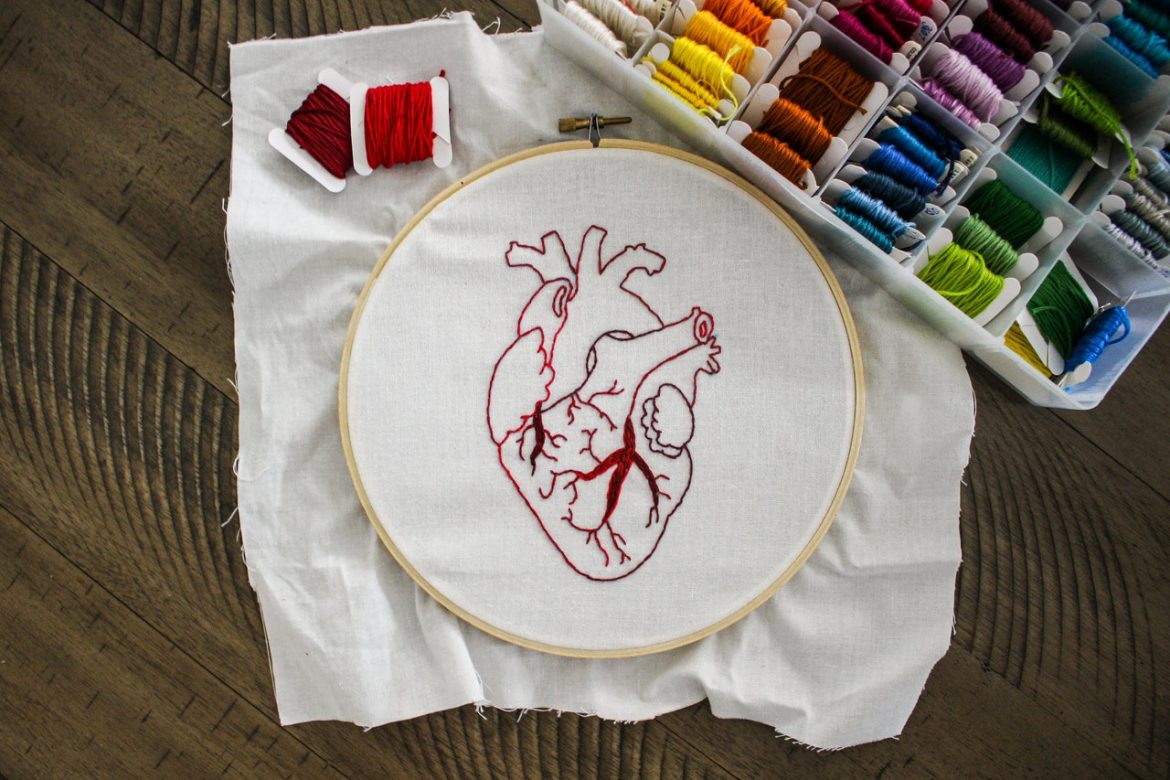
Most embroideries are circular in shape because of the hoops used to help stretch the fabric and keep it taught. This artform is also linked with the practice of hygge and cultivating more coziness in one’s life.
Its Origins
Suffice to say, the art of embroidering clothes has been around forever. It is directly linked to the Greek goddess Athena, who is said to have passed it down to mortals along with the knowledge of weaving. In medieval England, learning how to embroider was only available to the elite of society.
As for its real origins, it is thought that the craft was born out of a need to mend clothes and other garments. Because these tend to be expensive, people just kept on mending them instead of throwing them out. In time, hand embroidery patterns eventually became an art and evolved along with the cultures that helped shape it along the way.
Embroidery trivia: The oldest known embroidery that archaeologists have found is from 30,000 BCE. Found in Russia, evidence of embroidered garments were excavated along with the remains of the huntsman from the late Paleolithic era. Their clothing and boots had been hand-stitched with ivory beads!
Why is Embroidery Getting So Popular Today?
The resurgence in its popularity is likely due to people turning to self care ideas for relaxing after a work week. While this practice often means taking some time off to rest, it could also include adding activities that soothe and help relieve the effects of stress. Learning how to embroider is one such activity and is also very accessible for anyone to try.
DIY embroidery has health benefits you may not even be aware of.
Enhances Creativity
Learning how to embroider requires creativity and discipline. Now, you might see yourself as someone who is lacking in creative talents, but this practice can actually develop or hone what you already have. Because it is something that requires time and focus, your continued exposure will help you grow. Ask anyone who’s ever done this art and they’ll tell you that creative improvement is inevitable.
The first step is to try!
Boosting Brain Function
Many medical professionals recommend different brain boosting activities to their parents. These are meant to help “exercise” the brain and keep it agile, no matter your age. Practicing how to embroider requires concentration and accuracy, which should help keep your brain going.
Stress Relief
The best thing about learning how to embroider is that it can benefit anyone. This is especially true when it comes to relieving stress. It isn’t just a practice meant for homemakers or the elderly, which is contrary to the image most people have of it. In fact, if you’re working in a fast-paced environment and often have trouble feeling relaxed when you do have free time, you should consider this hobby.
Teaches the Value of Simple Pleasures
How to be happy? Cultivate small joys – such as embroidery, for example. Learning how to do embroidery is a very grounding activity that lets you focus on the present, instead of being distracted by what has come to pass or what hasn’t. This is a much needed break for people who live a very hectic lifestyle and “thrive” on being busy.
To help with staying in the present, try working on a small embroidery project. Doing so will keep your mind “busy” but your body relaxed. The bonus? You’ll feel accomplished once you see the finished product!
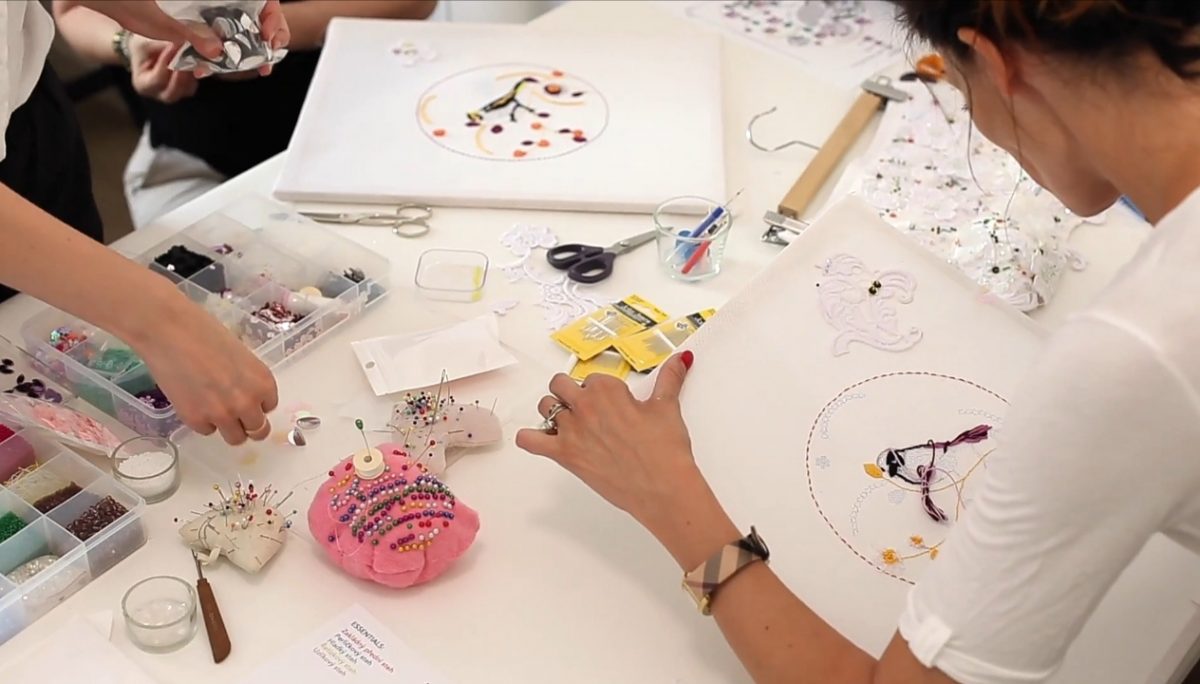
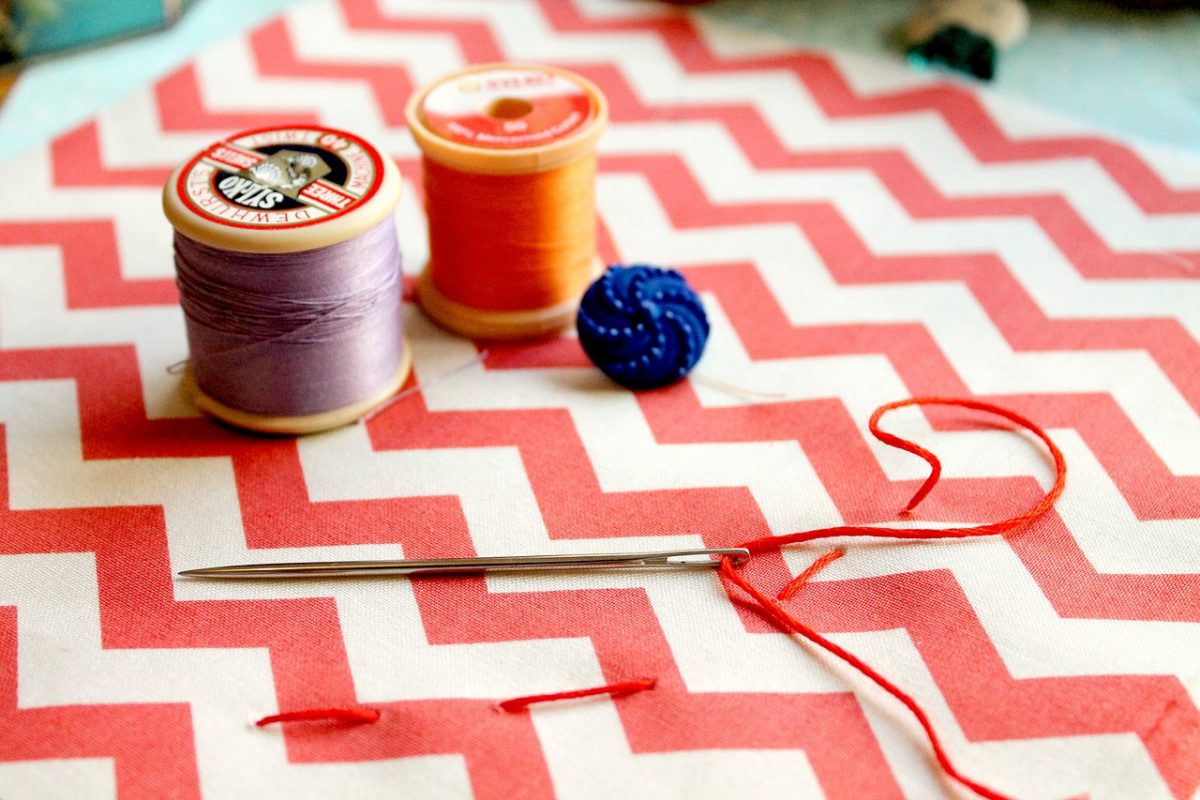
Embroidery Kits: Tools for Every Beginner
The first step to getting started with learning how to embroider is putting together a kit. Here are the essentials you will need.
Fabric
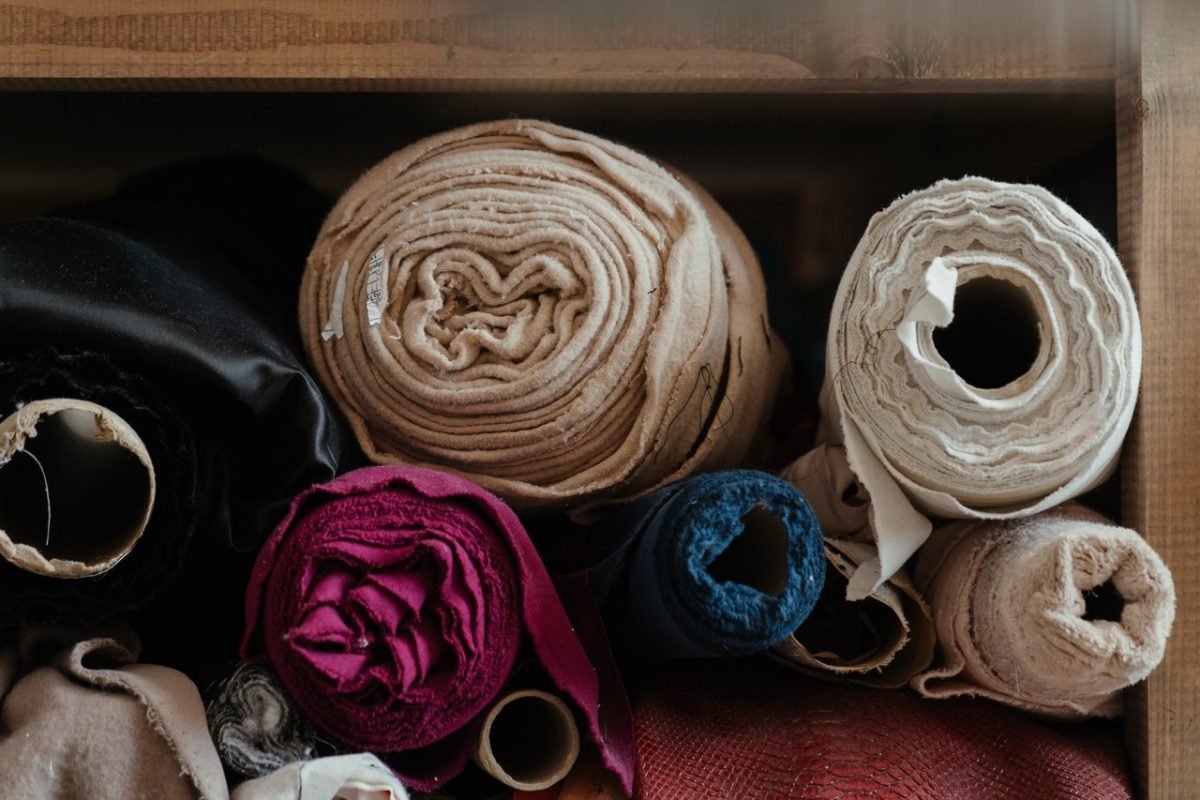
Think of your fabric as the foundation for your projects. It is important that you choose the right one because it could make or break the entire thing. Your fabric should be able to hold the structure of your thread, even without a hoop. Avoid any fabrics that have a tendency to wrinkle whenever you stitch something onto it. Lighter fabrics tend to be better for this purpose, but thread count is also important.
For beginners, start with a basic cotton fabric first. This is because it has a looser weave and the thread count is lower. Lower thread counts mean that you would be able to easily puncture it with your needle. Reserve any higher thread fabrics for when you’ve mastered the basic stitches.
Embroidery Thread
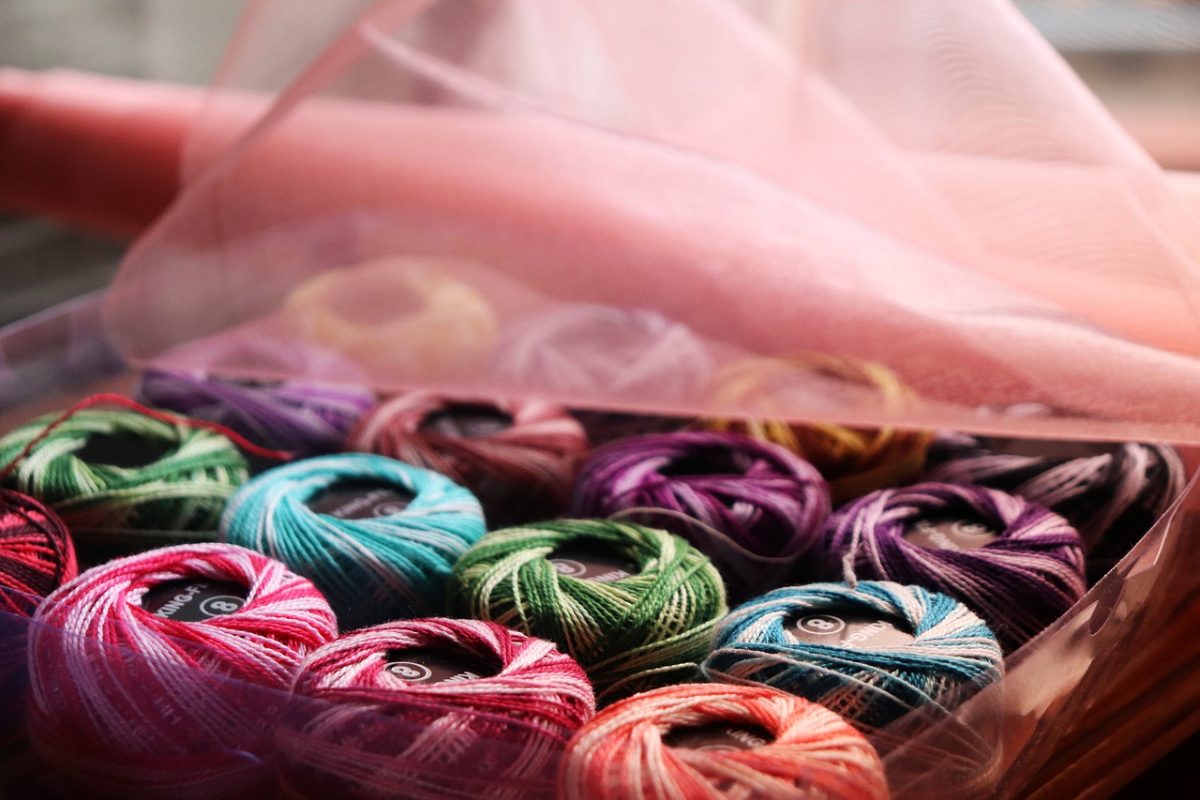
Aside from fabric, the thread you use makes up the foundation of every project you create. For those still learning how to embroider, start with using cotton thread. These are also referred to as embroidery floss and often come in skeins. The different types of embroidery threads you can choose from are: polyester, heavy-duty, silk, nylon, wool, metallic, and cotton.
Embroidery Needle
There are many types of needles meant for embroidery, which is no different from sewing. For beginners, choosing one that you’re comfortable with can actually help you improve much faster. Our recommendations?
- Crewel Needle – The most basic type of embroidery needle. This has a sharp tip and a medium-length eye, which is a bit bigger than its shaft. Most beginners find this easiest to use, especially if they’re still getting used to the techniques.
- Tapestry Needle – Unlike the Crewel type, this type has a blunt tip and has a shorter shaft as well. You’ll notice that its eye is larger than the shaft.
- Milliner Needle – This type has a much longer shaft compared to the other two and like the Crewel, also has a sharp tip. Its eye is almost circular in shape, unlike the other two.
Frames and Hoops
There aren’t a lot of requirements when it comes to your embroidery hoop. The most important consideration is the size of your project and how well the hoop fits around your fabric. It needs to be pulled taut, but there should also be overhang. Now, tightness is key here as well. If it becomes too tight, your fabric can end up puckering once you start the stitches. Lastly, choose a hoop that you can hold comfortably in one hand.
Embroidery Scissors
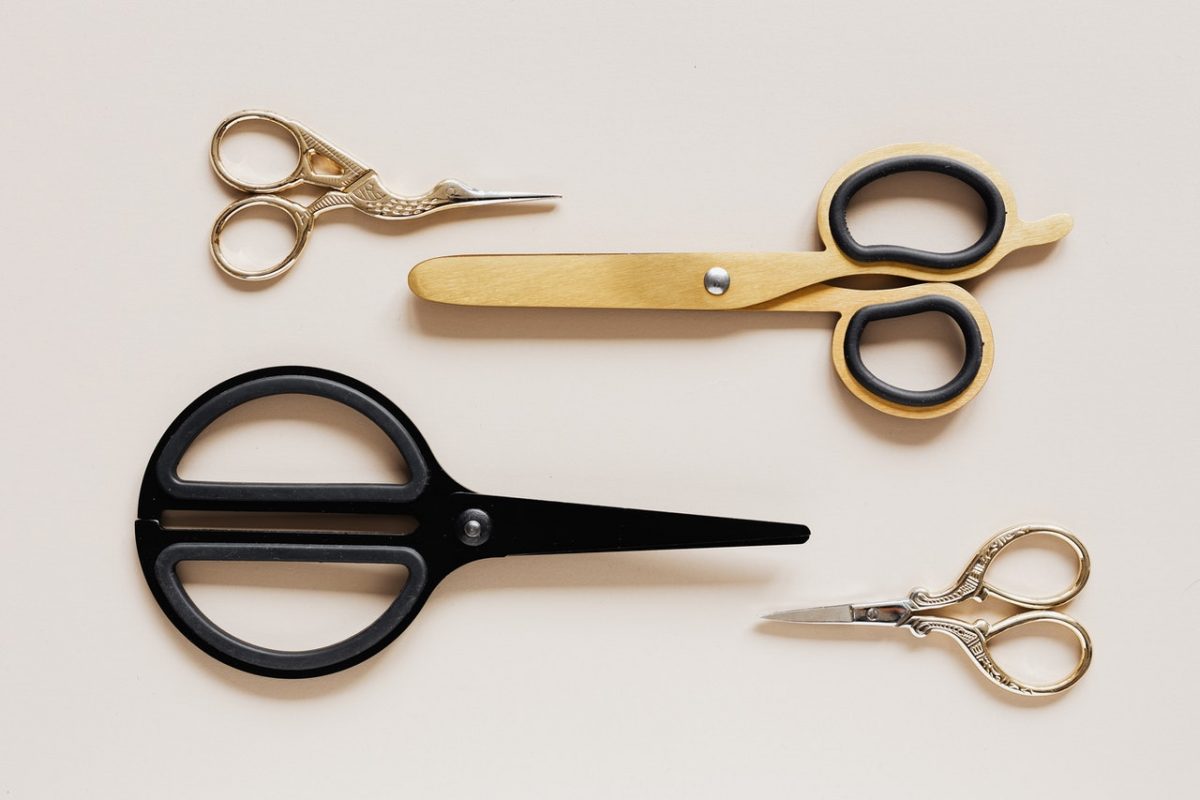
There are four basic factors that make a scissor great: handle, blade size, curved tip vs. straight tip, and sharpness.
- Blade Size – This depends on what you’ll be using the scissors for. Fabric scissors are usually heavy duty with a chunky blade since these will be used for all types of material thickness. For cutting embroidery floss, especially if you’re trying to get as close to it as possible, then a smaller and thinner blade would be best.
- Handle – Comfort is important, especially if you’ll be embroidering for a fair bit of time. The last thing you want are sore fingers and callouses! Look for embroidery scissors that are ergonomic. This might cause a bit more than dollar store options, but they will last you a long while—minus the pain.
- Sharpness – A single, clean snip is what you want. A blunt blade will result in frayed embroidery thread and can also damage your fabric in the process.
- Curved vs. Straight Tip – The difference between the two lies in their usage. For people who will mostly be using their hands, a straight edge blade is most recommended. If you plan on using an embroidering or sewing machine, however, a curved tip will give you better access to the embroidery floss.
These are all the basic supplies all embroidery kits must have. We suggest getting some decent-quality ones, as opposed to opting for the really cheap variety. The latter will likely not last and may prove difficult to use if you’re still practicing how to embroider.
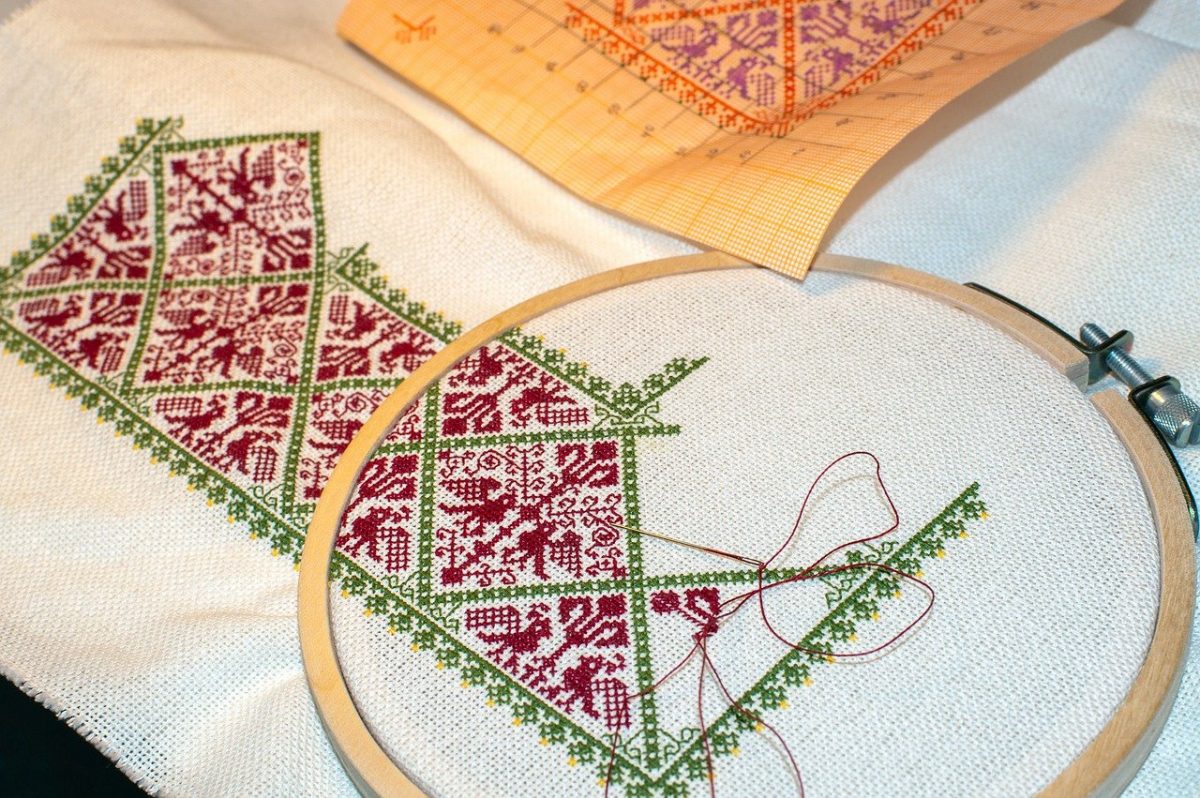
How to Do Embroidery – Basic Types of Stitches
Now that you have your kit ready, let’s put those supplies to use. Below are ten different basic embroidery stitches that should help you get started. With these, you’ll be able to create fashionable embroidered clothes, tea towels, beddings, and so on. If you love cottagecore and its aesthetics, quaint embroidered items are certainly part of it.
With that said, here are some of the stitches you should practice.
Running Stitch
These are best used for outlining your design and emphasizing its shape. There are two techniques you can use to create this type of stitch. The best bit is that both are easy to do for those still learning how to embroider.
- Sewing Style – For this, use a continuous weaving motion with your needle and thread through your fabric. By doing this, you’ll be able to create several stitches all the same time. This uses the same method if you were sewing a seam. Just be careful and avoid puckering up your fabric.
- Stabbing Method – This one takes a bit more time, but is perfect for those who are not confident with using the sewing style. For this, you simply have to push the needle through the fabric, then poke it back up a few spaces away from the original hole. This creates one stitch at a time.
Backstitch
Not all designs call for segmented lines. Some will require you to create a solid one, such as embroidered letters or outlines. To do a backstitch, you simply begin by pulling your needle and thread through your fabric, making one stitch forward. Check if you have your desired stitch length, then poke your needle and thread through again, pulling it down where your previous stitch ended.
Split Stitch
This one is pretty similar to the backstitch in that it creates a solid line. However, it also has a braided texture that the backstitch doesn’t have and is more often used for filling in outlines. It can be used for outlines and text, but the first two basic embroidery stitches might be the better options.
To get started, pull your needle and thread through your fabric to create one single, straight stitch. Now that these are underneath your hoop, try to poke the needle through the center of your stitch. Once you’ve centered your needle, bring it up and create another stitch in the same length as the first.
Now, this requires a bit more precision so if you’re still practicing how to embroider, try the split stitch with some spare flour sack first.
Stem Stitch
As the name suggests, this is a method that is typically used for creating designs such as vines and flower stems. This is one of the basic embroidery stitches you’ll need to create anything that is curved.
To get started, create one stitch that goes straight forward. Following this, bring your needle and thread underneath your fabric. Instead of going through the center (as seen in the split stitch), you poke through the side of your initial stitch.
French Knot
Now, let’s try something decorative. The French Knot will help you create cute accents for your project, but it does require a bit more technique. If you’re still learning how to embroider, just follow the guide below step-by-step.
First, poke your needle and thread up through your fabric. Hold your needle steady then carefully wrap your thread around it twice. Now, hold the end of your thread taut as you slowly push your needle through the space next to the initial hole.
Make sure you keep the thread taut as you pull the needle through. To change the size of your knots, just vary the amount of times you wrap your thread around the needle. The more you do it, the bigger the knot.
Satin Stitch
This is typically used for filling in designs where you want a smooth appearance, hence its name. If you’ve ever seen embroidery styles that are slightly embossed, this is likely the stitch that was used for it. To begin, you must first draw out the shape you want to fill.
Once that’s done, take your needle and thread then create a single stitch that extends from one end of your shape to the other. Bring up your needle and poke it through just opposite the first stitch. You would want to keep your stitches as close as possible to maximize its effect.
Chain Stitch
At first glance, this stitch might seem like it isn’t for those still practicing how to embroider. However, it gets easier once you understand the steps. It’s a very useful stitch to learn since it can be used for outlines or creating patterned designs.
Begin by pulling your needle and thread through your fabric, then poking it right beside the first hole. Now, don’t pull your thread all the way through. This should form a loop. Bring your needle through it, then pull. You have just made your first chain stitch!
To create the next one, place your needle under the hole you’ve just stitched and pull it through to create another loop. Repeat the same steps as earlier and just continue the chain until you’re done. To “lock” it in place, make a small stitch over your loop.
Lazy Daisy Stitch
The lazy daisy stitch is a variation on the chain stitch. It is referred to as such because instead of creating the chain, you add a stitch over the end of the loop to create a “daisy” petal. Sounds fun, right? It’s pretty easy to do as well, even if you’re still practicing how to embroider.
To start, do the first steps of the chain stitch, but don’t complete it. After pulling your needle and thread through the loop, create a small stitch on top of it to secure it in place. Just repeat the same steps in a circular pattern to create a full daisy.
Feather Stitch
Using the technique you’ve learned from doing a chain stitch, you can easily create this next one. A feather stitch is also a chain variation, but would allow you to cover more area. Start by doing the same first few steps in creating a chain stitch, but pause after you have created a loop.
Once you have the loop, pull your needle through it. Make sure to space your next stitch in the opposite direction as your previous one. Create another loop, then pull your needle through it again. Repeat this on the opposite side and secure it in the same way as a chain stitch.
Seed Stitch
Seed stitches are often used as filler and accents to any design. We’re including it here because it can be useful in many ways and it will help you become more familiar with the techniques involved. Just follow these steps:
Start by pulling your needle and thread through the fabric to create a short, straight stitch. Next, poke it through the fabric once more but change the angle this time. Repeat these steps until you have filled up the area. You can also space them as close or far away from each other, depending on your design.
Tip: Layering different threads will help create even more dimension in your embroidery design!
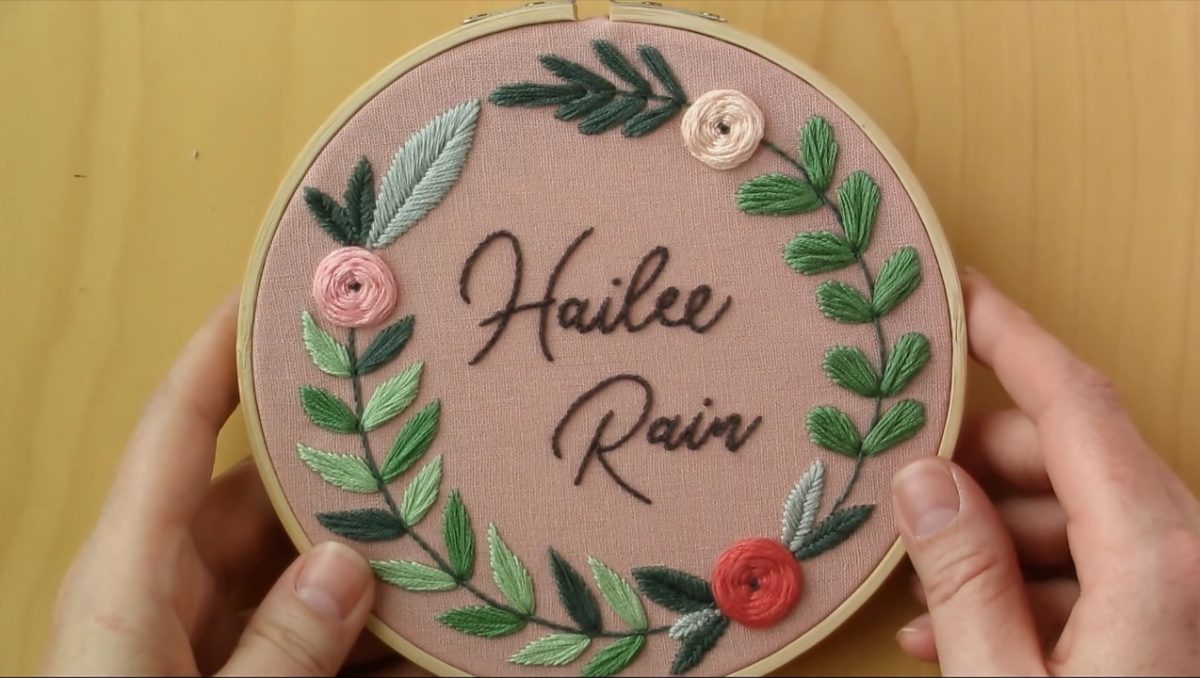
How to Embroider Letters for Beginners
- The first step is to choose the right font for your project. There are embroidery patterns you can download online or you can also play around with the typefaces available on word.
- Once you’ve found a suitable one, you can use tracing paper or draw directly onto your fabric using a washable marker or a pencil.
- Make sure you create a guide line that will help keep your letters in one straight line.
- It is also important to consider spacing when tracing the letters to your fabric. Always have enough allowance between each letter so they are not overlapping with each other.
Things to Remember:
- Always end your embroidery thread before you move to a new letter. Of course, cursive fonts are exempted from this rule. The same goes if you’re using a font that’s quite small and the letters are supposed to be close together.
- Make sure you determine the path where you’re going to stitch before you begin. This allows you to plan each stitch carefully to avoid mistakes.
- There will be letters that have to be divided into parts. For these, instead of stretching your thread in the back, turn the embroidery hoop over and wrap the thread around the current stitches you have. Do this until you have created a new starting point.
- Remember to use short stitches when working your way along corners. Try using a stem stitch for this part of your lettering!
How to Embroider Cursive Lettering
While working on basic block letters is straightforward enough, cursive fonts are a bit trickier because everything has to connect neatly for it to be legible. For this type of project, we recommend the use of stem stitch.
Here’s a Step-by-Step Guide:
- First, secure your fabric in an embroidery hoop. Don’t make it too taut.
- Trace the outline of your letters on the fabric or on a tracing paper.
- Stem stitch is the most commonly used type of stitch for lettering. When using it, always make sure to stitch in the same direction. For example, if you’re right-handed, then your stitch must start from left to right.
- Do your best to make sure that each stitch follows your outline. Using short stitches will greatly help with this as well.
- If you hit a curved part of your project, you will need to tilt or turn your hoop so you can keep stitching in one direction.
- There is one limitation to using the stem stitch for cursive lettering. If your chosen typeface has sharp corners, such as those seen in the letters “V” or “W”, shortening your stitch won’t work. You might end up with a more rounded curve or risk accidentally pulling out your previous stitch.
- Instead, what you can do is end your stitch, then pull your needle through the other side. However, in doing so, make sure you come up about a stitch away instead of right where you ended the last one. From there, just continue stitching normally.
- This technique can also be used for other types of embroidery lettering.
How to Embroider Flowers
For many, this will be their most used design so it’s important to know how to create even the most basic of flowers. There are many simple flower drawing examples you can find online, too! Here is a guide on how to create a simple embroidery flower such as roses and daffodils.
How to Embroider a Rose
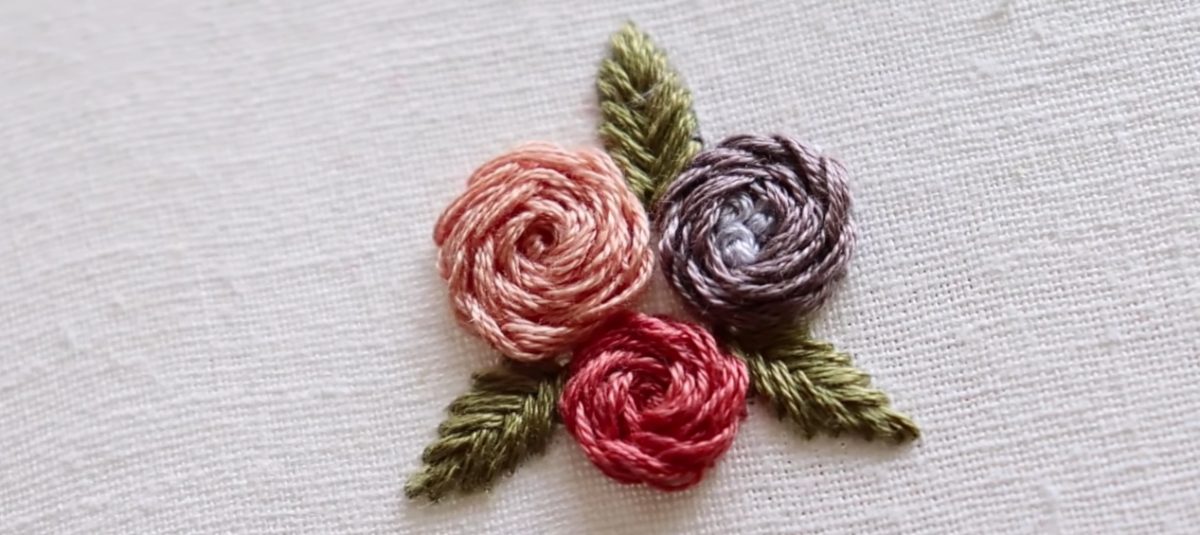
- Make two small parallel stitches, which will serve the center of the flower.
- To form the petals, slowly work your way around the center using small stem stitches. These should form a circle.
- Continue until it is as big as you want.
- You can try layering different color threads to create a more texture look.
How to Embroider a Daffodil
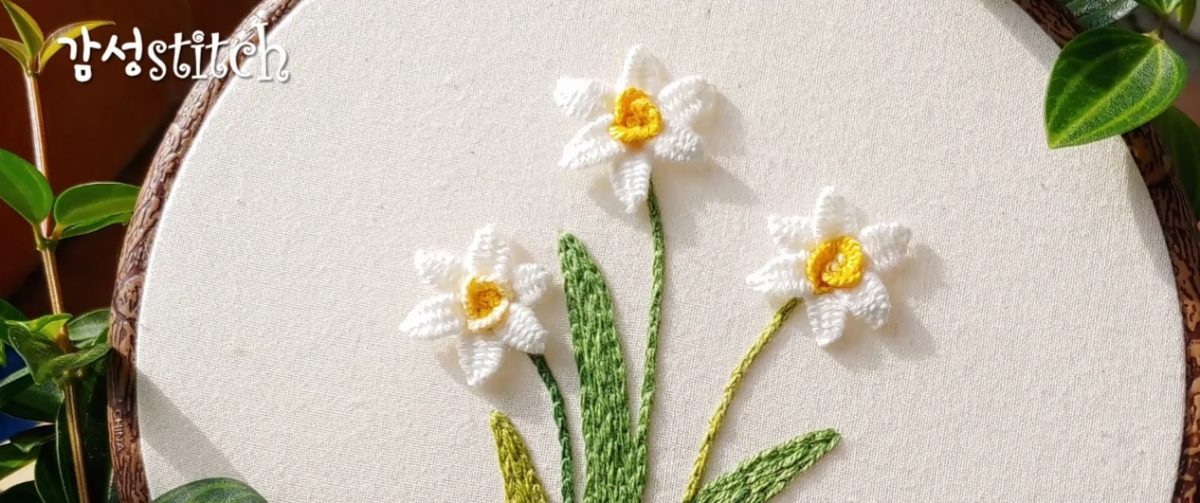
- For daffodils, start with a loose French knot. This will be the center of your flower. Use a darker color for this as well.
- To form petals, make three straight stitches. The first one should be your longest as this will be in the middle and form the tip of your petal.
- Add two shorter stitches of equal length on either side. It should form a small triangle.
- You can add as many petals as you want, but five or six should be enough to complete an embroidered daffodil.
With just these two embroidery flower designs, you’ll be able to create a few more. Aside from flowers, you can also learn easy drawings to make more unique projects.
How to Embroider a Shirt
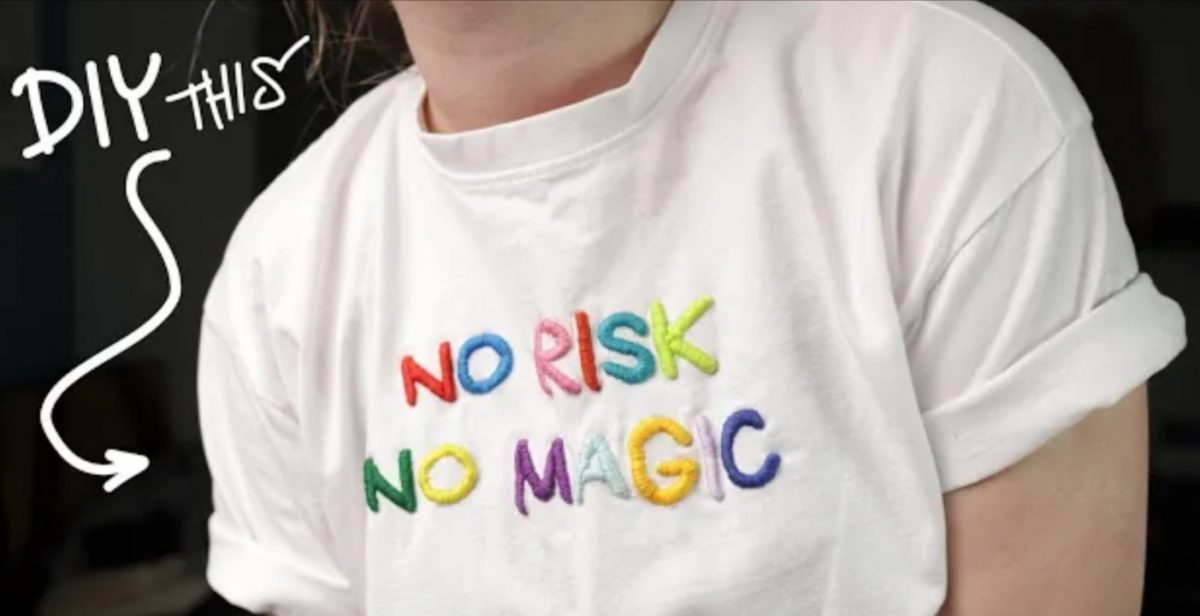
One of the most common uses for embroidering would be to decorate plain shirts. However, certain types of shirt fabrics can be very tricky to work with. This is the case when it comes to knit shirt fabrics. Your cute embroidery design can get distorted when the shirt stretches or is pulled too tight. For this, you’ll need a stabilizer.
There are a few varieties of stabilizers available, but their main purpose is to keep your design in place. It also adds a barrier between your skin and the stitch so it doesn’t feel itchy or scratchy. You will find permanent, tear away, and water soluble embroidery stabilizers so just choose one depending on your need.
How to Make T-Shirt Embroidery Using a Stabilizer
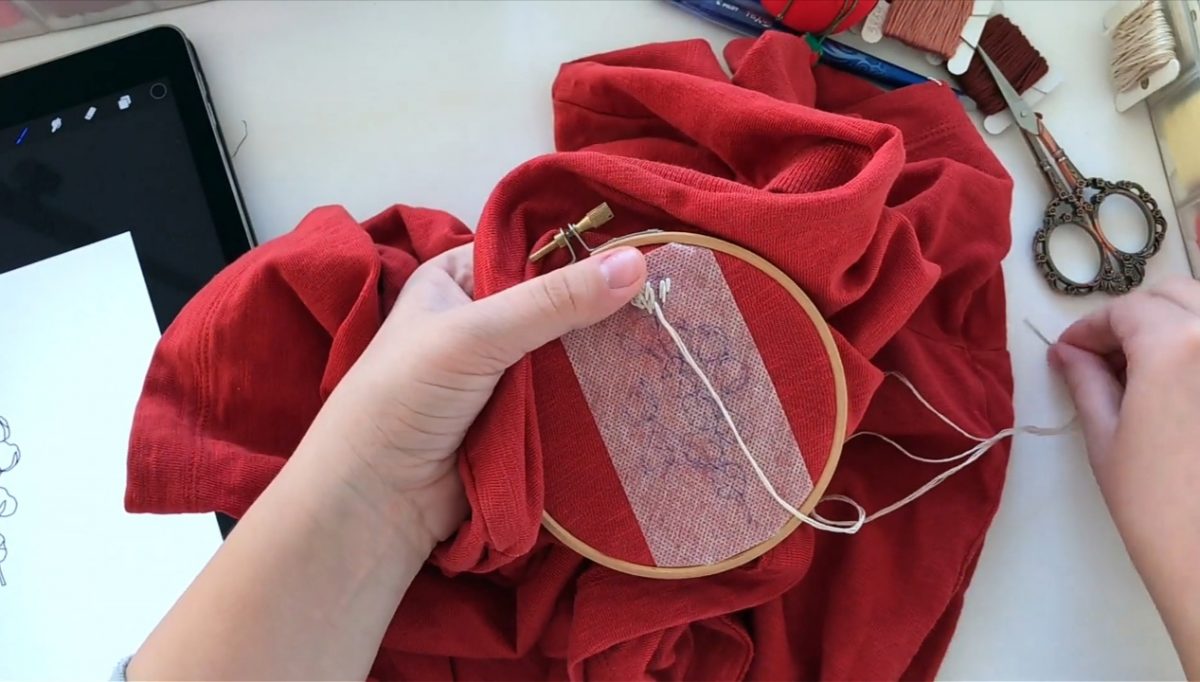
- Start by turning the shirt inside out since your stabilizer needs to be in the back. Next, slide a piece of paper between the layers of your shirt so you can avoid stitching into the second layer.
- Place your stabilizer in the area you plan on placing the design. Use large basting stitches to secure it in place. Do keep it as smooth as possible.
- Once done, turn your shirt right side out and you can begin applying the tracing paper or outlining your design onto the fabric.
- Next, place the inner hoop inside the area you’re working on. Slowly press the outer hoop onto the fabric and inner hoop, while avoiding stretching your fabric. For stretchy materials, a slightly loose outer hoop works best.
- If you’re happy with the way the fabric in the hoop looks, you can begin to stitch. You should use a ball-point or round-end needle for this project so you can avoid snagging. Tapestry needles also work well.
- Since this item will be washed a number of times with continued use, remember to end your embroidery designs. Secure the weaves properly to make the designs last longer.
- Once you’re done with the design, you can proceed to remove the stabilizer. Depending on what you’re using, just carefully snip the baste stitching, tear the material along its edges, or soak the shirt in water until it is removed.
You can also apply these same steps to embroidering stretchy material used for pillow cases, quilts, and even wall decor. If you’re looking for small bedroom ideas and how to decorate it, give embroidered items a try.
How to Remove Embroidery with a Stitch Eraser
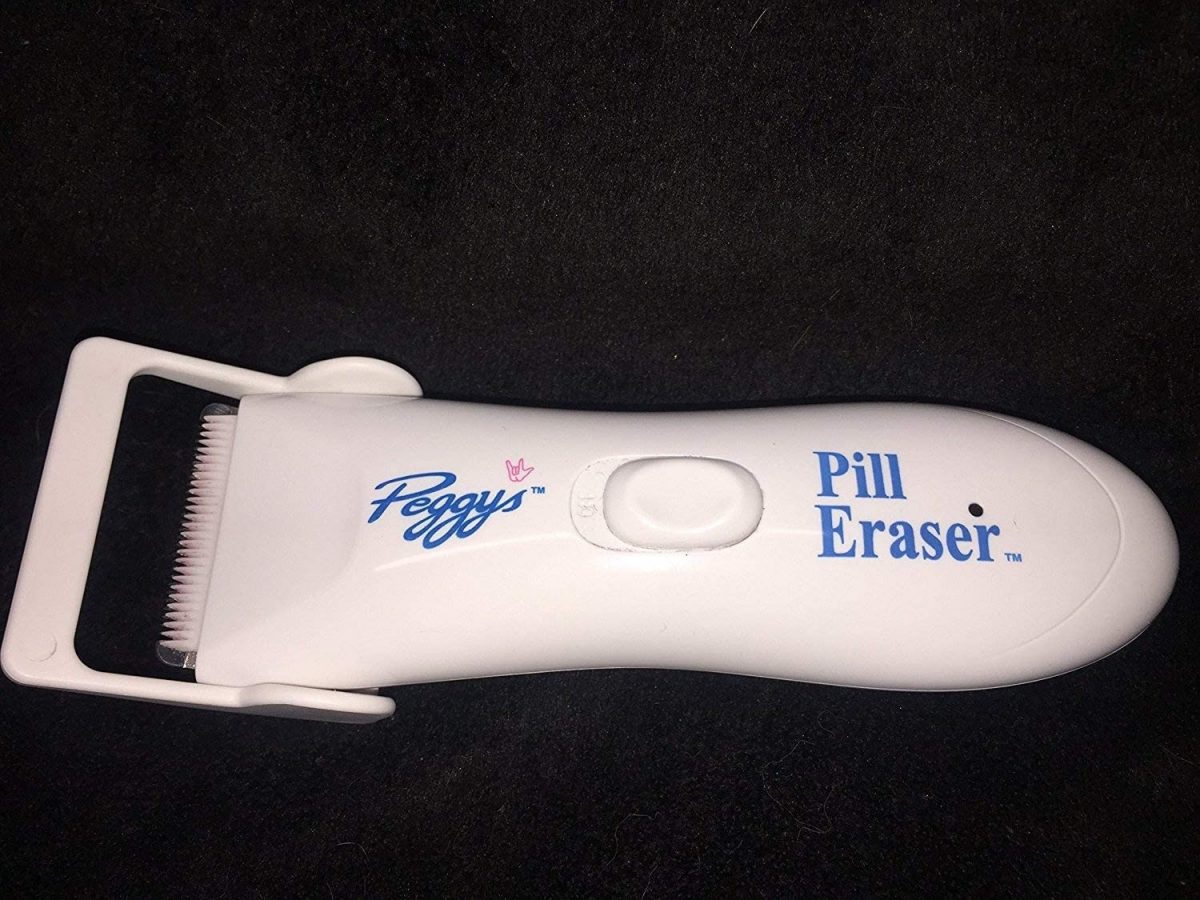
So, what happens if you make a mistake that cannot be easily corrected or you have grown tired of a design you made? You can choose to remove the embroidered patterns, of course. For this, you’ll need a stitch eraser.
It’s easy to mistake this handy tool as a pair of beard or hair trimmers, but it is actually used for removing professional-quality embroidery. If you’ve ever wanted to get rid of logos on caps or jackets, this is what you’ll need. However, it isn’t recommended for hand embroidered items that use a needle, thread, and hoop.
How to Use a Stitch Eraser
- Turn the garment over. This is because it might turn your fabric. Using it on the less exposed part of your shirt just makes the finished product appear neater.
- If there’s a stabilizer attached to the embroidered design, remove this first.
- Next, place your eraser on the edge of the design. Check if the blades have dug into the threads.
- Once it’s secure, slowly and using little pressure, push the tool forward. Slowly work your way across the whole design until you’ve removed what’s been embroidered.
- There will be threads left over and for these; you’ll need to use a seam ripper or pull the easier ones away with your fingers.
- Clean up any other excess threads left and you should have a plain fabric once again.
Give Embroidery a Try Today!
Learning how to embroider can be really fun and enriching if you know how to get started right. Whether you’re looking to master the skill or just looking for things to do when bored at home, create a better experience for yourself by starting with the basics. As with learning anything new, having a great foundation creates better opportunities for further improvement!