
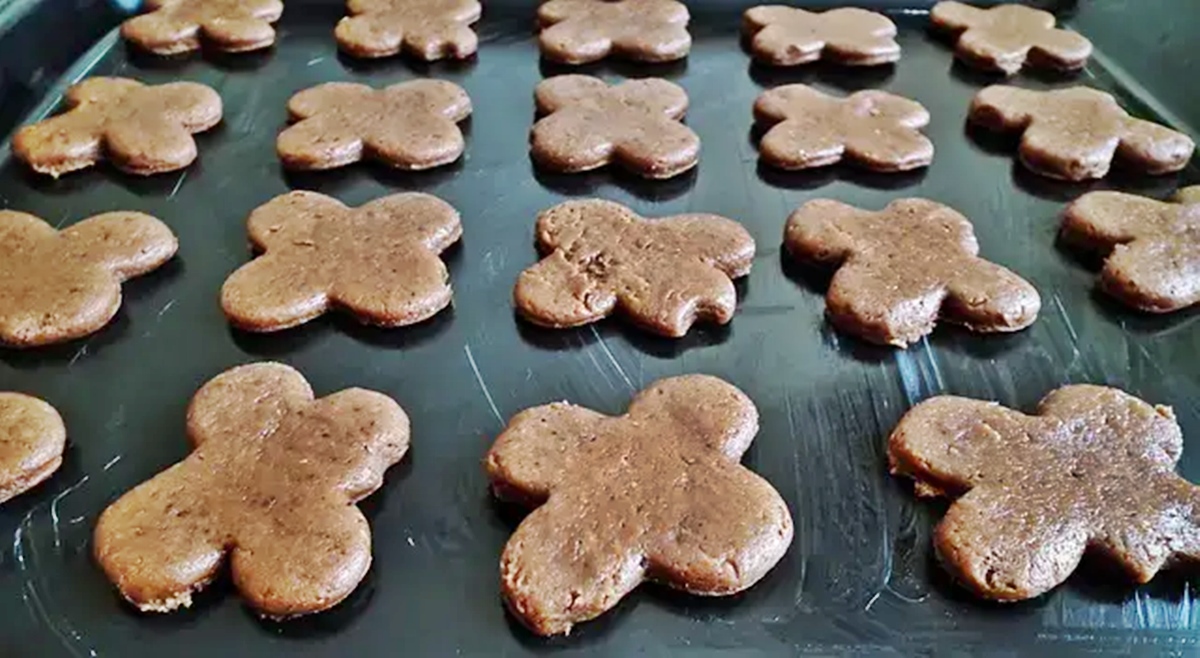
Choosing the Right Baking Tray
When it comes to baking pastries, selecting the right baking tray can make a world of difference in preventing your pastries from sticking. Here are some key factors to consider:
Size and Material: Opt for a baking tray that is the appropriate size for your chosen recipe. The material of the tray is equally important – non-stick trays are highly recommended as they significantly reduce the chances of sticking. Additionally, aluminum and stainless steel trays are popular choices due to their durability and even heat distribution.
Thickness: Thick baking trays are generally more effective in preventing the bottom of the pastries from over-browning or sticking. Look for trays with a sturdy construction to ensure proper heat conduction.
Edges: Choose a baking tray with slightly raised edges to prevent the pastry’s butter or other ingredients from spilling over during baking. This will help keep the tray clean and minimize the risk of sticking.
Coating: Some baking trays come with a non-stick coating such as Teflon. This can be beneficial in reducing sticking, but be cautious of using metal utensils on coated surfaces as they can scratch and damage the coating.
Stackability: If you often bake large batches of pastries, consider investing in trays that can be easily stacked or nested together. This will save storage space and make it more convenient for your baking endeavors.
By carefully considering these factors and choosing the right baking tray, you can greatly reduce the chances of your pastries sticking to the tray during baking. This will help ensure that your delicious creations come out flawlessly without any unnecessary hassle or frustration.
Greasing the Baking Tray
One effective way to prevent pastries from sticking to the baking tray is by properly greasing it. Here are a few methods to consider:
Butter or Oil: Using a small amount of butter or oil to grease the baking tray can create a protective barrier between the pastry and the tray’s surface. Simply take a piece of paper towel or a pastry brush and evenly spread a thin layer of butter or oil on the tray.
Non-Stick Cooking Spray: Another convenient option is to use a non-stick cooking spray. This spray contains oil and lecithin that help release the pastries easily from the tray.
Shortening or Lard: For certain pastry recipes, such as pie crusts, using shortening or lard can be a good alternative to butter or oil. These fats have a higher melting point and provide an excellent non-stick surface.
Flour and Butter Mixture: Some bakers prefer making a mixture of flour and butter to grease the tray. This combination provides a bit of a dry lubrication and can be particularly useful when working with delicate or highly sticky pastries.
Regardless of the greasing method you choose, make sure to apply the grease uniformly on the tray’s bottom and sides. Pay special attention to any corners or crevices where the pastry tends to stick the most.
Remember to use a light hand when greasing the tray – using too much fat can lead to excess oiliness or cause the pastry to become too greasy. Additionally, ensure that the greasing is done just before adding the pastry dough or batter to the tray to prevent the fat from pooling or running off the tray.
Greasing the baking tray is a simple yet effective step in preventing pastries from sticking. By using the right technique and the appropriate grease, you can ensure that your pastries effortlessly release from the tray, resulting in perfect and visually appealing results every time.
Using Parchment Paper
When it comes to preventing pastries from sticking to the baking tray, one of the most foolproof methods is to use parchment paper. This versatile tool acts as a barrier between the tray and the pastry, ensuring easy release and hassle-free cleanup. Here are a few reasons why parchment paper is a baker’s best friend:
Non-Stick Surface: Parchment paper has a non-stick surface, making it incredibly easy to remove the pastry from the tray once baked. Its slick surface prevents the dough from adhering to the tray, resulting in perfectly baked pastries with intact bottoms.
Even Heat Distribution: Parchment paper helps distribute the heat evenly across the surface of the pastry, preventing uneven browning and overcooking. This is particularly useful when baking delicate pastries that require precise temperature control.
Easy Cleanup: Using parchment paper eliminates the need to scrub or scrape the baking tray after use. Simply lift the parchment paper with the pastries off the tray, leaving you with a clean and grease-free surface underneath. This saves both time and effort in the kitchen.
Better Portability: If you plan to transport your baked goods or give them as gifts, parchment paper can be a lifesaver. You can easily lift the pastries off the tray with the parchment paper as a convenient handle, ensuring that they remain intact during transportation.
Remember to choose parchment paper that is specifically designed for baking. Look for parchment paper that is both non-stick and oven-safe. There are pre-cut sheets available, or you can simply cut a larger roll to fit your baking tray.
When using parchment paper, it’s important to ensure that it’s properly placed on the tray. Smooth out any wrinkles or creases, allowing the paper to neatly conform to the tray’s shape. This will prevent any air pockets that could lead to uneven baking or sticking.
Incorporating parchment paper into your baking routine is a simple yet highly effective way to prevent pastries from sticking. This versatile tool ensures that your pastries release flawlessly from the tray, resulting in perfect, professional-looking treats to delight your family and friends.
Dusting the Baking Tray with Flour
Another method to prevent pastries from sticking to the baking tray is by dusting it with flour. Dusting the tray creates a thin layer of flour which acts as a barrier and promotes easy release of the pastry. Here’s how to properly dust your baking tray with flour:
Step 1: Prep the Tray: Before dusting with flour, make sure your baking tray is clean and dry. Any moisture or residue on the tray can hinder the flour from adhering properly.
Step 2: Choose the Right Flour: Depending on the recipe, use either all-purpose flour or a specialized flour like cake flour or bread flour. All-purpose flour works well for most recipes and is readily available in most kitchens.
Step 3: Lightly Dust the Tray: Sprinkle a small amount of flour evenly over the tray. Use your fingers or a sifter to gently spread the flour and create an even layer. Be sure to cover the entire surface of the tray, including the corners and edges.
Step 4: Shake off Excess: Once the tray is dusted with flour, lightly shake or tap it to remove any excess. You want a thin coating of flour that will prevent sticking without adding too much flour to the pastry.
Step 5: Adjust Recipe: When using flour-dusted trays, you may need to adjust your recipe slightly. The dusting of flour can absorb some moisture from the dough, so you may need to add a bit more liquid to the recipe to compensate.
Dusting the baking tray with flour can be particularly useful when working with sticky doughs or pastries that have a high fat content. The flour creates a barrier between the pastry and the tray, helping to inhibit sticking and allowing for easy release.
It’s important to note that excessive flour can cause the pastry to become dry or alter the texture. Therefore, it’s crucial to use only a light dusting of flour and to shake off any excess before adding the dough or batter to the tray.
By following these steps and dusting your baking tray with flour, you can ensure that your pastries release effortlessly, providing you with beautifully baked treats that are not only delicious but also visually appealing.
Preparing the Pastry Properly
Properly preparing the pastry dough is essential to prevent it from sticking to the baking tray. Here are some key steps to follow:
1. Flour the Surface: Before rolling out the pastry dough, lightly flour the surface and the rolling pin. This prevents the dough from sticking to the surface and makes it easier to handle.
2. Roll out Evenly: Roll out the dough evenly to the desired thickness. Uneven dough can result in uneven baking and sticking to the baking tray. Use a ruler or measuring guide to ensure an even thickness throughout.
3. Lift and Rotate: As you roll out the dough, frequently lift and rotate it to prevent it from sticking to the surface. Adding more flour as needed can also help prevent sticking during this process.
4. Chill the Dough: After rolling out the dough, it’s important to chill it before transferring it to the baking tray. Place the rolled-out dough in the refrigerator for about 15-30 minutes. Chilling the dough helps it firm up, making it easier to handle and reducing the risk of sticking.
5. Use a Floured Spatula: When transferring the chilled dough to the baking tray, gently slide a floured spatula or a thin, wide pastry scraper under the dough to lift it. This will help prevent any sticking or tearing during the transfer process.
6. Trim Excess Dough: Once the dough is neatly placed on the baking tray, use a sharp knife or kitchen shears to trim any excess dough. This will prevent overlapping and reduce the chances of sticking or uneven baking.
7. Dock the Pastry: For certain types of pastries, such as pie crusts or puff pastry, dock the dough by pricking it with a fork. This creates small holes, allowing air to escape during baking and reducing the chances of the pastry sticking to the tray.
By following these steps to properly prepare the pastry dough, you can minimize the risk of sticking to the baking tray. This ensures that your pastries bake evenly and release effortlessly, resulting in beautifully golden and perfectly cooked treats.
Chilling the Pastry
Chilling the pastry dough is a crucial step in preventing it from sticking to the baking tray. Here’s why it’s important and how to do it effectively:
Why Chill the Pastry?
Chilling the pastry dough serves several purposes. Firstly, it allows the fats in the dough, such as butter or shortening, to firm up. This helps maintain the structure of the dough during baking and reduces the risk of it spreading and sticking to the tray.
Additionally, chilling the dough relaxes the gluten, making it less likely to become tough or shrink during baking. It also allows the flavors to meld and develop, resulting in a tastier end product.
How to Chill the Pastry:
1. Shape the dough: After preparing the pastry dough, shape it into a flat disc or rectangle. This shape allows for easier rolling and even chilling.
2. Wrap in plastic wrap: Wrap the shaped dough tightly in plastic wrap. This prevents air from reaching the dough, which could cause it to dry out or absorb odors from the refrigerator.
3. Refrigerate: Place the wrapped dough in the refrigerator for the recommended chilling time. This is typically around 30 minutes to an hour, but some recipes may require longer chilling times.
4. Optional: Repeat as needed – If the dough becomes too soft or difficult to work with during the rolling process, it may benefit from additional chilling. Re-wrap the dough and return it to the refrigerator for a few minutes to firm up.
Tips for Chilling the Pastry:
– Use a flat surface: To save space in the refrigerator, place the wrapped dough on a flat plate or baking sheet rather than directly on a shelf.
– Be patient: It’s important not to rush the chilling process. Allowing the dough sufficient time to rest and firm up will yield better results.
Chilling the pastry dough is an essential step in preventing it from sticking to the baking tray. By following these tips and incorporating this step into your baking routine, you’ll achieve pastries with a beautiful texture, even browning, and a clean release from the tray.
Using a Silpat or Silicone Baking Mat
Using a Silpat or silicone baking mat is a fantastic way to prevent pastries from sticking to the baking tray. These non-stick, heat-resistant mats offer a range of benefits for baking. Here’s why you should consider using them:
Non-Stick Surface:
Silpat or silicone baking mats are naturally non-stick, meaning you don’t have to worry about greasing or flouring the tray. The pastries will effortlessly release from the mat, resulting in perfectly baked goods with intact bottoms.
Even Heat Distribution:
These mats promote even heat distribution, ensuring consistent baking and uniform browning of the pastries. This eliminates the risk of hot spots on the tray, which can lead to unevenly cooked or stuck pastries.
Easy Cleanup:
Cleaning up after baking is a breeze with a Silpat or silicone baking mat. Simply wipe off any food residue with a damp cloth or sponge. These mats are dishwasher-safe as well, making cleanup even more convenient.
Reusable and Durable:
Silpat or silicone baking mats are designed to be used repeatedly. They are highly durable and can withstand high temperatures without warping or melting. With proper care and storage, these mats can last for several years, making them a cost-effective baking accessory.
Versatile:
Aside from preventing sticking, Silpat or silicone baking mats have other uses. They can act as a non-slip surface for rolling out dough, provide insulation to prevent over-browning of the bottoms, and even serve as a liner for cooling racks or as a surface for working with melted chocolate or sugar decorations.
Using a Silpat or Silicone Baking Mat:
1. Place the mat on a baking tray: Ensure that the mat fits the size of the tray and lays flat without any wrinkles or creases.
2. Prepare the dough or batter as instructed in your recipe.
3. Place the pastries on the mat, leaving enough space between them for even baking and expansion.
4. Bake according to the recipe’s instructions.
5. Once done, carefully remove the pastries from the mat using a spatula or your hands.
Silpat or silicone baking mats are excellent investments for any baking enthusiast. They provide a hassle-free baking experience, ensuring that your pastries effortlessly release from the tray without sticking. With their reusable nature and versatile functionality, these mats are a valuable addition to your kitchen arsenal.
Adjusting Baking Time and Temperature
One often overlooked aspect of preventing pastries from sticking to the baking tray is adjusting the baking time and temperature. Making small adjustments can make a significant difference in achieving perfectly baked pastries. Here’s what you need to know:
Baking Time:
One reason pastries may stick to the tray is if they are underbaked. Undercooked dough is more likely to be sticky and prone to sticking. Be sure to follow the recommended baking time in your recipe, but also keep an eye on the pastries as they bake. You may need to adjust the baking time slightly based on your oven’s performance and the thickness of the pastries.
If you find that your pastries are consistently sticking, try extending the baking time by a few minutes. This extra time ensures that the pastries are fully cooked and have a chance to develop a more solid structure, preventing sticking.
Baking Temperature:
Another aspect to consider is the baking temperature. If the oven temperature is too low, the pastries may not bake evenly and could stick to the tray. Conversely, if the temperature is too high, the pastries may brown too quickly on the bottom, increasing the chances of sticking.
Ensure that your oven is properly calibrated and accurately displays the set temperature. If you suspect that your oven runs hot or cold, consider using an oven thermometer to monitor the actual temperature. Adjust the temperature accordingly to achieve the desired results.
Observation and Adjustments:
Developing a keen eye for your pastries as they bake is key to preventing sticking. Observe the color and texture of the underside of the pastries during baking. If they are browning too quickly or unevenly, you may need to reduce the oven temperature slightly. On the other hand, if they seem pale and undercooked, you may need to increase the temperature slightly or extend the baking time.
Keep in mind that baking time and temperature can vary depending on the specific recipe, oven type, and altitude. It may take some trial and error to find the optimal settings for your desired results. Take note of any adjustments you make and the corresponding outcomes to refine your baking process over time.
By making careful adjustments to the baking time and temperature, you can ensure that your pastries bake evenly, possess a golden-brown exterior, and release effortlessly from the baking tray, resulting in perfectly baked treats every time.
Removing the Pastry from the Tray
Once your pastries have finished baking, it’s important to remove them from the tray without any sticking or tearing. Here are some tips to help you easily and successfully remove your pastries:
Cooling Time:
Allow your pastries to cool down on the baking tray for a few minutes before attempting to remove them. This allows the structure of the pastry to firm up and makes it less prone to sticking or breaking apart.
Use a Spatula:
A thin and wide spatula is an essential tool for lifting and removing fragile pastries from the tray. Carefully slide the spatula under the pastries, using gentle pressure, and lift them off the tray. This method is especially useful for delicate pastries such as cookies or tart shells.
Cooling Rack:
For larger pastries like cakes or bread, place a cooling rack upside down on top of the tray. Hold both the tray and the cooling rack together and quickly flip them over. This will transfer the pastries from the tray onto the cooling rack without the risk of them sticking or breaking.
Silicone Baking Mat:
If you used a silicone baking mat or a Silpat, simply peel the mat away from the pastries to release them. The non-stick surface of the mat allows for easy removal without any sticking or tearing.
Timing is Key:
It’s important to remove the pastries from the tray at the right moment. If you wait too long and the pastries cool completely on the tray, they may stick. However, if you remove them too soon, they may still be too fragile and prone to breaking. Finding the right timing comes with experience and may vary depending on the recipe and the type of pastry you are working with.
Proper Handling:
When removing the pastries, handle them gently to avoid any damage. Use precautionary measures while transferring them to a serving plate or storage container. It’s recommended to use a spatula or your hands to carefully lift and move them, ensuring they stay intact.
By following these tips for removing your pastries from the tray, you can enjoy beautifully baked treats without any sticking or tearing. The proper handling and timing, along with the right tools, will ensure that your pastries are released flawlessly and ready to be enjoyed.