
Why greasing a baking tray is important
When it comes to baking, greasing a baking tray is an essential step that should never be overlooked. Greasing helps to prevent the baked goods from sticking to the tray, ensuring easy removal and a picture-perfect presentation. But the benefits of greasing a baking tray go beyond just convenience; it also plays a vital role in achieving the desired texture and taste of your baked goods.
One of the primary reasons for greasing a baking tray is to prevent the baked goods from sticking. Without a greased surface, the dough or batter can adhere to the tray, making it difficult to remove and potentially causing the baked goods to break apart. This can be especially problematic for delicate items such as cookies or cakes. By greasing the tray, you create a barrier between the baked goods and the surface, allowing for easy release and preserving their shape.
In addition to preventing sticking, greasing also helps to ensure even heat distribution throughout the baking process. A greased tray promotes better heat transfer between the baked goods and the tray, resulting in even browning and a more consistent texture. Without greasing, certain parts of the baked goods may cook faster or become overly browned, while other areas remain undercooked. This can lead to uneven results and compromise the overall quality of your baked creations.
Furthermore, greasing a baking tray can impart a subtle flavor and enhance the texture of your baked goods. Depending on the type of grease you use, such as butter or oil, it can add richness and complexity to the final product. The greased surface also helps to create a slight crust on the bottom of bread or pastries, adding a desirable crunch and depth of flavor.
Lastly, greasing a baking tray makes the cleaning process much easier. When the tray is properly greased, any remnants of the baked goods can be easily wiped away, reducing the need for scrubbing and avoiding damage to the tray’s surface. By taking the time to grease the tray before baking, you can save yourself from the frustration of stubborn residue and enjoy a hassle-free cleanup.
Step 1: Choosing the right type of grease
Choosing the right type of grease is crucial when it comes to greasing a baking tray. The type of grease you use can impact the flavor, texture, and overall success of your baked goods. Here are some factors to consider when selecting the appropriate grease:
1. Butter: Butter is a classic choice for greasing a baking tray. It adds a rich flavor and helps create a golden crust on the bottom of your baked goods. However, keep in mind that butter has a lower smoke point, so it may not be suitable for high-temperature baking.
2. Vegetable oil: Vegetable oil is a versatile option that works well for most baking needs. It has a neutral flavor and a high smoke point, making it ideal for a wide range of temperatures. You can use regular vegetable oil or opt for lighter oils like canola or sunflower oil.
3. Shortening: Shortening is a solid fat that can withstand high temperatures without burning. It provides a tender texture to baked goods and is often used for pie crusts and cookies. However, keep in mind that shortening may not add as much flavor compared to butter or oil.
4. Baking spray: Baking sprays are a convenient option for greasing baking trays. They typically contain a combination of oil and flour, allowing for easy application and even coverage. However, be sure to read the labels as some baking sprays may contain additives or propellants.
When choosing the right type of grease, consider the specific recipe and the desired outcome. For example, if you’re making a delicate cake, using a light spray of vegetable oil or a combination of oil and flour might be the best choice to ensure easy release. On the other hand, if you’re making buttery cookies, greasing the tray with butter can enhance the flavor. Experimenting with different types of grease can help you discover the perfect combination for your favorite baked goods.
Remember, whatever type of grease you choose, make sure it is suitable for baking and doesn’t have any off-putting flavors or odors. It’s also important to use a clean, dry brush or cloth to apply the grease evenly onto the baking tray, ensuring every corner is well-coated.
Step 2: Cleaning the baking tray
Before you can grease a baking tray, it’s crucial to ensure that it is clean and free from any residue. Cleaning the baking tray properly will not only help prevent any unwanted flavors from transferring to your baked goods, but it will also ensure that the grease is applied evenly and adheres well to the surface. Here are the steps to clean a baking tray effectively:
1. Scrub with warm water and soap: Start by scrubbing the baking tray with warm water and dish soap. Use a sponge or soft brush to remove any visible food particles or stains. Avoid using harsh abrasive cleaners or scrubbers that may scratch the surface of the tray.
2. Soak for stubborn stains: If there are stubborn stains or burnt-on residues on the tray, you may need to soak it in warm soapy water for a few minutes. This will help loosen the buildup and make it easier to remove with gentle scrubbing.
3. Use baking soda or vinegar: For tough stains or grease spots, you can create a paste using baking soda and water or use vinegar. Apply the paste or vinegar to the problem areas and let it sit for a few minutes before scrubbing. These natural cleaning agents can help break down stubborn residue without damaging the baking tray.
4. Rinse thoroughly: Once you have scrubbed the baking tray, rinse it thoroughly with warm water to remove any soap or cleaning agents. Make sure to rinse all corners and edges of the tray to ensure a clean surface for greasing.
5. Dry completely: After rinsing, use a clean towel or allow the baking tray to air dry completely before proceeding with greasing. Moisture on the tray can prevent the grease from adhering properly and may result in uneven greasing or potential sticking issues.
By taking the time to clean the baking tray thoroughly, you set the foundation for successful baking. A clean and dry tray will provide a smooth surface for greasing and ensure that your baked goods come out perfectly every time.
Step 3: Applying the grease
Now that you have a clean and dry baking tray, it’s time to apply the grease. Applying the grease evenly will ensure that your baked goods are released effortlessly from the tray without any sticking. Follow these steps to apply the grease effectively:
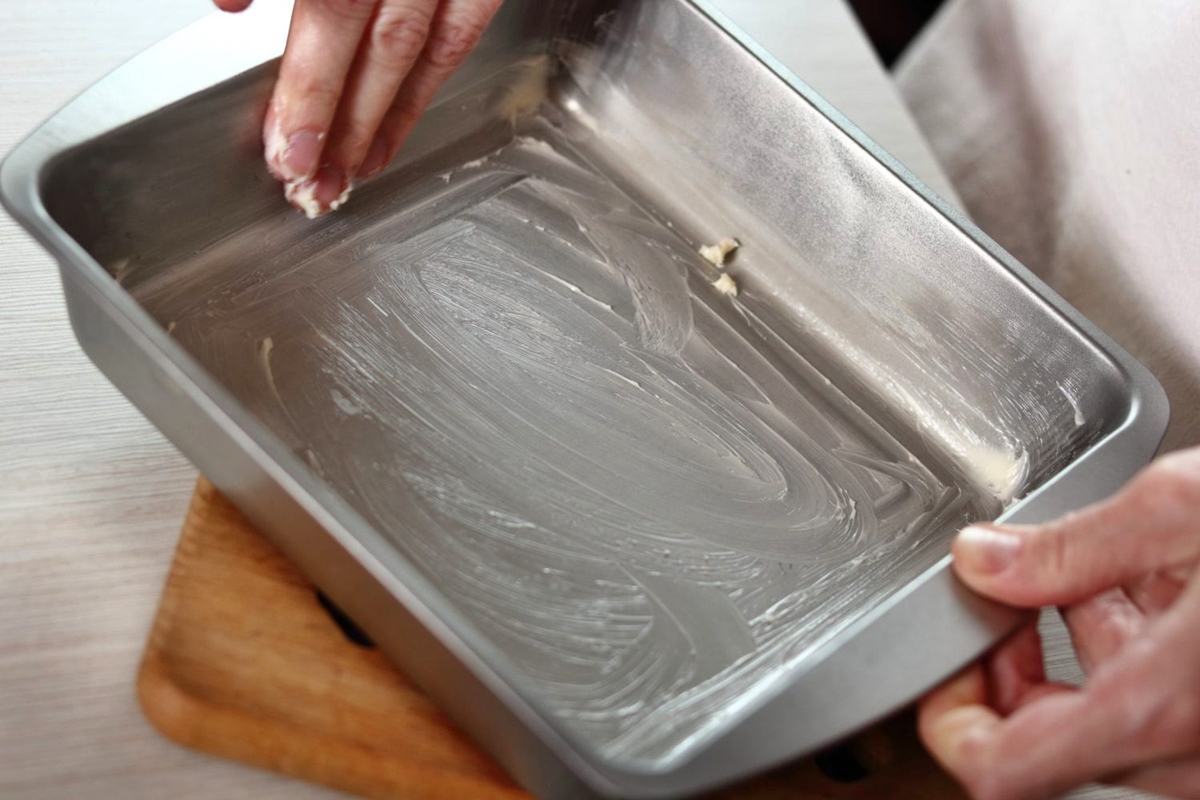
1. Choose the right amount: The amount of grease you need will depend on the size of the baking tray and the recipe you’re working on. In most cases, a thin layer of grease is sufficient to prevent sticking. Use a pastry brush, paper towel, or your fingers to apply the grease and spread it evenly across the surface.
2. Consider the edges: Pay attention to the edges and corners of the baking tray, as these are the areas where sticking is more likely to occur. Make sure to brush or spread the grease evenly into these areas to create a barrier between the baked goods and the tray.
3. Choose the right greasing method: There are a few different methods you can use to apply the grease. One option is to melt butter or shortening and brush it onto the tray. Another option is to use a baking spray, which provides a convenient and even application. Choose the method that works best for you and the specific recipe you’re working on.
4. Avoid excess grease: While it’s important to have a thin layer of grease on the baking tray, be cautious not to apply too much. Excess grease can cause the baked goods to spread too much or become greasy. If you notice pools of grease on the tray, use a paper towel to blot off the excess before placing your dough or batter on the tray.
5. Consider parchment paper: If you prefer not to grease the baking tray directly, you can also use parchment paper as a liner. Simply cut the parchment paper to fit the size of the tray and place it on top. The parchment paper acts as a non-stick barrier, allowing for easy removal of the baked goods.
By applying the grease properly, you create a protective layer on the baking tray, ensuring that your baked goods release easily and maintain their shape. Take your time to spread the grease evenly and cover all areas of the tray, paying special attention to the edges. This step is vital for successful baking and will help you achieve perfect results every time.
Step 4: Spreading the grease evenly
Once the grease is applied to the baking tray, it’s important to spread it evenly to ensure that every inch of the surface is coated. Spreading the grease evenly will help create a consistent non-stick layer, preventing any areas from sticking and ensuring an even release of your baked goods. Here are some tips for spreading the grease evenly:
1. Use a brush or spatula: A pastry brush or spatula is an excellent tool for spreading the grease evenly across the baking tray. Dip the brush or spatula into the grease and use smooth, even strokes to spread it across the surface. Pay attention to the corners and edges, as these areas are more prone to sticking.
2. Apply gentle pressure: While spreading the grease, apply gentle pressure to ensure that it adheres well to the tray. If you’re using butter or shortening, its warmth will make it easier to spread. For a baking spray, hold the can at a slight angle and move it back and forth across the tray to coat it evenly.
3. Consider a circular motion: If you find it challenging to spread the grease evenly with a brush or spatula, try using a circular motion. Start at the center of the tray and move outward in a concentric circle, ensuring that the grease reaches all corners and edges.
4. Check for even coverage: After spreading the grease, visually inspect the tray to ensure that it has been evenly coated. Look for any areas that may have been missed or have a thinner layer of grease. If necessary, apply a bit more grease to these spots and spread it out until the coverage is consistent.
5. Blot excess grease: If you accidentally applied too much grease and notice any pools or buildup on the tray, use a paper towel to gently blot off the excess. This will help prevent your baked goods from becoming greasy or spreading too much during baking.
Remember, the key to successful greasing is to create a thin, even layer on the baking tray. By spreading the grease properly, you ensure that your baked goods release easily, maintain their shape, and have a consistent texture. Take your time during this step to ensure every inch of the tray is evenly coated, and you’ll be rewarded with perfectly baked treats.
Step 5: Alternative methods to grease a baking tray
While greasing a baking tray with butter, oil, or baking spray is the most common method, there are alternative techniques you can use to achieve a non-stick surface. These methods can be handy when you’re looking for different flavors or prefer a specific texture for your baked goods. Here are a few alternative methods to grease a baking tray:
1. Flour coating: Instead of greasing the baking tray, you can coat it with a thin layer of flour. This method works best for dough or batter that is already quite greasy, like some bread or pastry doughs. Sprinkle a small amount of flour onto the tray and shake it gently to spread it evenly. The flour will help absorb excess moisture and prevent sticking.
2. Parchment paper: Parchment paper is an excellent alternative to greasing a baking tray. Simply cut a piece of parchment paper to fit the size of the tray and place it on top. The baked goods will easily release from the parchment paper, and you’ll have the added benefit of easy cleanup without any greasy residue on the tray.
3. Silicone baking mats: Silicone baking mats are reusable non-stick mats that can be placed on the baking tray. They provide an effective and convenient way to prevent sticking without the need for grease. The silicone material creates a non-stick surface, allowing for easy release of the baked goods and effortless cleaning.
4. Baking sprays with flour: Some baking sprays come with added flour, which eliminates the need for separate greasing and flouring steps. These sprays provide a convenient and even application of both grease and flour in one step, ensuring easy release and a lightly floured surface for your baked goods.
5. Non-stick pans: If you frequently bake and want to avoid the hassle of greasing altogether, investing in high-quality non-stick baking pans can be a great option. Non-stick pans have a special coating that prevents sticking, minimizing the need for grease. However, it’s still important to follow any specific instructions provided with the pans to ensure optimal results.
When exploring alternative methods to grease a baking tray, consider the specific recipe and your personal preferences. Experiment with different techniques to find the one that works best for you. Whether you choose to grease, use parchment paper, or try other alternatives, the goal is to create a non-stick surface that allows your baked goods to release easily and maintain their shape.
Step 6: Tips for preventing sticking
While greasing the baking tray is a crucial step in preventing sticking, there are additional tips and tricks you can follow to ensure the success of your baked goods. These tips will help create a non-stick surface and provide an enjoyable baking experience. Here are some valuable tips for preventing sticking:
1. Use the right type of pan: Different types of pans have varying degrees of non-stick properties. Consider using non-stick pans or silicone molds specifically designed for the type of baked goods you’re making. These pans are typically coated with a non-stick surface, minimizing the risk of sticking.
2. Preheat the oven and the tray: Preheating your oven and the baking tray can help ensure even heat distribution and prevent sticking. Placing the dough or batter on a hot tray creates a stronger initial barrier against sticking.
3. Let baked goods cool before removing: Allow your baked goods to cool slightly before attempting to remove them from the tray. When they are still warm, they are more fragile and prone to breakage. Allowing them to cool for a few minutes will make them sturdier and easier to handle.
4. Use a thin spatula or knife: When removing baked goods from the tray, use a thin spatula or knife to gently release the edges. Take care not to scrape the surface of the tray, as this can cause scratches and make future sticking more likely.
5. Grease the utensils: Grease the utensils you use for handling the dough or batter when working with sticky mixtures. This can help prevent the mixture from sticking to the utensils and make shaping or transferring easier.
6. Properly release the baked goods: Once the baked goods are ready to be removed from the tray, gently and slowly release them by lifting or turning the tray upside down. If necessary, tap the bottom of the tray to encourage the release of the baked goods.
7. Adjust baking time and temperature: If you’re experiencing frequent sticking issues, consider adjusting the baking time and temperature. Both underbaking and overbaking can contribute to sticking. Finding the right baking time and temperature for your specific recipe and oven can help minimize the risk of sticking.
8. Clean and maintain the baking tray: After each use, clean the baking tray thoroughly and remove any grease or residue. Proper maintenance is important to prevent the buildup of hardened grease, which can lead to sticking in future baking sessions.
By following these tips, you can greatly reduce the risk of sticking and ensure that your baked goods release effortlessly from the tray. Remember to experiment and adjust your techniques based on the specific recipe and baking conditions. With practice, you’ll become more skilled at preventing sticking and enjoy successful baking adventures.
Step 7: Troubleshooting common sticking issues
Even with proper greasing and preparation, there may still be instances where your baked goods stick to the tray. Understanding and troubleshooting common sticking issues can help you overcome these challenges and achieve better results. Here are some common sticking issues and how to troubleshoot them:
1. Sticking at the edges: If your baked goods tend to stick mostly at the edges of the tray, it could be due to uneven greasing or an accumulation of grease in those areas. To troubleshoot this issue, pay extra attention to greasing the edges of the tray, ensuring even coverage. You can also try using a little extra flour or incorporating parchment paper at the edges for added non-stick protection.
2. Sticking with delicate or intricate designs: Delicate or intricately designed baked goods, such as cut-out cookies or detailed cakes, can be more prone to sticking. To troubleshoot this issue, be sure to grease the tray thoroughly and consider chilling the dough or batter before shaping and baking. This helps solidify the mixture and reduce the risk of sticking when handling intricate shapes.
3. Baked goods breaking apart: If your baked goods are breaking apart when you try to remove them from the tray, it could be an indication of underbaking or insufficient greasing. To troubleshoot this issue, ensure that you bake the goods for the recommended time and check for doneness before removing them. Additionally, double-check that the tray is well-greased, paying attention to the corners and edges where sticking is more likely to occur.
4. Grease not adhering properly: Sometimes, the grease may not adhere properly to the tray, resulting in uneven coverage and sticking. To troubleshoot this issue, make sure the tray is clean and dry before applying the grease. If using butter or shortening, ensure that it is at room temperature and soft enough to spread easily. Additionally, evenly spread the grease with a brush or spatula, applying gentle pressure to help it adhere to the tray’s surface.
5. Excessive greasiness in the final product: If your baked goods turn out excessively greasy, it could be due to too much grease or the wrong type of grease being used. To troubleshoot this issue, make sure you are applying a thin and even layer of grease. If using butter or oil, consider reducing the amount used or switching to a lighter oil. Blotting off any excess grease before placing the dough or batter on the tray can also help prevent greasiness.
Remember, troubleshooting sticking issues requires a combination of proper greasing, adjusting baking techniques, and understanding the specific characteristics of your recipe. Paying attention to detail, using suitable greasing methods, and making necessary adjustments will greatly reduce sticking problems and lead to successful and enjoyable baking experiences.
Step 8: Cleaning greased baking trays
After baking, cleaning the greased baking trays is an important step to maintain their quality, prevent residue buildup, and ensure their longevity. Proper cleaning techniques will help remove any grease, food particles, or baked-on residue, allowing you to reuse the trays for future baking projects. Here’s how to effectively clean greased baking trays:
1. Allow the tray to cool: Before cleaning, allow the greased baking tray to cool completely. Cleaning a hot tray can cause damage to the tray’s surface and may also make it more difficult to remove any stuck-on residue.
2. Scrape off excess grease and debris: Using a spatula or a soft brush, scrape off any excess grease or large food particles from the tray. Carefully remove any baked-on residue, being gentle to avoid scratching the tray’s surface. Dispose of the collected residue in the trash or compost bin.
3. Soak the tray: Fill the sink or a basin with warm water and add a few drops of dish soap. Place the greased baking tray in the water, ensuring it is fully submerged. Allow it to soak for about 10-15 minutes to help loosen any remaining grease or residue.
4. Scrub gently: After soaking, use a soft sponge or non-abrasive brush to gently scrub the baking tray. Pay close attention to any areas with stubborn residue or grease buildup. Avoid using harsh abrasive cleaners or scrubbers that can damage the tray’s surface.
5. Rinse thoroughly: Once you’ve scrubbed the tray, rinse it thoroughly with warm water to remove any soap or residue. Make sure to rinse off all areas, including corners and edges, to ensure a clean and residue-free surface.
6. Dry properly: After rinsing, pat the greased baking tray dry with a clean towel or allow it to air dry completely. Ensure there is no moisture left on the tray, as this can cause rusting or a breeding ground for bacteria.
7. Check for any remaining residue: Before storing the cleaned baking tray, inspect it to ensure there is no remaining grease or residue. If needed, repeat the cleaning process or use a gentle scrub brush to address any lingering stains or buildup.
8. Store properly: Once your greased baking tray is cleaned and completely dry, store it in a dry place to prevent moisture from accumulating. Consider using stackable storage solutions or placing a sheet of parchment paper between stacked trays to prevent scratching.
Regular cleaning of greased baking trays is crucial for maintaining their performance and extending their lifespan. By following these cleaning steps after each use, you’ll be able to keep your baking trays in excellent condition, ready for your next baking adventure.