
Why Use Aluminium Foil for Baking Tray?
Aluminium foil is a versatile and essential tool in the kitchen, and using it to create a DIY baking tray offers several advantages. Whether you’re a professional baker or a novice in the kitchen, here are a few reasons why using aluminium foil for a baking tray is a great idea:
- Cost-effective: One of the main benefits of using aluminium foil for a baking tray is its affordability. Compared to purchasing a traditional metal baking tray, aluminium foil is a much cheaper option. This is especially beneficial for those who bake occasionally and do not want to invest in expensive bakeware.
- Convenient: Aluminium foil is readily available in most households, making it a convenient choice when you suddenly need a baking tray. You can easily find aluminium foil in your kitchen drawer and quickly create a makeshift baking tray without any hassle.
- Customizable Size and Shape: One of the advantages of using aluminium foil to make a baking tray is its flexibility. You can easily customize the size and shape of the tray to suit your baking needs. Whether you need a larger tray or a smaller one, aluminium foil can be molded to fit various sizes and shapes.
- Easy Cleanup: Cleaning up after baking can be a tedious task, but with an aluminium foil baking tray, it becomes a breeze. After removing your baked goods, you can simply discard the foil and avoid the hassle of scrubbing a dirty baking tray. This makes aluminium foil a time-saving and convenient option.
- Heat Distribution: Aluminium foil is an excellent conductor of heat, ensuring even distribution during the baking process. This means that your baked goods are more likely to cook evenly and avoid any hotspots that can result in unevenly baked or burnt food.
- Non-Stick Surface: When properly greased or lined with parchment paper, aluminium foil can provide a non-stick surface for your baked goodies. This is especially useful when baking items that tend to stick to the pan, such as cookies or sticky buns.
These are just a few reasons why using aluminium foil for a baking tray is a practical and beneficial choice. Whether you need a temporary solution or want to save money on bakeware, aluminium foil offers a versatile and convenient alternative for your baking needs.
Materials Needed for Making Baking Tray with Aluminium Foil
Making a baking tray with aluminium foil requires only a few simple materials that are readily available in most kitchens. Before you start, gather the following supplies:
- Aluminium Foil: The main material you’ll need is a roll of aluminium foil. Choose a high-quality foil that is sturdy enough to hold its shape during baking.
- Scissors or a Knife: You will need a sharp pair of scissors or a knife to cut the foil to the desired size and shape of your baking tray. Ensure that your cutting tool is clean and easy to handle.
- Parchment Paper (optional): While not necessary, parchment paper can be useful for lining the aluminium foil tray if you want to prevent food from sticking. It also makes cleanup easier.
- Cooking Spray or Butter (optional): If you decide not to use parchment paper, you can use cooking spray or butter to grease the foil and create a non-stick surface for your baked goods.
- Baking Ingredients: Of course, you’ll also need the ingredients for your recipe, whether it’s cookies, brownies, or any other baked goods you plan to make with your DIY aluminium foil baking tray.
- Oven and Oven Mitts: Don’t forget to have access to an oven for baking and a pair of oven mitts to handle the hot tray when it’s time to remove it from the oven.
Ensure that you have all these materials ready before you begin making your baking tray with aluminium foil. By having everything prepared, you’ll be able to create a functional and effective tray without any interruptions or delays.
Step 1: Choosing the Right Type of Aluminium Foil
When making a baking tray with aluminium foil, it’s important to choose the right type of foil to ensure optimal results. Here are a few factors to consider when selecting the foil:
- Thickness: Aluminium foil comes in different thicknesses, typically ranging from standard to heavy-duty. For a sturdy and durable baking tray, it’s recommended to use heavy-duty aluminium foil. This thickness will prevent the foil from tearing or warping during the baking process.
- Width: The width of the foil will depend on the size of the baking tray you want to create. Consider the dimensions of your oven and the desired size of your tray. Choose a foil that is wide enough to accommodate your baking needs but not so wide that it becomes difficult to handle or fit properly in your oven.
- Quality: Opt for a high-quality aluminium foil that is resistant to tearing and offers good heat distribution. Cheaper foils may not hold their shape well or may tear easily, compromising the effectiveness of your baking tray.
- Non-Stick Coating: Some aluminium foils come with a non-stick coating on one side. This can be beneficial if you want to minimize food sticking to the foil. However, if you plan to use parchment paper or grease the foil, a non-stick coating may not be necessary.
- Brand Reputation: Consider reputable brands that are known for their quality aluminium foils. Reading reviews or seeking recommendations can help you choose a reliable brand that offers consistent results.
Remember, the right type of aluminium foil will ensure that your baking tray is sturdy, durable, and performs well during the baking process. Taking the time to select the appropriate foil will contribute to the success of your DIY baking tray.
Step 2: Preparing the Foil for Baking Tray
Before you start shaping the aluminium foil into a baking tray, it’s important to prepare it properly. Follow these steps to ensure that the foil is ready for use:
- Clean and Dry Surface: Begin by cleaning the surface where you plan to work with the aluminium foil. Make sure it is free from any dust, debris, or contaminants that could transfer onto the foil and affect your baking.
- Unroll the Aluminium Foil: Take your chosen roll of aluminium foil and unroll a sufficient amount for your desired baking tray size. It’s better to have extra foil available than to run out while forming the tray.
- Smooth out Wrinkles: Smooth out any wrinkles or creases in the foil by gently running your hands over it. This will help ensure a neat and even surface for your baking tray.
- Place on a Flat and Stable Surface: Lay the aluminium foil on a flat and stable surface, such as a countertop or cutting board. This will provide a sturdy base for shaping the foil without it slipping or moving around.
- Optional: Use Parchment Paper or Grease: Depending on your preference, you can line the foil with parchment paper to prevent sticking or lightly grease it with butter or cooking spray. This step is particularly useful when baking items that tend to stick, such as gooey brownies or sticky buns.
By properly preparing the aluminium foil before shaping it into a baking tray, you’ll ensure that the foil is clean, smooth, and ready to be molded into the desired shape. This will help create a solid foundation for your homemade baking tray and contribute to the success of your baking endeavors.
Step 3: Measuring and Cutting the Foil
Now that you have prepared the aluminium foil, it’s time to measure and cut it to the appropriate size for your baking tray. Follow these steps to ensure accurate measurements and precise cuts:
- Measure the Baking Tray Size: Determine the dimensions of the baking tray you need. This will depend on the recipe you’re using or the amount of food you want to prepare. Measure the length, width, and depth of the tray to ensure your foil will be the right size.
- Add Extra Foil: To account for folding and creating sturdy edges, add a few extra inches to each side of the measured dimensions. This will provide the necessary material to fold and shape the edges, ensuring a solid and durable baking tray.
- Mark the Measurements: Once you have the accurate measurements and the additional foil allowance, use a pencil or a marker to mark the dimensions directly on the foil. This will serve as a guide for cutting.
- Cut the Foil: Using sharp scissors or a knife, carefully cut along the marked lines to trim the foil to the desired size. Take your time to make clean, straight cuts to ensure the tray’s shape and sturdiness.
- Smooth Edges: After cutting the foil, run your fingers along the edges to smooth out any rough or jagged areas. This will help prevent any accidental cuts or tears as you handle the foil during the shaping process.
By measuring and cutting the foil accurately, you’ll ensure that your baking tray fits perfectly in your oven and provides a suitable surface for your baking needs. Take your time during this step to ensure precise measurements and clean cuts for a successful DIY aluminium foil baking tray.
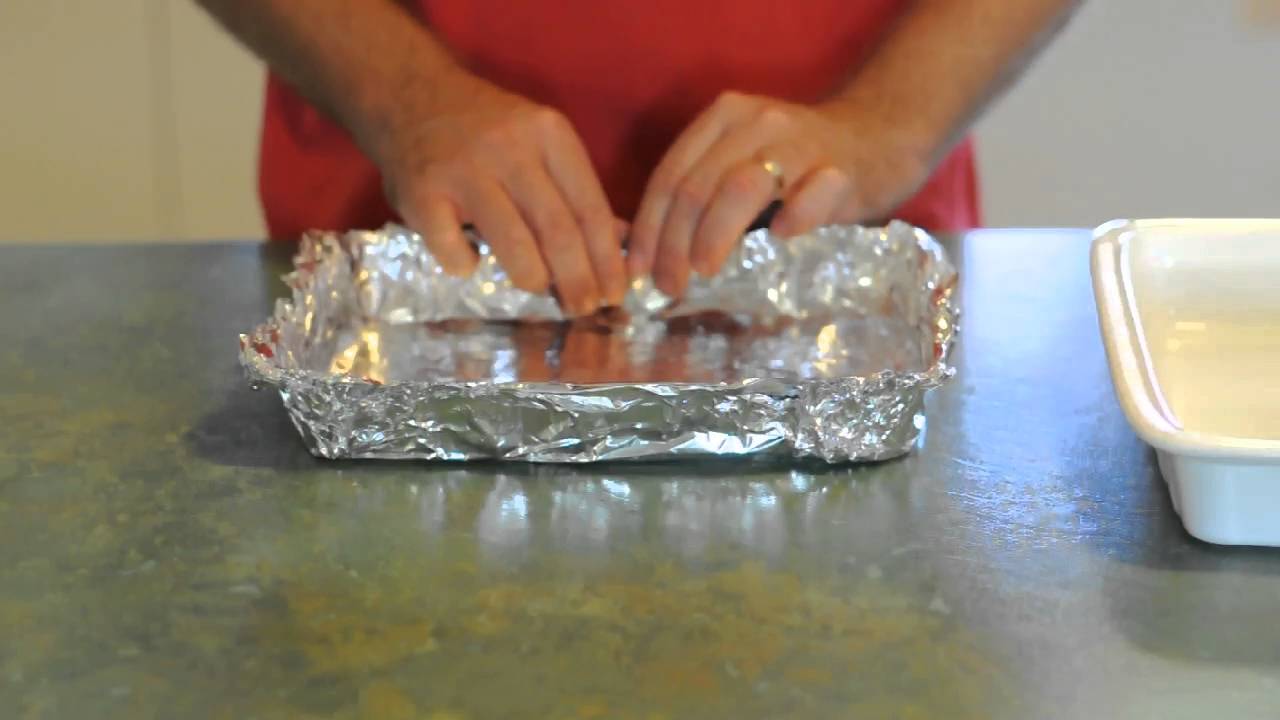
Step 4: Folding the Edges of the Foil
Once you have cut the aluminium foil to the desired size for your baking tray, it’s time to fold the edges to create a sturdy structure. Follow these steps to properly fold the edges:
- Identify the Edges: Take a moment to identify the four edges of the foil. These will be the sides that you’ll fold to create the walls of your baking tray.
- Start with Corner Folds: Begin by folding one corner of the foil at a 90-degree angle towards the center of the tray. Repeat this step for all four corners. This will create the initial folds that will serve as the foundation for the tray’s edges.
- Continue with Side Folds: Once the corners are folded, start folding the longer sides of the foil inward, perpendicular to the tray’s base. Use your fingers to crease the foil along each fold, ensuring a secure structure.
- Overlap the Foil: To create even sturdier edges, fold each long side of the foil inward once more, overlapping the previous fold. This overlapping technique will add strength and stability to the edges of the baking tray.
- Press Down Firmly: After folding and overlapping the foil, press down firmly on the edges to secure the folds in place. Run your fingers along each fold to ensure they are crisply creased and tightly sealed.
- Optional: Use a Fork to Seal: If you want to create a more decorative and secure seal for the folds, gently press a fork along the edges of the foil. This will create a pattern and help seal the folded edges together.
By folding the edges of the aluminium foil properly, you’ll create a sturdy and stable structure for your baking tray. Take your time during this step to ensure crisp folds and securely sealed edges, providing a reliable container for your delicious baked goods.
Step 5: Shaping the Foil into a Tray
After folding the edges of the aluminium foil, it’s time to shape it into a functional baking tray. Follow these steps to properly shape the foil:
- Identify the Base: Identify the flat surface of the foil that will serve as the base of your baking tray. This is the area enclosed by the folded edges.
- Press Down on the Base: Using your fingers, gently press down on the base of the foil tray to shape it into a flat and even surface. Smooth out any creases or bumps to ensure an even distribution of heat during baking.
- Form the Corners: To create the corners of the tray, gently press and pinch the folded corners together. Use your fingers to mold the foil into the desired shape, ensuring that the corners are formed securely and evenly.
- Smooth out the Sides: Run your fingers along the inside and outside of the folded edges to smooth out any bumps or irregularities. This will help create a seamless and visually appealing baking tray.
- Test the Shape: Ensure that the shaped foil tray fits comfortably in your oven and can hold the amount of food you intend to bake. Make any necessary adjustments to the shape or size of the tray before moving on to the next step.
By shaping the aluminium foil into a tray, you’ll create a functional and suitable container for your baking needs. Take your time during this step to ensure a well-formed and stable tray, allowing you to bake your favorite recipes with confidence.
Step 6: Testing the Sturdiness of the Tray
After shaping the aluminium foil into a baking tray, it’s important to test its sturdiness before proceeding with your baking. Follow these steps to ensure that the tray is stable and can hold up during the baking process:
- Gently Press on the Edges: Apply gentle pressure to the folded edges of the tray, ensuring that they hold their shape and don’t easily collapse or bend. The edges should feel firm and secure.
- Check for Stability: Place the tray on a flat surface and gently wiggle it or tap it to assess its stability. It should remain steady without wobbling or tilting excessively.
- Test Load Capacity: If you plan to bake heavier or denser items, consider adding a small test load to the tray. Place a few baking weights or evenly distribute some dry beans or rice across the surface. The foil tray should be able to support the weight without buckling or losing its shape.
- Assess Flexibility: Gently squeeze the sides of the tray to check its flexibility. It should maintain its structure and resist significant deformation.
- Reinforce if Needed: If you find that the tray lacks stability or does not meet your desired level of sturdiness, consider reinforcing it with additional layers of foil or by repeating the folding steps with added precision.
Testing the sturdiness of the foil tray is crucial to ensure that it can withstand the baking process and safely hold your prepared food. Take the time to conduct this test to avoid any mishaps or accidents during baking.
Step 7: Using the Aluminium Foil Baking Tray
Now that you have successfully created your aluminium foil baking tray, it’s time to put it to use. Follow these steps to effectively and safely use your homemade tray:
- Preheat the Oven: Before placing your baking tray in the oven, preheat it to the appropriate temperature as specified in your recipe.
- Prepare the Tray: If you didn’t line the tray with parchment paper, lightly grease it with cooking spray or butter to prevent your baked goods from sticking.
- Place the Tray in the Oven: Carefully transfer your prepared food onto the foil tray, ensuring that they are evenly distributed. Place the tray in the preheated oven on the designated oven rack.
- Monitor the Baking Process: Keep an eye on your baked goods as they are baking. Follow the recipe’s instructions for baking time and temperature, but also check for any signs of browning or burning that may require adjustments.
- Use Oven Mitts: When it’s time to remove the tray from the oven, use oven mitts to protect your hands from the heat. Grab the tray by the edges and carefully place it on a heat-resistant surface.
- Allow to Cool: Let your baked goods cool on the foil tray for a few minutes before transferring them to a cooling rack or serving platter. The foil will help retain their shape and prevent them from sticking to the tray.
- Dispose or Reuse the Tray: After removing the baked goods, you can either dispose of the aluminium foil tray or, if it is still in good condition, wash it and reuse it for future baking needs.
Using your aluminium foil baking tray is a convenient and cost-effective solution for your baking needs. Just ensure you follow proper safety precautions and baking instructions to achieve delicious results.