
Freeze in Water Bottles
When you find yourself without an ice tray but still need ice, don’t fret! You can easily make ice by freezing water in water bottles. This method is simple, convenient, and ensures you have ice readily available whenever you need it.
To make ice using water bottles, begin by selecting a suitable size water bottle. It is best to use bottles with a wide mouth for easy ice removal later on. Fill the water bottles about three-quarters full with clean water, leaving some space for the water to expand as it freezes.
Once the bottles are filled, securely tighten the caps to prevent any leakage. Place the bottles upright in the freezer, ensuring they are stable and won’t tip over. Allow the water to freeze completely, which usually takes around four to six hours, depending on the size of the bottles and the temperature of your freezer.
After the water has frozen, remove the bottles from the freezer and let them sit at room temperature for a few minutes. This will make it easier to remove the ice from the bottles. Gently squeeze the sides of the bottle or run it under warm water for a few seconds to loosen the ice. Alternatively, you can wrap a towel soaked in hot water around the bottle to loosen the ice.
Once the ice is loosened, carefully pour it into a container or use it directly as needed. If you want to store the ice for later use, transfer it to a freezer-safe bag or container and place it back in the freezer to keep it from melting.
Using frozen water bottles to make ice is not only a practical solution but also a space-saving one. It eliminates the need for an extra ice tray and ensures you have ice that is ready to use without any hassle. Whether you need ice for your beverages, to cool down a sprain or a headache, or even to pack in a cooler for a picnic, freezing water in water bottles is a fantastic alternative.
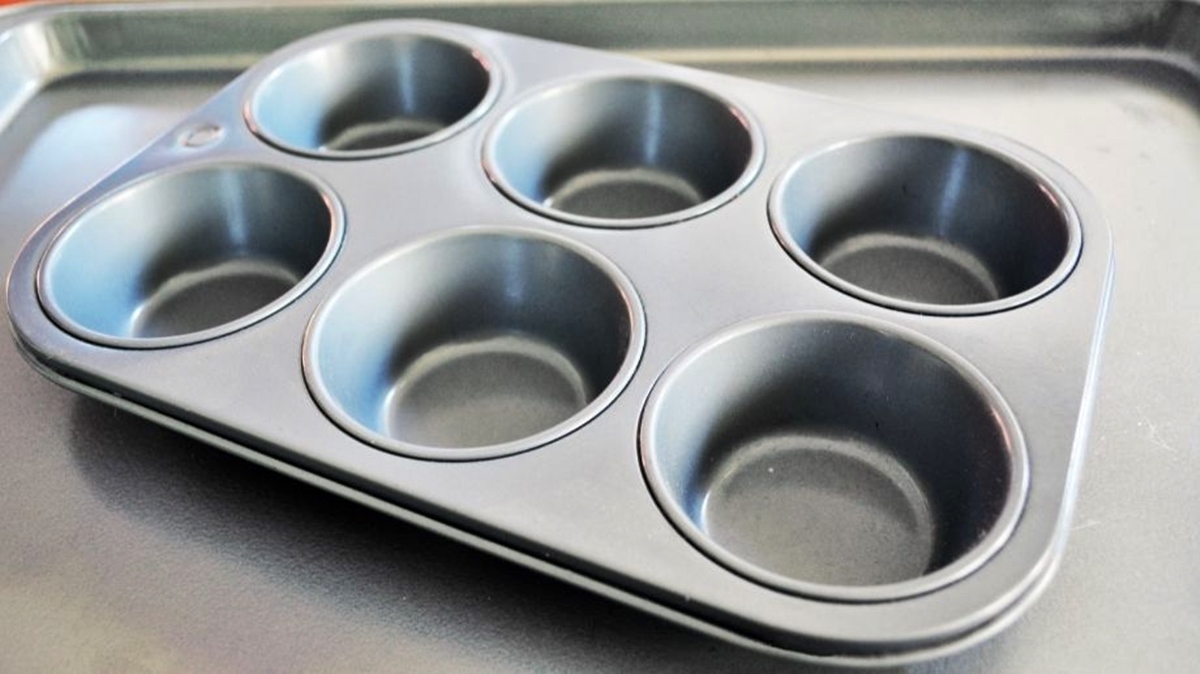
Use Muffin Trays
Don’t have an ice tray? No problem! Another ingenious way to make ice without an ice tray is to use muffin trays. These trays, typically used for baking muffins or cupcakes, can also serve as an excellent substitute for making ice cubes.
To make ice using muffin trays, start by thoroughly cleaning the trays to ensure they are free from any residue or baking oils. Once clean, fill each cup of the muffin tray about three-quarters full with water. Leave a little space at the top to allow for expansion as the water freezes. For added flavor or decoration, you can add a slice of lemon, a few mint leaves, or even a small edible flower to each cup.
Once the trays are filled, carefully place them in the freezer. Make sure to level the trays so that the water doesn’t spill and create a mess. Allow the water to freeze completely, which typically takes about four to six hours, depending on the size of the muffin cups and the temperature of your freezer.
After the water has frozen, remove the muffin trays from the freezer. To release the ice cubes, let the trays sit at room temperature for a few minutes. Then, gently twist and flex the tray to loosen the ice. If the cubes are stubborn, you can run the base of the tray under warm water for a few seconds to facilitate the release.
Once the ice cubes are released, transfer them to a container or use them directly as needed. If you plan to store the ice cubes for later use, transfer them to a freezer-safe bag or container and place them back in the freezer.
Using muffin trays to make ice cubes is not only a clever hack but also allows for larger ice cubes compared to traditional ice trays. These larger cubes are great for cocktails, as they melt slower, minimizing dilution. Additionally, the shape and size of the muffin cups can add an element of fun and visual appeal to your drinks or desserts.
So the next time you find yourself without an ice tray, raid your kitchen for a muffin tray instead. You’ll be surprised at how well it works and how much it can elevate your beverage-drinking experience!
Utilize Silicone Baking Molds
When you need to make ice but don’t have an ice tray, one practical alternative is to utilize silicone baking molds. These flexible molds, commonly used for baking cakes and other delicious treats, can also serve as excellent substitutes for creating ice cubes in various fun shapes and sizes.
To use silicone baking molds for making ice, start by selecting the desired mold shape. Silicone molds come in a wide range of designs, from traditional cubes to creative shapes like stars, hearts, animals, and more. The flexibility of the silicone allows for easy removal of the ice cubes once frozen.
Clean the silicone baking molds thoroughly before use to ensure they are free from any residue or baking oils. Then, place the molds on a flat surface or a baking sheet to provide stability throughout the freezing process.
Next, fill each cavity of the silicone mold with water. It’s essential not to overfill the molds to prevent spillover during freezing. Aim to fill the molds about three-quarters full to allow for expansion as the water freezes. You can also add a splash of juice or pieces of fruit to each cavity for a flavored or decorative twist.
Once the molds are filled, carefully place them in the freezer. The flat surface or baking sheet beneath the molds will ensure that they maintain their shape and prevent any spills. Allow the water to freeze completely, which typically takes about four to six hours, depending on the size and depth of the molds and the temperature of your freezer.
After the water has frozen, remove the silicone baking molds from the freezer. Let them sit at room temperature for a few minutes to release the ice cubes easily. Gently push or twist the bottom of the mold to pop out the ice cubes. If you encounter any resistance, you can run the bottom of the mold under warm water for a few seconds to loosen the ice.
Now you have beautifully shaped ice cubes ready to be used in your favorite beverages or desserts. Transfer the ice cubes to a container or use them directly as needed. To store them, place them in a freezer-safe bag or container.
Using silicone baking molds to make ice cubes not only provides an alternative to traditional ice trays but also adds a touch of creativity and whimsy to your drinks. Plus, the flexibility of the molds allows for easy release of the ice cubes without any cracking or breakage.
So don’t hesitate to dust off those silicone baking molds and put them to use in the freezer. They will not only shape your desserts but also help you create uniquely formed ice cubes that will impress your guests or add a touch of fun to your everyday routine.
Try Aluminum Foil
If you find yourself in need of ice but don’t have an ice tray, don’t worry! You can still make ice using aluminum foil, a household item commonly found in most kitchens. Aluminum foil can be a simple and effective solution for creating makeshift ice trays in a pinch.
To use aluminum foil for making ice, start by tearing off a sheet of aluminum foil. Make sure the sheet is large enough to accommodate the desired number of ice cubes. Fold the edges of the foil to create a shallow tray-like shape, ensuring there are no holes or gaps where the water could leak.
Once the aluminum foil tray is formed, carefully pour water into the tray, filling it to about three-quarters full. Be cautious not to overfill the tray, as water expands as it freezes and can cause spills.
After filling the tray with water, carefully transfer it to the freezer. To prevent any accidents or spills, it can be helpful to place the foil tray on a flat surface or tray before inserting it into the freezer.
Allow the water to freeze completely, which typically takes around four to six hours, depending on the size of the foil tray and the temperature of your freezer. It is essential to give the ice enough time to freeze thoroughly so that it is solid and usable.
Once the water has frozen and turned into ice, remove the foil tray from the freezer. Gently peel away the foil from the edges to release the ice block. If the ice block is too large or difficult to handle, you can use a knife to cut it into smaller, more manageable cubes.
Transfer the ice cubes to a container or use them directly as needed. If you plan to store them, place them in a freezer-safe bag or container and return them to the freezer to prevent melting.
Using aluminum foil as a temporary ice tray is a convenient solution when you don’t have access to traditional ice trays. It’s quick, easy, and allows you to customize the size and shape of the ice cubes based on your preferences.
So, next time you find yourself in need of ice but without an ice tray, reach for some aluminum foil and get creative. With a simple DIY foil tray, you can have ice cubes ready to cool down your favorite beverages or use in any other way you deem fit.
Make Ice Cubes in Ziplock Bags
When you don’t have an ice tray on hand, making ice cubes in Ziplock bags can be a practical and convenient alternative. Ziplock bags are versatile and commonly found in most households, making them an accessible option for creating makeshift ice trays.
To make ice cubes in Ziplock bags, start by selecting a freezer-safe, durable plastic bag with a reliable seal, such as a Ziplock bag. It’s crucial to choose a bag that is specifically designed for freezer use to ensure it can withstand the freezing temperatures.
Fill the Ziplock bag with clean water, leaving some room for the water to expand as it freezes. It’s best not to fill the bag completely to prevent it from bursting when the water expands. For added convenience, you can fill multiple bags with water at once, ensuring you have an ample supply of ice cubes.
Seal the Ziplock bag tightly to prevent any leakage or spills. Make sure to remove as much air as possible from the bag before sealing it, as excess air can cause the bag to float in the water and prevent the water from freezing evenly.
Place the sealed Ziplock bag(s) flat in the freezer. To prevent any mess or spills, it can be helpful to place the bags on a tray or flat surface before inserting them into the freezer. This will ensure that the bags maintain their shape and prevent any accidental leakage.
Allow the water in the Ziplock bags to freeze solid, which typically takes around four to six hours, depending on the size of the bags and the temperature of your freezer. It’s essential to give the water enough time to freeze completely so that you end up with solid ice cubes.
Once the water has turned into ice, remove the Ziplock bags from the freezer. Gently press and squeeze the bags to breakup the ice into individual cubes. Alternatively, you can also take the bags and knock them against the countertop to loosen the ice.
Transfer the ice cubes to a container or use them directly as needed. If you plan to store them, place them in a freezer-safe bag or container to prevent them from melting. You can also label the bag or container with the date to keep track of their freshness.
Making ice cubes in Ziplock bags is a flexible and convenient solution, especially when you don’t have a traditional ice tray. It allows you to easily create a batch of ice cubes that can be used for everything from chilling beverages to treating minor injuries.
So, the next time you find yourself without an ice tray, reach for some Ziplock bags and transform them into makeshift ice trays. It’s a simple and effective way to ensure you always have ice cubes readily available when you need them.
DIY Ice Cube Tray Alternatives
If you’re in a bind and don’t have access to a traditional ice tray, don’t worry! There are several creative and resourceful alternatives you can try using common household items. These DIY ice cube tray alternatives can come in handy in unexpected situations.
1. Egg Cartons: Empty egg cartons can be repurposed to make ice cubes. Simply fill the individual egg compartments with water and place them carefully in the freezer. Once frozen, you can cut or tear away the carton to release the ice cubes. Note that this method may yield irregularly shaped ice cubes.
2. Plastic Cups: Disposable plastic cups can serve as makeshift ice trays. Fill the cups with water and place them in the freezer. After the water has frozen, simply peel away the sides of the cup to release the ice cubes. For added stability, place the filled cups on a tray or baking sheet before freezing.
3. Cookie Cutters: If you have metal cookie cutters, they can be used to create unique and fun-shaped ice cubes. Place the cookie cutters on a flat surface or a baking sheet. Carefully pour water into each cookie cutter until it’s filled to the desired level. Freeze the water until it solidifies, and then remove the cookie cutters to release the ice cubes.
4. Small Food Containers: Reusable food containers with lids, such as those used for condiments or baby food, can be repurposed as ice cube trays. Fill the containers with water, leaving a little space at the top for the water to expand. Once frozen, simply run the bottom of the container under warm water to release the ice cubes.
5. Ice Cube Bags: While not exactly a DIY alternative, ice cube bags are sold specifically for making ice without the need for an ice tray. These bags have multiple compartments that can be filled with water and sealed. Once frozen, the compartments can be easily twisted or separated to release the ice cubes.
These DIY ice cube tray alternatives provide quick solutions when you need ice on the spot and don’t have a traditional ice tray available. While they may not offer the convenience or uniformity of regular ice trays, they can still get the job done in a pinch.
So, the next time you find yourself without an ice tray, get creative with what you have around the house. You’ll discover that there’s always a clever way to make ice cubes, even without the traditional tools!