
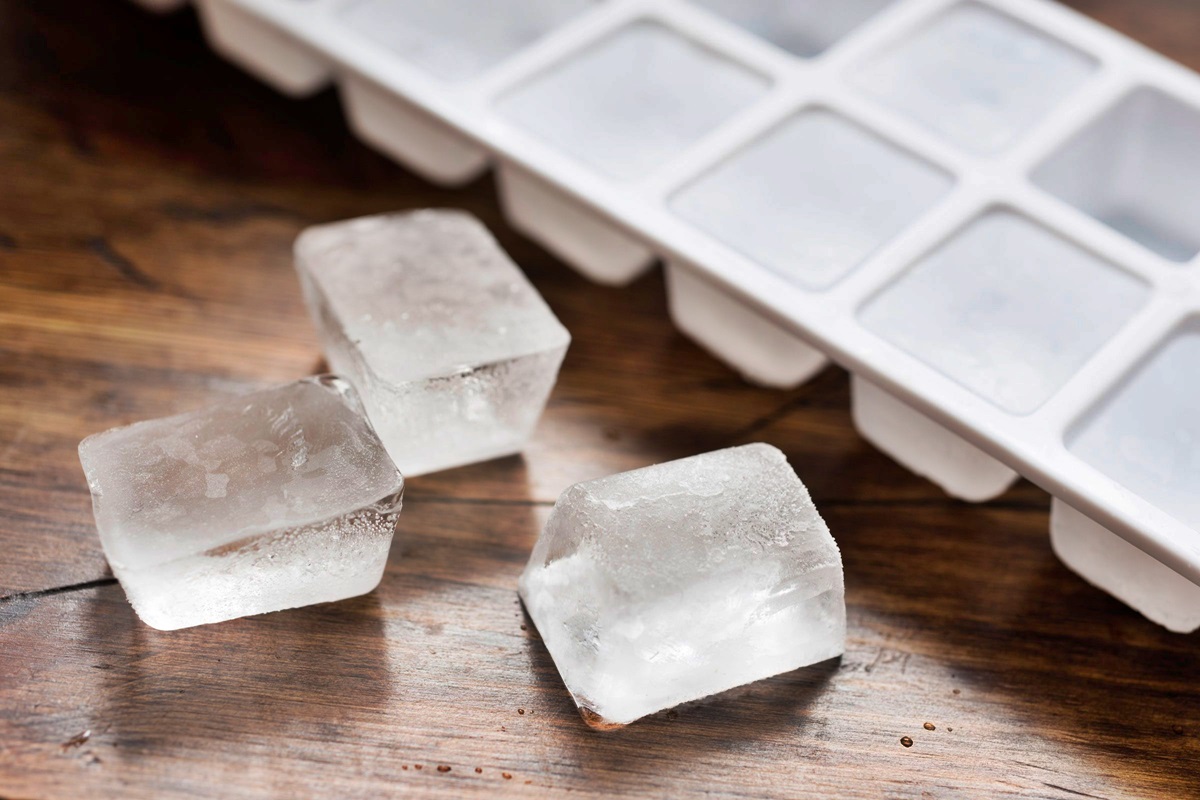
Why is ice stuck in silicone trays?
Silicone ice trays are a popular choice for producing ice cubes due to their flexibility, durability, and easy release capability. However, there may be instances where the ice becomes stuck in the trays, requiring a little extra effort to remove them. Understanding the reasons behind ice getting stuck in silicone trays can help troubleshoot the issue and ensure hassle-free ice cube removal.
One common reason for ice getting stuck is the formation of a vacuum seal between the ice and the silicone tray. When water freezes, it expands, and if the tray is filled to the brim, the ice may expand beyond the capacity of the tray, causing it to press against the sides. As a result, a vacuum seal is created, making it difficult to release the ice cubes.
Another factor that contributes to ice sticking is rapid freezing. If the water is frozen rapidly, it may cause the ice cubes to bond tightly to the silicone material. This bonding can make it challenging to remove the ice, even with a slight twist or tap.
The texture of silicone trays can also affect ice cube release. Some silicone trays have a smoother surface, while others have a textured or patterned design. The smooth surface may not provide enough traction for the ice to effortlessly slide out, leading to sticking.
Lastly, if the silicone tray is not properly prepared or lubricated before freezing, the ice cubes are more likely to get stuck. Without the appropriate coating or lubrication, the ice can adhere to the silicone surface, making it harder to release.
By understanding these factors, we can explore various methods to tackle ice cube sticking and make the ice removal process much easier. Let’s delve into some practical solutions to get that ice out of your silicone tray.
Preparing the tray
Before filling the silicone tray with water, it’s essential to properly prepare it to prevent ice cubes from sticking. Taking a few extra minutes to prepare the tray can save you from the frustration of dealing with stubborn ice cubes later on.
Firstly, ensure that the silicone tray is clean and free from any residue or debris. Wash it with warm soapy water and rinse thoroughly before use. This step will help eliminate any contaminants that could potentially cause the ice cubes to stick.
Next, consider applying a thin layer of cooking oil or non-stick spray to the silicone tray. The lubrication will create a barrier between the ice and the tray, making it easier for the cubes to release when they are frozen.
Alternatively, you can use a dusting of cornstarch or powdered sugar over the tray’s interior. These substances reduce the friction between the ice and the silicone, aiding in the effortless release of the ice cubes.
After applying the lubricant or dusting, gently tap the tray on a countertop or work surface to remove any excess. Be sure to distribute the oil, non-stick spray, or powdered substances evenly across the tray’s surface.
By preparing the silicone tray in advance, you create a favorable environment for the ice to freeze without sticking. This simple step can significantly improve your chances of smoothly releasing the ice cubes when they are frozen and ready to be used.
Using warm water to loosen the ice
If you find that the ice cubes are stuck in your silicone tray, one effective method to loosen them is by using warm water. Warm water can gently melt the ice, allowing for easy removal without damaging the tray or the cubes.
Start by running warm water over the back of the tray, where the ice cubes are located. The warm water will gradually heat the tray and begin melting the ice around the edges.
Hold the tray under the warm water stream for a few minutes, allowing the heat to penetrate and loosen the ice cubes. You may gently jiggle the tray while it’s under the water to help facilitate the melting process.
Once you feel that the ice has sufficiently loosened, turn off the water and carefully flip the tray over onto a cutting board or a large plate. Give it a gentle tap or shake to encourage the ice cubes to release from the tray.
If some of the ice cubes still remain stuck, you can place the tray in a basin or container filled with warm water. Leave it submerged for a few minutes, allowing the warm water to continue melting the ice and loosening the cubes.
After soaking, try tapping or shaking the tray again to release any remaining ice. If necessary, repeat the process of running warm water over the tray or soaking it until all the ice cubes are freed.
Using warm water is a simple yet effective method to loosen the ice cubes from a silicone tray. It requires minimal effort and can save you from resorting to more aggressive techniques that may damage the tray or cause the ice to break apart.
Tapping the tray on a hard surface
If warm water alone doesn’t do the trick, a tried-and-true method for releasing stubborn ice cubes from a silicone tray is tapping it on a hard surface. The impact from the tap can dislodge the ice cubes and help them break free from the tray.
Start by placing the silicone tray on a sturdy, flat surface such as a countertop or cutting board. Hold onto the sides of the tray firmly to prevent it from sliding or tipping over during the process.
With a quick but controlled motion, tap the bottom of the tray against the hard surface. The impact should jostle the ice cubes and break the bond between the ice and the tray, making it easier for the cubes to come out.
Try tapping with varying degrees of force, starting with lighter taps and gradually increasing the intensity if necessary. Be cautious not to use excessive force that could damage the tray or cause the ice cubes to shatter.
If tapping the tray alone doesn’t completely release the ice cubes, you can combine this method with others, such as using warm water or applying gentle pressure from the bottom of the tray.
Remember to tap the tray evenly across its surface to ensure all the ice cubes have a chance to loosen. Rotate the tray and tap each side, ensuring you cover all areas of the silicone mold.
By employing slight impact and vibration, tapping the tray on a hard surface helps break up the ice’s grip on the silicone, making the release process much more manageable.
Applying gentle pressure from the bottom of the tray
If tapping the tray alone isn’t enough to release the ice cubes, applying gentle pressure from the bottom can help dislodge them from the silicone tray. This method involves using controlled force to push the ice cubes out without damaging the tray or breaking the cubes.
Start by holding the tray firmly with both hands, ensuring a secure grip to prevent it from slipping or bending. Place your thumbs on the bottom surface of the tray, directly beneath the ice cubes.
Apply gentle, even pressure with your thumbs, pushing upwards towards the top of the tray. The pressure should be firm enough to encourage the ice cubes to shift, but not so strong that it causes the tray to deform or crack.
As you apply pressure, you may feel the ice cubes starting to shift or loosen from the sides of the tray. If necessary, you can also use your fingers to support the sides of the tray, providing additional stability and preventing any flexing or warping.
Continue to exert the pressure while simultaneously giving the tray a gentle twist or jiggle. This combination of upward pressure and subtle movement can help break the ice cubes free from the tray’s mold.
If a few cubes remain stubbornly stuck, focus your pressure and twisting efforts on those specific areas. By targeting the problem spots, you can gradually release any remaining stuck ice cubes.
Remember to be patient and avoid using excessive force, as it may lead to damaging the tray or causing the ice cubes to break apart.
By applying gentle pressure from the bottom of the tray, you can encourage the ice cubes to dislodge and free themselves, making it easier to remove the cubes without any hassle.
Twisting the tray to release the ice cubes
When the ice cubes are stubbornly stuck in a silicone tray, twisting the tray can be an effective technique to release them. This method involves applying rotational force to the tray, helping to break the ice cubes free from their molds.
Start by holding the sides of the silicone tray firmly with both hands. Use a steady grip to ensure better control and prevent the tray from slipping or twisting too forcefully.
Gently twist the tray in one direction, such as clockwise or counterclockwise, while keeping a slight downward pressure on the tray. The combination of the twist and the downward force helps to loosen the ice cubes and separate them from the tray’s surface.
While twisting, you may feel or hear a slight popping or cracking sound, which indicates that the ice cubes are releasing. This twisting action helps to break the bond between the ice and the silicone, allowing for easier removal.
If the ice cubes don’t release easily with the initial twist, try rotating the tray in the opposite direction and repeating the motion. Sometimes changing the twisting direction can provide a better release for stubborn ice cubes.
In addition to twisting the entire tray, you can also try twisting individual compartments. This method can be useful when only some of the ice cubes are stuck, allowing you to target specific areas more effectively.
Remember to be gentle and avoid applying excessive force while twisting. Applying too much force can cause the tray to deform or crack, and it can also break the ice cubes apart.
By twisting the tray, you create a rotational force that helps to separate the ice cubes from the silicone mold. This method, when combined with other techniques, can be a valuable tool in releasing those pesky stuck ice cubes.
Using a spoon or fork to pry out the ice cubes
If the ice cubes in a silicone tray are particularly stubborn and won’t release using previous methods, using a spoon or fork to pry them out can be an effective solution. This technique allows you to physically separate the ice cubes from the tray’s surface without causing damage.
Start by selecting a sturdy, heat-resistant spoon or fork. Metal utensils work well for this purpose, but make sure they are not sharp enough to puncture or scratch the silicone.
Insert the edge of the spoon or fork into the side of the ice cube, near its base. Gently push the utensil into the cube, applying a small amount of pressure, and then slowly lift or tilt the utensil to detach the ice cube from the tray.
Repeat this process for each stuck ice cube, working your way around the tray. Take care not to use excessive force that could cause the tray to bend or crack.
If the ice cubes are still firmly stuck, try running warm water over the back of the tray to slightly melt the edges of the ice cubes and make them easier to pry out.
As you pry out the ice cubes, pay attention to their shape and condition. If an ice cube starts to crack or break apart, you may need to adjust your technique or use an alternative method to avoid damaging the tray or creating small ice fragments.
Using a spoon or fork to pry out the ice cubes is a hands-on approach that can be effective for freeing stuck ice cubes from a silicone tray. Just remember to be gentle and patient, ensuring you maintain the integrity of the tray and the quality of the ice cubes.
Leaving the tray at room temperature for a few minutes
If you’re dealing with ice cubes that are firmly stuck in a silicone tray, sometimes a simple yet effective solution is to let the tray sit at room temperature for a few minutes. Allowing the tray to warm up slightly can help loosen the ice cubes and make them easier to release.
Start by removing the tray from the freezer and placing it on a stable surface at room temperature. Avoid placing it on a hot surface or near direct heat sources to prevent damaging the tray.
Allow the tray to sit undisturbed for a few minutes. The ambient temperature in the room will gradually warm the silicone material, causing it to expand slightly and loosen the grip on the ice cubes.
During this time, air circulation around the tray can also help with the warming process. If possible, try placing the tray in a well-ventilated area to enhance the warming effect.
After a few minutes, gently tap or twist the tray to check for any loosened ice cubes. If they don’t readily release, wait a bit longer to allow the warmth to further penetrate the tray.
It’s important to note that leaving the tray at room temperature is a passive method that requires patience. This method may be less effective for ice cubes that are deeply frozen or tightly stuck to the tray.
While waiting, it’s also a good time to prepare any other tools or methods, such as using warm water or applying pressure, to aid in the ice cube release process.
By allowing the tray to sit at room temperature for a few minutes, you give the ice cubes and the tray a chance to adjust to a slightly warmer environment. This adjustment can help break the bond between the ice cubes and the silicone, making the release process less challenging.
Using a silicone or rubber spatula to push out the ice cubes
If other methods haven’t been successful in releasing the ice cubes from a silicone tray, using a silicone or rubber spatula can provide the necessary leverage to push the cubes out. This technique allows for controlled pressure without damaging the tray or breaking the ice cubes.
Start by selecting a silicone or rubber spatula that is long enough to reach the bottom of the tray and has a thin, flat edge. Avoid using metal spatulas or utensils that may scratch or damage the tray’s surface.
Insert the edge of the spatula into the side of the ice cube, near its base. Apply gentle but firm pressure against the tray, pushing the edge of the spatula towards the center of the tray.
Continue to push the spatula along the sides and underneath the ice cube, gradually working your way around to release it. Be careful not to exert too much force that could cause the tray to deform or crack.
If the ice cube doesn’t release easily, try using the spatula to push from multiple angles or apply slight twisting motions to help dislodge it. Additionally, running warm water over the back of the tray beforehand can slightly melt the ice and make it easier to push out.
Repeat the process for each stuck ice cube, taking your time and adjusting your technique as needed. If any of the ice cubes start to show signs of cracking or breaking, reevaluate your approach to avoid damaging the tray or creating small ice fragments.
A silicone or rubber spatula provides the flexibility and control required to gently push out stuck ice cubes from a silicone tray. With patience and proper technique, this method can effectively release the cubes without causing any harm.
Using a hairdryer to warm the tray and release the ice
If you’re facing stubbornly stuck ice cubes in a silicone tray, using a hairdryer can be an effective method to warm the tray and encourage the ice to release. The application of warm air helps to soften the ice’s grip on the tray, making it easier to remove.
Start by removing the silicone tray from the freezer and placing it on a heat-resistant surface. Set the hairdryer to a low or medium heat setting to ensure gentle and controlled warming.
Hold the hairdryer a few inches away from the back of the tray, directing the warm airflow toward the stuck ice cubes. Slowly move the hairdryer back and forth, evenly distributing the heat across the surface of the tray.
Continue to apply the warm air for a few minutes, allowing the silicone tray to gradually warm up. The heat will help loosen the bond between the ice cubes and the tray, facilitating the release process.
After a few minutes, check the ice cubes by gently tapping or twisting the tray. If they are still stuck, continue to apply heat while using other techniques like tapping or prying with a utensil to encourage release.
Be cautious not to overheat the silicone tray or use the hairdryer on the highest heat setting, as excessive heat can damage the tray or cause it to warp.
Take breaks in between bouts of warming to avoid overheating. This also allows the tray and the ice cubes to equalize in temperature, maximizing the effectiveness of the method.
Using a hairdryer to warm the silicone tray can be particularly helpful if the ice cubes are firmly stuck due to a tight freeze or a vacuum seal. The gentle application of heat helps to loosen the ice cubes, giving you a better chance of successfully releasing them.
Avoiding the use of sharp objects or excessive force
When dealing with stuck ice cubes in a silicone tray, it’s crucial to avoid using sharp objects or applying excessive force in an attempt to release them. While it may be tempting to resort to aggressive methods, these can cause damage to the tray or result in broken ice cubes.
Using sharp objects, such as knives or metal utensils, to pry or chip away at the ice cubes can lead to scratches, cuts, or even punctures in the silicone tray. These damages not only compromise the tray’s usability but also create potential safety hazards.
Similarly, applying excessive force can cause the tray to bend, crack, or even break. It’s essential to remember that silicone is a flexible material, and using excessive force can compromise its structural integrity.
By avoiding sharp objects and excessive force, you lower the risk of damaging both the tray and the ice cubes. Instead, focus on gentle and non-destructive methods to release the ice cubes without compromising their quality or the tray’s usability.
If the ice cubes are particularly stubborn, try using alternative techniques such as tapping, applying gentle pressure, or using warm water to loosen their grip. These methods offer a safer and more effective way to release the ice without causing harm.
Ultimately, exercising patience and exploring gentle techniques will yield better results and prevent unnecessary damage. It’s important to prioritize the longevity of the silicone tray and the integrity of the ice cubes while seeking their release.