
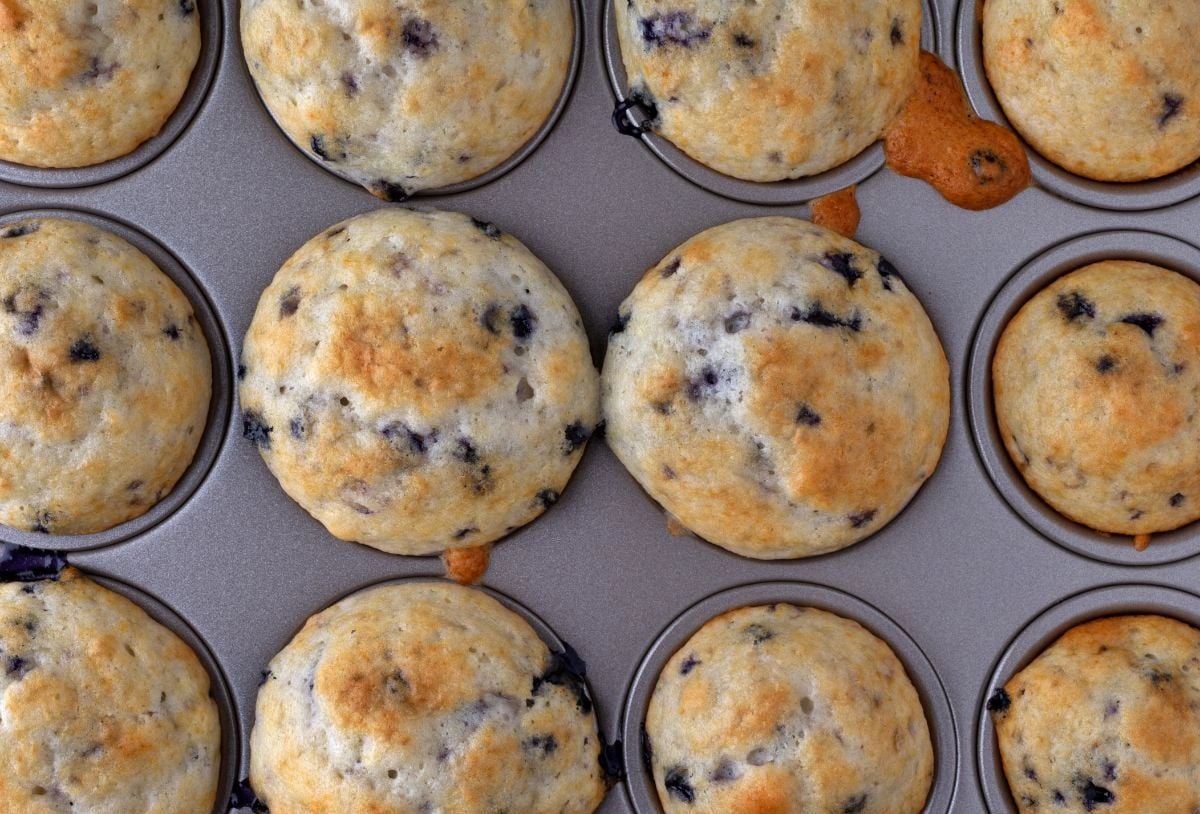
Preparing the Cupcake Tray
Before you can successfully take cupcakes out of a tray, it’s important to properly prepare the tray to ensure that the cupcakes don’t stick. Here are some steps to follow:
- Clean the tray: Start by thoroughly cleaning the cupcake tray to remove any residue or grease from previous uses. Use warm soapy water and a sponge to scrub the tray, making sure to get into all the crevices. Rinse it well and pat it dry before moving on to the next step.
- Use cupcake liners: One of the easiest ways to prevent cupcakes from sticking to the tray is by using cupcake liners. Choose high-quality liners made from greaseproof paper or use silicone liners for a more eco-friendly option. Place the liners in the tray, making sure they are centered in each cavity.
- Grease the tray: If you prefer not to use cupcake liners, greasing the tray is essential to prevent sticking. Apply a thin layer of non-stick cooking spray or use a pastry brush to brush melted butter or vegetable oil onto the tray’s surfaces. Make sure to coat the bottom and sides of each cavity.
By taking the time to prepare your cupcake tray properly, you ensure that your cupcakes release easily without leaving behind any crumbs or bits of cake. This step is crucial for achieving beautifully shaped cupcakes that are ready to be served or decorated.
Cooling the Cupcakes
After baking your delicious cupcakes, it’s important to allow them to cool properly before attempting to remove them from the tray. This will help prevent them from falling apart or sticking to the tray. Here are some guidelines to follow for effective cupcake cooling:
- Leave them in the tray: Once you’ve taken your cupcakes out of the oven, resist the temptation to remove them from the tray immediately. Leave them in the tray for about 5-10 minutes to cool slightly and set.
- Transfer to a wire rack: After the initial cooling period in the tray, gently transfer the cupcakes to a wire rack to continue cooling. This will allow air to circulate around the cupcakes, facilitating even cooling and preventing condensation.
- Avoid placing them in a cold environment: It’s important to avoid placing the cupcakes in a cold draft or directly in the refrigerator. Extreme temperature changes can cause the cupcakes to become dense or dry. Instead, allow them to cool at room temperature in a well-ventilated area.
Properly cooling your cupcakes not only ensures that they hold their shape but also enhances their flavor and texture. Rushing the cooling process may result in soggy or crumbly cupcakes, which can be challenging to remove from the tray without damaging them.
Loosening the Cupcakes
Once your cupcakes have cooled sufficiently, it’s time to loosen them from the tray to prepare for serving or further decorating. Here are a few methods you can use to loosen the cupcakes:
- Using a butterknife: Gently slide a butterknife or small offset spatula between the edge of the cupcake and the cavity of the tray. Carefully lift and wiggle the butterknife to loosen the cupcake, ensuring that it isn’t sticking to the sides. Repeat this process for each cupcake until they’re all loosened.
- Twisting the tray: Holding the edges of the cupcake tray, give it a gentle twist from side to side. This motion helps to release any cupcakes that may be stuck to the bottom or sides. Continue twisting until all the cupcakes feel loose.
- Using a silicone liner: If you used silicone cupcake liners, gently push up from the bottom of each liner to release the cupcakes. Silicone liners are naturally non-stick, making it easier to remove the cupcakes without any resistance.
Take care when loosening the cupcakes to avoid any damage or breakage. By using one of these gentle methods, you can ensure that your cupcakes come out of the tray easily, maintaining their shape and appearance.
Using an Offset Spatula
An offset spatula is a versatile tool that can be incredibly helpful when it comes to removing cupcakes from the tray. Here’s how you can effectively use an offset spatula:
- Slide the spatula underneath: Gently slide the offset spatula underneath the bottom of the cupcake. Place it close to the cavity’s edge, making sure not to damage the cupcake or the tray.
- Lift and wiggle: Once the spatula is underneath the cupcake, carefully lift it up slightly while giving it a gentle wiggle. This motion helps to release any areas where the cupcake might be sticking to the tray.
- Transfer to a plate or serving platter: Once the cupcake is loosened, transfer it to a plate or serving platter. You can use the offset spatula to guide it onto the desired surface, ensuring a smooth and easy transfer.
The flexibility and thinness of an offset spatula make it ideal for maneuvering underneath delicate cupcakes without damaging them. It allows for precise and controlled movements, making the cupcake removal process a breeze.
Tipping Over the Tray
If you’re looking for a simple and efficient way to take cupcakes out of a tray, tipping over the tray can be a great method. Here’s how to do it:
- Hold the tray firmly: Grasp the cupcake tray securely with both hands, ensuring a firm grip on each side. This will prevent any cupcakes from accidentally falling out during the tipping process.
- Tilt it slowly: Slowly tilt the tray at a slight angle, aiming to have the cupcakes slide towards the opening. Be careful and gradual with the tilting to avoid any cupcakes getting damaged or falling off.
- Patience is key: Patience is crucial with this method. Allow the cupcakes to slide gently and naturally out of the tray. Avoid any sudden or forceful movements that could cause the cupcakes to break or crumble.
- Catch the cupcakes: Have a clean plate or surface ready to catch the cupcakes as they slide out of the tray. Ensure that the plate is large enough and well-positioned to catch them all without any mishaps.
Tipping over the cupcake tray is a straightforward and effective technique that requires minimal effort. It’s an excellent option when you want to quickly remove cupcakes from the tray without using any additional tools.
Using Silicone Cupcake Liners
Silicone cupcake liners are a popular alternative to traditional paper liners. They offer several advantages when it comes to removing cupcakes from the tray. Here’s how you can use silicone cupcake liners to your advantage:
- Place the liners in the tray: Start by placing the silicone cupcake liners in the cupcake tray. Ensure that they are centered in each cavity and securely in place.
- Pour the batter: Fill each silicone cupcake liner with the desired amount of batter. The liners are naturally non-stick, so there’s no need to grease or add any additional coating.
- Bake as usual: Place the tray with the silicone cupcake liners in the oven and bake your cupcakes according to the recipe instructions. The liners will help the cupcakes cook evenly and prevent them from sticking to the tray.
- Cool and remove: Once the cupcakes are baked and cooled, simply press gently on the bottom of each liner to pop the cupcakes out of the tray. The flexibility of the silicone makes it easy to release the cupcakes without any sticking.
Using silicone cupcake liners not only makes the cupcake removal process effortless but also eliminates the need for greasing or using additional tools. The liners can be washed and reused, making them an eco-friendly choice for baking enthusiasts.
Freezing the Cupcakes
If you want to prepare cupcakes in advance or store leftovers for later, freezing them is a great option. Here’s how you can freeze cupcakes:
- Cool the cupcakes completely: Allow the cupcakes to cool completely before freezing. This will help retain their moisture and ensure they freeze evenly.
- Wrap individually: Once cooled, wrap each cupcake tightly in plastic wrap or place them in individual airtight containers. This will prevent them from drying out and protect them from freezer burn.
- Place in a freezer-safe bag or container: After individually wrapping the cupcakes, place them in a freezer-safe bag or container. Make sure to label the bag or container with the date to keep track of their freshness.
- Freeze for up to three months: Cupcakes can be kept in the freezer for up to three months. However, for the best quality, it’s recommended to consume them within one month.
- Thaw before serving: When you’re ready to enjoy the frozen cupcakes, remove them from the freezer and let them thaw at room temperature. This usually takes a couple of hours, depending on the size of the cupcake.
Freezing cupcakes is a convenient way to have a batch of homemade treats readily available. Whether you’re planning ahead for a special occasion or simply want to enjoy a sweet treat anytime, freezing cupcakes is a practical solution.
Using Non-Stick Cooking Spray
When it comes to taking cupcakes out of a tray with ease, using non-stick cooking spray can be a game-changer. Here’s how you can effectively use non-stick cooking spray:
- Clean the cupcake tray: Start by ensuring the cupcake tray is clean and free of any residue. Cleaning the tray beforehand prevents any leftover bits of cake from sticking to the cupcakes.
- Hold the tray over the sink: Take the cupcake tray and hold it over the sink to prevent any mess. This will make it easier to apply the non-stick cooking spray without it getting all over your countertop.
- Hold the spray at an angle: Holding the can of non-stick cooking spray at a slight angle, spray a light and even coating over the entire inside surface of each cavity. Be sure to cover the sides and bottom of each cavity thoroughly.
- Avoid over-spraying: It’s important not to overdo it with the non-stick cooking spray. Applying too much can result in greasy cupcakes. Remember, a light and even coat is sufficient to prevent the cupcakes from sticking.
- Use a pastry brush for precision: If you want to ensure an even coating and precise application, you can also use a pastry brush to spread the non-stick cooking spray onto the tray. This method allows for better control of the amount of spray used.
Using non-stick cooking spray adds a layer of lubrication between the cupcake tray and the batter, making it easier to remove the cupcakes once they’re baked. This technique is especially handy when you don’t have cupcake liners on hand or prefer not to use them.
Twisting the Cupcake Tray
A simple and effective method for taking cupcakes out of a tray is by giving it a gentle twist. This technique helps to release the cupcakes from the tray without using any additional tools. Here’s how it’s done:
- Let the cupcakes cool: Allow the freshly baked cupcakes to cool in the tray for a few minutes. This slight cooling period helps the cupcakes set and makes them easier to remove.
- Hold the tray securely: With one hand gripping each side of the cupcake tray, hold it firmly to ensure stability during the twisting process. This will prevent any cupcakes from accidentally falling out.
- Apply slight pressure: While still holding the tray securely, apply gentle pressure and twist it from side to side. The aim is to create a slight separation between the cupcakes and the tray, allowing them to release easily.
- Continue twisting: Gradually increase the twisting motion until all the cupcakes feel loose. Be patient and avoid applying excessive force, as it may cause the cupcakes to break or become misshapen.
- Transfer the cupcakes: Once the cupcakes are loosened from the tray, carefully transfer them to a serving platter or individual plates. You can use a butter knife or spatula to help lift the cupcakes, if necessary.
Twisting the cupcake tray is a quick and straightforward method that works well, especially with non-stick trays. It’s a convenient option when you want to remove the cupcakes without using any additional tools, making the process hassle-free and efficient.
Using a Butter Knife
If you don’t have any specialized tools on hand, a simple butter knife can come in handy when it’s time to remove cupcakes from a tray. Here’s how you can use a butter knife to safely and effectively take cupcakes out of the tray:
- Allow the cupcakes to cool: Before attempting to remove the cupcakes, ensure that they have cooled completely. This helps them retain their shape and makes them less likely to break or stick to the tray.
- Choose a sturdy butter knife: Select a butter knife that has a fairly thin and flat blade. Avoid knives with serrated edges or ones that are too thick, as they can easily damage the cupcakes or the tray.
- Slide the butter knife under the cupcake: Insert the butter knife at a slight angle between the edge of the cupcake and the tray. Gently slide it beneath the cupcake, ensuring it doesn’t pierce through the bottom.
- Loosen the cupcake: Once the knife is underneath the cupcake, carefully lift and wiggle the knife to loosen it from the tray. Be gentle and take your time to avoid any damage to the cupcake.
- Transfer the cupcake: Once the cupcake is loosened, use the butter knife to guide it onto a plate or serving platter. Ensure a smooth transfer by gently supporting the cupcake as you lift it away from the tray.
While using a butter knife may not be as precise as using specialized tools, it can still be a practical and effective method for removing cupcakes from a tray. Just remember to handle the knife with care to avoid any accidents or damage to the cupcakes.