
Materials Needed
To effectively shade a vase, you will need a few essential materials. Gather the following items before you start:
- Pencil or pen: Choose a soft pencil or a fine-tipped pen to create the initial outline of the vase.
- Sketchbook or paper: Use a high-quality sketchbook or thick paper to ensure durability and prevent smudging.
- Eraser: Have a quality eraser on hand to correct mistakes and clean up the sketch as you go.
- Light source: A well-lit area or a lamp that can cast clear shadows is crucial for accurate shading.
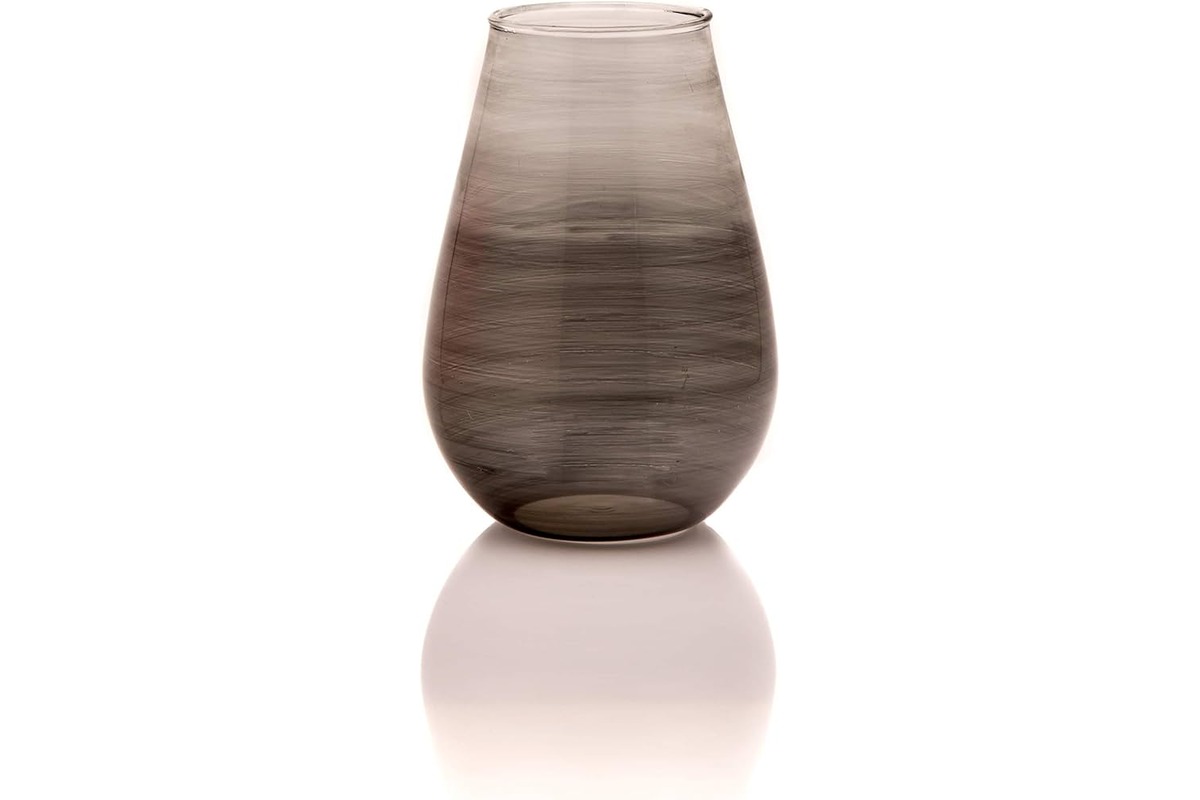
- Reference image: Find a reference image of a vase that inspires you or use a real vase as a model.
- Various shading tools: Depending on your preference, gather shading tools such as graphite pencils, charcoal, or shading sticks.
- Tortillon or blending stump: These tools help in blending and creating smooth gradients.
- Optional: Colored pencils or markers can be used to add depth and color to your shaded vase if desired.
Gather these materials and find a comfortable, well-lit space to work in. Once you have everything you need, you’ll be ready to start shading your vase.
Step 1: Draw the Outline of the Vase
The first step in shading a vase is to draw its outline. Use a pencil or pen to sketch the basic shape of the vase on your chosen sketchbook or paper.
Start by envisioning the overall shape of the vase. Is it tall and slender, or short and wide? Determine if it has a rounded or angular body. Based on your reference image or real-life observation, carefully draw the outline, paying attention to its proportions and curves.
You can begin by drawing a simple oval or rectangular shape to represent the body of the vase. Then, add in any distinctive features such as a curved neck, handles, or a decorative base. Take your time to ensure the outline accurately represents the shape and design of the vase.
Remember that the outline serves as a guide for the shading process, so it is important to be precise. Use light, small strokes to create the initial sketch, allowing you to make adjustments as needed. If you make any mistakes, gently erase and correct them.
Once you are satisfied with the outline, darken it slightly to make it more visible. However, keep in mind that the final shading will cover most of the outline, so it should not be too bold or overpowering.
With the outline complete, you are now ready to move on to the next step, where you will determine the light source for your vase shading.
Step 2: Decide on the Light Source
Before you start shading your vase, it’s crucial to decide on the placement of the light source. The light source will determine where the shadows fall and how the vase will be illuminated.
Take a moment to observe your reference image or the real-life vase in front of you. Imagine a light source, such as a lamp or the sun, shining on the vase from a specific angle.
Consider the direction and angle of the light. Is it coming from the left, right, above, or below? This will determine where the highlights and shadows will be positioned on the vase to create a three-dimensional effect.
Once you have determined the light source, make a mental note or lightly mark it on your sketch. This will serve as a visual reminder throughout the shading process.
Remember that consistency is key. Make sure the light source remains consistent throughout your shading to create a cohesive and realistic look. Avoid changing the angle or position of the light source as you progress.
Deciding on the light source is an essential step as it sets the foundation for the shading process. With the light source established, you can now move on to the next step, which involves identifying the areas of light and shadow on the vase.
Step 3: Identify the Areas of Light and Shadow
After determining the light source, it’s time to identify the areas of light and shadow on your vase. This step is crucial for creating depth and dimension in your shading.
Take a close look at your reference image or observe the real vase in front of you. Notice where the light hits the vase directly, creating bright areas of light. These are usually the top and sides facing the light source.
Conversely, identify the areas that are facing away from the light source or are blocked by the vase’s own structure. These regions will be in shadow and appear darker.
Keep in mind that shadows are not always black or uniformly dark. They can have various tones and gradients depending on the surrounding light and the vase’s surface texture.
Using a pencil or pen, lightly shade in the areas that will be in shadow. These preliminary marks will help you visualize the distribution of light and dark on the vase.
Remember to keep your shading strokes light and subtle at this stage. You can always darken and refine the shading later as you build up the layers.
By identifying the areas of light and shadow, you set the foundation for the shading process. This step provides a roadmap for your shading and ensures a realistic representation of the vase’s form.
With the areas of light and shadow identified, you’re now ready to move on to the next step: starting with light shading.
Step 4: Start with Light Shading
Now that you have identified the areas of light and shadow, it’s time to begin shading your vase. Starting with light shading will help establish the overall values and build up the form of the vase.
Using a soft pencil or shading tool, lightly shade in the areas of the vase that are directly facing the light source. Apply gentle, even strokes in the direction of the vase’s form.
Focus on creating a smooth transition from the lighter areas to the shadow regions. The goal is to gradually build up the form and capture the subtle variations in light intensity.
Keep your strokes light and avoid pressing too hard, as you can always darken the shading later. The key at this stage is to establish the basic values and create a foundation to work upon.
Take frequent breaks to step back and observe your work. Make adjustments as needed to ensure the shading aligns with your reference image or the desired effect.
Remember, light shading sets the groundwork for the more detailed shading to come. It establishes the basic values and helps define the overall form of the vase.
Once you are satisfied with the light shading, you can move on to the next step: adding mid-tones to further enhance the vase’s dimension.
Step 5: Add Mid-tones
Now that you have established the light shading, it’s time to add mid-tones to your vase. Mid-tones help bridge the gap between the light and shadow areas, further enhancing the three-dimensional quality of the shading.
Using a darker pencil or shading tool, gently layer in the mid-tones on the vase. Focus on the areas that are not directly illuminated by the light source but are not in deep shadow either.
Use light, controlled strokes to build up the mid-tones gradually. Pay attention to the shape and contours of the vase, allowing the mid-tones to enhance its form and volume.
Remember to observe your reference image or the real vase for guidance on where the mid-tones should be applied. Look for areas that appear slightly darker than the directly lit regions but are not as dark as the shadowed areas.
Blend the mid-tones with the lighter shading to create a seamless transition between the values. You can do this by using a blending stump, a tortillon, or even your fingertip to softly smudge and blend the strokes.
Adding mid-tones brings depth and richness to your shading, helping to create a more realistic and lifelike representation of the vase. Continuously assess your work as you progress, making adjustments and refining the tones and values as necessary.
With the mid-tones in place, you’re ready to move on to the next step: building up the shadows to further accentuate the form of the vase.
Step 6: Build Up the Shadows
Building up the shadows is a crucial step in shading the vase and adding depth and dimension to your artwork. Shadows help create contrast and define the form of the vase more effectively.
Using a darker shading tool such as a graphite pencil or charcoal, begin adding shadows to the areas of the vase that are facing away from the light source.
Observe your reference image or the real vase closely to identify the areas of deep shadow. Look for regions where the light is obstructed by the vase itself or by any other objects in the scene.
Apply the darker shading in a gradual and layered manner. Start with light strokes and gradually build up the intensity as you go. This will allow you to have better control over the values and prevent the shading from becoming too harsh or overpowering.
Focus on creating smooth transitions from the mid-tones to the darkest shadow areas. This will help create a more realistic and believable shading effect.
Consider the shape and volume of the vase as you add shadows. Take note of any curved or rounded surfaces that may catch less light and appear darker. Pay attention to the cast shadows on the surface or any reflections that contribute to the overall shading of the vase.
As you work on the shadow areas, continuously assess the overall balance of your shading. Step back from your work frequently to gain a fresh perspective and make adjustments as necessary.
Remember that building up the shadows is a gradual process. Take your time and build up the tones and values slowly and methodically to achieve the desired effect.
With the shadows in place, you’re ready to move on to the next step: blending and smoothing the shading to create a seamless and cohesive appearance.
Step 7: Blend and Smooth
Once you have added shadows to the vase, it’s time to blend and smooth the shading to create a seamless and cohesive appearance. Blending helps unify the different tonal values and eliminates any harsh lines or transitions.
Use a blending stump, tortillon, or a soft cloth to gently blend and smooth the shading on the vase. Start from the lighter areas and work your way towards the shadows, ensuring a gradual and even blending process.
The goal is to create a smooth gradient from the highlights to the shadows, maintaining the shape and form of the vase. Use circular or back-and-forth motions to blend the shading strokes together.
Be mindful not to over-blend as this can result in a loss of definition and detail. Aim for a balanced blend that maintains the overall form and texture of the vase.
Continuously step back and observe your work from a distance to assess the blending effectiveness. Make adjustments and refine the shading as needed.
Keep in mind that blending is a subjective process, and each artist may have their preferred method. Experiment with different techniques and tools to find the blending style that suits your artistic vision and achieves the desired result.
With the blending complete, you’re ready to move on to the next step: adding details and highlights to enhance the realism of your shaded vase.
Step 8: Add Details and Highlights
Adding details and highlights is the next step in shading your vase and bringing it to life. Details and highlights add depth, texture, and realism to your artwork.
Start by observing your reference image or the real vase to identify any intricate patterns, textures, or surface details. These may include fine lines, ridges, or decorative elements.
Using a fine-tipped pencil or pen, carefully add these details to your shaded vase. Take your time and work on one section at a time, ensuring accuracy and precision.
Consider the direction of the light source and how it interacts with the surface of the vase. Add highlights or lighter tones to areas that would catch more light, such as curved edges or raised surfaces.
Be mindful of not overdoing the detailing. It’s important to strike a balance between the defined details and the overall shading. The details should enhance the shading and not overpower it.
Additionally, consider adding reflected light or subtle highlights on the vase’s surface to create a more realistic effect. This can be done with a kneaded eraser or a white pencil, gently lifting off or adding highlights to specific areas.
Continue to step back and assess your work as you add details and highlights. Ensure that they harmonize with the shading and contribute to the overall three-dimensional quality of the vase.
Remember that the level of detail and highlights can vary depending on the style and desired effect. Experiment and explore different techniques to achieve the desired level of realism.
With the details and highlights in place, you’re approaching the final steps of shading your vase. The next step will involve some finishing touches to refine and complete your artwork.
Step 9: Finishing Touches
As you reach the final step of shading your vase, it’s time to add the finishing touches that will bring your artwork to completion. These touches will refine and polish your shading, ensuring a professional and polished result.
Start by carefully reviewing your shaded vase as a whole. Look for any areas that may require further adjustments or blending. Smooth out any harsh lines or transitions to create a cohesive and seamless appearance.
Pay attention to the overall balance of your shading. Ensure that the lights, shadows, and mid-tones are appropriately distributed to create a realistic and pleasing effect.
Refine any details or highlights that may need additional attention. Add any final touches to enhance the texture, pattern, or three-dimensionality of the vase.
Take the time to step back and evaluate your work from a distance. This will give you a fresh perspective and allow you to spot any areas that need refinement or improvement.
If you feel satisfied with your shading but still want to add a touch of color, you can consider lightly layering colored pencils or markers over your shaded vase. This can add a pop of vibrancy and depth to your artwork.
Lastly, when you are completely satisfied with your shading and the finishing touches, make sure to carefully scan or photograph your artwork for future reference or sharing.
Congratulations! You have successfully shaded a vase with skill and precision. With practice, you will continue to refine your shading techniques and create stunning artworks.
Remember, each shading project is an opportunity to learn and grow as an artist. Embrace the process, experiment with different techniques, and most importantly, enjoy the creative journey.
Tips and Tricks
Shading a vase can be both challenging and enjoyable. Here are some tips and tricks to help you navigate the process and achieve stunning results:
- Study and observe real vases or reference images to understand the form, texture, and lighting of different vase shapes.
- Practice drawing basic geometric shapes to improve your understanding of light and shadow.
- Start with light shading and gradually build up the values. This helps create a more realistic transition from light to shadow.
- Use a range of shading tools such as pencils, charcoal, and shading sticks to add variety and texture to your artwork.
- Experiment with different blending techniques to achieve the desired smoothness and gradient in your shading.
- Pay attention to the direction and angle of the light source. Consistency in the lighting will enhance the realism of your shading.
- Take breaks and step back to evaluate your work. Fresh eyes can help you spot areas that need adjustment or refinement.
- Use a kneaded eraser to lift off or lighten areas that require highlights or reflected light.
- Practice patience and take your time to gradually build up the shading. Rushing can lead to uneven or inconsistent results.
- Observe different vase materials like glass, ceramic, or metal, and adapt your shading technique accordingly to capture their unique qualities.
- Keep a sketchbook or dedicated folder to document your progress and track improvement over time.
- Seek inspiration from other artists and study their techniques. Don’t hesitate to try new approaches and adapt them to your own style.
Remember, shading is a skill that improves with practice. Don’t be discouraged by initial challenges and enjoy the creative journey of shading a vase.
Common Mistakes to Avoid
When shading a vase, it’s important to be aware of common mistakes that can occur in the process. By avoiding these pitfalls, you can enhance the quality and realism of your artwork. Here are some common mistakes to watch out for:
- Overusing a heavy hand when shading: Pressing too hard with your pencil can create harsh and unrealistic shading. Use light, gentle strokes and gradually build up the values.
- Neglecting to establish a clear light source: Without a defined light source, your shading may lack consistency and depth. Take the time to decide on and maintain a consistent light source throughout your artwork.
- Skipping the preliminary sketch: Starting directly with shading without a proper outline can lead to inaccurate proportions and form. Begin with a light sketch to guide your shading process.
- Not paying attention to the finer details: Small details, such as subtle reflections or intricate patterns on a vase, can greatly enhance the realism of your artwork. Take the time to add these finer details in your shading.
- Ignoring the importance of value and contrast: Shading is all about creating values and contrast. Ensure that you have a good range of lights, mid-tones, and shadows to bring out the form and dimension of the vase.
- Blending too much or too little: Finding the right balance in blending is crucial. Over-blending can result in a loss of texture and definition, while under-blending can create harsh lines and incomplete shading. Experiment and practice to achieve a smooth and seamless blend.
- Being too rigid with shading techniques: Shading is an art form that allows for creativity and adaptation. Don’t be afraid to experiment with different techniques, tools, and styles to find what works best for you.
- Not taking breaks to assess your work: It’s easy to become immersed in the shading process, but taking breaks and stepping back to review your work is essential. Distance yourself from your artwork to identify any areas that need adjustments or refinement.
- Rushing the process: Shading requires patience and attention to detail. Rushing can result in sloppy and inconsistent shading. Take your time and enjoy the journey of creating a beautifully shaded vase.
- Being overly critical of your own work: Remember that every artist is on a unique artistic journey. Embrace mistakes as learning opportunities and celebrate your progress along the way.
By being mindful of these common mistakes and continuously honing your skills, you can overcome challenges and create stunning shaded vase artwork.