
Choosing the Right Fabric
When it comes to sewing a shower curtain, choosing the right fabric is crucial. The fabric you select will determine not only the look and feel of the curtain but also its durability and functionality. Here are some key factors to consider when choosing the fabric for your shower curtain:
- Water-resistant: Look for fabrics that are specifically designed to repel water. Vinyl-coated fabrics, waterproof nylon, or polyester blends treated with a water repellent finish are excellent choices.
- Durable: The fabric should be able to withstand daily use and frequent washing without losing its color or shape. Avoid delicate fabrics that may tear or wear down easily.
- Mold and mildew resistant: Since shower curtains are constantly exposed to moisture, it is important to choose a fabric that has built-in resistance to mold and mildew. Fabrics with antimicrobial properties are ideal for this purpose.
- Easy to clean: Opt for fabrics that can be easily cleaned and maintained. Machine-washable fabrics are highly recommended for convenience.
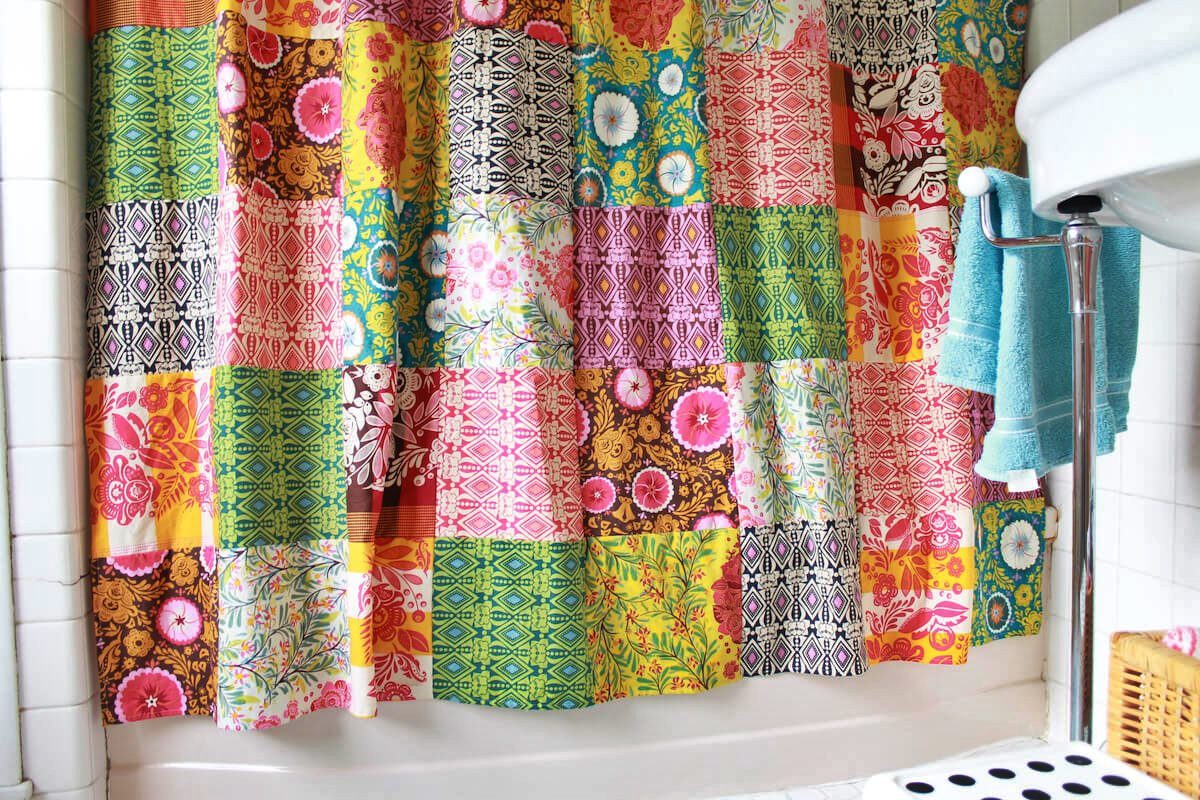
- Aesthetic appeal: Consider the overall style and color scheme of your bathroom. Choose a fabric that complements the existing decor and creates a cohesive look.
By taking these factors into account, you can ensure that you select the perfect fabric for your shower curtain. Remember, functionality and durability are just as important as aesthetics when it comes to this essential bathroom accessory.
Measuring the Shower Area
Before you start sewing your shower curtain, it’s important to accurately measure the dimensions of your shower area. Proper measurements are essential to ensure that the curtain fits perfectly and provides adequate coverage. Here’s how to measure the shower area:
- Height: Measure the height from the top edge of the shower rod or rings to the desired length of the curtain. This will depend on whether you want the curtain to hang just above the floor or to float slightly above.
- Width: Measure the width of the shower area from one end to the other. Take into account any fixtures or obstacles that may affect the curtain’s installation.
- Add extra length: To achieve a full and gathered look, add an additional 10-12 inches to the width measurement. This extra fabric will allow for pleats or folds when the curtain is hung.
- Consider the curtain style: If you plan to have a curved or circular shower rod, ensure that you measure the curved area rather than a straight line.
It’s important to double-check your measurements to avoid any fitting issues when it’s time to hang the curtain. Keep in mind that it’s always better to have more fabric than necessary, as you can always trim it down if needed. Taking precise measurements will ensure that your shower curtain fits perfectly and provides the desired level of coverage and privacy.
Calculating the Curtain Width
Once you have measured the shower area, the next step in sewing a shower curtain is to calculate the width of the curtain panels. The width of the curtain will depend on the desired fullness and gathering effect you want to achieve. Here’s how to calculate the curtain width:
- Determine the desired fullness: Decide how full you want your curtain to look. For a more tailored and sleek appearance, multiply the width measurement by 1.5. If you prefer a fuller and gathered look, multiply the width measurement by 2 or even 2.5.
- Account for seam allowances: Before cutting the fabric panels, remember to factor in the seam allowances. Typically, ½ inch is added to each side for the seams. This ensures that the final width of the curtain will be slightly smaller than the calculated measurement.
- If using multiple panels: If your curtain is wider than the fabric width, you may need to sew multiple panels together. In this case, divide the calculated width by the number of panels you plan to use, including a small overlap for the seams.
- Consider the pattern: If your chosen fabric has a pattern or print, you will need to align the panels or pattern repeats, ensuring a seamless and continuous design across the curtain’s width.
By calculating the curtain’s width accurately, taking into account the desired fullness, seam allowances, and any pattern considerations, you will be able to cut and sew your fabric panels with precision. This will result in a curtain that beautifully drapes and fits the shower area, adding both functionality and style to your bathroom.
Cutting the Fabric Panels
Once you have calculated the width of your shower curtain, it’s time to cut the fabric panels. Cutting the fabric accurately is crucial for achieving a professional-looking finished product. Here’s how to cut the fabric panels for your shower curtain:
- Gather your materials: Ensure you have all the necessary tools and supplies, including your fabric, measuring tape, marking pen, and sharp fabric scissors.
- Prepare the fabric: Lay your fabric flat on a clean, smooth surface. If necessary, wash and iron the fabric beforehand to remove any wrinkles or creases.
- Measure and mark: Using your measurements from earlier, measure and mark the height and width of the fabric panels on the wrong side of the fabric. Use a ruler or measuring tape to ensure accuracy.
- Cut the panels: Using sharp fabric scissors, carefully cut along the marked lines to create the fabric panels. Take your time and make clean, straight cuts to achieve neat edges.
- Align pattern repeats (if applicable): If your fabric has a pattern or a repeat design, be sure to align the panels properly. Match up the pattern at the seams to ensure a seamless and visually appealing look.
Pay attention to the details and take your time when cutting the fabric panels. It’s better to go slow and be precise to achieve the best results. Remember to double-check your measurements before cutting to avoid any mistakes that could impact the final fit and appearance of your shower curtain.
Hemming the Sides and Bottom
Once you’ve cut the fabric panels for your shower curtain, the next step is to hem the sides and bottom. Hemming creates clean and finished edges, preventing fraying and ensuring the longevity of the curtain. Follow these steps to hem the sides and bottom of your shower curtain:
- Prepare the fabric: Fold over the raw edge of the fabric panel by approximately 1/2 inch (or as desired for your hem width). Pin it in place to secure.
- Iron the hem: Use an iron to press the folded fabric in place. This will create a crease and make it easier to sew a straight hem.
- Sew the hem: Set your sewing machine to a straight stitch. Starting at one end, stitch along the folded edge of the fabric, securing the folded hem in place. Continue sewing all the way to the other end.
- Repeat for the other side: Repeat the above steps to hem the other side of the fabric panel. Ensure that the hem width is consistent on all sides.
- Hem the bottom: Fold the bottom edge of the panel over by the desired hem width, and follow the same process as for the sides. Pin, press, and sew the hem in place.
By hemming the sides and bottom of your shower curtain, you not only create a polished finish but also protect the fabric from fraying. Take your time when sewing the hems to ensure straight lines and secure stitching. Neatly hemmed edges will add to the overall professional look of your DIY shower curtain.
Creating the Top Hem and Rod Pocket
One of the essential parts of sewing a shower curtain is creating the top hem and rod pocket. The top hem not only adds a finished look to the curtain but also provides a space for the curtain rod to pass through. Follow these steps to create the top hem and rod pocket:
- Measure and mark: Determine the desired width of the top hem. Typically, it is around 2 to 3 inches. Measure and mark the width evenly along the top edge of the fabric panel.
- Fold and pin the hem: Fold the fabric over along the marked line, creating a fold that encloses the raw edge. Pin the fold in place, ensuring that it is straight and even.
- Iron the hem: Use an iron to press the folded fabric and create a defined crease. This will make it easier to sew the hem and keep it in place.
- Sew the top hem: Set your sewing machine to a straight stitch and sew along the bottom edge of the folded hem, securing it in place. You can add an additional row of stitching a few millimeters above the first row for extra reinforcement if desired.
- Cut the rod pocket: Measure and mark the desired width of the rod pocket just below the top hem. Subtract the diameter or width of your curtain rod from this measurement to determine the final width of the rod pocket.
- Fold and sew the rod pocket: Fold the fabric over along the marked line to create the rod pocket. Pin and sew along the bottom edge of the fold, leaving the ends open to allow the curtain rod to be inserted.
Creating the top hem and rod pocket allows you to easily hang the shower curtain on a curtain rod. It provides a clean and polished finish to the top edge while ensuring stability and functionality. Ensure that the hem and rod pocket are sewn securely to withstand the weight of the curtain and the frequent pulling and sliding along the rod.
Attaching Grommets or Buttonholes
Attaching grommets or buttonholes to your shower curtain is an important step that allows for easy hanging and ensures that the curtain stays securely in place. Grommets and buttonholes create openings through which you can insert shower curtain hooks or rings. Follow these steps to attach grommets or create buttonholes:
- Determine the spacing: Decide on the desired spacing between the grommets or buttonholes along the top edge of the curtain. Typically, they are spaced approximately 6 to 8 inches apart, but you can adjust this based on your preference.
- Mark the positions: Use a ruler or measuring tape to mark the positions for the grommets or buttonholes along the top hem or rod pocket. Ensure that the markings are evenly spaced and aligned.
- Attach grommets: If you prefer using grommets, position the grommet template over each marked spot, making sure the template’s center hole aligns with the marking. Trace around the inside of the template and cut out the marked circles. Follow the manufacturer’s instructions to attach the grommets using a grommet kit and grommet tool.
- Create buttonholes: If you opt for buttonholes, use a sewing machine equipped with a buttonhole foot. Select the buttonhole setting and place the machine’s needle at the first marked spot. Follow your sewing machine’s instructions to create buttonholes at each marked position. Make sure to reinforce the ends of the buttonholes with a few extra stitches for added durability.
Attaching grommets or creating buttonholes provides the necessary openings for shower curtain hooks or rings, allowing you to effortlessly hang the curtain on the rod. Grommets offer a sleek and modern look, while buttonholes provide a more traditional appearance. Choose the method that best suits your curtain’s style and your personal preference.
Adding Reinforcements for Hooks
When sewing a shower curtain, it’s important to reinforce the areas where the hooks or rings will be attached. Adding reinforcements ensures that the curtain can withstand the weight of the hooks and prevents the fabric from tearing or fraying over time. Follow these steps to add reinforcements for the hooks:
- Prepare the fabric: Identify the points where the hooks or rings will be attached. These are typically located below the grommets or buttonholes, along the top hem or rod pocket.
- Measure and cut the fabric strips: Cut fabric strips that are approximately 2 inches wide and long enough to cover the area where the hooks or rings will be attached.
- Fold and press the fabric strips: Fold the fabric strips in half lengthwise and press them with an iron to create a crease.
- Position and sew the reinforcements: Align the folded fabric strips with the marked attachment points and position them on the back of the curtain. Sew them in place along the edges, ensuring that the stitching is secure and strong.
- Reinforce with additional stitching: For extra reinforcement, sew an “X” or box shape within the fabric strips to provide additional strength at each attachment point.
Adding reinforcements for the hooks or rings ensures longevity and durability for your shower curtain. It prevents the fabric from stretching or tearing over time due to the weight and frequent movement of the hooks. By taking the time to reinforce these areas, you can enjoy a shower curtain that remains in top condition for a long time.
Sewing the Bottom Hem
Once you have completed the necessary hems and reinforcements for your shower curtain, it’s time to sew the bottom hem. The bottom hem provides a clean and finished look while ensuring that the fabric remains securely in place. Follow these steps to sew the bottom hem:
- Prepare the fabric: Fold the bottom edge of the shower curtain up by approximately 1 inch (or as desired for your hem width). Pin the fold in place to secure it.
- Iron the hem: Use an iron to press the folded fabric, creating a crisp crease. This will make it easier to sew the hem and maintain its shape.
- Sew the hem: Set your sewing machine to a straight stitch. Starting at one end, stitch along the folded edge of the fabric, securing the folded hem in place. Continue sewing all the way to the other end.
- Optional: Add additional reinforcement: For added strength and durability, you can sew a second row of stitching just above the first row. This provides extra security for the hem and prevents any potential unraveling.
By sewing the bottom hem, you create a neat and polished finish for your shower curtain. The bottom hem keeps the fabric securely in place and prevents fraying or unraveling over time. Take your time when sewing the hem to ensure straight lines and secure stitching. A well-sewn and finished bottom hem adds to the overall professional look and quality of your DIY shower curtain.
Adding Embellishments or Trim (Optional)
If you want to add a personal touch or enhance the aesthetic appeal of your shower curtain, you can consider adding embellishments or trim. This optional step allows you to customize your curtain and make it truly unique. Here are some creative ideas for adding embellishments or trim to your shower curtain:
- Lace or ribbon trim: Sewing lace or ribbon trim along the bottom edge or top hem of the curtain can add a touch of elegance and sophistication.
- Contrasting fabric panels: Incorporate contrasting fabric panels into your shower curtain design, creating a visually appealing and dynamic look.
- Appliques or embroidery: Attach fabric appliques or embroider decorative motifs onto the curtain for a personalized touch. This can include floral designs, monograms, or any other patterns that match your bathroom decor.
- Fringe or tassel trim: Attach fringe or tassel trim to the bottom edge or along the sides of the curtain, adding texture and a decorative element.
- Fabric paint or fabric markers: Use fabric paint or markers to create your own designs, patterns, or even write inspirational quotes directly onto the fabric.
When adding embellishments or trim, it’s important to consider the overall style and theme of your bathroom. Choose elements that complement and enhance the existing decor. Additionally, ensure that the chosen embellishments or trim are suitable for the fabric and can withstand regular use and washing.
Remember, the addition of embellishments or trim is completely optional. It’s an opportunity to showcase your creativity and personalize your shower curtain. Explore different ideas and experiment with various materials and techniques to achieve a unique and visually appealing result.
Installing the Shower Curtain
After completing all the necessary steps to sew your shower curtain, it’s time to install it in your bathroom. Proper installation ensures that the curtain hangs correctly and functions as intended. Follow these steps to install your shower curtain:
- Prepare the curtain rod: Ensure that your shower curtain rod is securely installed in the designated area of your shower or bathtub.
- Open the curtain rings or hooks: If using curtain rings or hooks, open them up to create a gap for attaching the curtain.
- Thread the curtain through the rings: Starting from one end, thread the curtain through the rings or hooks, making sure to evenly distribute the fabric along the rod.
- Adjust the gathering or pleating: Adjust the gathering or pleating of the curtain to your desired fullness, ensuring that it is evenly distributed along the rod.
- Smooth out any wrinkles: Smooth out any wrinkles or folds in the fabric, ensuring that the curtain hangs nicely.
- Position the curtain: Position the curtain so that it hangs at the desired height and provides adequate coverage in the shower or bathtub area.
- Secure the curtain: If necessary, secure the curtain by fastening any ties or clips used to hold the curtain in place.
Double-check that the curtain is securely attached and properly aligned. Ensure that it hangs evenly and doesn’t drag on the floor or obstruct any fixtures in the bathroom. Make any necessary adjustments to ensure a proper fit and functionality.
Installing your newly sewn shower curtain completes the process, bringing both functionality and a touch of style to your bathroom. Step back and admire your work, knowing that you have not only created a practical accessory but also added a personal touch to your bathing space.