
Tools and Materials Needed
Before you begin putting up a shower curtain, it’s important to gather all the necessary tools and materials. Here is a list of items you will need:
- Shower curtain rod
- Curtain rings or hooks
- Level
- Tape measure
- Pencil
- Drill
- Screwdriver
- Wall anchors (if needed)
- Shower curtain with hooks or rings
Having these tools and materials prepared will ensure a smooth and efficient installation process. The shower curtain rod can be either tension-based or wall-mounted, so choose one that suits your needs and bathroom layout.
Curtain rings or hooks will allow you to easily attach the curtain to the rod. Make sure to check if your curtain already comes with hooks or if you need to purchase them separately.
A level, tape measure, and pencil are essential for accurately marking the height and position of the curtain rod. Use the level to ensure the rod is straight.
A drill and screwdriver will be necessary if you need to install wall-mounted curtain rods. Depending on the type of walls in your bathroom, you may also need wall anchors for added stability.
Finally, choose a shower curtain that matches your bathroom decor and preferences. Ensure that the curtain has the appropriate type of hooks or rings that will fit your rod.
By gathering these tools and materials beforehand, you’ll be ready to tackle the installation process with ease.
Step 1: Measure and Mark the Height for the Curtain Rod
The first step in putting up a shower curtain is to measure and mark the appropriate height for the curtain rod. This will ensure that the curtain hangs at the desired level and provides adequate coverage.
Start by using a tape measure to determine the height at which you want the curtain rod to be positioned. Typically, the rod is placed at a height of around 72 inches (6 feet) above the floor. However, you can adjust this measurement based on your personal preference and the length of your shower curtain.
Once you have determined the height, use a pencil to make small marks on the wall where the brackets or hooks for the curtain rod will be placed. Use a level to ensure that the marks are straight and aligned.
If you have a tile or ceramic wall surface, it’s important to be cautious during this step to avoid damaging the tiles. You may want to use a piece of masking tape to mark the height instead of directly marking on the tiles.
Keep in mind any obstructions in your shower area such as showerheads or wall-mounted fixtures. These may affect the placement of your curtain rod, so make sure to consider them when choosing the height.
By accurately measuring and marking the height for the curtain rod, you will have a solid foundation for the installation process. This step sets the stage for properly hanging the shower curtain and achieving a visually pleasing result.
Step 2: Install the Curtain Rod
Now that you have measured and marked the height for the curtain rod, it’s time to move on to the installation process. Follow these steps to securely install the curtain rod:
- Start by selecting the appropriate mounting brackets or hardware for your curtain rod. These may be included with the rod or available for purchase separately.
- Using a screwdriver or drill, attach the mounting brackets to the wall at the marked positions. Make sure to align them properly with the level to ensure the rod will hang straight.
- If your brackets require wall anchors for added support, insert them into the wall at the marked positions before attaching the brackets. Follow the manufacturer’s instructions for proper installation.
- Once the brackets are securely attached to the wall, place the curtain rod into the brackets. Depending on the type of rod you have, this may involve sliding it into position or tightening screws to hold it in place.
- Ensure that the rod is level by using a spirit level. Adjust the position of the rod if necessary, and tighten any screws to secure it in place.
- Gently test the stability of the curtain rod by pulling on it slightly. If it feels secure, you can proceed to the next step.
It’s important to follow the manufacturer’s instructions for your specific curtain rod and brackets during the installation process. This will ensure that the rod is properly installed and able to support the weight of your shower curtain.
By carefully installing the curtain rod, you’ll create a sturdy foundation for hanging the curtain and avoid any potential issues or accidents down the line.
Step 3: Attach Curtain Rings or Hooks to the Curtain
After successfully installing the curtain rod, the next step is to attach the curtain rings or hooks to the shower curtain. Follow these steps to ensure a secure and proper attachment:
- Lay the shower curtain flat on a clean surface, with the design or pattern facing downwards.
- Inspect your curtain rings or hooks to ensure they are in good condition and suitable for your specific shower curtain and rod. If needed, clean or replace any damaged rings or hooks.
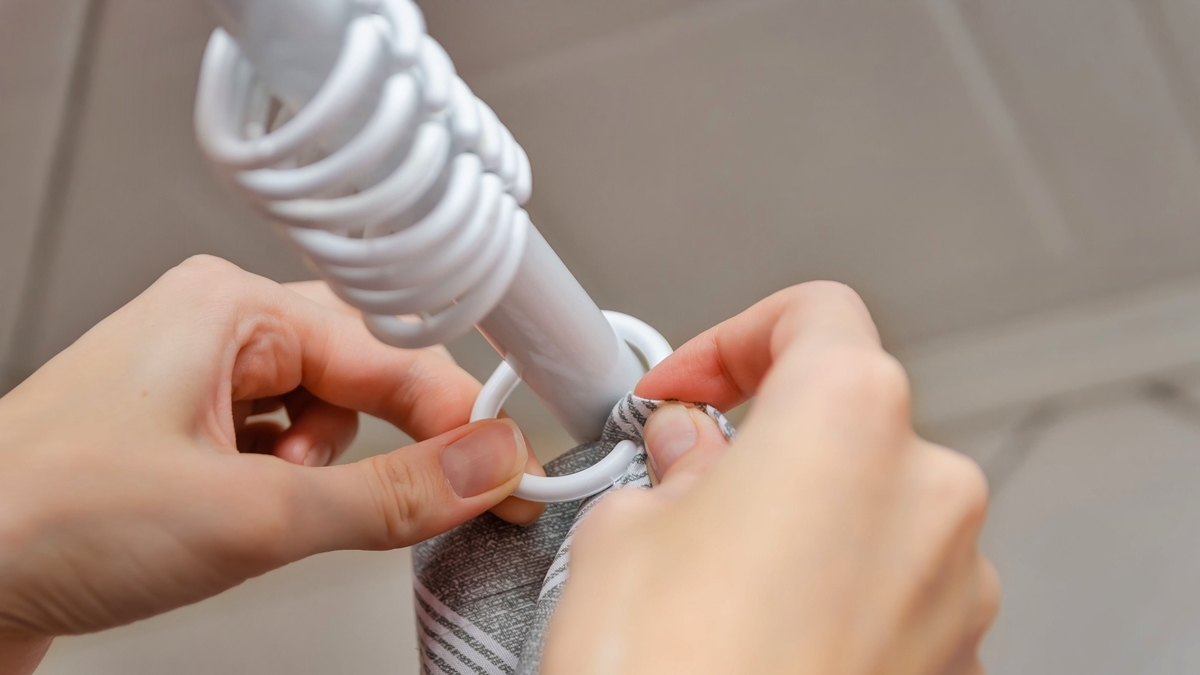
- Take one curtain ring or hook and slide it through the small holes or loops located at the top of the shower curtain. Ensure that the ring or hook is securely threaded through, without any risk of it coming loose or unraveling.
- Continue attaching the rest of the curtain rings or hooks to the shower curtain, evenly spacing them apart to distribute the weight of the curtain more effectively.
- If you have a fabric shower curtain with grommets, simply slide the rings through the grommets for an easy attachment.
- Once all the rings or hooks are attached, gently lift the shower curtain by holding onto the rings or hooks to ensure they are secure and won’t come off when hanging it on the rod.
Make sure to follow any specific instructions provided by the manufacturer for attaching the rings or hooks to your shower curtain. This will help ensure a secure and durable attachment that will withstand regular use.
By properly attaching the curtain rings or hooks to the shower curtain, you’ll be ready to hang it on the curtain rod in the next step and complete the installation process.
Step 4: Hang the Curtain on the Rod
With the curtain rings or hooks securely attached to the shower curtain, it’s time to hang it on the curtain rod. Follow these steps to properly hang your shower curtain:
- Hold the shower curtain by the rings or hooks, making sure to distribute the weight evenly along the rod.
- Align the rings or hooks with the curtain rod brackets and gently slide them into place. If you have a tension-based rod, simply extend the rod to match the width of your shower and position it between the walls.
- Double-check that each ring or hook is securely positioned on the curtain rod and that the curtain is hanging evenly.
- If your curtain has multiple panels or layers, ensure that they are properly aligned and layered for a seamless look.
- Gently tug on the curtain to test its stability and make any necessary adjustments to ensure it hangs straight and doesn’t sag.
It’s important to note that not all shower curtains require rings or hooks. Some may come with built-in loops or grommets that can be directly attached to the rod.
If you’re using a curtain with rings or hooks that allow for easy removal, it’s a good idea to periodically remove the curtain for cleaning to maintain its freshness and cleanliness.
By carefully hanging the shower curtain on the rod, you’ll complete the installation process and have a beautifully draped and functional curtain in your bathroom.
Step 5: Adjust the Curtain Length
Once the shower curtain is securely hanging on the rod, you may need to make adjustments to its length to ensure it falls at the desired height. Follow these steps to properly adjust the curtain length:
- Step into the shower or stand outside the tub and observe the curtain’s length. Determine whether it is too long or too short, taking into consideration the functionality and aesthetics you desire.
- If the curtain is too long, use a pair of scissors or fabric shears to trim the bottom edge to the desired length. Fold the curtain over at the appropriate height and cut it in a straight line, ensuring not to cut any rings or hooks.
- For curtains that are too short, you have a couple of options. You can purchase a separate shower curtain liner that is longer than the fabric curtain, effectively extending its length. Alternatively, you can add a decorative trim or fabric panel at the bottom to give the illusion of a longer curtain.
- After adjusting the length, step back and assess the appearance of the curtain. Ensure that it is hanging evenly and flows nicely along the tub or shower enclosure.
- Make any necessary refinements, such as trimming or adding extra fabric, until you achieve the desired length and overall look.
It’s essential to take your time when adjusting the curtain length to ensure a neat and professional-looking result. Keep in mind that different curtain materials may require specific cutting techniques to prevent fraying or unraveling.
By carefully adjusting the curtain length, you’ll achieve a customized fit that complements your bathroom decor and provides the functionality you desire.
Step 6: Secure the Bottom of the Curtain
Securing the bottom of the shower curtain is an important step to prevent it from billowing or floating while you shower. Follow these steps to ensure the bottom of the curtain stays in place:
- Start by assessing the length of the shower curtain. If it is touching the floor, you may not need to secure the bottom. However, if there is a gap between the curtain and the floor, proceed to the next steps.
- Using a sewing machine or fabric glue, create a simple hem at the bottom of the curtain. This will prevent the fabric from fraying and give it a finished look.
- For a temporary solution, use adhesive-backed curtain weights or magnets. Attach these weights to the bottom corners of the curtain or at strategic locations where it tends to lift up.
- If you prefer a more permanent solution, consider sewing or gluing small weights or magnets directly into the hemline of the curtain.
- Another option is to use suction cup curtain clips that can be attached to the bottom edge of the curtain and secured to the bathtub or shower floor.
- Once the bottom of the curtain is secured, gently pull it taut to ensure it hangs smoothly without any excess fabric bunching up or dragging on the floor.
By taking the time to secure the bottom of the shower curtain, you’ll prevent it from clinging to your body while showering and maintain the desired level of privacy within the shower area.
Consider experimenting with different methods or combination of techniques until you find the one that works best for your specific shower curtain and bathroom setup.
Step 7: Test and Adjust the Curtain
The final step in putting up a shower curtain is to test its functionality and appearance, making any necessary adjustments to ensure a satisfactory result. Follow these steps to thoroughly test and fine-tune the curtain:
- Step into the shower or stand outside the tub and simulate the typical movements and water flow you would experience during a shower.
- Observe how the curtain moves and whether it effectively keeps the water contained within the shower area. Look for any leaks or excessive water splashing outside the curtain.
- If you notice any water escaping or areas where the curtain is not fully covering the shower opening, adjust the positioning of the curtain rings or hooks. This may involve sliding them along the curtain rod or adjusting the tension of a tension-based rod.
- Pay attention to any areas of the curtain that may rub against the walls or shower fixtures. If necessary, adjust the position of the curtain or trim any excess fabric to prevent interference.
- Assess the overall appearance of the curtain in terms of how it complements your bathroom decor. If there are any aesthetic issues, such as wrinkling or unevenness, adjust the curtain or consider ironing or steaming it to create a smoother appearance.
- Make any additional adjustments or refinements based on your observations and preferences until you are satisfied with the functionality and appearance of the shower curtain.
Testing and adjusting the curtain is crucial to ensure that it performs its intended function of keeping water contained while enhancing the overall aesthetic of your bathroom.
By carefully evaluating the curtain’s performance and making necessary adjustments, you’ll have a fully functional and visually pleasing shower curtain that enhances your showering experience.