
Why Would You Need to Remove the Detergent Tray?
The detergent tray in your LG washer is an essential component that holds the detergent, fabric softener, and bleach to properly dispense them during the wash cycle. Over time, residue from detergents and other laundry products can accumulate in the detergent tray, leading to a build-up of mold, mildew, and slime. This can not only affect the performance of your washer but also result in unpleasant odors and the transfer of residue onto your clothes.
Removing the detergent tray allows you to thoroughly clean it and eliminate any build-up, ensuring that your washer continues to function optimally and your laundry comes out fresh and clean. Regular maintenance of the detergent tray is recommended to prevent these issues from occurring and maintain the longevity of your washing machine.
There are also instances where you may need to remove the detergent tray for troubleshooting purposes. If you are experiencing a blockage, malfunction, or leaking in the dispenser system, removing the detergent tray can provide better access to identify and resolve the issue.
By removing and cleaning the detergent tray, you can maintain a healthy and efficient washing machine, prolong its lifespan, and ensure that your laundry comes out smelling and looking its best.
Tools Required for Removing the Detergent Tray
Before you begin removing the detergent tray from your LG washer, it’s important to ensure you have the necessary tools to perform the task effectively. Here are the tools you’ll need:
- Phillips-head screwdriver: This will be used to remove any screws or fasteners holding the detergent tray in place.
- Flat-head screwdriver: This tool can be handy for prying and gently releasing any clips or tabs securing the detergent tray.
- Small brush or toothbrush: You’ll need this to clean the detergent tray thoroughly, removing any residue or build-up.
- Clean cloth or sponge: This will be used to wipe down the detergent tray and surrounding areas.
- Mild detergent or cleaning solution: To effectively clean the detergent tray, you may need a mild detergent or a cleaning solution specifically designed for washing machines.
- Warm water: Cleaning the detergent tray requires a mixture of warm water and cleaning solution to remove any stubborn residue.
Having these tools readily available will make the process of removing and cleaning the detergent tray smoother and more efficient. Ensure that the screwdrivers fit the screws or fasteners securely to prevent any damage or slipping during the removal process.
Remember to exercise caution while working with tools and follow any safety guidelines recommended by the manufacturer. It’s also a good idea to unplug your washing machine before attempting to remove the detergent tray to avoid any electrical accidents.
With the necessary tools at hand, you’re now ready to proceed with the step-by-step process of removing the detergent tray from your LG washer.
Step-by-Step Guide to Removing the Detergent Tray
Removing the detergent tray from your LG washer may vary slightly depending on the model, but the following step-by-step guide provides a general overview of the process:
- Start by opening the washer door and locating the detergent tray. It is typically located at the top left corner of the washer’s control panel.
- Inspect the detergent tray for any screws or fasteners that may be holding it in place. Using a Phillips-head screwdriver, carefully remove any screws or fasteners that are securing the detergent tray.
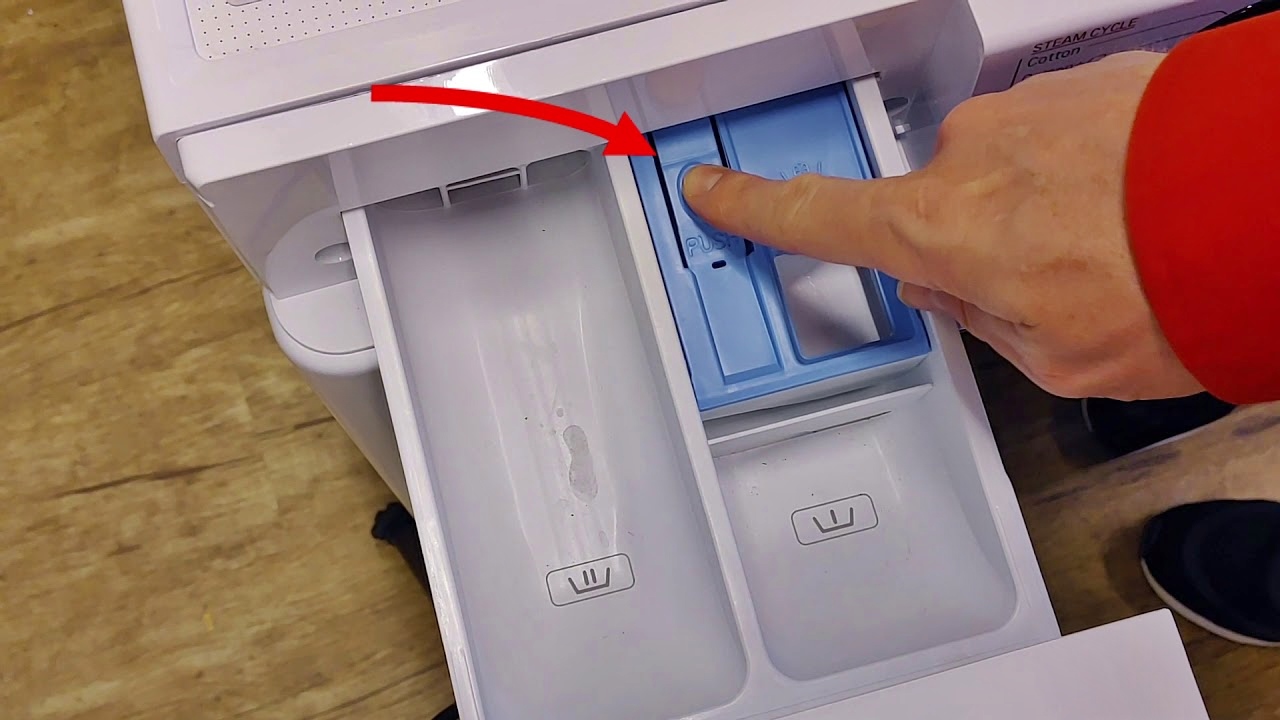
- If there are no visible screws, gently pull the detergent tray towards you. In some models, there may be tabs or clips that need to be released. Use a flat-head screwdriver to pry them open, if necessary.
- Once the detergent tray is released, slowly slide it out towards you. Be cautious as it may still have water or residual detergent in it.
- Place the detergent tray on a flat and stable surface. Inspect it for any build-up, mold, or slime. If there is significant residue, use a small brush or toothbrush to scrub the tray and dislodge any stubborn deposits.
- Prepare a mixture of warm water and a mild detergent or a cleaning solution designed for washing machines. Dip a clean cloth or sponge into the solution and wipe down the detergent tray thoroughly.
- Rinse the detergent tray with clean water to remove any soap residue. Ensure that all traces of cleaning solution are completely washed away.
- Allow the detergent tray to air dry completely before reassembling it back into the washer.
Once the detergent tray is clean and dry, you can proceed with reassembling it back into your LG washer. Follow the manufacturer’s instructions or refer to the user manual for the specific steps to reattach the detergent tray securely.
By regularly removing and cleaning the detergent tray, you can maintain a hygienic washing machine and ensure that your laundry comes out fresh and clean.
Cleaning the Detergent Tray
Regularly cleaning the detergent tray in your LG washer is essential to maintain its performance and prevent the build-up of mold, mildew, and residue. Here’s how you can clean the detergent tray effectively:
- Begin by removing the detergent tray from your washing machine using the steps outlined earlier.
- Inspect the detergent tray for any visible residue, mold, or slime. If there is significant build-up, use a small brush or toothbrush to scrub away the deposits.
- Prepare a mixture of warm water and a mild detergent or a cleaning solution specifically designed for washing machine cleaning.
- Dip a clean cloth or sponge into the cleaning solution and thoroughly wipe down the detergent tray, paying attention to all the compartments and crevices.
- For stubborn residue, let the cleaning solution sit on the detergent tray for a few minutes to loosen the deposits before scrubbing again.
- Rinse the detergent tray under clean water to remove any soap residue or cleaning solution. Ensure that all traces of the cleaning agents are thoroughly rinsed away.
- Inspect the detergent tray for any remaining residue. If necessary, repeat the cleaning process until the tray is completely clean and free from any build-up.
- After cleaning, allow the detergent tray to air dry completely before reassembling it back into the washing machine.
It’s important to note that cleaning the detergent tray should be done regularly to prevent the accumulation of residue. Aim to clean the tray at least once a month or whenever you notice visible build-up. This will help maintain the performance and freshness of your LG washer and ensure that your laundry comes out clean and odor-free.
Remember to always follow the manufacturer’s guidelines for cleaning the detergent tray and refer to the user manual for any specific recommendations or precautions.
Reassembling the Detergent TrayOnce you have thoroughly cleaned the detergent tray of your LG washer, it’s time to reassemble it. Follow these steps to properly reattach the detergent tray:
- Ensure that the detergent tray is completely dry before reassembling it back into the washing machine. Any moisture left in the tray can lead to mold or mildew growth.
- Hold the detergent tray at the same angle as during removal, aligning it with the opening in the control panel of the washer.
- Carefully slide the detergent tray back into its original position. Apply gentle pressure to ensure that it fits securely into place.
- If the detergent tray has tabs or clips, make sure they are properly engaged and hold the tray in position. You may need to gently push or press on the tray until it clicks or snaps into place.
- Double-check that the detergent tray is securely attached and does not wobble or move when lightly touched.
- Once the detergent tray is reassembled, give it a gentle tug to confirm that it is properly locked in place. This will prevent any accidental dislodging during future wash cycles.
It’s important to refer to the manufacturer’s instructions or user manual for any specific guidance on reassembling the detergent tray for your LG washer model. Some models may have additional steps or specific features that need to be considered during reassembly.
By following these steps and ensuring that the detergent tray is securely reattached, you can confidently proceed with using your washer and enjoy clean and fresh laundry results.
Tips and Precautions while Removing the Detergent Tray
Removing the detergent tray from your LG washer requires some caution and attention to prevent any damage or accidents. Here are some tips and precautions to keep in mind:
- Before attempting to remove the detergent tray, make sure your washing machine is unplugged to avoid any potential electrical hazards.
- Read through the manufacturer’s instructions or refer to the user manual specific to your LG washer model. This will provide you with any model-specific guidance or precautions to be aware of.
- If you are unsure about any aspect of removing the detergent tray, consider consulting a professional or contacting customer support for assistance.
- Take note of the location and position of any screws, fasteners, tabs, or clips that may be securing the detergent tray. This will aid in the reassembly process.
- Be mindful of any water or residual detergent that may be present in the detergent tray. This can spill or splash during removal, so be prepared with a towel or container to catch any liquid.
- Handle the detergent tray with care to avoid any cracks or damage. If the tray is fragile or shows signs of wear, consider replacing it with a new one.
- During the cleaning process, use mild detergents or cleaning solutions specifically formulated for washing machines. Avoid using harsh chemicals or abrasive cleaning agents that may damage the plastic or rubber components of the detergent tray.
- Thoroughly rinse the detergent tray after cleaning to remove any residual cleaning solution. Any leftover soap or cleaning agents can potentially affect the performance of the washer or leave residue on your laundry.
- Allow the detergent tray to dry completely before reassembling it back into the washing machine. Moisture in the tray can lead to mold or mildew growth.
- If you encounter any difficulties or if the detergent tray does not come out easily, do not force it. Seek professional assistance or contact LG customer support for guidance.
By following these tips and precautions, you can safely remove the detergent tray from your LG washer, clean it effectively, and avoid any unnecessary damage or accidents.
Frequently Asked Questions (FAQs) about Removing Detergent Tray from LG Washer
Here are some commonly asked questions about removing the detergent tray from an LG washer:
1. How often should I remove and clean the detergent tray?
It is recommended to clean the detergent tray at least once a month or whenever you notice a build-up of residue. Regular cleaning will help maintain the performance of your washer and prevent odors and transfer of residue onto your clothes.
2. Can I clean the detergent tray while it is still attached to the washing machine?
It is best to remove the detergent tray for cleaning to ensure thorough access to all the compartments and crevices. This allows for a more effective cleaning process and reduces the chances of residue or mold build-up.
3. What should I do if the detergent tray is stuck or difficult to remove?
If you are having trouble removing the detergent tray, do not force it. Double-check for any screws, clips, or tabs that may still be securing it. If the tray continues to resist removal, consult the user manual or reach out to LG customer support for further guidance.
4. Can I use abrasive cleaners or bleach to clean the detergent tray?
Abrasive cleaners and bleach can potentially damage the plastic or rubber components of the detergent tray. It is best to avoid using harsh chemicals or abrasive cleaners and opt for mild detergents or cleaning solutions specifically formulated for washing machines.
5. How can I prevent mold or mildew from forming in the detergent tray?
To prevent mold or mildew growth in the detergent tray, ensure that it is thoroughly cleaned and dried before reassembling it into the washer. Also, try to leave the detergent tray open after each use to allow for proper air circulation and drying.
6. Can I replace the detergent tray if it is damaged or cracked?
Yes, if the detergent tray is damaged or cracked, it is recommended to replace it with a new one. Contact LG customer support or a certified technician to find the appropriate replacement part for your specific washer model.
7. Are there any specific cleaning solutions or methods recommended by LG?
LG may provide specific cleaning solutions or methods in the user manual or on their official website. It’s always a good idea to refer to the manufacturer’s recommendations for the best cleaning practices for your LG washer’s detergent tray.
If you have any additional questions or concerns, it is recommended to contact LG customer support directly for personalized assistance and guidance.