
Materials You Will Need
Before you begin your fabric shower curtain painting project, make sure you have the following materials at hand:
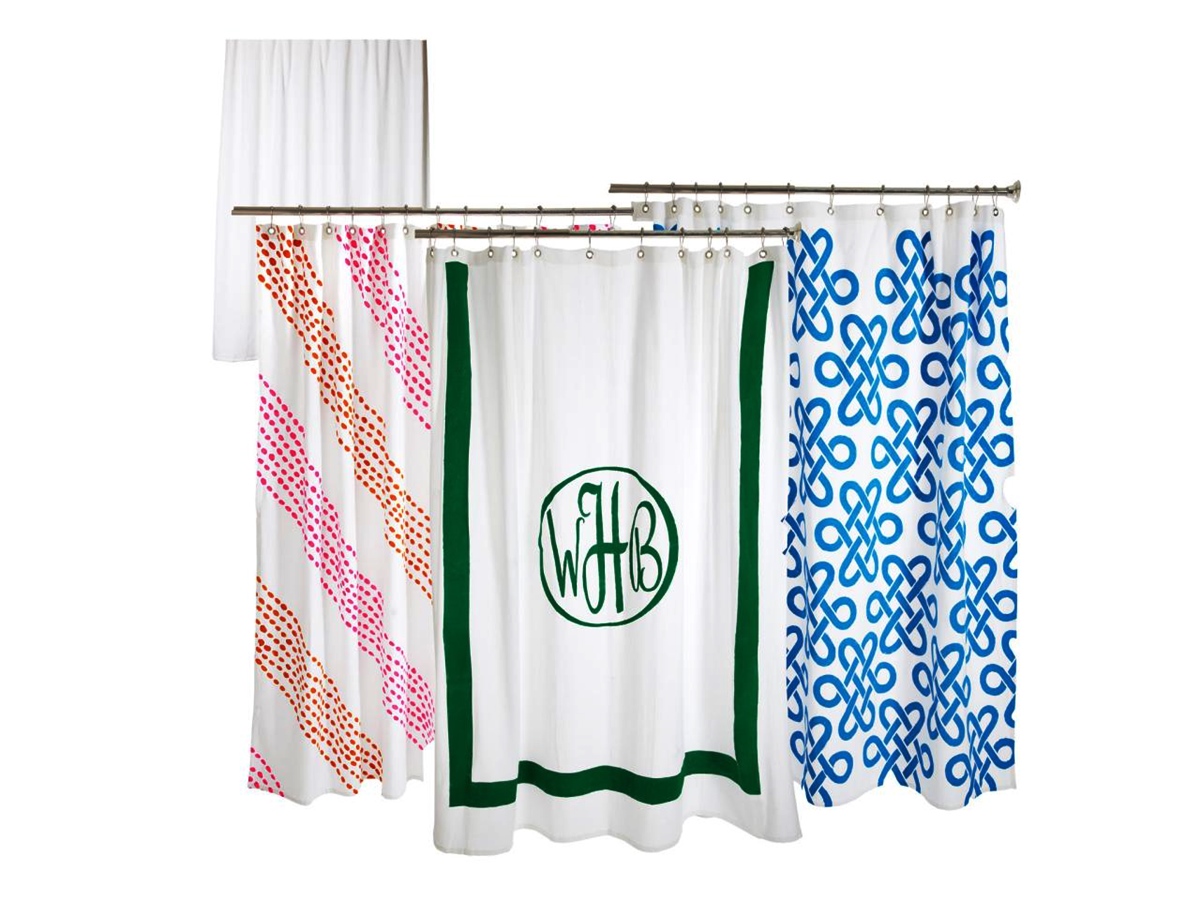
- Fabric shower curtain
- Quality fabric paint
- Fabric medium
- Paintbrushes in various sizes
- Stencil (optional)
- Painter’s tape
- Palette or disposable plates for mixing paint
- Old cloth or newspaper to protect the work surface
- Water basin for cleaning brushes
- Paper towels or rags for drying brushes
- Iron
Having the right materials is crucial for achieving great results. Make sure to choose fabric paint that is specifically designed for use on textiles. This ensures that the paint adheres well to the fabric and retains its color and vibrancy even after multiple washes.
The fabric medium is an essential component that helps to keep the paint flexible and prevents it from cracking or peeling. It also assists in achieving a smooth and even application of the paint on the fabric.
Invest in a variety of brush sizes to cater to different design elements and details. A fine-bristled brush is ideal for intricate patterns and lines, while a larger brush is suitable for covering larger areas or creating bold strokes.
If you plan to incorporate stencils into your design, ensure that they are made for fabric painting. These stencils are designed to withstand multiple uses and allow for precise patterns and shapes.
Lastly, remember to protect your work surface using old fabric or newspaper to prevent any paint or spills from ruining it. It’s also essential to have a water basin, paper towels, and an iron on hand for cleaning and drying brushes between color changes.
Now that you have gathered all the necessary materials, you are ready to embark on your fabric shower curtain painting journey!
Preparing the Fabric Shower Curtain
Before you start painting your fabric shower curtain, it’s crucial to prepare the surface properly. Follow these steps to ensure the best results:
- Take down the shower curtain and lay it on a flat, clean surface. Ensure that the surface is free from any dirt, dust, or debris that could affect the adhesion of the paint.
- Remove any hooks, rings, or other attachments from the curtain. This will make it easier to work with and ensure that the paint covers the entire surface evenly.
- Gently wash the fabric shower curtain using mild detergent and cold water. Avoid using fabric softener or bleach, as these can affect the paint’s adherence. Rinse thoroughly and let it dry completely before proceeding.
- If your shower curtain has fold lines or wrinkles, use a warm iron on the lowest setting to remove them. Be careful not to leave the iron on the fabric for too long to avoid damaging it.
- Smooth out the curtain on the surface, ensuring that it lies flat and taut. Use painter’s tape to secure the edges and corners, if necessary, to keep it from shifting while you paint.
Properly preparing your fabric shower curtain ensures that the paint adheres well and results in a professional-looking finish. Cleaning the fabric removes any dirt or residue that could interfere with the paint’s bond. Ironing helps create a smooth surface for painting, eliminating any unwanted wrinkles or fold lines.
Remember, taking the time to prepare your fabric shower curtain correctly sets the stage for a successful painting process. Now that everything is in order, you’re ready to move on to the next step: choosing the right paint!
Choosing the Right Paint
When it comes to painting a fabric shower curtain, selecting the right type of paint is crucial for achieving long-lasting and vibrant results. Consider the following factors when choosing your paint:
- Opt for fabric-specific paint: Standard acrylic or oil-based paint may not adhere well to fabric and can result in a stiff, crackled finish. Look for fabric paints specifically formulated for use on textiles. These paints have additives that allow them to bond effectively with fabric fibers.
- Consider the paint’s transparency: Depending on your design preferences, you may choose opaque or transparent paint. Opaque paints offer better coverage and are ideal for solid colors or bold designs. Transparent paints, on the other hand, allow the fabric’s texture and pattern to show through, adding depth and dimension to your artwork.
- Check the paint’s washability: Since your fabric shower curtain may come into contact with water and regular cleaning, it’s essential to choose a paint that is wash-resistant. Look for paints labeled as “washable” or “machine-washable” to ensure that the design stays intact even after multiple washes.
- Consider the drying time: Some fabric paints require longer drying times, while others dry quickly. Depending on your project’s complexity and the time you have available to work on it, choose a paint that suits your needs. Quick-drying paints are beneficial if you want to add multiple layers or work on intricate designs.
- Think about color-fastness: Look for paints that are fade-resistant and retain their vibrancy even with repeated exposure to sunlight or washing. This ensures that your fabric shower curtain remains visually appealing and retains its original colors for a long time.
By taking these factors into account, you can select a paint that is compatible with your fabric shower curtain and meets your desired design goals. Experiment with different paint types and brands to find the one that suits your preferences and provides the best results.
Now that you have chosen the ideal paint, it’s time to move on to the next step: mixing the fabric medium!
Mixing the Fabric Medium
When painting a fabric shower curtain, mixing a fabric medium with your chosen paint is essential. The fabric medium helps to improve the paint’s adherence to the fabric, flexibility, and overall durability. Follow these steps to properly mix the fabric medium:
- Read the instructions on the fabric medium bottle carefully to understand the recommended mixing ratios.
- Start by pouring your desired amount of fabric paint into a palette or disposable plate. It’s a good practice to start with a small amount and mix more as needed to avoid wastage.
- Add the fabric medium to the paint, following the instructed ratio. Typically, the fabric medium is mixed in a 1:1 ratio with the paint, but consult the specific product guidelines for accurate measurements.
- Use a palette knife or a clean brush to thoroughly blend the fabric medium with the paint. Make sure there are no lumps or separate streaks of medium left in the mixture.
- If the mixture appears too thick or gloopy, you can add a small amount of water to thin it out slightly. Be cautious and add water gradually to avoid making the mixture too thin, as it may affect the paint’s performance on the fabric.
- Continue to mix until the fabric medium and paint are thoroughly combined and have a smooth, consistent texture.
Mixing the fabric medium with your paint is an important step as it ensures the paint adheres well to the fabric and remains pliable even after drying. The fabric medium helps to prevent the paint from cracking or peeling, allowing your design to last for a long time.
Remember to follow the specific instructions provided by the fabric medium manufacturer for accurate mixing ratios. By following these guidelines and properly mixing the fabric medium, you are now ready to test the paint mix on a small patch of the fabric shower curtain.
Testing the Paint Mix
Before you start painting your fabric shower curtain, it’s important to test the paint mix on a small, inconspicuous area of the curtain. This allows you to evaluate the color, consistency, and adhesion of the paint before proceeding with your design. Follow these steps to test the paint mix:
- Identify a small section of the curtain, preferably along the edge or near a corner, where the paint won’t be noticeable if it doesn’t turn out as expected.
- Apply a thin layer of the mixed paint to the test area using a brush. Ensure that the paint covers the fabric evenly and there are no visible streaks or clumps.
- Observe the paint’s coverage and adhesion on the fabric. Pay attention to how well the color shows up and whether the paint adheres smoothly or appears patchy.
- Allow the test patch to dry completely according to the paint manufacturer’s instructions. This will give you an idea of the final color and texture after the paint has dried.
- Inspect the test patch under different lighting conditions to assess its overall appearance. Take note of any changes in color or texture that may occur.
- Once the paint is dry, gently rub the test patch to check its durability. If the paint scratches or flakes off easily, it may indicate a need for adjustments to the paint mix or application technique.
Testing the paint mix is a crucial step that helps you make any necessary adjustments and ensure that you are satisfied with the paint’s performance and the color’s appearance on the fabric. It gives you an opportunity to fine-tune your technique and make informed decisions before proceeding with the full painting process.
If you are pleased with the results of the paint test, you can proceed confidently to the next steps of protecting the area and applying the basecoat. However, if you are not satisfied with the outcome, consider making adjustments to the paint mix, such as adding more fabric medium or water in small increments, until you achieve the desired consistency and coverage.
Protecting the Area
Protecting the work area is an important step when painting a fabric shower curtain. Taking precautions to prevent paint spills and splatters will help keep your surroundings clean and ensure that the paint only goes where you want it. Follow these steps to protect the area:
- Remove any objects or furniture near the work area. Clearing the space will give you ample room to move around and minimize the risk of accidentally knocking things over.
- Spread out a drop cloth, old cloth, or a layer of newspaper on the work surface. This protective barrier will catch any paint drips or spills, keeping your table or floor clean.
- If you are working near walls or other surfaces, use painter’s tape to create a protective border. Apply the tape carefully, ensuring it adheres tightly to the surface. This will prevent any accidental paint smears or splatters on adjacent areas.
- Consider using a paint shield or cardboard to block off areas of the shower curtain that you don’t intend to paint. This will provide a clean edge and help you maintain control over your design.
- Keep a damp cloth or paper towels nearby to quickly clean up any accidental paint smudges or spills. Addressing these mishaps promptly can prevent them from spreading or staining the fabric.
By taking these precautions, you can minimize the risk of paint accidents and create a controlled painting environment. Protecting the area ensures that your focus remains on the fabric shower curtain and allows for a smoother and more enjoyable painting experience.
Now that you have safeguarded the work area, it’s time to move on to the next step: applying the basecoat to the fabric shower curtain!
Applying the Basecoat
Applying a basecoat is an important step in fabric shower curtain painting, as it creates a solid foundation for your design and ensures proper color saturation. Follow these steps to apply the basecoat:
- Prepare your basecoat color by mixing the paint with the fabric medium, as per the manufacturer’s instructions.
- Dip your paintbrush into the mixed paint, ensuring it is evenly coated but not overloaded. This will help prevent drips and allow for smoother application.
- Begin applying the basecoat to the fabric shower curtain using long, even strokes. Work from top to bottom and left to right, or vice versa, to maintain a consistent application.
- Pay attention to any folds or creases in the fabric, making sure to cover them thoroughly with the basecoat. Take your time to ensure that the paint is evenly distributed across the entire curtain.
- Continue applying the basecoat until the fabric is fully covered. Depending on the opacity of the paint and the desired effect, you may need multiple coats. Allow each coat to dry completely before applying the next layer.
- After each coat, step back and assess the coverage and color. Make sure there are no thin or patchy areas that may require additional paint. If necessary, apply another coat to achieve the desired depth and intensity of color.
Applying a basecoat to your fabric shower curtain not only creates a solid background for your design but also helps prevent the subsequent layers of paint from soaking into the fabric too much. The basecoat acts as a barrier, allowing the subsequent layers to stand out more vibrantly.
Remember to allow each coat of the basecoat to dry completely before proceeding with the next step. Patience during this process will ensure that your basecoat is smooth, even, and provides an excellent foundation for the design to come.
With the basecoat complete, you are ready to embark on the exciting part of adding layers, colors, and creative designs to your fabric shower curtain!
Adding Layers and Colors
Once you have applied the basecoat to your fabric shower curtain, it’s time to unleash your creativity by adding layers of colors and design elements. Follow these steps to create a visually appealing and multi-dimensional masterpiece:
- Plan your design: Before diving into adding layers and colors, it’s helpful to have a rough sketch or plan in mind. Consider the overall theme, patterns, and color combinations you want to incorporate into your curtain.
- Start with lighter colors: Begin by adding lighter colors as your first layer. This allows you to build up the intensity gradually without overpowering the design. Use a separate brush for each color to avoid muddying the shades.
- Create depth with shading: To add depth and dimension to your design, consider incorporating shading techniques. Mix a darker shade of the color you’re working with to create shadows and highlights. This will give your artwork a more realistic and three-dimensional feel.
- Blend colors seamlessly: If you want to create transitions between different colors, use a clean, damp brush to blend them together. This technique helps to create a smooth gradient effect and adds visual interest to your artwork.
- Add details and embellishments: Once you have layered the primary colors and achieved the desired background, it’s time to add intricate details and embellishments. Use smaller brushes for precision and add fine lines, patterns, or artistic elements to enhance your design further.
- Experiment with different techniques: Don’t be afraid to get creative and try various techniques such as stippling, splattering, or using stencils to create unique textures and patterns. These techniques can add excitement and variety to your fabric shower curtain.
- Step back and assess your progress: Periodically step back and take a look at your design from a distance. This will allow you to evaluate the overall composition and make adjustments if needed.
- Allow each layer to dry: Give each layer of paint enough time to dry before adding the next layer. This prevents smudging or blending unintended colors together.
Adding layers and colors to your fabric shower curtain is the stage where your creativity truly comes to life. Embrace the process and be willing to experiment with different color combinations, techniques, and patterns to create a visually stunning and unique piece of art.
Now that you have added depth and dimension with layers of colors, consider taking it a step further by incorporating stencils for intricate designs!
Using Stencils for Designs
Stencils are a fantastic tool to create precise and intricate designs on your fabric shower curtain. They offer a simple and effective way to achieve professional-looking patterns with ease. Here’s how you can use stencils to enhance your artwork:
- Select the desired stencil: Choose a stencil that complements your design and fits well within the available space on your fabric shower curtain. You can find a wide variety of stencils in craft stores or create your own using sturdy materials like plastic or cardboard.
- Position the stencil: Carefully place the stencil on the desired area of your curtain. Secure it in place using painter’s tape or stenciling adhesive to prevent any shifting during the painting process.
- Load the paint: Dip a stencil brush or sponge into the paint color of your choice. Remove any excess paint by blotting it on a paper towel to prevent bleeding or smudging.
- Apply the paint: Gently dab or stipple the loaded brush/sponge over the openings of the stencil, applying a light amount of pressure. Be careful not to apply too much paint at once, as it can seep under the stencil and blur the design.
- Remove the stencil: Once you have finished applying the paint, carefully lift the stencil away from the fabric shower curtain. Take care not to smudge the design while removing the stencil.
- Clean the stencil: Rinse the stencil immediately after use to remove any residual paint. Dry it thoroughly before using it again, ensuring the stencil remains in good condition for future projects.
- Repeat the process: If you want to incorporate multiple stenciled designs, or if you want to repeat the design in different areas of the curtain, reposition the stencil and repeat the steps above.
Stencils provide a convenient way to achieve consistent and intricate designs on your fabric shower curtain. Whether you’re aiming for elaborate patterns or simple motifs, stencils can help elevate the overall aesthetic of your artwork.
Remember to practice proper paint application techniques, such as using a light touch and building up the design gradually, to ensure clean and crisp stencil results. With stencils, you can add personalized and eye-catching designs to your fabric shower curtain with ease!
Once you have completed the stenciling process, allow the paint to dry thoroughly before moving on to the next step of letting the paint dry completely.
Letting the Paint Dry
After you have finished painting your fabric shower curtain, it’s crucial to allow ample time for the paint to dry before handling or moving the curtain. Proper drying ensures that the paint sets and adheres to the fabric effectively. Follow these steps to let the paint dry:
- Find a well-ventilated and dust-free area: Choose a location where the fabric shower curtain can be left undisturbed while the paint dries. Keep in mind that airflow helps accelerate the drying process.
- Hang the curtain or lay it flat: Depending on the size and convenience, you can either hang the curtain on a clothesline using clothespins or lay it flat on a clean, dry surface.
- Avoid touching or moving the curtain: It’s essential to refrain from touching or moving the fabric shower curtain while it dries. This prevents accidental smudging or disturbing the paint, ensuring a smooth and flawless finish.
- Follow the paint manufacturer’s instructions: Different fabric paints may have varying drying times. Refer to the instructions provided by the manufacturer to determine the recommended drying duration.
- Allow ample drying time: As a general rule, it’s best to let the fabric shower curtain dry for at least 24 hours. However, the drying time may vary depending on factors like humidity, temperature, and the thickness of the paint layers.
- Perform a touch test: After the suggested drying time has elapsed, gently touch a small inconspicuous area of the painted surface to ensure that it is fully dry. The paint should no longer feel tacky or sticky to the touch.
Waiting for the paint to dry completely is crucial for the longevity of your artwork. Rushing the drying process may lead to smearing or smudging, potentially ruining your hard work. Patience at this stage ensures a professional and polished look.
Once you are confident that the paint is fully dry, you can proceed to the next step: heat setting the paint to make it permanent!
Heat Setting the Paint
Heat setting is a crucial step in ensuring that the paint on your fabric shower curtain becomes permanent, allowing it to withstand regular use and washing. Follow these steps to properly heat set the paint:
- Check the paint manufacturer’s instructions: Before proceeding with heat setting, read and follow the specific instructions provided by the fabric paint manufacturer. Different brands may have specific guidelines for heat setting.
- Preheat your iron: Set your iron to the temperature indicated by the paint manufacturer. Generally, a medium heat setting without steam is recommended for heat setting fabric paint.
- Protect the painted surface: Place a clean cloth or a thin fabric over the painted surface of the fabric shower curtain. This acts as a protective barrier between the iron and the paint, preventing direct contact.
- Apply even pressure and heat: Place the heated iron on top of the protective cloth and gently press down. Move the iron in a slow and steady motion, applying even pressure to the painted area for the designated amount of time specified by the paint manufacturer.
- Avoid sliding the iron: When heat setting, it’s important not to slide the iron back and forth. The iron should be lifted and placed again on a different spot to ensure each section of the painted area receives equal heat.
- Continue heat setting the entire painted surface: Repeat the process outlined above for each painted area of your fabric shower curtain until the entire design has been heat set.
- Cool down and avoid immediate washing: Allow your fabric shower curtain to cool completely before handling or washing it. This cooling period helps to ensure that the paint sets and adheres properly.
Heat setting the paint helps to bond it to the fabric fibers, making it more durable and resistant to fading or cracking. The heat ensures that the paint becomes fully set and permanent, even during subsequent washing or exposure to moisture.
By following the specific heat setting instructions provided by the fabric paint manufacturer, you can ensure that your painted fabric shower curtain will retain its vibrant colors and design for an extended period.
With the paint now heat set, you can move on to the final touches and tips to perfect your artistic creation!
Final Touches and Tips
As you near the completion of your fabric shower curtain painting project, here are some final touches and tips to add those finishing touches and perfect your artistic creation:
- Inspect for touch-ups: Take a close look at your painted design and identify any areas that may require touch-ups. Use a fine-tip brush and carefully fill in any gaps or uneven sections to ensure a cohesive and polished look.
- Consider embellishments: If you desire additional flair, consider adding embellishments such as fabric markers, rhinestones, or sequins to enhance certain elements of your design. These embellishments can bring extra dimension and texture to your fabric shower curtain.
- Add a protective layer: To help safeguard your artwork, consider applying a fabric sealant or a clear topcoat specifically made for fabric painting. This will provide an additional layer of protection against fading and wear, making your design last even longer.
- Care instructions: Ensure you follow any care instructions provided by the fabric paint manufacturer. This may include recommendations for washing, drying, and ironing your fabric shower curtain after the paint has fully cured.
- Display and enjoy: Once your fabric shower curtain is fully dry and has undergone the necessary treatments, hang it back up in your bathroom and admire your unique creation. Enjoy the personalized touch it adds to your space.
- Get inspired: Continually seek inspiration from other artists and fabric painting projects. Explore different techniques, color combinations, and patterns to expand your creativity and improve your skills as an artist.
- Experiment and have fun: Fabric shower curtain painting is a creative endeavor, so don’t be afraid to experiment and try new ideas. Embrace the joy of the process and let your imagination guide you to create something truly remarkable.
By paying attention to these final touches and following these helpful tips, you can ensure a beautifully executed fabric shower curtain painting project.
Remember that painting is an art form, and each piece you create is unique. Enjoy the journey, let your creativity shine, and revel in the satisfaction you derive from transforming a plain fabric shower curtain into a work of art!