
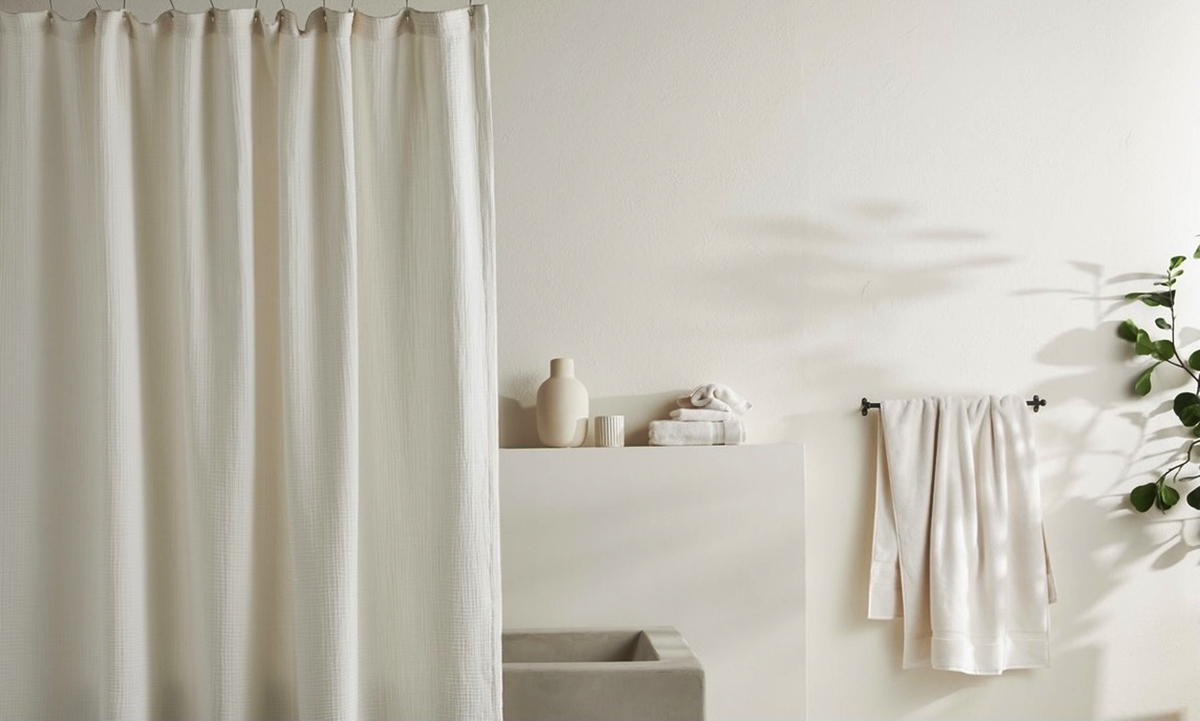
Benefits of using a shower curtain
When it comes to designing or renovating a bathroom, a shower curtain is an essential element to consider. While it may seem like a simple accessory, a shower curtain offers several benefits that can enhance your showering experience. Let’s explore the advantages of using a shower curtain:
- Privacy: One of the primary benefits of a shower curtain is privacy. It creates a barrier between the shower area and the rest of the bathroom, allowing you to enjoy your shower without worrying about prying eyes.
- Moisture containment: Shower curtains prevent water from splashing outside the shower area, helping to keep the bathroom floor dry. This can minimize the risk of slips and falls, providing a safer bathing experience.
- Cost-effective: Compared to installing shower doors, a shower curtain is a budget-friendly option. It offers a cost-effective solution for enclosing your shower area, saving you money that can be used for other bathroom improvements.
- Easy to install and replace: Shower curtains are incredibly easy to install. With a simple rod and a few hooks or rings, you can have your shower curtain up in no time. Additionally, if you want to change the look or style of your bathroom, replacing the shower curtain is a quick and hassle-free process.
- Versatility: Shower curtains come in various colors, patterns, and materials, allowing you to select one that suits your style and complements your bathroom decor. They provide an opportunity to add a pop of color or create a focal point in the space.
- Easy maintenance: Unlike shower doors, which require regular cleaning and maintenance, shower curtains are simple to maintain. Most curtains are machine washable, making it easy to keep them fresh and clean. Regular washing can help prevent mold and mildew buildup.
- Temporarily customizable: Shower curtains can be easily changed to match the season or your mood. You can switch them out for a festive design during the holidays or opt for a calming pattern to create a spa-like atmosphere.
Choosing the right shower curtain material
When it comes to selecting a shower curtain, the material plays a crucial role in both functionality and aesthetics. Here are some factors to consider when choosing the right shower curtain material:
- Water resistance: Opt for a shower curtain made from a water-resistant material to ensure that water doesn’t soak through and cause damage to the surrounding area. Vinyl and polyester are popular choices due to their excellent water-repellent properties.
- Durability: Look for a shower curtain that is durable and long-lasting. Consider the thickness of the material, as a thicker curtain is less likely to tear or wear out quickly. Reinforced grommets and double-stitched hems are also indications of a more durable curtain.
- Ease of cleaning: Consider how easy it is to clean the shower curtain material. Some materials can be machine washed, while others may require handwashing or spot cleaning. Choose a material that suits your preference and lifestyle.
- Design and aesthetics: The shower curtain material can greatly impact the overall look and ambiance of your bathroom. Consider the color, pattern, and texture to ensure that it complements your existing decor or serves as a statement piece that adds visual interest.
- Environmental friendliness: If sustainability is important to you, look for shower curtains made from eco-friendly materials such as hemp, organic cotton, or bamboo. These materials are biodegradable and have a lower environmental impact.
- Odor resistance: Some materials, such as nylon or polyester, have built-in antimicrobial properties that help prevent odors and inhibit the growth of mold and mildew. Choosing a material with these properties can contribute to a cleaner and fresher-smelling bathroom.
- Texture and drape: Consider the texture and drape of the shower curtain material. A heavier fabric can provide better coverage and reduce billowing, while a lighter material can create a more airy and relaxed feel.
By considering these factors, you can select the most suitable shower curtain material that not only meets your functional needs but also enhances the style and atmosphere of your bathroom.
Installing a shower curtain rod
Installing a shower curtain rod is a straightforward process that can be completed in just a few simple steps. Here’s a guide on how to install a shower curtain rod:
- Measure and mark: Start by measuring the width of your shower area to determine the appropriate length for your curtain rod. Use a pencil to mark the desired height of the rod on both sides of the shower wall.
- Drill pilot holes: Using a drill and appropriate drill bit, create pilot holes at the marked locations. Ensure that the holes are level and the same height on both sides.
- Install brackets: Attach the brackets that came with your curtain rod into the pilot holes. Make sure they are secure and level.
- Insert the rod: Place the curtain rod into the brackets. Adjust the length of the rod if necessary to fit snugly between the brackets. Some rods have a twisting mechanism that allows you to adjust the length, while others may require manual adjustment.
- Tighten the brackets: Once the rod is properly positioned, use a screwdriver or wrench to tighten the screws on the brackets. This will ensure that the rod is securely held in place.
- Test and adjust: Give the curtain rod a gentle tug to ensure it is secure. If necessary, make any adjustments to the rod or brackets to ensure stability.
- Hang the shower curtain: With the rod securely installed, it’s time to hang your shower curtain. Attach the curtain rings or hooks to the rod, then slide the curtain onto the rings.
- Level the curtain: Adjust the position of the curtain so that it hangs evenly across the rod and touches the floor or the desired length.
Remember to follow the manufacturer’s instructions provided with your specific curtain rod for the best installation results. Installing a shower curtain rod is a simple DIY project that can be done in no time, allowing you to enjoy the function and aesthetics of your shower curtain.
Making sure the shower curtain is the right size
Having a properly-sized shower curtain ensures optimal functionality and visual appeal in your bathroom. Here are some important considerations to ensure that your shower curtain is the right size:
- Measure the shower area: Start by measuring the width and height of your shower area. Use a tape measure to get accurate dimensions. Measure from wall to wall or the outer edges of your shower enclosure, depending on the type of shower you have.
- Account for the rod: Keep in mind that the curtain rod will add some width to the overall measurement. Consider the width of the rod when determining the size of your shower curtain. Typically, you will want the curtain to extend a few inches beyond the edges of the shower area to prevent water from leaking onto the floor.
- Consider the height: Determine the desired height of your shower curtain. Most shower curtains hang just above the floor to prevent water from splashing out, but you may prefer a different length based on your personal preference and bathroom design.
- Account for the shower liner: If you plan to use a shower liner in addition to your curtain, make sure to factor in its dimensions when choosing the size. The liner should ideally match the length of the curtain or be slightly shorter to avoid it peeking out from under the curtain.
- Adjustable options: Some shower curtains come with adjustable features like tension rods or extendable widths. These options can be helpful if you have an irregularly shaped shower area or if you want the flexibility to adjust the size as needed.
- Consider water-resistant requirements: Depending on your showering habits and bathroom layout, you may need a curtain that provides extra water resistance. If your shower produces a significant amount of splashing, you might opt for a curtain with a wider width or one that is made from a thicker water-resistant material.
- Custom-made options: If you have a unique shower shape or specific size requirements, consider exploring custom-made shower curtains. These can be tailored to fit your exact measurements, ensuring a perfect fit and minimizing any water leakage.
By taking accurate measurements and considering these factors, you can ensure that your shower curtain is the right size for your shower area. This will not only prevent water leakage but also contribute to the overall aesthetics and functionality of your bathroom.
Adding shower curtain rings or hooks
Shower curtain rings or hooks are essential accessories that enable you to hang your shower curtain securely and easily. Here’s a helpful guide on adding shower curtain rings or hooks:
- Select the right type: There are various types of shower curtain rings or hooks available, including plastic, metal, and decorative options. Choose a style that matches your bathroom decor and complements the design of your shower curtain.
- Prepare the curtain: Before adding the rings or hooks, make sure your shower curtain is ready. Lay it flat on a clean surface and ensure that any folds or creases are smoothed out and the curtain is properly positioned.
- Attach the first ring or hook: Start at one end of the curtain and insert the first ring or hook through the designated holes or grommets. Ensure that the opening of the ring or hook is facing outward, away from the curtain.
- Continue adding rings or hooks: Space the remaining rings or hooks evenly along the curtain, inserting them through the holes or grommets. Make sure they are all facing the same direction for a uniform appearance.
- Adjust the spacing: As you add the rings or hooks, pay attention to the spacing and adjust as needed. You want to ensure that the curtain hangs evenly and isn’t too crowded or too sparse.
- Attach the curtain to the rod: Once all the rings or hooks are attached to the curtain, it’s time to hang the curtain from the rod. Simply slide each ring or hook onto the shower curtain rod, one at a time, starting from one end and working your way to the other.
- Test the movement: Give the curtain a gentle tug to ensure that it moves smoothly along the rod. If there are any tight spots or resistance, adjust the rings or hooks as needed to achieve proper movement.
- Double-check for stability: Before finishing the installation, double-check that all rings or hooks are securely attached to the curtain and the rod. A loose ring or hook can potentially cause the curtain to fall or become unbalanced.
By following these steps, you can easily add shower curtain rings or hooks to your curtain, allowing for a secure and convenient installation. These accessories not only serve a functional purpose but can also add a decorative touch to your bathroom decor.
Hanging the shower curtain properly
Properly hanging your shower curtain is crucial for both functionality and aesthetics. Follow these steps to ensure that your shower curtain is hung correctly:
- Prepare the curtain: Before hanging the shower curtain, make sure it is clean and wrinkle-free. If necessary, give it a quick ironing or run it through a gentle cycle in the dryer to remove any creases.
- Identify the top and bottom: Most shower curtains have a designated top and bottom. Look for features such as decorative patterns or a weighted hem that indicate the bottom of the curtain.
- Attach the curtain to the rings or hooks: Slide each ring or hook through the holes or grommets on the top of the shower curtain. Make sure they are evenly spaced and facing the same direction.
- Prepare the curtain rod: Ensure that the shower rod is securely installed and level. Adjust the rod height if needed, making sure it sits at a comfortable height for the curtain to hang freely.
- Hang the curtain on the rod: Starting at one end, slide the rings or hooks onto the shower curtain rod one by one. Take care not to twist or tangle the rings or hooks as you hang the curtain.
- Evenly distribute the curtain: Once the curtain is hung, distribute the fabric evenly along the rod. Make sure there are no bunches or sagging sections, and the curtain hangs straight and smoothly.
- Adjust the length: Check the length of the curtain to ensure that it suits your preferences. The bottom of the curtain should ideally touch the floor or be slightly above it to prevent excessive water leakage.
- Check for gaps: Take a few steps back and observe the curtain from different angles. Look for any gaps between the curtain and the wall or gaps between the curtains if you have multiple layers. If necessary, adjust the rings or hooks to eliminate any gaps.
- Test the movement: Pull the curtain gently to see how it moves along the rod. It should glide smoothly without any snags or resistance. If there are any issues, adjust the rings or hooks as needed.
By following these steps, you can ensure that your shower curtain is hung properly, creating a functional and visually appealing barrier in your bathroom. Take the time to properly hang the curtain to enjoy a satisfying showering experience.
Using a liner with your shower curtain
Using a liner in conjunction with your shower curtain offers several benefits, including added protection and easy maintenance. Here are some important points to consider when using a liner:
- Water protection: A shower liner acts as an additional layer of protection against water. It helps prevent water from penetrating through the curtain and onto the bathroom floor, reducing the risk of slips, falls, and water damage.
- Mold and mildew prevention: Liners are typically made from water-resistant materials that are resistant to mold and mildew. They provide an extra barrier against moisture, inhibiting the growth of these unwanted bathroom contaminants.
- Easy maintenance: Liners are designed to be easily cleaned and maintained. Most liners are machine washable or can be wiped clean with a mild detergent. Regular cleaning helps prevent the buildup of soap scum, bacteria, and mold.
- Extend curtain lifespan: By using a liner, you can protect your shower curtain from direct contact with water and reduce the frequency of necessary cleanings. This can help extend the lifespan of your curtain, saving you money and effort in the long run.
- Replaceable: Liners are typically more affordable than shower curtains, making them easier to replace when needed. If your liner becomes damaged or overly worn, you can easily find a replacement without having to entirely replace your shower curtain.
- Choosing the right liner: When selecting a liner, opt for one that complements the style and dimensions of your shower curtain. Consider the material, thickness, and features such as weighted magnets or weighted hems to ensure a secure and effective liner.
- Proper installation: Install the liner inside the bathtub or shower area, closest to the water source. The liner should ideally align with the top of the bathtub or shower floor to effectively contain water.
- Maintaining the liner: Regularly clean and inspect the liner for any signs of mold, mildew, or wear. Over time, liners may develop stains or become discolored, so it’s important to replace them if they no longer provide adequate protection or appear unsightly.
- Using multiple layers: For added water protection, some individuals opt to use multiple layers of liners. This can offer additional peace of mind and ensure maximum water containment.
By utilizing a liner alongside your shower curtain, you can enhance the functionality and longevity of your curtain while providing essential protection for your bathroom. Take the time to choose a high-quality liner and properly maintain it to enjoy a cleaner, safer, and more durable showering experience.
Preventing water leakage
Water leakage in the bathroom can be a hassle to deal with and may lead to water damage and safety hazards. To prevent water leakage, there are several steps you can take:
- Choose the right curtain: Select a shower curtain made from a water-resistant material, such as vinyl or polyester. These materials help repel water and minimize the chances of leaks.
- Ensure proper installation: Properly install the shower curtain rod and securely hang the curtain. Make sure the curtain covers the entire length and width of the shower area to contain water effectively.
- Use a liner: Install a shower liner in addition to the curtain. The liner provides an extra layer of protection against water leakage, especially if the curtain is made from a less water-resistant material.
- Keep the curtain inside the shower: Make sure the curtain remains inside the shower area whenever water is running. Encourage everyone in your household to keep the curtain closed during and after showering to prevent water from splashing outside the designated area.
- Utilize a weighted hem: Consider using a shower curtain with a weighted hem or a weighted liner. These weighted features help the curtain or liner hang straight and prevent water from pooling at the bottom, reducing the risk of leakage.
- Check for gaps: Regularly inspect the curtain and liner for any gaps or spaces where water may leak through. Adjust the curtain or liner, along with the rings or hooks, to eliminate these gaps and ensure a secure barrier.
- Inspect the curtain and liner: Routinely examine the condition of the curtain and liner for any signs of wear, tear, or damage. Replace them promptly if necessary to maintain their effectiveness in preventing water leakage.
- Keep the curtain and liner clean: Regularly clean and maintain the curtain and liner to prevent the buildup of soap scum, mold, and mildew. Follow the manufacturer’s instructions for cleaning, and periodically wash or replace them to ensure their effectiveness in preventing leaks.
- Regular maintenance: Address any plumbing issues promptly. Fix any leaks or drips in your shower to prevent water from escaping and causing damage. Regularly check for loose fittings or damaged seals that could contribute to water leakage.
- Use bath mats or rugs: Place a bath mat or rug outside the shower area to absorb any water that may escape. This can help prevent accidental slips and falls and protect your bathroom floor from water damage.
By implementing these preventive measures, you can reduce the risk of water leakage in your bathroom. These steps not only help maintain a dry and safe environment but also preserve the integrity of your bathroom fixtures and surfaces.
Cleaning and maintaining your shower curtain
Regular cleaning and maintenance of your shower curtain are essential to keep it looking fresh, extend its lifespan, and prevent the buildup of mold and mildew. Here are some tips on cleaning and maintaining your shower curtain:
- Read the care instructions: Before cleaning your shower curtain, check the manufacturer’s care instructions. Different materials may require specific cleaning methods and temperature settings.
- Machine washable curtains: Many fabric shower curtains are machine washable. Remove the curtain from the hooks or rings and place it in the washing machine. Use a mild detergent on a gentle cycle, and add a few towels for extra agitation.
- Plastic or vinyl curtains: For plastic or vinyl shower curtains, clean them by wiping with a damp cloth or sponge. Use a mixture of warm water and mild soap or a diluted solution of white vinegar and water. Rinse thoroughly and hang to dry.
- Handwashing: If your shower curtain is not machine washable, you can handwash it using a mild detergent, warm water, and a soft brush or cloth. Gently scrub the surface, paying attention to any stains or buildup.
- Dry thoroughly: After cleaning, ensure that the shower curtain is completely dry before hanging it back up. Excess moisture can lead to mold and mildew growth. Allow the curtain to air dry or use a towel to pat it dry.
- Remove and clean the liner: It’s important to clean the shower curtain liner regularly as well. Depending on the material, you can either machine wash or handwash the liner using similar methods as mentioned above. Allow it to dry thoroughly before reattaching it.
- Prevent mold and mildew: To prevent mold and mildew growth, keep the bathroom well-ventilated. Use the exhaust fan or open a window during and after showering to reduce humidity. Also, avoid leaving the curtain bunched up or wet for extended periods.
- Address stains promptly: If you notice any stains on your shower curtain, address them promptly. Treat them with a mild stain remover or a mixture of baking soda and water. Test a small, inconspicuous area before applying to the entire curtain.
- Inspect for damage: Regularly inspect your shower curtain for any signs of wear, tear, or damage. Check the hooks or rings for rust or corrosion. Replace any damaged or worn-out parts for optimal functionality and appearance.
- Replace when needed: Despite proper cleaning and maintenance, shower curtains have a limited lifespan. If your shower curtain shows significant signs of wear and cannot be effectively cleaned, it’s time to replace it with a new one.
By following these cleaning and maintenance tips, you can keep your shower curtain looking its best and ensure a clean and hygienic bathing environment in your bathroom.
DIY shower curtain alternatives
If you’re looking to add a personal touch to your bathroom or explore creative alternatives to traditional shower curtains, consider these DIY options:
- Fabric curtain: Create a unique shower curtain by repurposing a fabric item, such as a bedsheet, tablecloth, or shower curtain liner. Cut and hem the fabric to the desired size, and attach grommets or buttonholes for hanging.
- Vintage curtain: Visit thrift stores or yard sales to find a vintage bedsheet, curtain, or tapestry that can be repurposed as a shower curtain. Choose a fabric that reflects your style and complements your bathroom decor.
- Beaded curtain: For a bohemian or eclectic look, create a beaded curtain. String beads onto thin wire or fishing line, and hang them from a curtain rod. The beads will add visual interest and create a unique barrier in your shower area.
- Nature-inspired curtain: Collect branches, twigs, or driftwood from the outdoors to create a nature-inspired shower curtain. Attach the branches or twigs to a curtain rod using twine or wire. Add hanging planters or dried flowers for an extra touch of natural beauty.
- Macramé curtain: Use macramé techniques to craft a decorative and intricate shower curtain. Knot thick cords or ropes together to create various patterns and textures. Hang the macramé curtain from a rod or dowel.
- Painted shower curtain: Get creative with fabric paint and a plain white or light-colored shower curtain. Use stencils, stamps, or freehand painting to create patterns, designs, or artwork that suits your style and adds a personalized touch.
- Shower screen: Instead of a traditional curtain, consider installing a shower screen made from glass or acrylic panels. This option offers a sleek and modern look, while still providing the necessary enclosure for your shower area.
- Curtain panel: Hang a decorative curtain panel from a curtain rod to create a unique and stylish alternative to a traditional shower curtain. Choose a panel that complements your bathroom decor and provides privacy.
- Bamboo or reed curtain: Create a tropical or spa-inspired vibe by using bamboo or reed curtains. These natural materials provide privacy while still allowing light to filter through. Attach the curtains to a rod using hooks or ties.
- Curtain divider: If you have a large bathroom, consider using a curtain as a room divider to separate the shower area from the rest of the space. This provides a sense of privacy and adds a decorative element to the room.
With these DIY shower curtain alternatives, you can showcase your creativity and style while adding a unique touch to your bathroom. Explore different materials, patterns, and designs to find the perfect alternative that suits your taste.
Styling and accessorizing with your shower curtain
Your shower curtain can be more than just a functional item in your bathroom; it can also serve as a stylish statement piece and inspiration for the overall design of the space. Here are some ideas for styling and accessorizing with your shower curtain:
- Color coordination: Choose a shower curtain that complements the existing color palette in your bathroom. Opt for colors that harmonize or create a contrast that adds visual interest. Consider matching or coordinating accessories such as towels, rugs, and toothbrush holders.
- Pattern play: If you have a neutral or minimalist bathroom, let your shower curtain become the standout feature with bold patterns or prints. Experiment with geometric designs, floral motifs, or abstract artwork for an eye-catching focal point.
- Texture and fabric: Use the texture and fabric of your shower curtain to add depth and visual appeal to your bathroom. Incorporate materials like linen, cotton, or waffle-weave fabric for a touch of elegance or cozy vibe.
- Layering: Experiment with layering your shower curtain by adding a sheer curtain or a decorative curtain panel behind it. The added layer can create depth, texture, and a luxurious look.
- Accessorize with hardware: Choose stylish and complementary hooks or rings to hang your shower curtain. Consider options like decorative metal hooks, vintage-inspired rings, or colorful hooks that add a pop of personality to your curtain.
- Lighting effects: Use lighting strategically to enhance the visual impact of your shower curtain. Install wall sconces or pendant lights above your bathtub or shower area to create soft, ambient lighting that highlights the curtain as a focal point.
- Artistic touches: If you have a solid or minimalist shower curtain, treat it as a blank canvas for your creativity. Add your personal touch by hand-painting or stenciling designs onto the curtain, creating a unique and artistic look.
- Coordinate with window treatments: If your bathroom has a window, consider coordinating your shower curtain with the window treatments. Choose fabrics or colors that complement each other, creating a cohesive and stylish look.
- Add additional textiles: Layering with additional textiles can enhance the overall aesthetic. Consider adding a fabric valance, a patterned shower mat, or a plush bathrobe that ties in with the color or design of your shower curtain.
- Greenery and natural elements: Bring in some life and freshness by placing potted plants or a vase with flowers near your shower area. The vibrant greenery and natural elements will complement the curtain and add a soothing and organic feel to the space.
By carefully selecting and styling your shower curtain, as well as incorporating complementary accessories and accents, you can transform your bathroom into a stylish and inviting sanctuary that reflects your personal taste and design aesthetic.
Troubleshooting common shower curtain issues
While shower curtains are relatively easy to use and maintain, they may encounter a few common issues over time. Here are some troubleshooting tips for addressing these issues:
- Mildew and mold: If your shower curtain develops mildew or mold, remove it from the hooks or rings and clean it thoroughly. Machine wash it with a mild detergent, or handwash it using a mixture of vinegar and water. For tough stains, use a diluted bleach solution. Allow the curtain to dry completely before rehanging.
- Stuck curtain rings: Over time, curtain rings may become stuck or difficult to slide along the curtain rod. Apply a small amount of lubricant, such as silicone spray or a bar of soap, to the rod to help the rings glide smoothly.
- Sagging or uneven curtain: If your shower curtain sags or hangs unevenly, adjust the tension of the curtain rod. Tighten it slightly to create more stability and straighten the curtain. If necessary, consider using curtain rings with clips to hold the curtain in place at regular intervals.
- Curtain blowing inward: If your shower curtain tends to blow inward during showers, especially with high water pressure, try using a heavier liner or curtain. You can also attach magnets or weights to the bottom of the curtain or liner to increase stability and prevent flapping.
- Water leaks: If you notice water leaking out of your shower area, check for gaps or spaces between the curtain and the walls or floor. Adjust the curtain rings or hooks to eliminate any gaps and ensure a proper seal. Consider using a wider curtain or adding a liner to improve water containment.
- Rusty or damaged rings: If your curtain rings have become rusty or damaged, replace them with new ones for smooth movement and a fresh appearance. Opt for rings made of rust-resistant materials such as plastic, stainless steel, or coated metal.
- Frequent cleaning: If your shower curtain requires frequent cleaning or is difficult to keep clean, consider switching to a material or color that is less prone to showing stains or soap scum. Use a mildew-resistant liner and make sure the bathroom is well-ventilated to minimize moisture buildup.
- Excessive billowing: If your shower curtain billows excessively while showering, consider using a weighted liner or curtain, or choose a heavier fabric that stays in place more effectively. Additionally, ensure that the bathroom exhaust fan is functioning properly to reduce humidity.
- Size mismatch: If your shower curtain is too long or wide for the shower area, it may create an unappealing appearance and hinder its functionality. Measure your shower area accurately before purchasing a curtain to ensure a proper fit.
- Discoloration or fading: If your shower curtain has become discolored or faded, especially from prolonged exposure to sunlight, it may be time to replace it. Consider using curtains made from fade-resistant materials or those specifically designed for high UV exposure.
By addressing these common shower curtain issues promptly and utilizing these troubleshooting tips, you can maintain a functional, aesthetically pleasing, and long-lasting shower curtain in your bathroom.