
Gather the necessary tools
Before you begin opening a picture frame, it’s essential to gather all the necessary tools. Having the right tools on hand will make the process much easier and help prevent any damage to the frame or artwork. Here are the essential tools you’ll need:
- A small screwdriver: This will be used to remove any screws or fasteners holding the frame together.
- Scissors or a utility knife: These will come in handy for cutting through any adhesive or tape that may be securing the frame’s backing.
- A clean cloth or gloves: Whether you’re preserving a valuable piece of art or simply want to avoid getting fingerprints on your picture, it’s important to handle the frame and artwork with clean hands or gloves.
- A soft brush or compressed air: Dust and debris can accumulate inside the frame over time, so having a brush or compressed air can help clean out any dirt before opening it.
- Optional: Pliers and wire cutters: If your frame has wire hangers, you may need pliers to bend or cut the wire for easy removal.
By using these tools, you’ll be well-prepared to open your picture frame without causing any unnecessary damage. It’s important to note that the specific tools you’ll need may vary depending on the type and construction of your frame. Take your time to assess the frame before starting and gather any additional tools that may be required.
Identify the type of picture frame
Before you proceed with opening a picture frame, it’s crucial to identify its type. Different types of frames have different mechanisms for opening and securing the artwork or photograph. Here are some common types of picture frames:
- Hinged frames: These frames have hinges along one side, allowing you to open and close them like a book. They are typically secured with small clips or latches.
- Clip frames: These frames use clips or spring-loaded mechanisms to hold the picture or artwork in place. They are relatively easy to open and close, as you don’t need any tools.
- Snap frames: Similar to clip frames, snap frames have edges that snap open and shut. They are commonly used for displaying posters or advertisements.
- Screw or nail frames: These frames are held together by screws or nails. You’ll need a screwdriver or appropriate tool to remove these fasteners before opening the frame.
- Shadow box frames: These frames are deeper than regular frames and are designed to display three-dimensional objects. They typically have a removable back or a hinged front, making it easier to access the contents.
Once you’ve identified the type of frame you have, you’ll have a better understanding of how it functions and how to proceed with opening it. Take a close look at the frame and any visible mechanisms or fasteners to determine the best method for opening. If you’re unsure, it’s always a good idea to consult the manufacturer’s instructions or seek guidance from a professional framer.
Determine the method of opening
Once you’ve identified the type of picture frame you have, the next step is to determine the appropriate method for opening it. The method will depend on the specific design and construction of the frame. Here are a few common methods:
- For hinged frames: Gently undo any clips or latches that secure the frame. Use your fingertips or a small tool to carefully lift the hinged side of the frame, being mindful not to apply too much pressure or force.
- For clip frames: Locate the clips or springs on each side of the frame. Gently press or release these mechanisms to loosen the frame. Once the clips are disengaged, you can easily remove the front of the frame.
- For snap frames: Find the edges of the frame and apply gentle pressure to release the snap closures. Work your way around the edges, releasing each snap until the frame opens. Be cautious not to rush or use excessive force.
- For screw or nail frames: Use a screwdriver or appropriate tool to remove the screws or nails that hold the frame together. Carefully unscrew or remove each fastener, taking care not to scratch or damage the frame or artwork.
- For shadow box frames: Depending on the design, you may need to remove the backing or open the front of the frame. Look for any clips, latches, or screws that hold the frame together. Undo these fasteners to gain access to the interior of the frame.
It’s important to approach the method of opening with caution and patience. Avoid using excessive force or haste, as this can result in damage to the frame or artwork. If you’re uncertain about the method or encounter any difficulties, consider seeking guidance from a professional framer or consulting the manufacturer’s instructions.
Prepare the frame for opening
Before you begin opening a picture frame, it’s important to take certain precautions and prepare the frame to ensure a smooth and safe process. Here are some steps to help you prepare the frame:
- Find a clean and level surface: Choose a surface where you can safely place the frame without the risk of it falling or getting damaged. Make sure the surface is clean to prevent any debris from getting inside the frame.
- Remove any hanging hardware: If your frame has hanging hardware such as wire or brackets, it’s best to remove them before opening. This will make the frame lighter and easier to handle.
- Inspect the frame for any damage: Take a close look at the frame for any visible damage or loose parts. If you notice any issues, such as broken corners or loose joints, consider repairing them before proceeding with opening the frame.
- Choose a suitable workspace: If you’re working with a large or delicate frame, it may be helpful to have a spacious workspace. This will give you enough room to maneuver and handle the frame without any obstructions.
- Protect the artwork or photograph: If you’re concerned about the artwork or photograph getting damaged during the opening process, consider placing a clean cloth or protective sheet over the front of the frame. This will prevent any accidental scratches or smudges.
By following these preparation steps, you’ll ensure that the frame is in a suitable condition for opening. Taking the time to prepare will minimize the risk of accidents and help preserve the integrity of both the frame and the artwork or photograph inside.
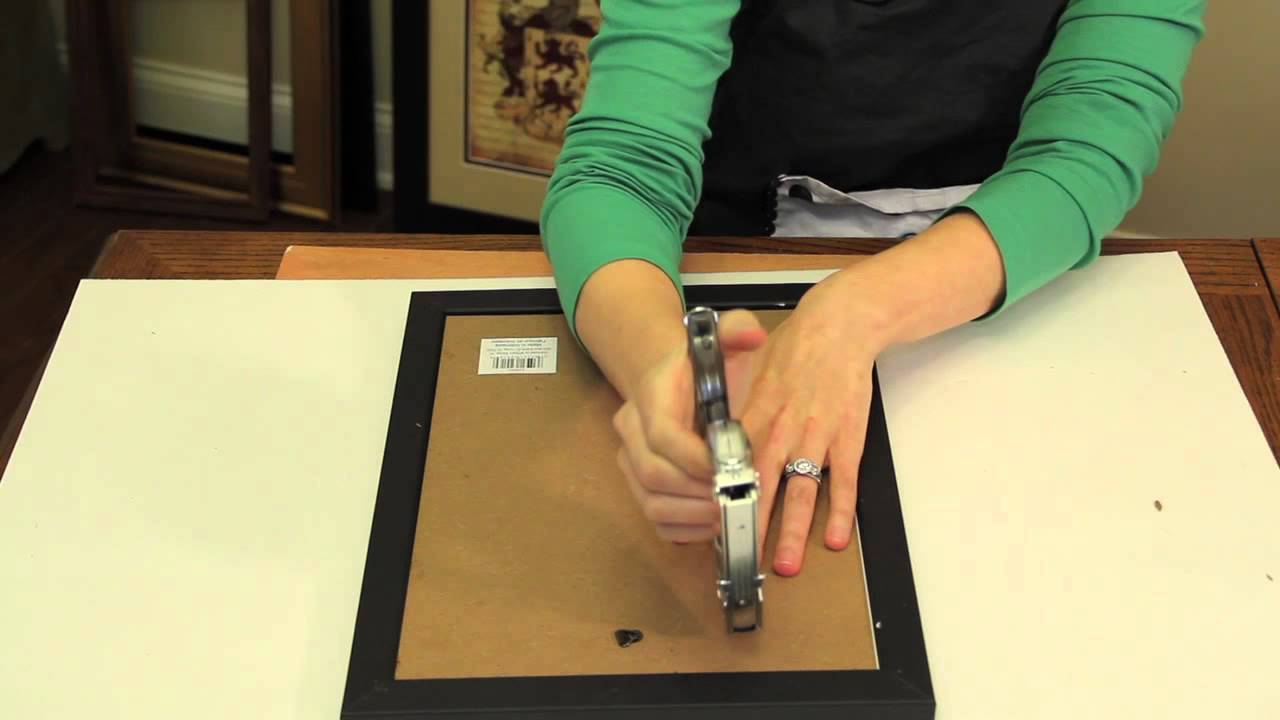
Remove the backing of the frame
Once the frame is properly prepared, it’s time to remove the backing. The backing of a picture frame is typically what secures the artwork or photograph in place. Here’s how to proceed:
- Examine the back of the frame: Take a close look at the back of the frame to determine how the backing is attached. Look for any clips, tabs, or fasteners that may be holding it in place.
- Unfasten the clips or tabs: If there are any clips or tabs securing the backing, carefully undo them using your fingers or a tool, such as a screwdriver or pliers. Be gentle to avoid bending or damaging the clips.
- Remove screws or nails: Some frames may have screws or nails holding the backing in place. Use a screwdriver or appropriate tool to unscrew or remove these fasteners, taking care not to scratch the frame or artwork.
- Cut through tape or adhesive: In some cases, the backing may be held in place with tape or adhesive. Use scissors or a utility knife to carefully cut through the tape or adhesive, ensuring that you don’t damage the frame or artwork.
- Gently remove the backing: Once any fasteners or adhesive have been undone, gently lift or slide the backing away from the frame. Take your time to ensure that the artwork or photograph stays securely in place as you remove the backing.
As you remove the backing, be mindful of the fragility of the artwork or photograph. Support it with your hand or another flat surface to prevent it from bending or getting damaged. If you encounter any difficulties or notice any damage to the backing or frame, consider seeking assistance from a professional framer.
Remove the picture or artwork from the frame
With the backing of the frame removed, it’s time to safely take out the picture or artwork. It’s crucial to handle the art with care to avoid any damage. Follow these steps to remove the picture or artwork from the frame:
- Lay the frame face-down: Place the frame on a clean, soft surface with the front facing down. This will allow you to access the artwork without putting any pressure on it.
- Gently lift the artwork: Using your fingertips or a soft tool, begin lifting the artwork from one corner. Take your time and work your way around the edges, ensuring that none of the artwork is stuck or adhered to the frame.
- Support the art as you remove it: As you lift the artwork, support it with your other hand or a flat surface, such as a clean cloth or piece of cardboard. This will help prevent any bending or creasing of the artwork.
- Avoid touching the surface: When handling the artwork, it’s important to avoid touching the front surface as much as possible. Use clean, lint-free gloves or hold the artwork by the edges to prevent smudges or fingerprints.
- Inspect the artwork: Take a moment to inspect the front and back of the artwork for any damage or signs of deterioration. If you notice any issues, consider consulting a professional to address them before reassembling the frame.
By following these steps, you’ll be able to safely remove the picture or artwork from the frame without causing any harm. Remember to handle the art with care and take precautions to avoid any accidental damage.
Reassemble the picture frame
Now that you’ve successfully removed the picture or artwork from the frame, it’s time to reassemble the frame. This step is crucial to ensure the artwork is securely held in place and protected. Follow these steps to reassemble the picture frame:
- Inspect the frame components: Take a moment to examine the various parts of the frame, including the front, backing, and any fasteners or clips. Ensure that all the components are clean and free from any debris.
- Position the artwork or picture: Carefully place the artwork or picture back into the frame, aligning it properly within the borders. Make sure the artwork is straight and centered, taking care to avoid any misalignments or overlaps.
- Secure the picture or artwork: Once the artwork is in position, reattach the backing. If the frame has clips, tabs, or fasteners, securely fasten them back into place. If there were screws or nails, carefully insert them and tighten them without applying excessive force.
- Check for stability: Gently test the stability of the reassembled frame by holding it or giving it a light shake. Ensure that the artwork or picture remains securely in place and that there are no loose parts or any signs of damage.
- Clean the frame: Use a clean, lint-free cloth to gently wipe down the surface of the frame, removing any fingerprints, dust, or smudges. This will help maintain the frame’s appearance and keep it looking its best.
By following these steps, you’ll be able to reassemble the picture frame and protect the artwork or picture for years to come. Remember to handle the frame with care and to take your time during the reassembly process to ensure everything is properly aligned and secure.