
Choosing the Right Hemming Style
When it comes to hemming your curtains, one of the first decisions you need to make is choosing the right hemming style. The hemming style not only affects the overall appearance of the curtains but also determines how they hang and drape. Here are a few popular hemming styles to consider:
- Single Fold Hem: This is the most basic and commonly used hemming style. It involves folding the raw edge of the fabric once and sewing it in place. The single fold hem is clean and easy to do, making it ideal for lightweight curtains or curtains made from delicate fabrics.
- Double Fold Hem: The double fold hem provides more stability compared to the single fold hem. It involves folding the raw edge of the fabric twice, creating a folded edge that encases the raw edge. This style works well for curtains that are made from medium-weight to heavy-weight fabrics.
- Blind Hem: If you want a seamless and barely visible hem, the blind hem is the way to go. This technique involves folding the fabric in a specific way so that the stitches are hidden when viewed from the front. It requires some practice and skill but results in a professional-looking finish.
- Scalloped Hem: For a touch of elegance and decorative flair, consider a scalloped hem. This style involves cutting the bottom edge of the fabric into a scalloped or wavy pattern and then hemming it. It adds a unique and stylish touch to your curtains.
When choosing between these hemming styles, consider the overall design of your curtains and the look you want to achieve. If you’re unsure, you can always experiment with a small test piece of fabric before committing to a specific style.
Measuring and Marking the Curtain
Before you begin hemming your curtain, it’s essential to measure and mark the fabric properly to ensure accurate and even hemming. Here’s a step-by-step guide to measuring and marking your curtain:
- Measure the Length: Start by determining the desired length of your curtain. Measure from the top edge of the curtain rod down to where you want the curtain to end. Add any additional length for hems or decorative elements, if needed.
- Mark the Hem Length: Decide on the desired hem length. This could be anywhere from a few inches to several inches, depending on your preference. Use a measuring tape and a fabric marker or chalk to mark the hemline evenly across the bottom edge of the curtain fabric.
- Consider the Curtain Style: Take into account the type of curtain you have. For curtains with a header, consider whether you want the hem to sit above or below the header. For tab-top or grommet curtains, factor in the height of the tabs or grommets when marking the hem length.
- Check the Levelness: Ensure that the curtain is hanging level before marking the hem. Uneven hems can give the curtain an unbalanced appearance. Use a level or measure from the ceiling or floor to double-check that the curtain is straight.
- Repeat for Each Panel: If you have multiple curtain panels, measure and mark each one individually. Even if they appear to be the same length, variations can occur due to differences in fabric stretch or the curtain rod’s position. Taking the time to measure and mark each panel will result in a professional look.
By carefully measuring and marking your curtain, you will ensure that your hems are even and the curtain hangs beautifully. Double-check your measurements and marks before proceeding to the next step to avoid any mistakes.
Preparing the Fabric for Hemming
Before you start hemming your curtains, it’s important to prepare the fabric to ensure clean and precise hems. Here are the necessary steps to prepare the fabric for hemming:
- Trim Excess Fabric: Begin by trimming any loose threads or excess fabric from the bottom edge of the curtain. This will create a neat starting point for the hemming process.
- Iron the Fabric: Use an iron to remove any wrinkles or creases in the curtain fabric. Smooth and flat fabric will make hemming much easier and ensure a polished final result. Be sure to follow the fabric’s ironing instructions to prevent any damage.
- Secure the Raw Edge: To minimize fraying and create a clean edge, you can use either sewing machine stitches, fabric glue, or fabric adhesive tape to secure the raw edge of the fabric. This step is particularly important for lightweight or loosely woven fabrics.
- Preshrink the Fabric (If Needed): If your curtain fabric is prone to shrinkage, it’s essential to preshrink it before hemming. Follow the fabric manufacturer’s instructions for preshrinking, which usually involves washing and drying the fabric at the recommended settings.
- Consider Pattern Placement: If your curtain fabric has a pattern, take a moment to consider how it will appear at the hemline. Ensure that the pattern aligns correctly, using pins or fabric marker to mark the desired position before proceeding with hemming.
By taking the time to prepare the fabric before hemming, you will improve the overall look and durability of your curtains. These preparatory steps will help you achieve clean, professional-looking hems that will enhance the overall appearance and longevity of your curtains.
Fold and Pin the Hem
Once your curtain fabric is prepared, it’s time to fold and pin the hem. This step is crucial for creating clean and even hems. Follow these steps to fold and pin the hem of your curtains:
- Identify the Hem Length: Refer to the markings you made earlier to determine the desired hem length. This will serve as your guide as you fold the fabric.
- Fold the Fabric: Take the bottom edge of the curtain fabric and fold it up to meet the hemline marks. For a single-fold hem, fold the fabric up once along the marked line. For a double-fold hem, fold the fabric up once to meet the first fold, and then fold it up again to encase the raw edge.
- Ensure Evenness: Pay attention to maintaining an even width for the entire hem. Use a ruler or measuring tape to double-check that the folded fabric is consistent in width along the entire length of the curtain. Adjust the fold if necessary.
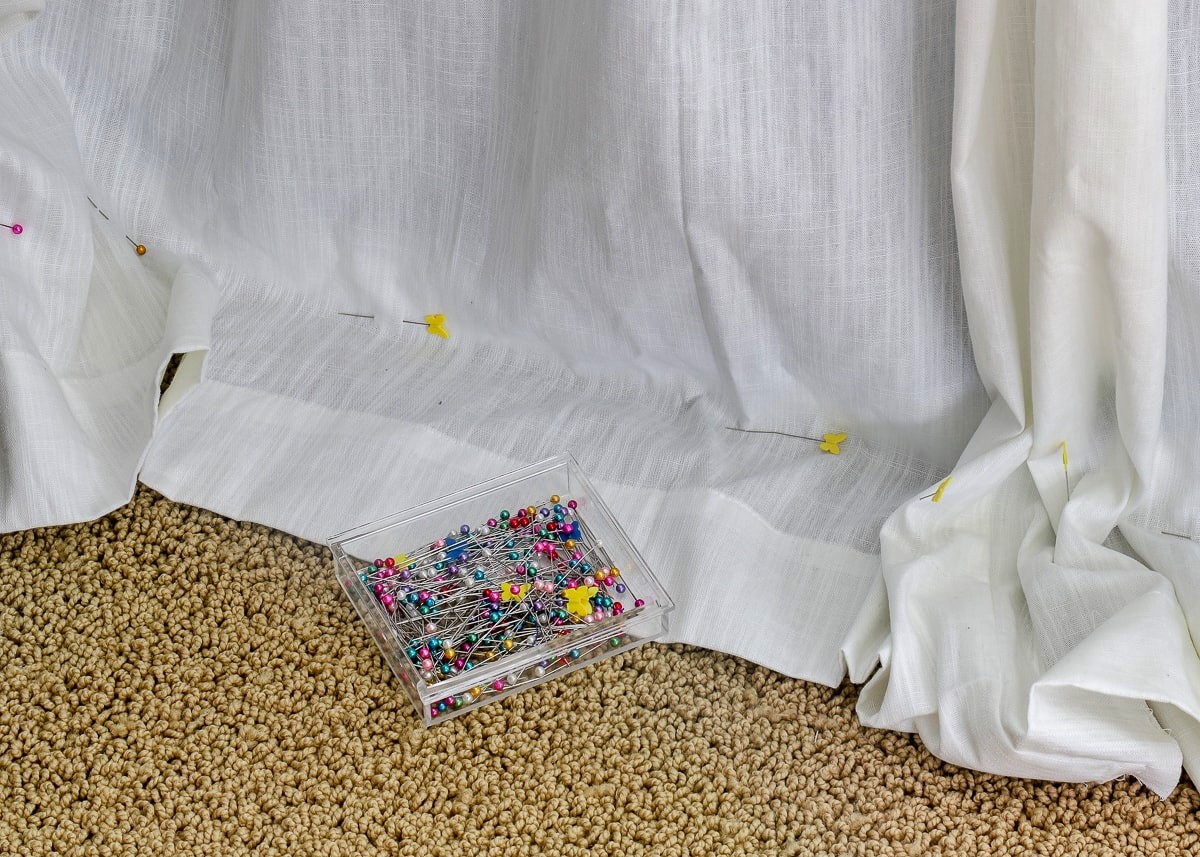
- Secure with Pins: Use straight pins to secure the folded hem in place. Insert the pins perpendicular to the fold and about an inch apart. For a neater look, keep the pins closer to the bottom edge of the hem, where they will be less visible.
- Try On and Adjust (If Needed): Hang the curtain on the curtain rod or hold it up against a window to get a visual representation of how it will hang. Check that the hem is the desired length and adjust if needed. It’s better to make any necessary changes now than to have uneven hems later.
Folding and pinning the hem is a crucial step in the hemming process. Take your time to ensure that the folds are neat, even, and aligned with your desired hemline. The pins will keep the fabric in place as you move on to the next step of sewing the hem.
Sewing the Hem
After folding and pinning the hem of your curtains, it’s time to sew the hem in place. Sewing the hem is the crucial step that will provide a polished and finished look to your curtains. Here’s how to sew the hem:
- Select the Stitch: Choose the appropriate stitch for your hemming style and fabric. For a single fold hem or double fold hem, a straight stitch or a narrow zigzag stitch will work well. For a blind hem, you will need to use a blind hem stitch on your sewing machine.
- Set Up Your Machine: Thread your sewing machine with a matching thread color and adjust the stitch length and tension as per the fabric and your machine’s recommendations. It’s always a good idea to test the stitch on a scrap piece of fabric before sewing the actual hem.
- Start Sewing: Position the curtain fabric under the sewing machine’s presser foot, aligning the needle with the edge of the hem. Remove the straight pins as you go along, being careful not to sew over them. Begin sewing the hem, keeping the stitches as straight and even as possible.
- Backstitch at the Beginning and End: To secure the stitches, backstitch at the beginning and end of the hem. This helps prevent the stitches from unraveling over time. If your sewing machine has a backstitch function, use it; otherwise, you can manually reverse the stitch for a few stitches.
- Continue Sewing the Hem: Sew along the entire length of the hem, removing pins as you go. Take your time to maintain a consistent stitch length and keep the fabric flat and smooth underneath the sewing machine. If necessary, stop periodically to readjust the fabric and ensure it’s sewn straight.
Remember to sew the hem on the underside of the curtain fabric, so the stitches are not visible from the front when the curtains are hung. Take care to sew close to the folded edge while avoiding sewing into the body of the curtain fabric. This will give your curtains a clean and professional finish.
Trim Excess Fabric and Press the Hem
After sewing the hem, the next step is to trim any excess fabric and press the hem to give your curtains a crisp and polished look. Follow these steps to trim and press the hem:
- Trim Excess Fabric: With sharp fabric scissors, carefully trim any excess fabric that extends beyond the stitched hem. Be cautious not to cut into the main body of the curtain fabric. This step will create a clean and neat edge.
- Press the Hem: Use an iron to press the hem, starting with the wrong side of the fabric. Place a pressing cloth over the hem and press it with medium heat. Gently press along the entire length of the hem, holding the iron in place for a few seconds at a time. This will help set the stitches and create a crisp fold.
- Steam and Final Press: If desired, you can use the steam function on your iron to further smooth out any wrinkles or creases. Steam helps to relax the fabric fibers, allowing for a more professional finish. Once you’ve steamed the hem, give it a final press on the right side of the fabric.
- Rehang and Check: After pressing the hem, rehang or lay out the curtains to see how they hang. Check for any unevenness or areas that need adjustment. If you notice any issues, such as an uneven hemline, you can make minor adjustments by hand or resew if necessary.
- Store or Hang: Once your curtains are properly hemmed and pressed, you can store them or hang them up. Take care to fold or hang them with care to maintain the freshly pressed hem. Avoid crushing the hems to ensure they stay looking their best.
Trimming the excess fabric and pressing the hem are essential steps to achieve a professional-looking finish for your curtains. Taking the time to press the hem properly will enhance the overall appearance of your curtains and give them a neat and well-tailored look.
Finishing Touches and Final Checks
As you near the completion of hemming your curtains, it’s important to pay attention to the finishing touches and perform some final checks to ensure a perfect outcome. Here are the last steps to take before admiring your beautifully hemmed curtains:
- Trim Loose Threads: Inspect the hem and curtain fabric for any loose threads and trim them with sharp fabric scissors. This will give your curtains a clean and tidy look.
- Check for Evenness: Hang up the curtains or lay them flat to check for any unevenness in the hemline. Adjust any areas that appear uneven by carefully hand-sewing or resewing them. Ensure that the hem is consistent across the entire length of the curtains.
- Inspect the Seams: Examine the seams along the folded hem to make sure they are secure and free from any visible rips or loose stitches. Reinforce any weak areas by resewing them if necessary.
- Clean Up: Remove any stray pins or remnants of thread or fabric from the hemming process. This will not only ensure the safety of handling the curtains but also give them a polished and professional appearance.
- Try the Curtain: Hang the curtains in their intended location and step back to assess their appearance. Check that the hem is at the desired length and that the curtains hang evenly. Make any additional adjustments if needed.
- Enjoy Your Hemmed Curtains: Once you are satisfied with the final result, it’s time to enjoy your beautifully hemmed curtains. Admire how they enhance the overall ambiance of your space and revel in the satisfaction of a job well done.
Taking care of these finishing touches and performing the final checks will ensure that your hemmed curtains look their best and meet your expectations. By paying attention to the details, you can create curtains that are not only functional but also a stylish addition to your space.